Skip to content
DisclaimerTerms Of UseGDPR PolicyCookie Policy

momdishmagic

  • Home
  • Drinks
  • Appetizers
  • Dinner
  • Dessert
  • About
  • Contact
  • Privacy Policy
DisclaimerTerms Of UseGDPR PolicyCookie Policy

Emma

- 1 pound large shrimp, peeled and deveined - 2 tablespoons Sriracha sauce - 3 tablespoons honey - 1 tablespoon soy sauce - 2 cloves garlic, minced - 1 tablespoon fresh ginger, grated - 2 tablespoons sesame oil - 1 tablespoon lime juice - 1 green onion, sliced - Sesame seeds - Salt and pepper to taste For Spicy Sriracha Honey Shrimp, you need fresh, high-quality shrimp. The shrimp should be large and deveined for the best result. Sriracha sauce gives it heat, while honey adds sweetness. Use fresh garlic and ginger for a punch of flavor. Sesame oil adds richness, and lime juice brightens the dish. Optional garnishes like green onion and sesame seeds add color and texture. They make the dish look beautiful on the plate. Salt and pepper add extra taste, but use them to your liking. You can find the full recipe above to guide you through the cooking process. - In a medium bowl, whisk together: - 2 tablespoons Sriracha sauce - 3 tablespoons honey - 1 tablespoon soy sauce - 2 cloves garlic, minced - 1 tablespoon fresh ginger, grated - 2 tablespoons sesame oil - 1 tablespoon lime juice - Salt and pepper to taste - Coat the shrimp in the marinade. Toss well to cover every piece. - Cover the bowl with plastic wrap. Refrigerate for at least 20 minutes. This step lets the shrimp soak up all the amazing flavors. - Heat a large skillet over medium-high heat. If you like, add a touch of sesame oil for extra taste. - Add the marinated shrimp to the pan in a single layer. Cook for about 2-3 minutes. Flip the shrimp halfway to ensure even cooking. They should turn pink and opaque. - Pour the reserved marinade into the pan. Let it simmer for another 2-3 minutes. This thickens the sauce and coats the shrimp nicely. - Remove from heat and let it cool slightly. - Garnish with sliced green onions and sprinkle sesame seeds on top. This adds a nice crunch and extra flavor. - For a great meal, serve the Spicy Sriracha Honey Shrimp on jasmine rice or quinoa. Drizzle extra sauce over the top and add lime wedges on the side. - To adjust spice levels, start with less Sriracha. You can always add more later. - For sweetness, try adding more honey or even maple syrup. This will balance the heat. - Be careful not to overcook the shrimp. They cook fast! Once they turn pink and opaque, they’re ready. - Use fresh ingredients. Fresh garlic and ginger make a big difference in taste. - Pair your Spicy Sriracha Honey Shrimp with rice or quinoa. Both soak up the sauce well. - Consider side dishes like steamed broccoli or a fresh salad. They add color and crunch to your meal. For more details, check the Full Recipe. {{image_2}} You can swap shrimp for chicken or tofu in this recipe. For chicken, use boneless, skinless thighs or breasts. Cut them into bite-sized pieces. Cook the chicken for about 5-7 minutes until it's fully done. For tofu, use firm or extra-firm to hold its shape. Cut it into cubes and cook for about 4-5 minutes until golden brown. Adjust the cooking time based on the protein you choose. Want to spice things up? Add more chili flakes or fresh herbs like cilantro. Fresh basil also works well! You can toss in sliced bell peppers or snap peas for extra crunch. Cook them with the shrimp for a colorful dish. They add flavor and nutrients, making your meal more exciting. If you're watching sugar, try using a sugar-free honey substitute in the marinade. You can also mix in some coconut aminos instead of soy sauce for a gluten-free option. This keeps the flavors strong without adding extra sugar or gluten. Don't hesitate to make these changes to fit your diet. Enjoy a tasty meal that meets your needs! Store your Spicy Sriracha Honey Shrimp in an airtight container. This keeps the shrimp fresh. You can refrigerate them for up to three days. Make sure to seal the container well to avoid any odors. When reheating shrimp, use a skillet. Heat it on low to medium heat. Add a splash of water or broth to keep the moisture. This helps maintain the shrimp's texture and flavor. Avoid microwaving, as it can make the shrimp rubbery. You can freeze cooked shrimp, but it's best done right after cooking. Place them in a freezer-safe bag. Remove all air to prevent freezer burn. For uncooked shrimp, freeze them in the same way. To thaw, place the shrimp in the fridge overnight or run them under cold water. This method is quick and safe. For more details, check the Full Recipe. Yes, you can make Spicy Sriracha Honey Shrimp ahead of time. To prepare it for meal prep, follow these tips: - Marinate the shrimp: You can marinate the shrimp up to 24 hours in advance. This enhances the flavor. - Store properly: Keep the marinated shrimp in an airtight container in the fridge. - Cook when ready: Cook the shrimp just before serving for the best taste and texture. Spicy Sriracha Honey Shrimp pairs well with many dishes. Here are some great sides: - Jasmine rice: Its mild flavor balances the spice. - Quinoa: This adds a nutty taste and is super healthy. - Steamed vegetables: Broccoli, snap peas, or bell peppers add color and crunch. - Cabbage slaw: A fresh slaw can cool the heat from the shrimp. Cooking shrimp is quick. Here’s a general guide: - Large shrimp: Cook for about 2-3 minutes per side. - Medium shrimp: They need about 1.5-2.5 minutes per side. - Small shrimp: Cook for 1-2 minutes per side. Make sure shrimp turn pink and opaque, which means they are done. In this blog post, you learned how to prepare delicious Spicy Sriracha Honey Shrimp. We covered key ingredients, step-by-step cooking instructions, and helpful tips to ensure perfect results. Remember to play with flavors and adjust as you like. Whether you use shrimp, chicken, or tofu, you'll enjoy a fantastic meal. Don’t forget the garnishes for an extra touch! Storing and reheating properly keeps your dish tasty for leftovers. Try these ideas to impress your friends and family. Happy cooking!

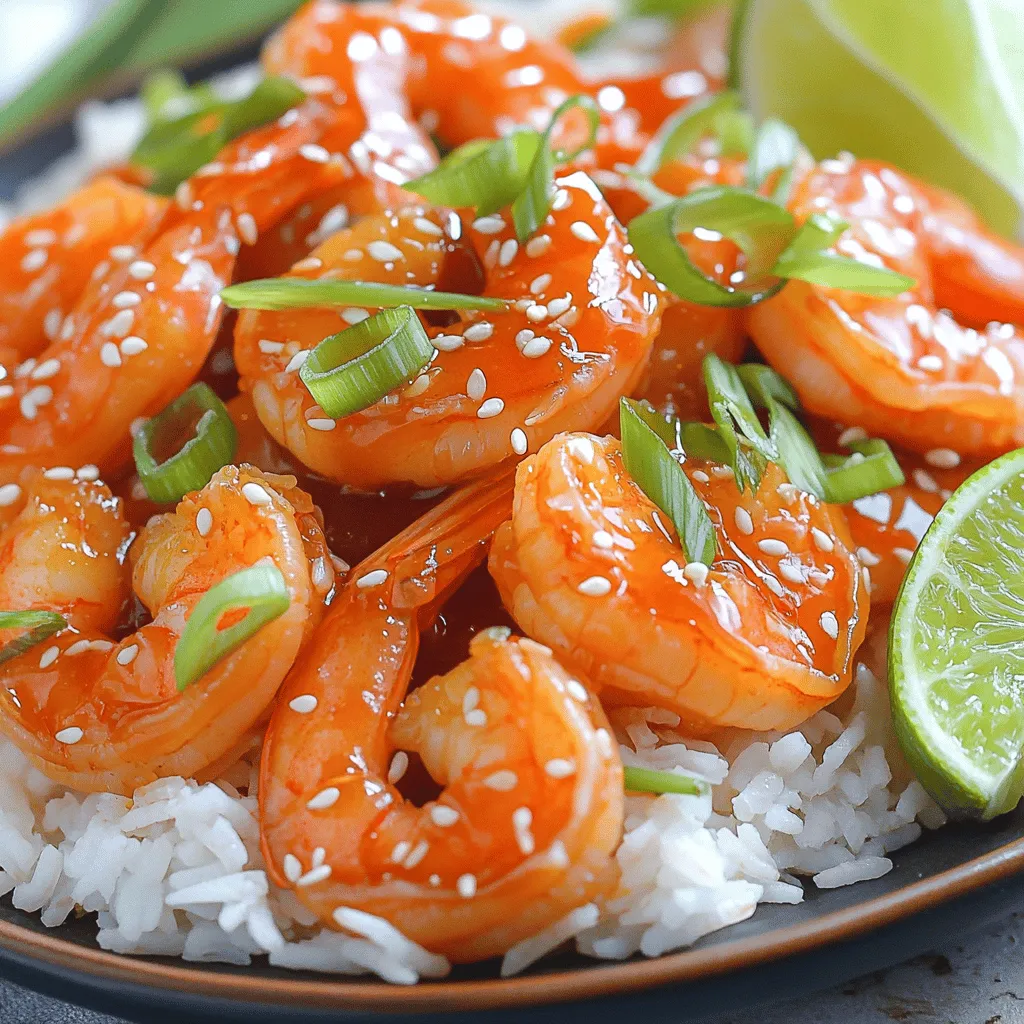
Spicy Sriracha Honey Shrimp Quick and Tasty Recipe

Get ready to spice up your dinner with this easy Spicy Sriracha Honey Shrimp recipe! With just a handful of

For this tasty dish, you need: - 1.5 lbs boneless, skinless chicken thighs, cut into bite-sized pieces - 1 cup plain Greek yogurt - 2 tablespoons garam masala - 1 tablespoon turmeric - 1 tablespoon ground cumin - 1 teaspoon chili powder - 2 tablespoons vegetable oil - 1 medium onion, finely chopped - 4 cloves garlic, minced - 1 inch ginger, grated - 1 can (14 oz) diced tomatoes - 1 cup coconut milk - Salt and pepper to taste - Fresh cilantro for garnish - Cooked basmati rice for serving These ingredients blend to make a rich and flavorful meal. The marinade is key in this recipe. It uses Greek yogurt and spices to tenderize the chicken. Here’s why each ingredient helps: - Greek yogurt: Adds creaminess and tenderizes the chicken. - Garam masala: Adds warmth and depth. - Turmeric: Gives a lovely color and has anti-inflammatory benefits. - Cumin and chili powder: Bring warmth and spice. Marinating for at least 30 minutes, or overnight, boosts flavor and tenderness. Garnishing your dish makes it special. Here are some options: - Fresh cilantro: Adds a burst of color and flavor. - Cooked basmati rice: Serves as a base and soaks up the sauce. - Naan or pita bread: Perfect for scooping up the tikka masala. These simple additions enhance your meal and create a complete dining experience. For the full recipe, check out the details above. To start, mix the Greek yogurt, garam masala, turmeric, cumin, chili powder, and salt in a bowl. This mixture makes a great marinade. Next, add the chicken pieces and coat them well. Let this sit for at least 30 minutes. For a deeper flavor, marinate overnight. Now, set your Instant Pot to Sauté mode. Heat the vegetable oil until it shimmers. Add the chopped onion and cook until it turns soft and clear. This may take about 3 to 5 minutes. Then, stir in the minced garlic and grated ginger. Cook these for one more minute. After that, turn off the sauté function. Pour in the diced tomatoes, along with their juice. Add the marinated chicken and any leftover marinade. Stir everything together to blend the flavors. Next, lock the Instant Pot lid and set it to Manual or Pressure Cook on high for 10 minutes. Once the cooking time is up, let the pressure release naturally for 5 minutes. Then, do a quick release for any remaining pressure. Finally, stir in the coconut milk. Taste and adjust the seasoning with salt and pepper if needed. Serve the chicken tikka masala over basmati rice and sprinkle with fresh cilantro. To ensure a successful cooking experience, make sure your Instant Pot is clean and assembled correctly. Check that the sealing ring is in place. This prevents steam from escaping. Always use enough liquid to avoid a burn notice. In this recipe, the tomatoes and coconut milk provide the needed moisture. Plan your time wisely for a smooth cooking process. Start by marinating the chicken. While it sits, chop the onion and get the garlic and ginger ready. This helps you stay organized. Aim for a total prep time of about 30 minutes. After marinating, the cooking time in the Instant Pot takes just 10 minutes. With some extra time for pressure release, you can have dinner ready in under an hour. For the full recipe, check the details provided earlier. When making Instant Pot Chicken Tikka Masala, avoid overcooking the chicken. If you cook it too long, it can become dry. Also, don't skip marinating the chicken. This step adds depth to the flavor. Lastly, ensure you seal the lid properly before cooking. If not sealed, the dish won’t cook right. To get the best flavor, use fresh spices. Ground spices lose their potency over time. Also, let the chicken marinate for at least 30 minutes. Overnight marination works wonders for taste. Don't forget to adjust the salt and pepper after you add the coconut milk. This helps balance the creaminess. You can enhance the dish by adding more spices. Try adding a pinch of cinnamon or cardamom. These spices give a warm, sweet note. You can also add crushed red pepper for extra heat. If you like it smoky, add a bit of smoked paprika. Just remember to keep the balance right so one spice doesn’t overpower the others. For a complete guide on making this dish, check the Full Recipe. {{image_2}} You can make chicken tikka masala with other proteins. For example, try using shrimp, beef, or lamb. Each protein brings its unique flavor. Shrimp cooks quickly, while beef and lamb add depth. Adjust the cooking time in your Instant Pot. Shrimp needs just a few minutes, while beef may need more. If you want a vegetarian option, use paneer, tofu, or chickpeas. Paneer gives a rich taste and texture. Tofu absorbs the spices well and adds protein. Chickpeas provide a hearty feel and are very filling. Just follow the same steps in the recipe. Cook them for less time than chicken. Serve chicken tikka masala with basmati rice or naan bread. Both absorb the sauce well. You can also pair it with a fresh salad or yogurt. Adding a side of roasted veggies can enhance the meal. For a fun twist, try serving it in a wrap. It’s a great way to enjoy leftovers! For more on preparing this dish, check out the Full Recipe. To store your Chicken Tikka Masala, let it cool first. Use an airtight container. This will keep the flavors fresh. Make sure to refrigerate it within two hours of cooking. Leftovers stay good for about three to four days in the fridge. When you reheat your Chicken Tikka Masala, do it gently. Use a stove or microwave. If using the stove, add a splash of coconut milk for moisture. Heat on low until warm. Stir often to avoid burning. The microwave works too! Heat for one to two minutes, stirring halfway through. You can freeze Chicken Tikka Masala for longer storage. Use a freezer-safe container. Leave some space for the sauce to expand. It’s best to freeze it in single servings. This way, you can thaw just what you need. Chicken Tikka Masala stays good for up to three months in the freezer. When ready to eat, thaw it overnight in the fridge before reheating. Yes, you can make chicken tikka masala on the stove. Just use a heavy pot. Start by marinating the chicken as in the recipe. Heat oil in the pot and sauté the onions, garlic, and ginger until soft. Add the tomatoes and marinated chicken. Cover and cook on low heat for about 30-40 minutes. Stir occasionally until the chicken is tender. I recommend using boneless, skinless chicken thighs. They stay juicy and tender during cooking. Thighs also soak up the spices well, giving you more flavor. You can use chicken breasts, but they may dry out faster. To adjust spice levels, start with less chili powder. You can always add more later. If you want it milder, use more coconut milk. For extra heat, try adding cayenne pepper or fresh chili. Taste as you go to find your perfect level. You now have a complete guide to making delicious Instant Pot Chicken Tikka Masala. We covered the key ingredients, marinade benefits, and even tips for perfect cooking. Remember to avoid common mistakes and consider variations to fit your taste. Storing and reheating leftovers properly will keep your meal fresh. Whether you use chicken or try a vegetarian option, this dish is versatile. Follow these steps, and you're set for great meals. Enjoy this flavorful journey in your kitchen!

Instant Pot Chicken Tikka Masala Flavorful Dinner Dish

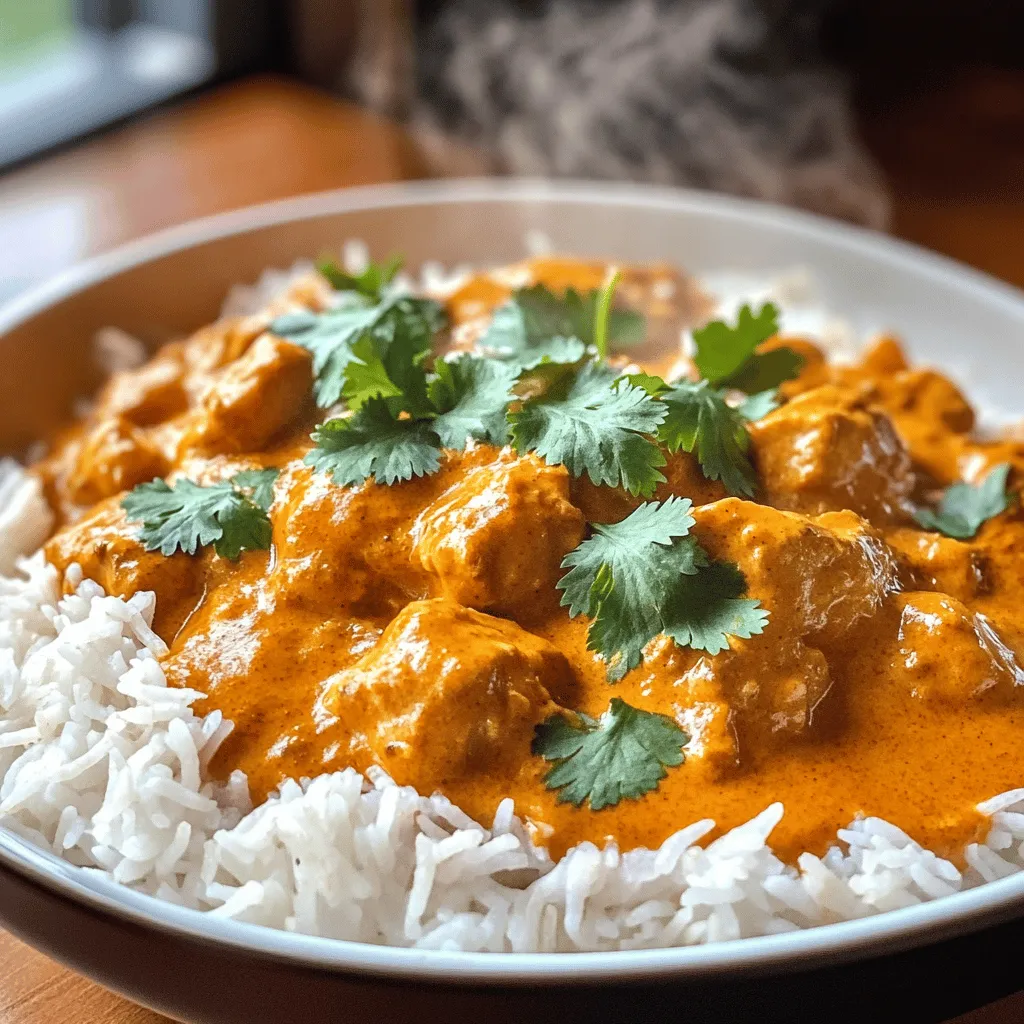
Are you ready to impress your dinner guests with a mouthwatering meal? Instant Pot Chicken Tikka Masala is both quick

For my chocolate chip cookie dough dip, I use these simple ingredients: - 1 cup all-purpose flour (heat-treated for safety) - 1/2 cup unsalted butter, softened - 3/4 cup brown sugar, packed - 1/4 cup granulated sugar - 1 teaspoon vanilla extract - 1/2 teaspoon salt - 1 cup mini chocolate chips - 1/2 cup cream cheese, softened - 1/4 cup milk (or more for desired consistency) These ingredients come together to create a deliciously creamy dip. Using heat-treated flour is key for safety. Raw flour can harbor harmful bacteria, like E. coli. Heat-treating flour kills any bacteria while keeping the flour safe for eating. To heat-treat, spread flour on a baking sheet and bake at 350°F (175°C) for about 5 minutes. Let it cool before using it in the dip. This step ensures you enjoy your dip without worry. You can easily swap some ingredients if needed. Here are a few ideas: - Instead of butter, use coconut oil for a dairy-free option. - For a lower-sugar option, try using a sugar substitute like erythritol. - If you want a creamier dip, add more cream cheese or use Greek yogurt. - For a nutty flavor, replace some chocolate chips with chopped nuts. These substitutions help customize the dip to your taste or dietary needs. First, gather all your ingredients. You need flour, butter, sugars, vanilla, salt, chocolate chips, cream cheese, and milk. Make sure the butter and cream cheese are soft. This will help mix everything smoothly. You can use a big mixing bowl to start. In your bowl, cream together the softened butter, brown sugar, and granulated sugar. Mix until it looks light and fluffy. This step is key for a smooth dip. Next, add in the cream cheese and vanilla. Keep mixing until it's all well combined. Now, add the heat-treated flour and salt. Mix just until the flour disappears. Don't overmix; it can make the dip tough. Now, pour in the milk a little at a time. Keep stirring until you like the dip's thickness. If you want it creamier, add more milk. Finally, fold in the mini chocolate chips. Make sure they spread evenly through the mix. Transfer your dip to a colorful bowl. For extra flair, sprinkle some chocolate chips on top. If you have time, chill it in the fridge for about 30 minutes. This helps the flavors mix well. Enjoy your tasty treat with dippables like graham crackers or apple slices! For the full recipe, check out the Full Recipe section. To get the best texture for your dip, keep these tips in mind: - Use softened butter and cream cheese. This helps mix easily. - Gradually add milk. This lets you control the dip's creaminess. - Mix just until smooth. Over-mixing can make it too fluffy. These steps guarantee a smooth and creamy dip every time. Want to boost flavor? Try these ideas: - Add a pinch of cinnamon for warmth. - Use brown sugar for a deeper taste. - Swap vanilla extract with almond extract for a twist. These little changes can make your dip pop! When serving at a party, presentation matters. Here are some fun ideas: - Use a bright bowl to catch the eye. - Arrange dippables around the bowl. Try graham crackers, apple slices, or pretzels. - For a special touch, sprinkle extra chocolate chips on top. These tips will make your Chocolate Chip Cookie Dough Dip a hit! For the full recipe, check out the details above. {{image_2}} You can add nuts to your dip for extra crunch. Chopped walnuts or pecans work well. Just stir in about half a cup to the mix. The nuts add a great texture and flavor. They blend well with the chocolate chips. You can also toast the nuts for a deeper taste. This variation makes the dip even more fun and tasty. Want a vegan version? You can swap out the butter and cream cheese. Use coconut oil or vegan butter instead of regular butter. For cream cheese, try a plant-based option. You can also use almond or oat milk for a creamy texture. With these swaps, you can enjoy a dairy-free treat. The flavor stays rich and delightful, just like the original. You can change the dip's flavor based on the season. In fall, add pumpkin spice for warmth. For summer, mix in crushed strawberries or mint. These flavors bring a fun twist to your dip. You can also add a splash of almond extract for a nutty flair. This keeps the dip fresh and exciting for every occasion. Store your Chocolate Chip Cookie Dough Dip in an airtight container. This keeps it fresh and tasty. Always place it in the fridge when you are not serving it. If you have leftovers, make sure to cover them well. Avoid using plastic wrap directly on the dip, as it can stick. When stored properly, this dip lasts about 5 days in the fridge. After that, it may lose its flavor and texture. Always check for any off smells or changes in color before eating. If it looks or smells funny, it’s best to throw it away. You can freeze the dip for later use. Place it in a freezer-safe container. Make sure to label it with the date. It can stay good for up to 3 months in the freezer. When you are ready to use it, thaw it overnight in the fridge. Stir it well before serving to restore its creamy texture. Yes, you can eat raw cookie dough in this dip. I use heat-treated flour to keep it safe. Heat-treated flour removes harmful bacteria. This makes it safe for you to enjoy the dough. You can indulge without worry! You can serve this dip with many fun snacks. I love using: - Graham crackers - Apple slices - Pretzels - Vanilla wafers - Mini marshmallows These dippers add a nice crunch and flavor. You can mix and match to suit your taste. The sweet dip pairs well with both sweet and salty options. You can make this dip a bit healthier. Try these easy swaps: - Use low-fat cream cheese instead of regular. - Replace some sugar with honey or maple syrup. - Add a scoop of protein powder to boost nutrition. These changes keep the dip tasty while cutting some calories. You can enjoy this treat without too much guilt! The full recipe is a great starting point for your healthy twist. This blog post covered all the essentials for making a great chocolate chip cookie dough dip. You learned about necessary ingredients, like heat-treated flour, and smart substitutions. The step-by-step guide made mixing easy. I shared tips for texture and flavor boosts. You got great variations to try, plus smart storage advice. In the end, this treat is fun and tasty for any occasion. Dive in and enjoy your dip!

Chocolate Chip Cookie Dough Dip Tasty and Easy Treat

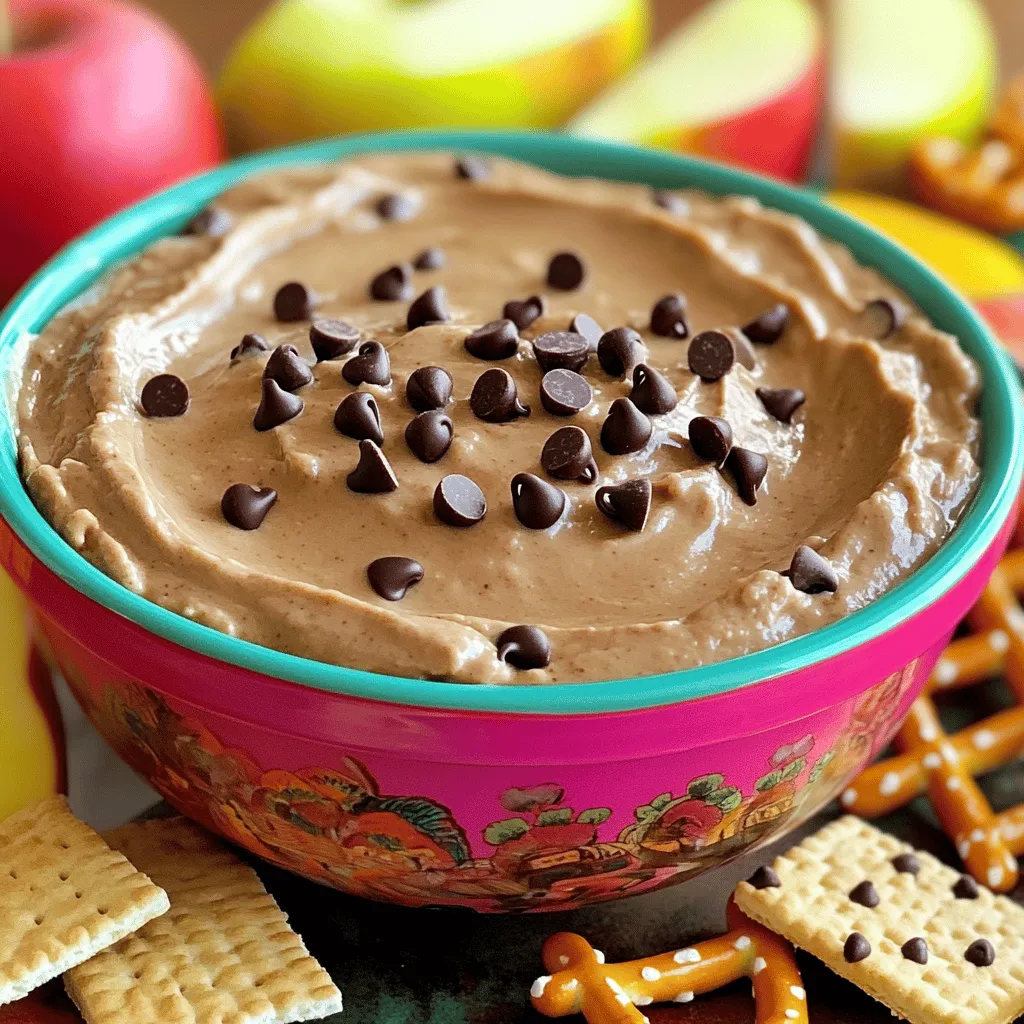
Craving a sweet treat that’s simple to make and oh-so-delicious? Look no further! My Chocolate Chip Cookie Dough Dip is

To make Buffalo Cauliflower Bites, you need a few simple ingredients. Here’s the list: - 1 large head of cauliflower, cut into bite-sized florets - 1 cup all-purpose flour - 1 cup water - 1 teaspoon garlic powder - 1 teaspoon onion powder - 1 teaspoon smoked paprika - 1 teaspoon salt - 1/2 teaspoon black pepper - 1 cup buffalo sauce - 2 tablespoons olive oil These ingredients blend well to create a crispy and tasty snack. The cauliflower acts as a great base, soaking up the flavors of the spices and buffalo sauce. For an extra touch, you can serve the bites with: - Celery sticks - Ranch dressing These add a nice crunch and creamy dip. They balance the heat of the buffalo sauce and make the dish more fun. Buffalo Cauliflower Bites are not just tasty; they are also nutritious. Here’s a quick look at the benefits: - Low in calories: Cauliflower is a low-calorie veggie. - High in fiber: This helps with digestion and keeps you full. - Rich in vitamins: Cauliflower has vitamins C and K, which are good for your health. As you enjoy these bites, you get a mix of flavor and nutrition. You can find the full recipe [here](#). First, gather your ingredients. You will need: - 1 large head of cauliflower, cut into bite-sized florets - 1 cup all-purpose flour - 1 cup water - 1 teaspoon garlic powder - 1 teaspoon onion powder - 1 teaspoon smoked paprika - 1 teaspoon salt - 1/2 teaspoon black pepper - 1 cup buffalo sauce - 2 tablespoons olive oil - Optional: Celery sticks and ranch dressing for serving Next, preheat your oven to 450°F (232°C). Line a baking sheet with parchment paper. This helps the bites not stick. In a large bowl, whisk together the flour, water, garlic powder, onion powder, smoked paprika, salt, and black pepper until smooth. Make sure there are no lumps. Once your batter is ready, dip each cauliflower floret in it. Make sure each piece is well-coated. Place the coated florets on the baking sheet in a single layer. Now, bake your cauliflower. Place it in the preheated oven for 20-25 minutes. Flip the florets halfway through for even cooking. The goal is to get them golden and crispy. While they bake, mix the buffalo sauce and olive oil in a small bowl. After the baking time, take the cauliflower out. Drizzle the buffalo sauce mixture over the florets. Toss gently to coat them well. Return the bites to the oven for an additional 10 minutes. This step makes the sauce crisp up nicely. If you prefer a different method, you can use an air fryer. Just follow similar steps but reduce the cooking time. When your Buffalo Cauliflower Bites are ready, serve them hot. They pair well with celery sticks and ranch dressing for dipping. This adds a nice crunch and coolness to the spicy bites. Feeling adventurous? You can also try them in a wrap or on a salad. They make a great snack at parties or movie nights. Enjoy your tasty and simple snack! For more detailed steps, check the Full Recipe. To get that perfect crunch, focus on the batter. Make sure it's thick enough to coat each piece well. A thin layer won't give you that nice crispy bite. Use a high heat when baking. The oven at 450°F (232°C) helps to crisp the outside while keeping the inside tender. Flip the cauliflower halfway through to ensure even cooking. This will turn all sides golden and crispy. Not all buffalo sauces are the same. Look for a sauce that has a good balance of heat and flavor. Some sauces are very spicy, while others are milder. If you're not sure, start with a medium sauce. You can always add more heat later. Mixing in olive oil with the sauce helps it stick better to the cauliflower. This gives an extra layer of flavor. One mistake is overcrowding the baking sheet. If you pack the florets too close, they won’t crisp up well. Give them space to breathe and cook evenly. Another mistake is skipping the flipping step. This can lead to uneven cooking and soggy spots. Lastly, don’t skip the extra bake after adding the sauce. This step is key for a sticky, crispy finish. For more details, check the Full Recipe for Buffalo Cauliflower Bites. {{image_2}} You can easily make Buffalo Cauliflower Bites vegan and gluten-free. To make them gluten-free, swap all-purpose flour for gluten-free flour. This flour works well and keeps the bites crispy. For a vegan option, ensure your buffalo sauce is dairy-free. Most brands offer a vegan version. These changes keep the flavor while meeting your diet needs. To kick up the taste, try adding spices to the batter. You can mix in cayenne pepper for heat or nutritional yeast for a cheesy flavor. If you love herbs, add dried oregano or thyme. For a sweet touch, mix in a bit of maple syrup into the buffalo sauce. These small tweaks create unique versions of the dish. Using an air fryer gives you a great way to make Buffalo Cauliflower Bites. The air fryer can cook them quicker and keep them crispy. Set the air fryer to 400°F (204°C) and cook for about 15-20 minutes. Shake the basket halfway through to ensure they cook evenly. You can also grill them on a barbecue for a smoky flavor. Each method brings its own twist to the classic recipe. For the full recipe, check out the instructions above. After enjoying your Buffalo Cauliflower Bites, let them cool. Place leftovers in an airtight container. This keeps them fresh for about 3-4 days in the fridge. Always seal the container well to avoid moisture. If you want to keep them longer, consider freezing. To reheat, I suggest using an oven. Preheat it to 350°F (175°C). Spread the cauliflower bites on a baking sheet. Heat for about 10-15 minutes. This helps them stay crispy. You can also use an air fryer for quicker reheating. Set it to 350°F (175°C) and cook for 5-7 minutes. If you want to freeze the bites, lay them on a baking sheet in a single layer. Freeze until solid. Then, transfer them to a freezer bag. They can last up to 3 months this way. When ready to eat, bake directly from frozen. Just add a few extra minutes to the cooking time. For exact steps, check the Full Recipe. Yes, you can make Buffalo Cauliflower Bites ahead of time. Prepare them fully and store them in the fridge. When ready to eat, just reheat them in the oven. This keeps them crispy and tasty. For best results, serve them fresh after baking. Buffalo Cauliflower Bites pair well with several sides. You can serve them with celery sticks. They also go great with ranch dressing for dipping. Other options include blue cheese dressing or carrot sticks. These sides add crunch and coolness to balance the heat. To make your Buffalo Cauliflower Bites extra spicy, simply increase the amount of buffalo sauce. You can add diced jalapeños to the batter for an extra kick. Another option is to mix in cayenne pepper with your seasonings. Adjust to your heat preference for a bold flavor. Buffalo cauliflower bites are tasty and fun to make. We covered the key ingredients and cooking methods, like baking or air frying. I shared tips for crispiness and how to avoid common mistakes. You can try vegan or gluten-free options and enhance flavors easily. With the right storage, you can keep leftovers fresh. These bites are great for snacks or meals. I hope you enjoy making and sharing them!

Buffalo Cauliflower Bites Tasty and Simple Snack

Looking for a tasty and simple snack? Buffalo Cauliflower Bites are a perfect choice! You’ll love their spicy flavor and

- 1 pound boneless, skinless chicken breasts - 1 red bell pepper, julienned - 1 yellow bell pepper, julienned - 1 green bell pepper, julienned - 1 medium red onion, sliced - 3 cloves garlic, minced - 2 teaspoons chili powder - 1 teaspoon cumin - 1 teaspoon smoked paprika - ½ teaspoon salt - ¼ teaspoon black pepper - 2 tablespoons olive oil - Juice of 1 lime The main ingredients are simple yet flavorful. Chicken breasts are the star here. Use fresh bell peppers for color and crunch. The spices add depth and warmth. Garlic gives a lovely aroma. - Fresh cilantro - Lime wedges - Tortillas Toppings can make your meal pop. Fresh cilantro adds a burst of flavor. Lime wedges give a nice zing. Warm tortillas help hold everything together. - Non-stick skillet - Spatula - Measuring spoons You need a non-stick skillet for easy cooking and cleanup. A spatula helps flip the chicken and veggies. Measuring spoons ensure you get the right spice amounts. For the full recipe, check the section above. Enjoy your cooking! First, slice your chicken into thin strips. Aim for pieces that are even in size. This helps them cook evenly. You can marinate the chicken for extra flavor. A simple mix of lime juice, chili powder, and olive oil works well. Marinate for at least 15 minutes. This makes a big difference in taste. Next, heat a large non-stick skillet over medium-high heat. Add 2 tablespoons of olive oil and let it heat for about 1 minute. Once hot, add the chicken strips to the pan. Sprinkle chili powder, cumin, smoked paprika, salt, and black pepper on top. Cook for 5-7 minutes, stirring often. You want the chicken to be browned and fully cooked. When the chicken is ready, it’s time to add the veggies. Toss in your sliced red onion, red bell pepper, yellow bell pepper, and green bell pepper. Stir everything well. Cook for another 5-7 minutes. This keeps the vegetables tender but still crunchy. Stirring helps them cook evenly and soak in those great flavors. Finish your dish by adding minced garlic and cooking for one more minute. This adds a nice aroma. Now you're ready to enjoy your One-Pan Chicken Fajitas! For the complete recipe, check out the Full Recipe section. One-pan meals save time and effort. To start, heat your pan on medium-high. Add olive oil and let it warm up. This step helps sear the chicken. When adding chicken strips, spread them out. This ensures even cooking. Cook for about 5-7 minutes until they are golden. Stir them occasionally to avoid sticking. After browning the chicken, it’s time for the veggies. Add bell peppers and onion next. This mix cooks well in a pan. Keep the heat steady. Cook for another 5-7 minutes until they stay crisp. This keeps your fajitas from getting soggy. To boost flavor, use spices wisely. Chili powder, cumin, and smoked paprika give depth. These spices make the dish pop. For more taste, consider marinating the chicken. A simple mix of lime juice, garlic, and spices works great. Let the chicken sit for at least 30 minutes. This step really brings out the flavor. Serving fajitas can be fun! Start by using a large platter. Place the chicken and veggies in the center. Warm tortillas can be on the side. This lets everyone build their own fajitas. For garnishing, fresh cilantro adds a nice touch. You can also add lime wedges. These small details make your dish look appealing. Consider serving with sides like guacamole or salsa. This adds variety to your meal. For the full recipe, check the earlier section. {{image_2}} You can easily swap chicken for other proteins. Beef works great in fajitas. Use flank steak or sirloin, sliced thin. Shrimp is another tasty option. Cook them for just a few minutes until pink. For a vegetarian twist, use mushrooms or tofu. Both options absorb flavors well and add a nice texture. If you want to change the veggies, go for it! Zucchini or mushrooms are excellent substitutes for bell peppers. You can also use red cabbage for a crunch. Carrots add sweetness, too. Mix and match to find your favorite combo. Want your fajitas milder? Simply reduce the chili powder and skip the hot sauce. You can add a touch of honey for sweetness instead. If you love spice, add jalapeños or cayenne pepper. You can also use a spicier chili powder. Adjust to your taste for a perfect kick. For the full recipe, check out the [Full Recipe]. To store leftovers, let your fajitas cool down first. Use an airtight container. This keeps moisture in and flavors fresh. Place the container in the fridge. You can keep them there for up to three days. If you want to enjoy them later, separate the chicken and veggies from the tortillas. This way, the tortillas won’t get soggy. To freeze the fajita mixture, wait until it cools completely. Pack the chicken and veggies into freezer-safe bags. Remove as much air as possible before sealing. This helps prevent freezer burn. You can store them in the freezer for up to three months. When you're ready to eat, take the mixture out and place it in the fridge overnight to thaw. For reheating, warm it in a skillet over medium heat. Stir often until heated through. Cooked fajitas last in the fridge for about three days. If you freeze them, they can last for up to three months. Always check for any off smells or changes in color to be safe. Enjoy your One-Pan Chicken Fajitas any time with these storage tips! You can pair your chicken fajitas with several tasty sides. Here are some great options: - Spanish rice: The flavor complements the spices in the fajitas. - Refried beans: They add creaminess and protein to your meal. - Guacamole: This rich dip enhances the fajita experience. - Salsa: Fresh salsa brightens the plate with tangy flavor. - Corn on the cob: It brings a sweet crunch to each bite. Feel free to mix and match these sides for a fun meal! Yes, you can make chicken fajitas ahead of time! Just follow these storage tips: - Refrigeration: Store your cooked fajitas in an airtight container. They will stay fresh for up to three days. - Freezing: For longer storage, place the fajitas in a freezer-safe bag. They can last up to three months in the freezer. - Reheating: When ready to eat, thaw in the fridge overnight. Reheat in a pan or microwave until hot. Making fajitas in advance helps save time on busy days! Choosing the right tortillas makes a big difference. Here are some types to consider: - Flour tortillas: These are soft and chewy, great for wrapping. - Corn tortillas: They are gluten-free and add a nice texture. - Whole wheat tortillas: These offer a healthier option with more fiber. Each type has its own taste and texture, so pick what you like best! For a delicious meal, warm the tortillas before serving. In this post, we explored making one-pan chicken fajitas. We covered ingredients, including chicken and mixed veggies. I shared tips on prepping and cooking chicken, adding flavors, and ensuring great texture. We also discussed variations to suit your taste. Lastly, I provided storage guidelines to keep leftovers fresh. With this knowledge, you can create delicious fajitas with ease. Now, enjoy your cooking!

One-Pan Chicken Fajitas Quick and Simple Meal

Are you ready to spice up your dinner routine? One-Pan Chicken Fajitas are quick to make, easy to clean up,

- 2 ripe avocados, pitted and peeled - 2 cloves garlic, minced - 1 tablespoon fresh lemon juice - 1/4 cup fresh basil leaves - 1/4 cup olive oil - Salt and pepper to taste - 12 oz spaghetti or your choice of pasta - 1/2 cup cherry tomatoes, halved - 1/4 cup grated Parmesan cheese (optional for garnish) - Crushed red pepper flakes (optional for a kick) For this creamy avocado pasta, use two ripe avocados. Ripe avocados make the dish smooth and rich. You need two cloves of garlic for flavor. The garlic adds a nice kick without being too strong. One tablespoon of fresh lemon juice brightens the dish up. It helps balance the creaminess of the avocados. You will also need 1/4 cup of fresh basil leaves. Basil adds a fresh herbal taste. The olive oil, also at 1/4 cup, gives the sauce a silky texture. Salt and pepper are essential for seasoning, so adjust to your taste. I recommend using 12 ounces of spaghetti or any pasta you like. If you want a lighter option, use zucchini noodles. The 1/2 cup of cherry tomatoes adds color and sweetness. Finally, if you enjoy cheese, sprinkle 1/4 cup of grated Parmesan on top. For some heat, add crushed red pepper flakes as needed. Feel free to swap ingredients. For a vegan version, leave out the cheese. You can also add nuts or seeds for a crunchy bite. This recipe is flexible and fun to make! Check out the Full Recipe for more details. Start by boiling a large pot of salted water. Once boiling, add 12 oz of spaghetti. Cook the pasta until it's al dente, usually around 8 to 10 minutes. This means the pasta should be firm yet tender. As the pasta cooks, stir it occasionally to prevent sticking. Once done, reserve about half a cup of the pasta water. Then, drain the rest of the water, and set the pasta aside. While the pasta cooks, it's time to make the sauce. Take 2 ripe avocados, 2 cloves of minced garlic, 1 tablespoon of fresh lemon juice, 1/4 cup of basil leaves, and 1/4 cup of olive oil. Put these in a food processor or blender. Blend everything until it's smooth and creamy. If it’s too thick, add a splash of the reserved pasta water. This will help reach the right consistency. Now, combine the hot pasta with the creamy avocado sauce in a large bowl. Start adding the reserved pasta water bit by bit until the sauce coats the pasta evenly. Toss in the halved 1/2 cup of cherry tomatoes gently. Finally, season to taste with salt and pepper. You can serve your delicious creamy avocado pasta immediately. If you want, sprinkle with grated Parmesan cheese and crushed red pepper flakes for a little kick. For the complete process, check the Full Recipe. To get that dreamy, creamy texture in your avocado pasta, start with ripe avocados. A ripe avocado feels slightly soft when you press it. If it's hard, wait a few days. Once you have ripe avocados, blend them until smooth. If the sauce is too thick, add pasta water. This water has starch, which helps the sauce cling to the pasta. To boost flavors, you can add herbs and spices. Fresh parsley or cilantro works great. A pinch of garlic powder can add depth. For a bit of heat, sprinkle in some crushed red pepper. When you serve the pasta, add halved cherry tomatoes for color. Grating fresh Parmesan cheese on top adds a lovely finish. This makes your dish not only tasty but also beautiful. {{image_2}} You can make creamy avocado pasta even better by adding proteins. Here are some great options: - Chicken: Cooked and diced chicken adds heartiness. - Shrimp: Lightly sautéed shrimp brings a nice flavor. - Chickpeas: For a plant-based choice, add canned chickpeas. They boost protein and are easy to use. These proteins mix well with the creamy sauce. They also make the meal more filling and nutritious. To make a vegan version, replace Parmesan cheese with nutritional yeast. It gives a cheesy taste without dairy. Use gluten-free pasta like brown rice or quinoa pasta. These options are tasty and safe for gluten-free diets. This way, everyone can enjoy creamy avocado pasta, no matter their dietary needs. Experimenting with different spices can take your dish to new heights. Consider adding: - Garlic powder: For extra garlic flavor. - Cumin: Adds warmth and depth. - Crushed red pepper flakes: For a spicy kick. You can also try different cheeses. Feta or goat cheese can give a tangy twist. Each change brings a new taste experience. Enjoy exploring these flavor profiles! After you make creamy avocado pasta, you may have leftovers. Storing them right keeps them tasty. Place any leftover pasta in an airtight container. This helps keep it fresh. Store it in the fridge. It will stay good for about 2 days. For the best flavor, eat it soon. To keep the sauce fresh, put it in a separate container. Make sure to seal it tightly. This helps prevent browning. You can also add a splash of lemon juice on top. This adds flavor and keeps the color bright. If you want to save the avocado sauce for later, freezing is an option. First, pour the sauce into a freezer-safe bag. Squeeze out the air before sealing. This helps prevent freezer burn. The sauce can last up to 3 months in the freezer. When you’re ready to eat, thaw the sauce in the fridge overnight. To reheat, warm it gently in a pan. Add a bit of water or olive oil to adjust the texture. Stir until it’s smooth and creamy again, just like the first time. Yes, you can use frozen avocados. However, they may change in texture. Frozen avocados tend to become mushy when thawed. If you don't mind a softer sauce, go ahead. Make sure to thaw them in the fridge overnight for best results. To keep your avocado fresh, use lemon juice. The acidity helps slow down browning. Cover the dish tightly with plastic wrap or a lid. This keeps air out and preserves color. You can also store it in an airtight container for extra freshness. This pasta pairs well with a simple side salad. You might try a fresh green salad with lemon vinaigrette. Grilled vegetables also make a great side. For added protein, consider serving grilled chicken or shrimp. Reheat the pasta gently on low heat. Add a splash of olive oil or pasta water. This helps keep the sauce creamy. Stir often to avoid sticking. You can also microwave it, but cover it to retain moisture. Avocados are rich in healthy fats. They provide fiber and vitamins like E and K. This dish is also low in carbs if you use zucchini noodles. The healthy fats help your body absorb nutrients better. Plus, avocados support heart health and can lower cholesterol. This blog post covered crafting a delicious creamy avocado pasta. You learned about the key ingredients, how to prepare everything, and tips for great flavor. You also saw variations and storage tips to keep your meal fresh. In my experience, using ripe avocados makes all the difference. Experiment with flavors and have fun in your kitchen. Your creamy avocado pasta journey can lead to tasty meals that impress anyone!

Creamy Avocado Pasta Delightfully Simple Recipe

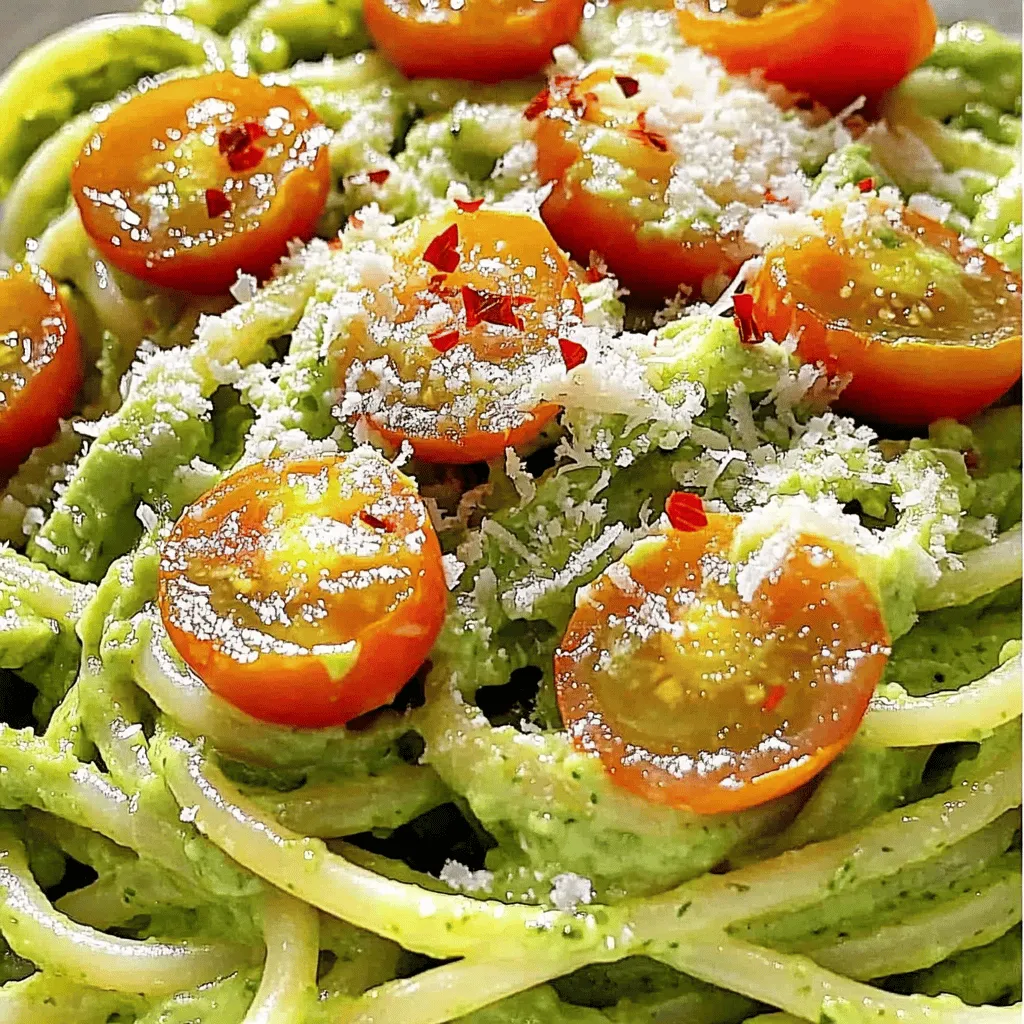
Are you ready to whip up a dish that’s both creamy and delightful? My Creamy Avocado Pasta recipe is not

- 1 lb large shrimp, peeled and deveined - 4 tablespoons unsalted butter - 4 cloves garlic, minced - 1 medium lemon, zested and juiced - 1 teaspoon red pepper flakes (adjust for heat preference) - 1/4 cup fresh parsley, chopped - Salt and pepper to taste - Lemon slices for garnish You can swap shrimp for scallops or chicken if you prefer. Scallops cook fast and have a sweet flavor. Chicken gives a hearty bite. If you want a lighter dish, use olive oil instead of butter. It works well and adds a nice taste. For shrimp, choose high-quality brands like SeaPak or Wild American Shrimp. They ensure freshness and flavor. For butter, I recommend brands like Kerrygold or Plugrá. They have rich taste and great quality. For garlic, fresh is best, but you can use jarred minced garlic in a pinch. To make Lemon Garlic Butter Shrimp, start by peeling and deveining the shrimp. Here’s how: - Hold the shrimp firmly. Start at the head end and pull off the shell. - Use a small knife to cut along the back. This opens up the shrimp. - Remove the dark vein you see. Rinse the shrimp under cold water. Next, let’s prepare the lemon: - Roll the lemon on the counter. This helps release the juice. - Cut it in half. Use a zester to get fine shavings from the peel. - Squeeze the lemon juice into a bowl. Remove any seeds that may fall in. Now, let’s cook the shrimp in the skillet: 1. Heat a large skillet over medium heat. Add the butter and let it melt. 2. Once melted, add minced garlic and red pepper flakes. Stir for about one minute until it smells amazing. 3. Add the shrimp to the skillet. Cook for 2-3 minutes on one side until they turn pink. 4. Flip the shrimp over. Pour in the lemon juice and add the lemon zest. Cook for another 2-3 minutes. They should be fully cooked and opaque. Timing is key. Overcooked shrimp can become tough, so watch them closely. To plate the dish attractively, use a large, white plate. This helps the colors pop. - Place the shrimp in the center of the plate. - Sprinkle chopped parsley over the top for a fresh look. - Add lemon slices around the shrimp for a bright touch. For serving, pair the dish with rice or steamed vegetables. These sides balance the rich flavors of the shrimp. You can find the Full Recipe for more details. To avoid overcooking shrimp, watch the color closely. Shrimp turn pink when done. Cook them for about 2-3 minutes on each side. If they curl up tightly, they are overdone. For extra flavor, add spices. Try using smoked paprika or a pinch of cayenne. Fresh herbs like basil or cilantro can also enhance taste. A splash of white wine adds a nice zing too. Lemon Garlic Butter Shrimp pairs well with many sides. Serve it over rice or pasta for a filling meal. Steamed vegetables like broccoli or green beans make a great addition. For garnish, fresh parsley adds color and brightness. Lemon slices on the side look nice and add flavor. A drizzle of extra lemon juice before serving is a nice touch. To make ahead, cook the shrimp but leave out the garnishes. Store them in an airtight container in the fridge. They stay good for 1-2 days. Reheat in a skillet over low heat to keep them tender. For freezing, let the shrimp cool first. Place them in freezer bags and remove air. They can last up to three months. Thaw in the fridge overnight before reheating. {{image_2}} You can change the taste of Lemon Garlic Butter Shrimp easily. Adding fresh herbs like basil or thyme gives it new flavors. These herbs add a fragrant touch and make the dish special. You can also add vegetables like spinach or asparagus. These veggies bring color and nutrition. They cook quickly and blend well with shrimp. If you need gluten-free options, this dish is already safe. Just check the butter and spices. For low-carb or keto-friendly meals, you can skip the butter and use olive oil. This keeps the dish light but tasty. You can also serve it with cauliflower rice instead of regular rice. This keeps the meal low in carbs! You can cook Lemon Garlic Butter Shrimp in different ways. Grilling adds a smoky flavor. Just marinate the shrimp with the sauce and grill for a few minutes. Skillet cooking is quick and easy, as shown in the full recipe. Another option is oven-baked shrimp. Preheat your oven to 400°F. Place shrimp on a baking sheet with the butter and garlic mixture. Bake for about 8-10 minutes. This method is great for a hands-off approach. Whatever way you choose, the shrimp will be delicious! To store leftovers safely, place the shrimp in an airtight container. This keeps them fresh and tasty. Make sure to let the shrimp cool down before sealing. You can keep them in the fridge for up to three days. After that, they may lose flavor and texture. If you want to save your shrimp for later, freezing is a great option. First, let the shrimp cool completely. Then, place them in a freezer-safe bag or container. Squeeze out as much air as possible. This helps prevent freezer burn. You can freeze cooked shrimp for up to three months. To defrost shrimp properly, move them from the freezer to the fridge the night before you plan to use them. This ensures they thaw slowly and safely. If you're in a hurry, you can also run cold water over the sealed bag for quicker defrosting. Reheating in a skillet is easy and effective. Add a little butter or oil to the pan and heat it on medium. Once hot, add the shrimp. Cook for about three minutes, stirring gently until they’re warm. This keeps them juicy and flavorful. If you prefer using the microwave, place the shrimp in a microwave-safe dish. Cover it loosely with a microwave-safe lid or wrap. Heat in short bursts of 30 seconds, stirring in between. This method is quick but can dry out the shrimp if not careful. For this recipe, I recommend using large shrimp. These shrimp are easier to cook and provide a nice bite. You can choose wild-caught or farmed shrimp. Wild-caught shrimp often offer better flavor. If you can find them, go for shrimp labeled as "jumbo" or "extra-large." They cook evenly and pair well with the lemon and garlic. Yes, you can use frozen shrimp. Start by thawing them properly. Place the shrimp in a bowl of cold water for about 15-20 minutes. If you are in a hurry, you can run cold water over them in a colander. Avoid using hot water, as it can cook the shrimp unevenly. Once thawed, make sure to pat them dry before cooking for the best results. To add some heat, sprinkle in red pepper flakes. Start with 1 teaspoon and adjust to your liking. If you want more spice, you can also add diced fresh jalapeños or cayenne pepper. Mix these ingredients in while cooking the garlic. This way, the flavors blend nicely with the shrimp. This dish is flavorful and nutritious. A serving of Lemon Garlic Butter Shrimp has around 300 calories. It also provides about 30 grams of protein, making it a great choice for a healthy meal. The dish contains healthy fats from butter, and the lemon adds vitamin C. If you want to lower calories, you can use less butter or substitute with olive oil. For the full recipe, check out the [Full Recipe]. This recipe combines simple ingredients for a delightful meal. You learned about shrimp, butter, and lemon. You can substitute or try different flavors to shake things up. Proper cooking and plating make a big difference. Remember to use fresh ingredients for the best taste. Store leftovers correctly, and don't hesitate to experiment. Whether you enjoy it as a quick dinner or meal prep, this dish shines in its simplicity and flavor. Enjoy bringing this delicious shrimp to your table!

Lemon Garlic Butter Shrimp Quick and Flavorful Recipe

If you’re craving a quick and tasty dish, Lemon Garlic Butter Shrimp is the answer. With just a few simple

- 1 lb ground beef - 2 tablespoons sesame oil - 3 cloves garlic, minced - 1 inch ginger, grated - 3 green onions, finely chopped - 2 tablespoons soy sauce (low sodium) - 1 tablespoon brown sugar - 1 tablespoon gochugaru (Korean red pepper flakes) - 1 cup shredded carrots - 1 cup bean sprouts - 12 egg roll wrappers - Oil for frying I love using these ingredients for Korean Ground Beef Egg Rolls. They create such bold flavors. Ground beef is the star here. It’s juicy and packed with flavor. Use high-quality beef for the best taste. Sesame oil adds a nutty touch that elevates the dish. Just a little goes a long way. Garlic and ginger bring warmth and depth. Mince the garlic well and grate the ginger for the best results. Green onions add freshness and crunch. Chop them finely so they blend smoothly into the filling. Soy sauce and brown sugar balance each other. The soy sauce brings saltiness, while brown sugar adds sweetness. For a spicy kick, we use gochugaru. This Korean red pepper flakes give the rolls a nice heat. Adjust the amount to your taste. Shredded carrots add color and some sweetness. They also give a nice texture to the filling. Bean sprouts bring crunch and a fresh flavor. Make sure to rinse them well before use. Egg roll wrappers are essential for wrapping the filling. They create a crispy outer layer when fried. Finally, oil for frying is necessary. Choose a neutral oil that can withstand high heat. These ingredients come together beautifully in the Full Recipe for Korean Ground Beef Egg Rolls. Get ready to impress your friends and family with this tasty snack! To make the filling, start by heating sesame oil in a large skillet over medium heat. Add minced garlic and grated ginger. Sauté them for about 1 minute until they smell good. This step adds a lot of flavor. Next, add the ground beef to the skillet. Use a spatula to break it up as it cooks. Brown the beef for about 5-7 minutes. If there is too much fat, drain it off. This keeps the filling from being too greasy. Now, stir in chopped green onions, soy sauce, brown sugar, and gochugaru. Cook this mixture for an additional 2-3 minutes. This blends all the flavors well. Finally, fold in the shredded carrots and bean sprouts. Mix everything until it's even. Let the filling cool for a few minutes. To assemble, place an egg roll wrapper on a clean surface. Make sure the pointed side is facing you. Spoon about 2 tablespoons of the beef mixture onto the center of the wrapper. Fold the bottom corner over the filling. Next, fold the sides in to form an envelope shape. Roll it tightly away from you. Use a little water to seal the top corner. This keeps the filling inside. Repeat this step until you finish all the wrappers and filling. Heat enough oil in a deep skillet or frying pan. You want about 2 inches of oil for frying. Set the heat to medium-high. Once the oil is hot, fry the egg rolls in batches. Cook them for about 4-5 minutes until they are golden brown on all sides. Use a slotted spoon to remove them and drain on paper towels. This helps absorb extra oil. Serve hot with your favorite dipping sauce, like sweet chili sauce or soy sauce. For the full recipe, check the details provided earlier. - Optimal frying temperature: Aim for 350°F (175°C). This heat gives you crispy rolls. If the oil is too cold, the egg rolls will soak up oil and become greasy. If it's too hot, they will burn. - Techniques for even browning: Fry in small batches. This ensures each roll gets enough space and heat. Turn them gently for a uniform golden color. Use a slotted spoon to help you flip them. - Recommended dipping sauces: Sweet chili sauce pairs great with these rolls. Soy sauce adds a salty touch. You can mix them for a unique flavor. - Substituting ingredients wisely: If you don't have gochugaru, use red pepper flakes for a similar kick. Swap out sesame oil with olive oil if needed. These swaps still keep the flavor nice. - Best side dishes or accompaniments: Serve with rice or a fresh salad. A simple cucumber salad brightens the meal. You can also add pickled vegetables for a tangy twist. - Presentation tips for serving: Place the egg rolls on a nice platter. Use colorful garnishes like chopped green onions or sesame seeds. This makes the dish look more inviting and fun. {{image_2}} You can swap ground beef for ground turkey or chicken. These meats are leaner and still tasty. They fit well with the flavors of Korean cuisine. For a vegetarian option, try using mushrooms, tofu, or lentils. These ingredients bring great texture and flavor. You can also mix in some chopped spinach for added nutrients. Adding vegetables can change the taste of your egg rolls. Try bell peppers, zucchini, or even corn. They add crunch and sweetness. You can also mix in some fresh herbs like cilantro or basil for a unique twist. If you want to spice things up, add more gochugaru or a dash of chili powder. You can also try soy sauce or hoisin sauce for extra depth of flavor. Experimenting with seasonings can lead to fun new tastes. Baking your egg rolls is a healthier choice. Preheat your oven to 400°F (200°C). Place the rolls on a baking sheet and spray with a little oil. Bake for about 20 minutes until they are golden brown and crispy. You can serve these egg rolls as appetizers or main dishes. Pair them with rice or a fresh salad. They also work great with dipping sauces like sweet chili or soy sauce. Try these different styles to find your favorite way to enjoy this dish. For the full recipe, check out the section above. To keep your Korean ground beef egg rolls fresh, store them right. Place leftover rolls in an airtight container. You can use a glass or plastic container. Make sure to cool them first. Refrigerate the container right away. They will stay good for about 3 to 4 days. When it comes time to enjoy your leftovers, reheating is key. The best way is to use an oven. Preheat your oven to 350°F (175°C). Place the egg rolls on a baking sheet. Bake for about 10-15 minutes. This keeps them crispy. You can also use an air fryer. Heat at 350°F (175°C) for about 5-7 minutes. If you want to save some for later, freezing works well. Lay the cooked egg rolls on a baking sheet. Make sure they are not touching. Freeze until firm, about an hour. Then, transfer them to a freezer bag. Squeeze out the air and seal well. They can last up to 3 months in the freezer. To eat, thaw them in the fridge overnight. Reheat in the oven or air fryer for best results. Enjoy your tasty snacks anytime! For the full recipe, check out the initial section. To get crispy egg rolls, follow these tips: - Use enough oil: Make sure you have about 2 inches of hot oil in your pan. This helps fry them evenly. - Heat the oil properly: Test the oil by dropping in a small piece of the wrapper. If it bubbles and sizzles, it’s ready. - Don’t overcrowd the pan: Fry in small batches. This allows hot oil to circulate around each egg roll. - Drain well after frying: Place fried egg rolls on paper towels. This helps remove extra oil and keeps them crisp. Yes, you can prepare egg rolls ahead of time. Here’s how to store them: - Refrigerate: Keep pre-made, uncooked egg rolls in the fridge for up to 24 hours. Wrap them in plastic wrap to prevent drying. - Freeze: For longer storage, freeze them on a baking sheet. Once frozen, transfer to a freezer bag. They last up to 3 months. When you’re ready to cook, fry them straight from the fridge or freezer. Just add a few extra minutes to the cooking time. Dipping sauces make these egg rolls even better. Here are some tasty options: - Sweet chili sauce: This sauce adds a nice balance of sweet and spicy. - Soy sauce: A classic choice that enhances the savory flavors. - Gochujang sauce: For a spicy kick, try this Korean chili paste mixed with a bit of honey or vinegar. Feel free to mix and match sauces to find your favorite combination! For the full recipe, check here: [Full Recipe]. You learned about making tasty Korean Ground Beef Egg Rolls. We covered key ingredients, step-by-step cooking, and useful tips. You can mix flavors and make these rolls your own. Remember to try different cooking methods and sauces. Enjoy your delicious creations with family and friends. With practice, you'll get even better at crafting these treats. Happy cooking!

Korean Ground Beef Egg Rolls Flavorful and Easy Snack

Are you ready for a tasty adventure? Korean Ground Beef Egg Rolls are the perfect mix of flavors and crunch.

To make a tasty tortellini pasta salad, gather these fresh ingredients: - 12 oz cheese tortellini - 1 cup cherry tomatoes, halved - 1 cup cucumber, diced - 1/2 cup bell peppers (red and yellow), diced - 1/4 cup red onion, finely chopped - 1/2 cup black olives, sliced - 1/4 cup feta cheese, crumbled - 1/4 cup fresh basil, chopped - 3 tablespoons olive oil - 2 tablespoons lemon juice - 1 teaspoon dried oregano - Salt and pepper to taste Each serving of this salad has about: - Calories: 280 - Protein: 10g - Carbohydrates: 30g - Fiber: 3g - Fat: 14g This dish is rich in vitamins and minerals. It offers a colorful mix of nutrients. When choosing your ingredients, keep these tips in mind: - Tortellini: Look for fresh or frozen cheese tortellini. Check the expiration date to ensure freshness. - Vegetables: Choose firm and vibrant cherry tomatoes, crisp cucumbers, and colorful bell peppers. - Olives: Select pitted black olives for easy use. They should have a shiny surface and a fresh smell. - Feta Cheese: Opt for blocks of feta instead of crumbled for better texture and flavor. - Basil: Pick fresh basil leaves with bright green color. Avoid any that are wilted or brown. Using fresh ingredients makes your tortellini pasta salad taste better and look fantastic. For the full recipe, check the section above. Start by cooking the cheese tortellini. Boil water in a large pot. Add the tortellini and cook according to the package directions. You want it to be al dente. This usually takes about 3 to 5 minutes. Drain the tortellini and rinse it under cold water. This stops the cooking. It also cools the pasta down. Set it aside in a large bowl. Now it's time to mix the salad. In that same bowl, add the halved cherry tomatoes, diced cucumber, and diced bell peppers. Next, add the finely chopped red onion and sliced black olives. Crumble some feta cheese over the top. Finally, sprinkle in fresh basil. This adds a bright flavor. Gently toss everything together, making sure each ingredient gets mixed well. For the dressing, grab a small bowl. Whisk together the olive oil, lemon juice, dried oregano, salt, and pepper. Make sure it's well combined. Pour this dressing over the tortellini and veggie mix. Toss it all again until everything is coated. Fold in the chopped fresh basil carefully. You can save some for garnish later. Adjust the seasoning to your taste. Cover the salad and refrigerate it for at least 30 minutes. This helps the flavors blend well. Enjoy this fresh and colorful dish! You can find the Full Recipe online for more details. One common mistake is overcooking the tortellini. Always cook it until al dente. This keeps it firm and adds a nice bite. Another mistake is not rinsing the pasta after cooking. Rinsing cools it down and prevents it from sticking together. Avoid adding too much dressing. Start with a little, then add more if needed. Lastly, don’t skip chilling the salad. Letting it sit helps the flavors blend. To boost flavor, use fresh herbs like basil or parsley. They add a bright taste. You can also mix in some lemon zest for extra zing. Try adding a pinch of red pepper flakes for heat. If you love cheese, consider more feta or even a sprinkle of Parmesan. A splash of balsamic glaze can also give a sweet kick. Taste as you go to find your perfect mix. This salad is perfect for meal prep. You can make it a day in advance. Just keep the dressing separate until you are ready to serve. This keeps everything fresh. Store the salad in an airtight container in the fridge. It can last up to three days. When ready to eat, give it a good toss to mix. For the best flavor, let it sit at room temperature for a few minutes before serving. Check out the Full Recipe for more details. {{image_2}} If you want a meat-free option, try a vegetarian tortellini pasta salad. Use cheese tortellini as your base. Add lots of fresh veggies like bell peppers, cucumbers, and cherry tomatoes. You can also include chickpeas for extra protein. The mix of flavors makes it filling and tasty. Toss in a handful of spinach for added nutrients. This salad is colorful and great for any meal. For those who enjoy a heartier salad, adding proteins is a great idea. Grilled chicken works well and adds a smoky flavor. You can also use canned tuna for a quick option. Simply drain the tuna and mix it in. For a unique twist, try adding shrimp. Cook the shrimp lightly, then mix it with the tortellini. Each protein adds a new taste and makes the salad more satisfying. Get creative with your ingredients! Swap the feta cheese for goat cheese for a tangy twist. You can also change the dressing; a balsamic vinaigrette offers a rich flavor. Instead of olive oil, use avocado oil for a different taste. If you like a crunch, add sunflower seeds or nuts. Experiment with herbs too! Fresh dill or parsley can change the whole vibe of your dish. The Full Recipe is flexible, so have fun with it! To keep your tortellini pasta salad fresh, store it in an airtight container. Make sure to press out any air before sealing. This helps keep the flavors strong and the veggies crisp. If you have leftover dressing, store it separately. This way, the salad won’t become soggy. When you're ready to eat, just toss in the dressing again. If stored properly, tortellini pasta salad lasts about 3 to 5 days in the fridge. Always check for any off smells or changes in texture before eating. If you see any signs of spoilage, it’s best to toss it out. Remember, the fresher the salad, the better it tastes! Freezing tortellini pasta salad is not the best idea. The veggies lose their crispness and the pasta can become mushy. If you must freeze it, only freeze the tortellini and the dressing. Store them separately. When you want to enjoy the salad again, thaw them in the fridge. Then mix with fresh veggies and herbs for the best flavor. If you want the full recipe, you can check out the detailed steps above. Yes, you can make tortellini pasta salad ahead of time. In fact, this dish tastes better after resting. Make it a few hours or the night before serving. This allows the flavors to mix well. Just keep it in the fridge. Before serving, give it a quick toss to refresh it. I recommend using cheese tortellini for this salad. Cheese tortellini adds a rich and creamy taste. You can also use spinach or meat-filled tortellini if you prefer. Just ensure it pairs well with your other salad ingredients. The key is to pick a flavor that you enjoy. Serving tortellini pasta salad for a crowd is easy. Use a large bowl to mix and display the salad. You can also divide it into smaller bowls for individual servings. Garnish each bowl with extra fresh basil and feta for added appeal. This makes it look festive and inviting. This blog post gave you a clear guide on making tortellini pasta salad. We covered ingredients, step-by-step instructions, and tips for perfecting the dish. Remember to choose fresh ingredients for the best flavor. Avoid common mistakes to make your salad shine. Get creative with variations and store leftovers properly. Making this dish ahead of time can save you effort when hosting. Use these tips to impress your family and friends. Enjoy your cooking adventure!

Tortellini Pasta Salad Fresh and Flavorful Dish

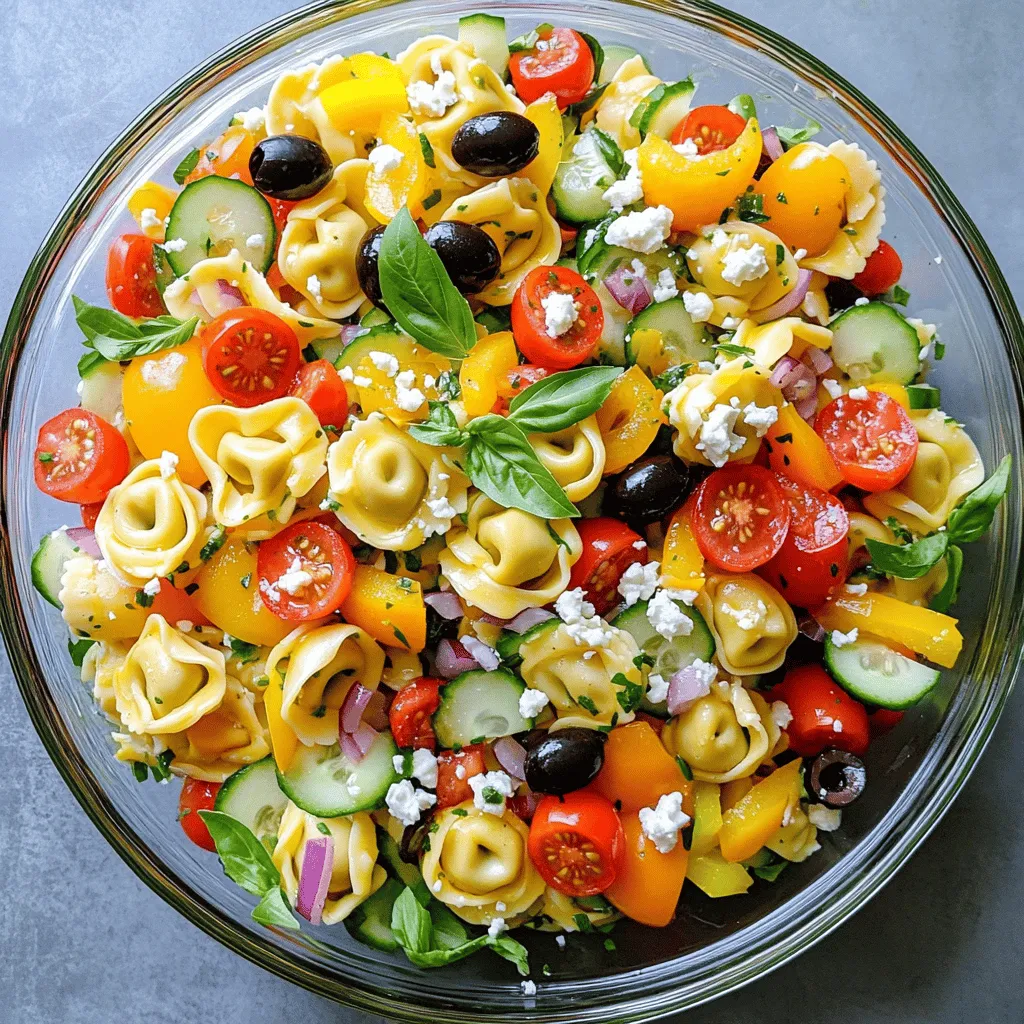
Looking for a dish that’s packed with flavor and easy to make? Tortellini pasta salad is your answer! With a

- 1 cup all-purpose flour - 1 cup whole wheat flour - 1 tablespoon pumpkin spice blend (cinnamon, nutmeg, ginger, allspice) - 1 teaspoon baking soda - 1/2 teaspoon baking powder - 1/2 teaspoon salt - 3/4 cup brown sugar, packed - 1/2 cup granulated sugar - 1 cup pumpkin puree (canned or fresh) - 2 large eggs - 1/2 cup brewed coffee, cooled - 1/2 cup vegetable oil - 1 teaspoon vanilla extract - 1/2 cup semi-sweet chocolate chips (optional) Using fresh ingredients makes a big difference. Look for bright orange pumpkin puree. Choose spices that smell strong and fresh. They add flavor and warmth. Good quality sugars help create a nice texture. You can swap all-purpose flour for gluten-free flour. Use maple syrup instead of brown sugar for a unique taste. If you’re out of pumpkin spice, mix cinnamon and nutmeg for a quick fix. Want fewer calories? Replace vegetable oil with applesauce. 1. First, preheat your oven to 350°F (175°C). This step is vital for even baking. 2. Next, line a muffin tin with paper liners or grease it lightly. This helps prevent sticking. 3. In a medium bowl, mix the following dry ingredients: - 1 cup all-purpose flour - 1 cup whole wheat flour - 1 tablespoon pumpkin spice blend - 1 teaspoon baking soda - 1/2 teaspoon baking powder - 1/2 teaspoon salt This mix adds flavor and helps the muffins rise. Set it aside for later. 1. In a large bowl, combine these wet ingredients: - 3/4 cup brown sugar, packed - 1/2 cup granulated sugar - 1 cup pumpkin puree - 2 large eggs - 1/2 cup brewed coffee, cooled - 1/2 cup vegetable oil - 1 teaspoon vanilla extract 2. Whisk these until the mixture is smooth. This blend gives the muffins their rich taste. 1. Gradually add the dry ingredients to the wet mixture. Stir just until combined. 2. If you want, fold in 1/2 cup semi-sweet chocolate chips for a sweet touch. 3. Spoon the batter into the prepared muffin tin, filling each cup about 2/3 full. 4. Bake for 18-22 minutes. Check for doneness by inserting a toothpick into the center. It should come out clean when done. 5. Once baked, let the muffins cool in the pan for 5 minutes. Then transfer them to a wire rack to cool completely. 6. For a delightful touch, dust them with powdered sugar or drizzle caramel sauce before serving. For the full recipe, check out the complete guide. For perfect pumpkin spice latte muffins, bake at 350°F (175°C). This temperature cooks the muffins evenly. Bake them for 18 to 22 minutes. Start checking around the 18-minute mark. Every oven is different, so keep an eye on them. To check if your muffins are done, use a toothpick. Insert it into the center of a muffin. If it comes out clean or with a few crumbs, they are ready. If it has wet batter, bake a few more minutes. Don’t open the oven door too early; this can make them sink. One common mistake is overmixing the batter. Mix until just combined; lumps are okay. Another mistake is not measuring ingredients accurately. Use measuring cups for dry and liquid ingredients. Lastly, don’t skip cooling time. This helps the muffins set and makes them easier to remove from the pan. Remember, you can find the full recipe to make these muffins perfectly every time! {{image_2}} If you want to make nut-free muffins, it's easy! You can skip any nuts or nut-based flour. Use just all-purpose and whole wheat flour. This way, everyone can enjoy your pumpkin spice latte muffins without worry. Do you want to change the sweetness? You can use honey, maple syrup, or coconut sugar instead of brown sugar. These options give your muffins a unique taste. If you use liquid sweeteners, reduce the liquid in the recipe a bit to keep the batter just right. Want to spice things up? Add extras like chocolate chips, dried cranberries, or even a swirl of cream cheese. These additions give your muffins more flavor and texture. You can also add a splash of almond or coconut milk for a twist. For the full recipe, check the main section. To keep your pumpkin spice latte muffins fresh, store them in an airtight container. You can place parchment paper between layers to prevent sticking. Keep them at room temperature for easy access. If you live in a humid area, storing them in the fridge helps maintain freshness. Freezing is a great option if you want to save some muffins for later. First, let them cool completely. Then, wrap each muffin tightly in plastic wrap. Place the wrapped muffins in a freezer-safe bag. This way, they stay fresh for up to three months. When you're ready to enjoy, just thaw them at room temperature or heat them in the microwave. These muffins last about three days at room temperature. If stored in the fridge, they can last up to a week. If frozen, they maintain good quality for three months. Just remember, the sooner you eat them, the better they taste! For the full recipe, check out the complete ingredients and instructions. Yes, you can make these muffins gluten-free. Use a gluten-free flour blend instead of all-purpose and whole wheat flour. Make sure the blend has a good balance of starches and proteins. This will help mimic the texture of regular flour. You might also want to add a teaspoon of xanthan gum. This helps bind the ingredients together. The best way to reheat muffins is in the oven. Preheat your oven to 350°F (175°C). Place the muffins on a baking sheet. Heat them for about 10 minutes. This warms them up and keeps them soft. You can also use the microwave. Heat for 15 to 20 seconds. Be careful not to overheat, or they can become dry. Yes, you can use instant coffee. Mix 1 tablespoon of instant coffee with 1/2 cup of hot water. Let it cool before adding it to the batter. This gives the muffins a nice coffee flavor. However, brewed coffee adds a richer taste and depth. Experiment to see which you prefer! To enhance the pumpkin flavor, you can add more pumpkin spice. A little extra cinnamon or nutmeg can boost the taste. You could also mix in some pumpkin puree, up to 1/4 cup more. This adds moisture and flavor. Another idea is to use roasted pumpkin instead of canned. Roasting brings out a sweeter, deeper flavor. Check out the Full Recipe for more tips! In this post, we explored the key ingredients for delicious muffins, along with step-by-step guidance. We added tips on baking, storage, and common mistakes to ensure your success. Remember, using quality ingredients makes a big difference. Feel free to experiment with variations and substitutions based on your taste. I hope these insights help you create the perfect muffins every time. Happy baking!

Pumpkin Spice Latte Muffins Delicious Fall Treat

Fall is here, and that means it’s time for Pumpkin Spice Latte Muffins! These treats blend the cozy flavors of

Older posts
Newer posts
← Previous Page1 Page2 Page3 … Page6 Next →

dsad

© 2025 momdishmagic • Built with GeneratePress

Our Policies

  • Copyright Policy
  • Cookie Policy
  • GDPR Policy
  • Privacy Policy
  • Disclaimer
  • Terms Of Use

More Information

  • Home
  • About
  • Contact
  • Appetizers
  • Dessert
  • Dinner
  • Drinks
©2025, momdishmagic About Back To Top