![To make miso glazed eggplant, gather these items: - 2 medium eggplants - 3 tablespoons white miso paste - 2 tablespoons maple syrup or honey - 1 tablespoon sesame oil - 2 tablespoons soy sauce (or tamari for gluten-free) - 1 teaspoon rice vinegar - 1 tablespoon grated fresh ginger - 2 cloves garlic, minced - 1 tablespoon sesame seeds (for garnish) - 2 green onions, finely sliced (for garnish) These ingredients work together to create a rich and savory glaze. The eggplant absorbs the flavors well, making each bite delicious. You can add a few items to boost the taste: - Chili flakes for heat - Fresh herbs like cilantro or basil - A splash of citrus juice for brightness These extras can take your dish to the next level. Even small tweaks can add exciting flavors. When picking eggplants, look for these signs: - Choose firm, shiny skins without blemishes. - The color should be deep purple or glossy black. - Smaller eggplants tend to be less bitter and more tender. Fresh eggplants will make your dish taste great. Always check for quality before buying. Start by preheating your oven to 400°F (200°C). This ensures the eggplants cook evenly. Next, take your medium eggplants and slice them in half lengthwise. Make sure to cut all the way through the flesh but not the skin. A crisscross pattern works best. This allows the glaze to soak in well. Place the eggplant halves on a cutting board, cut side up, and get ready for the glaze. In a medium bowl, mix 3 tablespoons of white miso paste with 2 tablespoons of maple syrup or honey. The sweetener balances the salty miso. Add 1 tablespoon of sesame oil for a nutty flavor. Then, pour in 2 tablespoons of soy sauce and 1 teaspoon of rice vinegar. These ingredients enhance the glaze's depth. Finally, add 1 tablespoon of grated fresh ginger and 2 cloves of minced garlic. Whisk everything until it is smooth. This creamy glaze will add tons of flavor to the eggplant. Now it’s time to bake! Brush the miso glaze generously over the cut sides of the eggplant halves. Make sure the glaze seeps into the scored flesh. Place the eggplant cut side up on a lined baking sheet. Bake them for about 25 to 30 minutes. This will make them tender and caramelized. Halfway through, take them out and brush on any remaining glaze. Once done, let them cool a bit before serving. For the final touch, sprinkle sesame seeds and sliced green onions on top. Enjoy this flavorful dish! You can check the [Full Recipe] for more details. To get the best texture, choose medium eggplants. They should feel firm and heavy. Next, score the flesh lightly. This step helps the glaze soak in well. Bake them until tender but not mushy. The eggplant should have a slight bite for great texture. Some eggplants can taste bitter. To reduce bitterness, sprinkle salt on the eggplant after cutting. Let them sit for about 20 minutes. This process draws out extra moisture and bitterness. Rinse them well with water and pat dry with a paper towel to remove excess salt. You can prepare the miso glaze in advance. Mix the miso paste, maple syrup, sesame oil, soy sauce, rice vinegar, ginger, and garlic in a bowl. Store the glaze in the fridge for up to a week. Just remember to stir it before using. This way, you save time on busy cooking days. For the full recipe, check out the details above. {{image_2}} Miso glazed eggplant is already a great choice for both vegetarians and vegans. The main ingredient, eggplant, adds rich flavor. The miso glaze provides umami, making it tasty and satisfying. If you want a vegan twist, use maple syrup instead of honey. You can also add more vegetables. Try bell peppers or zucchini alongside the eggplant. They will soak up the glaze and add more color. When serving miso glazed eggplant, think about what to pair it with. It goes well with rice or quinoa for a hearty meal. The grains soak up the glaze and balance the dish. You can also serve it with a fresh salad to add crunch. For a complete meal, add some protein, like tofu or chickpeas. If you don’t have miso paste, don’t worry. You can use tahini or peanut butter as a substitute. Both add creaminess and flavor. For a different taste, try tahini mixed with lemon juice. This will give the dish a nice zing. If you need it gluten-free, use tamari instead of soy sauce. These simple swaps keep the dish delicious and exciting. For the full recipe, check out the details above! To keep your leftover miso glazed eggplant fresh, place it in an airtight container. Make sure it cools completely before sealing it. Store it in your fridge for up to three days. This method helps maintain its texture and flavor. If you plan to eat it later, slicing the eggplant before storing can help with portion control. When you're ready to enjoy the leftovers, you can reheat the eggplant. The best way is to use an oven. Preheat your oven to 350°F (175°C). Place the eggplant on a baking sheet lined with parchment paper. Reheat it for about 10-15 minutes. This method keeps the eggplant warm and helps revive its nice, caramelized edges. You can also use a microwave for quick reheating. Just microwave for 1-2 minutes, but it may lose some texture. You can freeze miso glazed eggplant, but it's best to do so before cooking. Halve and score the eggplants, then coat them with the miso glaze. Place the glazed halves in a freezer bag. Make sure to remove as much air as possible. You can freeze them for up to three months. When you’re ready to cook, thaw them overnight in the fridge and bake as usual. This way, you keep that great flavor and texture! For the full recipe, check out the earlier section. Miso is a thick paste made from fermented soybeans. It has a salty, umami flavor. You can find different types of miso, like white, red, and yellow. Each type brings a unique taste to dishes. I love using miso for its depth. It enhances the flavor of vegetables, meats, and soups. Miso adds richness without needing heavy sauces. Plus, it’s packed with probiotics, which are great for gut health. Yes, you can! This glaze is very versatile. Try using zucchini, mushrooms, or cauliflower. These veggies soak up the glaze well. Just remember to adjust cooking times. Some vegetables cook faster than eggplant. For example, zucchini may need less time in the oven. Always check for tenderness. The goal is to have a nice caramelization on the outside. Making this dish gluten-free is easy! Just replace regular soy sauce with tamari. Tamari is a gluten-free soy sauce alternative. Be sure to check the miso label too. Some brands may contain gluten. Look for miso that is labeled gluten-free. This way, you can enjoy the dish without worry. In this article, we covered how to make miso glazed eggplant. We discussed the key ingredients and tips for choosing the best eggplants. I shared step-by-step instructions for prepping, glazing, and baking the dish. We explored ways to enhance flavor and ways to adapt the recipe for different diets. Lastly, we looked at storage and reheating tips. Miso glazed eggplant is simple and tasty. You can enjoy it in many ways. Try it out and savor the flavors!](https://momdishmagic.com/wp-content/uploads/2025/05/ebdb88c3-01b0-44b6-af78-18140d125409.webp)
Miso Glazed Eggplant Flavorful and Simple Dish
Are you ready to elevate your cooking game? Miso Glazed Eggplant is a simple yet flavorful dish that transforms this
Are you ready to elevate your cooking game? Miso Glazed Eggplant is a simple yet flavorful dish that transforms this
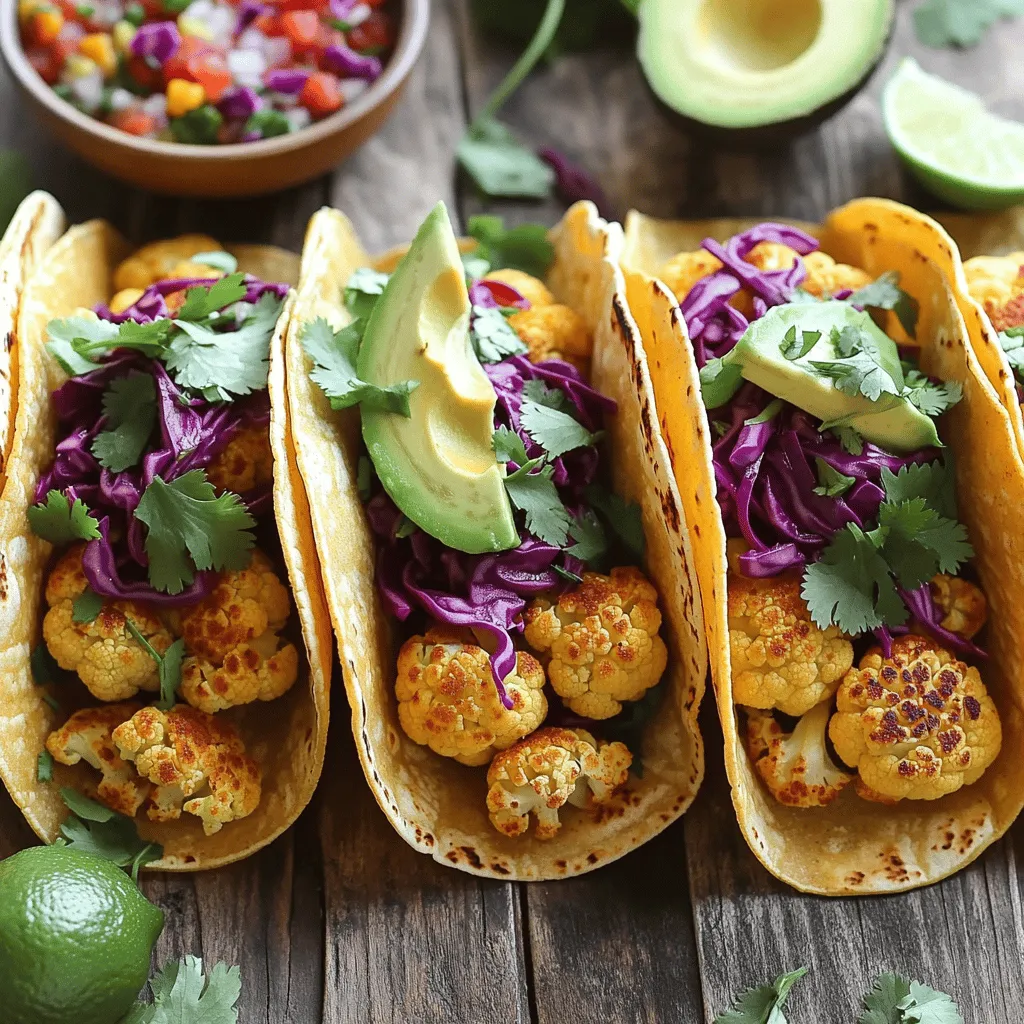
Looking for a quick and tasty meal? Vegan Cauliflower Tacos are just what you need! With flavorful roasted cauliflower, creamy

Craving a sweet and creamy treat? Look no further! My No-Bake Nutella Cheesecake is simple and indulgent. With just a
![- 1 can (15 oz) chickpeas, drained and rinsed - 1 tablespoon olive oil - 2 teaspoons cumin powder - 1 teaspoon smoked paprika - 1/2 teaspoon cayenne pepper (adjust to taste) - Salt and pepper to taste - 1 avocado, diced - 1 cup coleslaw mix (cabbage and carrots) - 1/4 cup fresh cilantro, chopped - 2 tablespoons lime juice - 8 small corn or flour tortillas - Diced tomatoes - Sliced jalapeños - Hot sauce To make spicy chickpea tacos, gather these simple ingredients. You will need chickpeas, olive oil, and spices for the main part. The spices include cumin, smoked paprika, and cayenne pepper. You can adjust the cayenne for your spice level. Don’t forget the salt and pepper for taste. For freshness, add diced avocado, coleslaw mix, cilantro, and lime juice. These bright flavors will balance the spice of the chickpeas. Finally, grab some small tortillas. Corn or flour will work well. Optional toppings like diced tomatoes, sliced jalapeños, and hot sauce can add more flavor. The combination of these ingredients makes a tasty meal that is fun to prepare. Check out the [Full Recipe] for detailed instructions on how to bring this all together! - Heat 1 tablespoon of olive oil in a skillet over medium heat. - Add 1 can of rinsed chickpeas and sauté for 3-4 minutes. - Sprinkle in 2 teaspoons of cumin, 1 teaspoon of smoked paprika, and 1/2 teaspoon of cayenne pepper. - Add salt and pepper to taste. Cook until spices smell great and chickpeas are crispy, about 3-5 minutes. - In a bowl, mix 1 cup of coleslaw, 1 diced avocado, 1/4 cup of chopped cilantro, and 2 tablespoons of lime juice. - Toss gently to combine all ingredients well. - Warm 8 small corn or flour tortillas in a skillet or over a flame for a few seconds on each side. - Take each tortilla and add a generous spoonful of the spicy chickpeas. - Top with the avocado-cabbage mixture and any optional toppings like diced tomatoes or sliced jalapeños. These spicy chickpea tacos are quick and simple to make. For the full recipe, refer to the instructions provided above. Enjoy! - Adjust spice levels based on personal preference. - Ensure chickpeas are well-drained for best texture. When I make spicy chickpea tacos, I start by checking the spice level. You can add more cayenne if you love heat. If you prefer milder flavors, use less. Chickpeas should be dry. Drain them well, so your tacos won’t get soggy. - Serve with lime wedges for extra flavor. - Pair with a side of salsa or guacamole. I love adding lime wedges to my tacos. A squeeze of lime brightens the dish. You can also serve salsa or guacamole on the side. These add fresh, creamy flavors that mix well with the spicy chickpeas. - Use colorful serving platters. - Garnish with more cilantro or avocado slices. For a fun look, choose bright serving platters. It makes the dish pop! Add extra cilantro or avocado slices on top for color and taste. Pretty food makes eating more enjoyable. For the full recipe, check out the detailed steps above. {{image_2}} You can switch things up by using black beans or lentils instead of chickpeas. Both options add great flavor and texture. If you want a non-vegetarian version, consider adding grilled chicken or shrimp. These proteins mix well with the spices and give a hearty bite. Don't be afraid to play with flavors! You can try different spices like chili powder or garlic powder. Each spice adds its unique kick. Also, you can use different types of tortillas. Whole wheat or spinach tortillas can change the taste and look of your tacos. Toppings make a big difference. For creaminess, add cheese or avocado crema. They bring a rich texture to each bite. You can also include pickled onions or corn. These toppings add crunch and brighten the flavors. For more ideas, check the Full Recipe! Keep the chickpea filling and toppings separately in airtight containers. This helps keep them fresh. Store in the refrigerator for up to 3 days. When you are ready to enjoy your tacos, just bring them out. You can freeze unsauced chickpeas for up to 1 month. This is great for meal prep. When you want to eat them, thaw and reheat when ready to serve. This method keeps the flavor intact. Reheat chickpeas in a skillet for crispiness. This gives them a nice texture. Warm tortillas briefly before serving. This makes them soft and easy to fold. Enjoy your tasty tacos again! All ingredients in this recipe are already vegan-friendly, ensuring a plant-based dish. You can enjoy these tacos without any animal products. Yes, just soak and cook them before following the recipe. This option gives you control over texture and flavor. Consider serving with Mexican rice, chips, or a fresh salad. These sides complement the flavors well and make a full meal. Use corn tortillas or gluten-free tortillas instead. This way, anyone with gluten sensitivities can enjoy the meal. Canned chickpeas are most convenient, but you can cook dried chickpeas as an alternative. Canned chickpeas save time and effort while still tasting great. For the full recipe, refer back to the main section. You can make tasty spicy chickpea tacos easily. This recipe takes simple ingredients and shows you how to prepare them step by step. From adding spices to mixing fresh toppings, each part adds flavor. Feel free to switch up ingredients to match your taste. So grab your ingredients, warm up those tortillas, and enjoy a yummy meal that's fun to share. Don’t forget to try some new toppings next time!](https://momdishmagic.com/wp-content/uploads/2025/05/07453990-f0ba-49df-8639-caf6f4c05d59.webp)
Craving a quick and tasty meal? Spicy Chickpea Tacos are here to save the day! With flavorful spices and fresh
. - Choosing ripe avocados: Look for avocados that feel slightly soft when you press them. They should not be too mushy. A ripe avocado will have a dark green or black skin. You can check the stem; if it pops off easily and reveals green underneath, it's ready to eat. - Avoiding browning: To keep your avocado fresh, squeeze lemon juice over the mashed avocado. This slows down browning. You can also store any leftover avocado in an airtight container. Press plastic wrap directly onto the surface to block air. - No-fail methods for poaching: Use fresh eggs for the best results. Start with a pot of simmering water and add one tablespoon of vinegar. This helps the egg whites set quickly. Crack the egg into a small bowl first. This makes it easier to slide into the water gently. - Common pitfalls to avoid: Don't let the water boil. Boiling water can break the egg apart. If you see a lot of bubbles, reduce the heat. Also, avoid adding too many eggs at once. This can make it hard for them to cook evenly. - Complementary beverages: Pair your avocado toast with fresh juice or herbal tea. A light coffee can also work well. These drinks enhance the meal without overpowering the flavors. - Pairing with sides: Serve your toast with a simple side salad or fresh fruit. Sliced tomatoes or a handful of berries add color and nutrition. A few crispy bacon strips can also add a savory touch. {{image_2}} You can have fun with different toppings on your avocado toast. Here are two tasty ideas: - Adding tomatoes and feta: Fresh tomatoes add a juicy burst. Crumbled feta cheese gives a salty kick. Simply slice the tomatoes thinly and sprinkle feta on top after adding your poached egg. - Incorporating smoked salmon: This adds a rich flavor. Use thin slices of smoked salmon right over the avocado. It pairs well with the creamy texture and adds a touch of elegance. If you follow a special diet, there are easy swaps you can make: - Gluten-free bread options: You can choose gluten-free bread for your toast. Look for brands that offer whole-grain options. This keeps it healthy and tasty. - Vegan alternatives: For a vegan twist, skip the egg and use chickpea flour instead. Mix chickpea flour with water to form a batter and cook it like a pancake. This gives you a protein-rich topping. Spice up your avocado toast with these flavor boosters: - Spices and herbs to try: Adding spices like cumin or smoked paprika can enhance the taste. Fresh herbs like basil or dill also work well. Just sprinkle them on top before serving. - Unique ingredients for twists: Think outside the box! Try adding pickled onions for tang or even a drizzle of balsamic glaze for sweetness. These small changes can make your dish stand out. Feel free to explore these variations and make your avocado toast your own! For the complete recipe, check out the [Full Recipe]. To keep your avocado toast fresh, store each part separately. Avocado can turn brown quickly. Use these tips to store it well: - Storing Avocado: Wrap any leftover avocado tightly in plastic wrap. Press the wrap against the flesh to prevent air from getting in. You can also sprinkle lemon juice on it. This helps slow down browning. - Keeping Poached Eggs Fresh: Store poached eggs in a bowl of cold water in the fridge. Cover them tightly with plastic wrap. This keeps them moist and ready to use later. When you're ready to enjoy your leftovers, here's how to reheat: - How to Re-toast Bread: Use a toaster or an oven. If you choose the oven, set it to 350°F (175°C) for about 5 minutes. This will make the bread warm and crispy again. - Options for Warming Eggs: You can warm poached eggs in hot water. Place them in a bowl of hot water for a few minutes. This will gently heat them without cooking them further. These simple steps will help you enjoy your delicious avocado toast with poached egg even later! For the full recipe, check out the earlier section. You can poach eggs without vinegar by using a different method. One way is to create a whirlpool in the water. Boil water and stir it quickly to form a vortex. Crack the egg into a small bowl and gently slide it into the center of the whirlpool. The motion helps the egg white wrap around the yolk. Another method is to use silicone egg poachers. These handy tools let you poach eggs in simmering water without any fuss. Just crack the egg into the poacher and float it in the water. Both methods work well for a perfect poached egg. Yes, you can prepare avocado toast in advance, but with some care. To save time, toast the bread ahead of time and store it in an airtight container. Keep the mashed avocado in a separate container. To prevent browning, add a squeeze of lemon juice to the avocado. When ready to eat, spread the avocado on the toast and top with a freshly poached egg. This keeps everything fresh and tasty. Just remember, the avocado will brown quickly once exposed to air. Whole-grain bread is a great choice for avocado toast. It has a hearty texture and adds fiber. Sourdough is another favorite due to its tangy taste. Rye bread gives a unique flavor, while gluten-free bread works for those with dietary needs. Experiment with different types to find what you like best. Each type brings a new taste and texture to your toast. To keep your avocado fresh, use these techniques. First, store the avocado with its pit in an airtight container. This helps slow browning. Second, add lemon or lime juice to the mashed avocado. The acid in the juice helps keep its bright green color. Finally, cover the surface of the avocado with plastic wrap, pressing it directly onto the mash. This reduces air exposure and keeps it fresh longer. Using these tips, you can enjoy your avocado toast without the worry of browning. This post covered how to make delicious avocado toast with perfectly poached eggs. We discussed ingredient choices, the steps for toasting bread, and mashing avocados. I shared tips for poaching eggs and assembling your toast. Don't forget the fun variations and storage tips for leftovers. Avocado toast is simple yet satisfying. With a few tweaks, you can make it fit your tastes. Enjoy experimenting with toppings and flavors, and share your favorite finds!](https://momdishmagic.com/wp-content/uploads/2025/05/3dfeb3ac-8798-4872-8e23-5074ef630c98.webp)
Looking for a delicious and easy breakfast? My Savory Avocado Toast with Poached Egg recipe is just what you need.
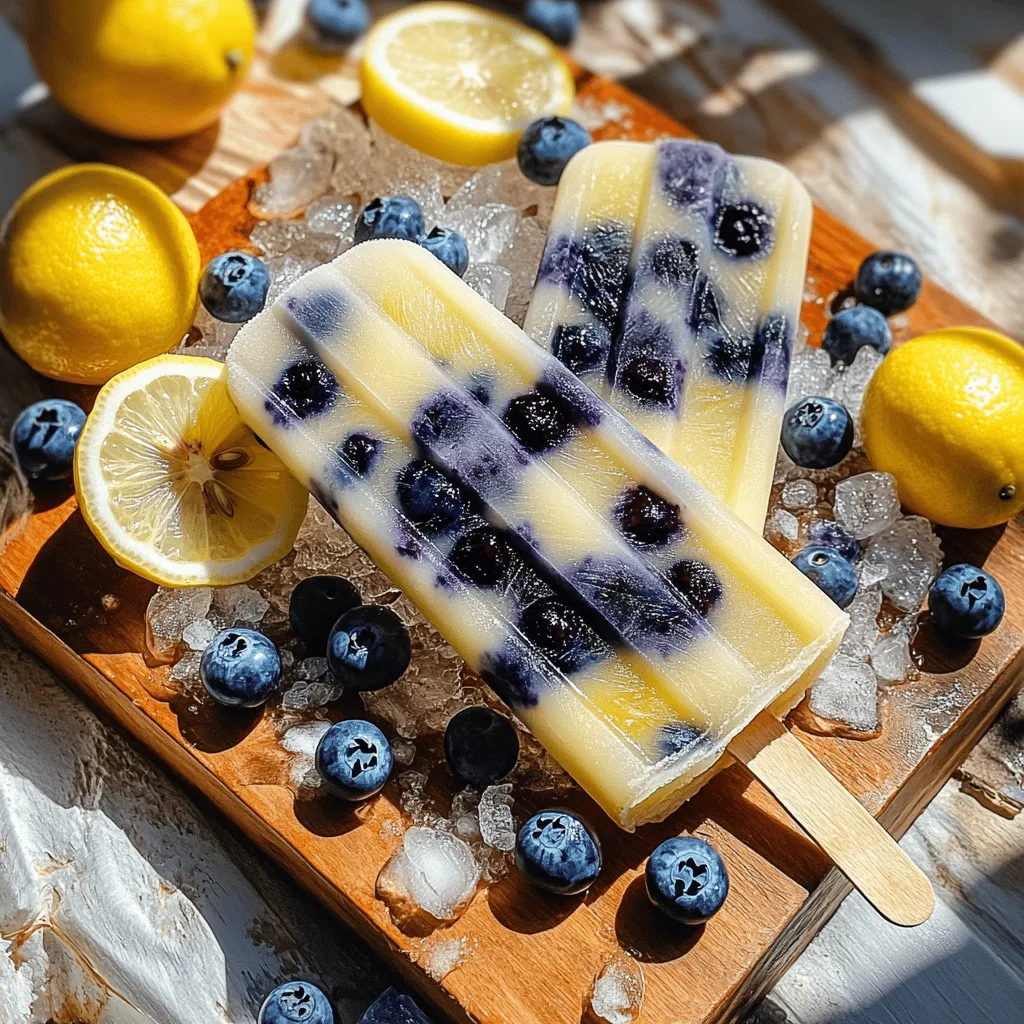
Beat the heat with my easy Blueberry Lemonade Popsicles! Perfect for hot summer days, these vibrant treats blend fresh blueberries

Breakfast just got a sweet upgrade with my Strawberry Shortcake Pancakes! This delicious twist on a classic combines fluffy pancakes
![To make no-bake cheesecake jars, gather these simple ingredients: - 8 oz cream cheese, softened - 1/2 cup powdered sugar - 1 tsp vanilla extract - 1 cup heavy whipping cream - 1/2 cup sour cream - 1 cup graham cracker crumbs - 4 tbsp unsalted butter, melted - 1/4 cup granulated sugar - Fresh berries (strawberries, blueberries, or raspberries) for topping - Mint leaves for garnish These ingredients create a creamy and delightful treat. The cream cheese forms the base, while the heavy cream adds lightness. The graham cracker crumbs offer a crunchy layer. Using fresh berries and mint makes it look pretty and adds flavor. You can find the full recipe with steps to make this tasty dessert easily. 1. Beating the cream cheese Start with 8 oz of softened cream cheese. Place it in a large bowl. Use an electric mixer on medium speed. Beat until it becomes smooth and creamy. This step is key for a rich filling. 2. Mixing in powdered sugar and vanilla Next, add 1/2 cup of powdered sugar. Pour in 1 tsp of vanilla extract. Mix until well combined. The sugar adds sweetness, while vanilla gives flavor. 3. Whipping the cream In a separate bowl, pour 1 cup of heavy whipping cream. Use a whisk or mixer to whip it. Aim for stiff peaks. This means it should hold its shape. Gently fold the whipped cream into the cream cheese mixture. Be careful not to deflate it. This keeps your cheesecake light and fluffy. 1. Creating the graham cracker base In another bowl, mix 1 cup of graham cracker crumbs. Add 4 tbsp of melted unsalted butter and 1/4 cup of granulated sugar. Stir until all crumbs are coated. This mixture forms the crunchy base. 2. Assembling the cheesecake layers Grab your jars. Start by adding 2 tablespoons of the graham cracker mixture at the bottom. Press it down gently with a spoon. Next, spoon in about 1/4 cup of the cheesecake filling. Repeat the layers, alternating between crumbs and filling. You can do 2 or 3 layers depending on jar size. 3. Topping with berries and mint Once your jars are full, top each with fresh berries. Use strawberries, blueberries, or raspberries. Tuck in a few mint leaves for color and freshness. 1. Refrigeration time for best results Place the jars in the fridge. Let them chill for at least 2 hours. This allows the cheesecake to set and flavors to blend. 2. Serving recommendations Serve the jars chilled. You can place them on a nice tray. Add more fresh berries and mint for a vibrant look. Enjoy your no-bake cheesecake jars! To make the best no-bake cheesecake, you need a creamy texture. Start with softened cream cheese. This helps it blend smoothly. Mix it well with powdered sugar and vanilla. If you beat it too fast, you might get air bubbles. Next, whip the heavy cream until stiff peaks form. This is key for a light texture. When folding the whipped cream into the cream cheese, do it gently. Use a rubber spatula and fold it in slowly. This keeps the air in, making the cheesecake light and fluffy. Garnishing your cheesecake jars makes them look inviting. I love to top each jar with fresh berries. Strawberries, blueberries, and raspberries add color and flavor. You can also add mint leaves for a fresh touch. When serving, place the jars on a decorative tray. Add some extra berries around the jars. This makes the dish pop and looks great for gatherings. People will love it! One big mistake is overmixing the filling. Mixing too long can make it runny. Blend just until smooth. Another mistake is using stale graham crackers. Fresh crumbs give a better flavor and texture. If your crumbs are old, they won’t stick well. Always use fresh ingredients for the best taste. For the full recipe, check out [Full Recipe]. {{image_2}} You can change the flavor of your no-bake cheesecake jars easily. One fun option is chocolate no-bake cheesecake jars. Just add cocoa powder to the cream cheese mix. Use about 1/4 cup of cocoa for a rich chocolate taste. Mix it well with the cream cheese and other ingredients. You’ll enjoy a creamy and decadent treat. Another great choice is fruit-flavored variations. Try lemon or strawberry. For lemon, add the zest of one lemon and a bit of juice. This gives your jars a fresh, zesty flavor. For strawberry, blend fresh strawberries into a puree. Mix this puree into your cheesecake filling to create a fruity twist. Toppings can change the game. You can use whipped cream to add a light and fluffy texture. Just whip heavy cream with a bit of sugar until it holds peaks. Spoon this on top of your cheesecake jars. You can also add nutty or chocolatey add-ins. Crushed nuts, like almonds or pecans, add crunch. Chocolate shavings or chips bring extra sweetness. These toppings make your jars look pretty and taste amazing. If you have dietary needs, there are options. For a gluten-free version, use gluten-free graham crackers. Many brands offer these now. They work just as well in the crust. For those who want a vegan treat, look for dairy substitutes. Use vegan cream cheese and coconut cream instead of heavy cream. These ingredients give you a creamy texture without dairy. You can enjoy the same delicious taste while meeting your dietary needs. For the full recipe, check out the detailed instructions. Your no-bake cheesecake jars will last in the fridge for about 3 to 5 days. To keep them fresh, cover each jar with a lid or plastic wrap. This prevents air from drying out the cheesecake. If you want to enjoy them later, store them without toppings. Add fresh berries and mint just before serving. This way, they stay vibrant and tasty. Yes, you can freeze no-bake cheesecake jars! Start by letting them chill in the fridge for at least two hours. After that, cover each jar tightly with plastic wrap and then foil. This helps keep out air and moisture. You can freeze them for up to 2 months. To thaw, move the jars to the fridge and let them sit overnight. Avoid thawing them at room temperature. This method keeps the texture smooth. After thawing, top with fresh berries for a delicious treat. Enjoy your creamy delight! It takes about 2 hours for no-bake cheesecake to set in the fridge. This time allows the filling to firm up and develop its creamy texture. If you can, let it chill longer, even overnight. This extra time enhances the flavor. Yes, you can use low-fat cream cheese and sour cream. This change will still give you a tasty cheesecake. However, the texture may be less rich. If you want to keep it light, consider using low-fat whipped cream too. Fresh berries add color and flavor, but they are not a must. You can skip them or use other toppings like chocolate or caramel sauce. If you choose frozen berries, just thaw them and drain excess juice before adding. Your cheesecake filling should be smooth and thick. When you mix it, there should be no lumps. If it looks creamy and holds its shape, it is ready to use. Be careful not to overmix, as this can make it runny. I recommend using 8 oz jars for serving. This size is perfect for a single serving of cheesecake. If you want smaller portions, 4 oz jars work well too. Just adjust the layer sizes to fit the jars you choose. For the complete recipe, check out the Full Recipe. - 8 oz cream cheese, softened - 1/2 cup powdered sugar - 1 tsp vanilla extract - 1 cup heavy whipping cream - 1/2 cup sour cream - 1 cup graham cracker crumbs - 4 tbsp unsalted butter, melted - 1/4 cup granulated sugar - Fresh berries (strawberries, blueberries, or raspberries) for topping - Mint leaves for garnish To make these delightful cheesecake jars, first mix the cream cheese until it is smooth. Add powdered sugar and vanilla, blending well. In a new bowl, whip the heavy cream until it forms stiff peaks. Carefully fold this whipped cream into the cream cheese mix. Then, add sour cream and blend until smooth. Next, prepare your graham cracker base. Combine crumbs, melted butter, and sugar in a separate bowl. Mix until the crumbs are well coated. Now, it’s time to layer! Start with two tablespoons of the graham cracker mixture at the bottom of each jar. Press down gently with the back of a spoon. Spoon in about a quarter cup of the cheesecake filling on top. Repeat the layers until your jars are full. Finally, top each jar with fresh berries and a mint leaf for a pop of color. Chill the jars in the fridge for at least two hours to let them set. You can find the full recipe details within this section, perfect for easy reference. Enjoy your creamy, dreamy no-bake cheesecake jars! You now have a complete guide to making no-bake cheesecake jars. We covered ingredients, preparation, layering, and storage. Remember to chill your jars for the best taste and texture. Experiment with different flavors and toppings to keep it fresh. Avoid common mistakes, like overmixing. Enjoy crafting these sweet treats for yourself or friends. With a few steps, you can impress everyone with a delicious dessert. Happy baking!](https://momdishmagic.com/wp-content/uploads/2025/05/af35427d-7471-439d-a937-989309d7e01f.webp)
If you’re craving a sweet treat that’s easy to whip up, you’ve come to the right place. No-Bake Cheesecake Jars
![To make pesto zucchini noodles, you need these simple, fresh ingredients: - 4 medium zucchinis - 1 cup fresh basil leaves - 1/2 cup grated Parmesan cheese - 1/3 cup toasted pine nuts - 2 garlic cloves, minced - 1/4 cup extra virgin olive oil - Salt and pepper to taste - Cherry tomatoes, halved (for garnish) - Toasted pumpkin seeds (for garnish) These ingredients come together to create a dish that bursts with flavor. Zucchini is a great low-carb alternative to pasta. It gives you a light and healthy base. The fresh basil adds a bright taste, while the Parmesan cheese gives a rich, savory kick. To make the pesto, you blend the basil, Parmesan, pine nuts, and garlic. This mix creates a creamy sauce that clings to the zucchini noodles. The olive oil adds smoothness and depth. Garnishing with cherry tomatoes and pumpkin seeds adds color and crunch. Each bite is fresh, delicious, and healthy. For the full recipe, check the guide above. To start, you need to create the zucchini noodles. You can use a spiralizer or a vegetable peeler. A spiralizer gives you beautiful, long noodles. If you use a peeler, you'll get wide, flat strips. Both options are tasty! Once you have your noodles, place them in a colander. Sprinkle a little salt over them. Let them sit for 10-15 minutes. This step helps remove excess moisture. It prevents your dish from being too watery later. Now, let’s move on to the pesto. In a food processor, combine fresh basil leaves, grated Parmesan cheese, toasted pine nuts, and minced garlic. Add a pinch of salt and pepper to enhance the flavor. Pulse everything until it’s finely chopped. Next, while the food processor runs, slowly drizzle in the olive oil. This will help create a smooth and creamy pesto. Taste it and adjust the seasoning if needed. You want it to be just right! Heat a large skillet over medium heat. Add the zucchini noodles to the skillet. Sauté them for 2-3 minutes. You want them slightly softened but still al dente. Avoid overcooking them; this keeps the noodles vibrant and crunchy. Once the noodles are ready, remove the skillet from the heat. Add the freshly made pesto to the zucchini noodles. Toss everything well to coat the noodles evenly with the pesto. To plate your dish, serve the pesto zucchini noodles in bowls. Garnish with halved cherry tomatoes and a sprinkle of toasted pumpkin seeds. This adds a nice crunch and looks pretty! For the full recipe, check out the details above. When choosing zucchini, look for medium-sized ones. They should feel firm and smooth. Avoid those with soft spots or blemishes. Organic zucchini is often fresher and tastier. However, conventional zucchini can also be good if you wash them well. To enhance your pesto, use fresh basil and good olive oil. Toasting the pine nuts brings out their rich flavor. If you don’t have pine nuts, try walnuts or sunflower seeds. You can also swap Parmesan for nutritional yeast for a dairy-free option. For perfect texture, sauté zucchini noodles for only 2-3 minutes. This keeps them crunchy and bright. If you want softer noodles, cook them a bit longer. Avoid using high heat to prevent mushiness. Toss the noodles gently with the pesto to coat them evenly. For the full recipe, check the detailed instructions above. {{image_2}} You can enhance your pesto zucchini noodles by adding protein. Grilled chicken or shrimp works great. They add a nice flavor and texture. For a vegetarian option, try tofu or chickpeas. Both are tasty and filling. You can play with flavors in this dish. Consider adding spices like red pepper flakes or herbs like oregano. They give your dish a nice kick. You can also swap the pesto for other sauces. Avocado sauce is a creamy and tasty choice. For a vegan twist, use dairy-free substitutes for cheese. Nutritional yeast adds a cheesy flavor without dairy. You can also make vegan pesto. Blend basil, nuts, garlic, and olive oil. Skip the cheese, and you have a fresh, vegan sauce. For the complete recipe, check the Full Recipe. To keep your pesto zucchini noodles fresh, you should store them in an airtight container. This helps prevent moisture loss and keeps them tasting great. Place the container in the fridge. They will last for about 2 to 3 days. After that, they may become soggy and lose flavor. Yes, you can freeze zucchini noodles! However, keep in mind that they may change texture. To freeze, place the noodles in a freezer-safe bag. Squeeze out as much air as possible before sealing. They can last in the freezer for about 2 months. When you’re ready to use them, thaw the noodles in the fridge overnight. This way, they will be ready for cooking. To reheat your pesto zucchini noodles, use a skillet over low heat. This method helps maintain their texture. Add a splash of olive oil to keep them moist. Avoid using a microwave, as it can make the noodles soggy. Heat them just until warm, not hot. This keeps them crunchy and delicious. Zucchini noodles, or zoodles, are long, thin strands made from zucchini. They mimic pasta but are low in carbs and calories. Benefits of zucchini noodles - Low in calories - High in vitamins - Great for gluten-free diets Nutritional comparisons to pasta Zucchini noodles have fewer carbohydrates than regular pasta. For example, one cup of cooked pasta has around 200 calories, while one cup of zoodles has only about 20 calories. This makes them a fantastic option for health-conscious cooks. Homemade pesto is easy and quick. You only need a few key ingredients. Essential ingredients for classic pesto - Fresh basil leaves - Grated Parmesan cheese - Pine nuts (toasted) - Garlic - Olive oil Tips for variations You can change nuts or cheese types. Try walnuts or nutritional yeast for a vegan option. Yes, you can use store-bought pesto for convenience. Pros and cons of using pre-made pesto - Pros: Saves time and effort - Cons: May have preservatives or less flavor Recommendations for quality store-bought options Look for brands with fresh ingredients and no added sugars. Yes, pesto zucchini noodles are gluten-free. Overview of gluten content in the recipe Zucchini contains no gluten, making it safe for those with gluten sensitivities. Gluten-free alternatives If you want more options, try gluten-free pasta made from rice or quinoa. You can easily adjust the recipe for a vegan diet. Key substitutions for a vegan diet - Use nutritional yeast instead of cheese - Swap pine nuts for sunflower seeds Adjusting flavors for a vegan-friendly dish Taste and tweak the ingredients. Add more garlic or lemon for brightness. Check the [Full Recipe] for details! This recipe for zucchini noodles with pesto blends fresh flavors and healthy ingredients. We explored the steps to make zucchini noodles, create homemade pesto, and properly cook your dish. You learned tips for selecting the best zucchini and enhancing your pesto. Remember, you can customize this dish with protein or vegan options. Storing leftovers and reheating tips help keep your meal fresh. Enjoy making this tasty, healthy dish and share it with others!](https://momdishmagic.com/wp-content/uploads/2025/05/2134283c-c2a8-4a8c-ae9e-c202d6b830d7.webp)
Looking for a tasty, healthy meal that’s simple to make? In this post, I’ll share my easy recipe for Pesto
![When making an easy vegetable stir-fry, gather these fresh ingredients for the best flavor and texture. - 1 cup broccoli florets - 1 bell pepper (any color), sliced - 1 cup snap peas - 1 carrot, julienned - 1 zucchini, sliced into half-moons These vegetables add color and crunch to your dish. You can mix and match based on what you have. - 2 cloves garlic, minced - 1-inch piece of ginger, grated Garlic and ginger bring a bold flavor. They create a fragrant base for your stir-fry. - 2 tablespoons soy sauce (low-sodium) - 1 tablespoon sesame oil - 1 tablespoon vegetable oil - 1 tablespoon sesame seeds (for garnish) - Salt and pepper to taste These oils and seasonings enhance the taste. Soy sauce adds umami, while sesame oil gives a nutty finish. For the full recipe, click [Full Recipe]. Rinsing your vegetables is key. Start by washing all the veggies under cold water. This clears off dirt and bacteria. For cutting, use a sharp knife. Cut the broccoli into small florets. Slice the bell pepper into strips. Julienning the carrot means cutting it into thin, matchstick pieces. Slice the zucchini into half-moons. Once done, set all the veggies aside. Next, heat the oil in a large non-stick skillet or wok. Use medium-high heat until the oil shimmers. This shows it is hot enough for cooking. Add the minced garlic and grated ginger. Sauté them for about 30 seconds. You want to smell their fragrant aroma. Now it’s time to add the prepared vegetables. Toss in the broccoli, bell pepper, snap peas, carrot, and zucchini. Stir-fry them for about 5 to 7 minutes. The goal is to cook them until they are tender-crisp. They should still have some bite to them. Pour in the low-sodium soy sauce and sesame oil. Stir well to coat the vegetables evenly. This adds amazing flavor. Cook for an additional 1 to 2 minutes. Finally, season with salt and pepper to taste. Adjust to your liking. You can find the full recipe [here](#). To get a great stir-fry, you need high heat. Use a non-stick skillet or a wok for best results. Heat the pan until it shimmers. This lets the vegetables cook quickly and evenly. Cut your vegetables into similar sizes. This helps them cook at the same rate. For example, slice bell peppers thinly and chop broccoli into small florets. Consistent sizes mean even cooking and delicious bites. Watch the time closely. Stir-fry the veggies for about 5 to 7 minutes. Look for a bright color and a slight crunch. If they look soft or brown, you may have overcooked them. Aim for that tender-crisp texture for the best flavor and bite. For more details, check out the Full Recipe. {{image_2}} You can make your stir-fry heartier with protein. Tofu is a great choice. Firm tofu absorbs flavors well. First, press it to remove excess water. Then, cut it into cubes and sauté it until golden. Chicken is another option. Cut it into bite-sized pieces and cook it until no longer pink. Shrimp cooks fast and adds a sweet flavor. Toss in shrimp just before the vegetables finish cooking. Want to spice up your dish? Try adding sauces or spices. Sriracha gives a nice heat. Hoisin sauce adds a sweet touch. You can also mix in some oyster sauce for depth. For a fresh twist, add a squeeze of lime juice or sprinkle some fresh herbs like cilantro or basil right before serving. Using seasonal vegetables can make your stir-fry even better. In spring, try asparagus and green beans. In summer, bell peppers and corn add sweetness. Autumn brings squash and Brussels sprouts, while winter is perfect for root vegetables like carrots and parsnips. Feel free to mix and match based on what you find fresh. Check the [Full Recipe] for more ideas! To keep your easy vegetable stir-fry fresh, store leftovers in an airtight container. Allow the stir-fry to cool first. This helps prevent condensation, which can make your veggies soggy. Place it in the fridge within two hours of cooking. Use the leftovers within three to four days for the best taste. You can freeze vegetable stir-fry for future meals. Start by letting it cool completely. Then, place the stir-fry in freezer-safe bags or containers. Squeeze out as much air as you can. This helps prevent freezer burn. When you're ready to eat, thaw it overnight in the fridge. Reheat in a pan over medium heat until hot. Stir in a splash of soy sauce to refresh the flavors. For the best flavor and texture, eat your stored stir-fry within a week. If you freeze it, it can last up to three months. After that, the taste and quality may fade. Always check for off smells or colors before eating. Enjoy your colorful easy vegetable stir-fry! For the full recipe, check the section above. Yes, you can use frozen vegetables for stir-fry. They are convenient and often pre-cut. Just remember, they may release more water. To avoid sogginess, cook them a bit longer. I recommend adding them straight from the freezer into a hot pan. This helps keep them crisp. The best oils for stir-frying have a high smoke point. Good options include vegetable oil, canola oil, or peanut oil. These oils heat well without burning. I often use a mix of vegetable oil and sesame oil for flavor. This combo brings out the taste of the dish while keeping it healthy. To spice up your stir-fry, add fresh chilies or red pepper flakes. You can also use spicy sauces like sriracha or chili garlic sauce. Start with a little, then taste and adjust. Adding ginger also gives a nice kick. Experiment to find your perfect heat level. Yes, there are several alternatives to soy sauce. You can try tamari, which is gluten-free. Coconut aminos is another great option, with a sweeter flavor. If you want a low-sodium choice, look for low-sodium soy sauce. Each option can add a unique taste to your stir-fry. Making an easy vegetable stir-fry takes about 20 minutes. You will spend about 10 minutes prepping the vegetables. Cooking usually takes around 10 minutes. This quick time makes it perfect for busy days. For the full recipe, check out the details above. Making a delicious vegetable stir-fry is easy and fun. We covered the key ingredients, cooking steps, and tips for perfect results. Remember to choose fresh veggies and control your heat. You can also mix in proteins or different sauces for variety. Follow proper storage for leftovers to keep them fresh. Enjoy your cooking journey, and don't hesitate to try new flavors! Your next meal will be both tasty and healthy.](https://momdishmagic.com/wp-content/uploads/2025/05/d95d4bf3-9ffc-4220-b978-a1191fdd911e.webp)
Looking for a quick, healthy meal? You’ve come to the right place! My easy vegetable stir-fry is packed with flavor
