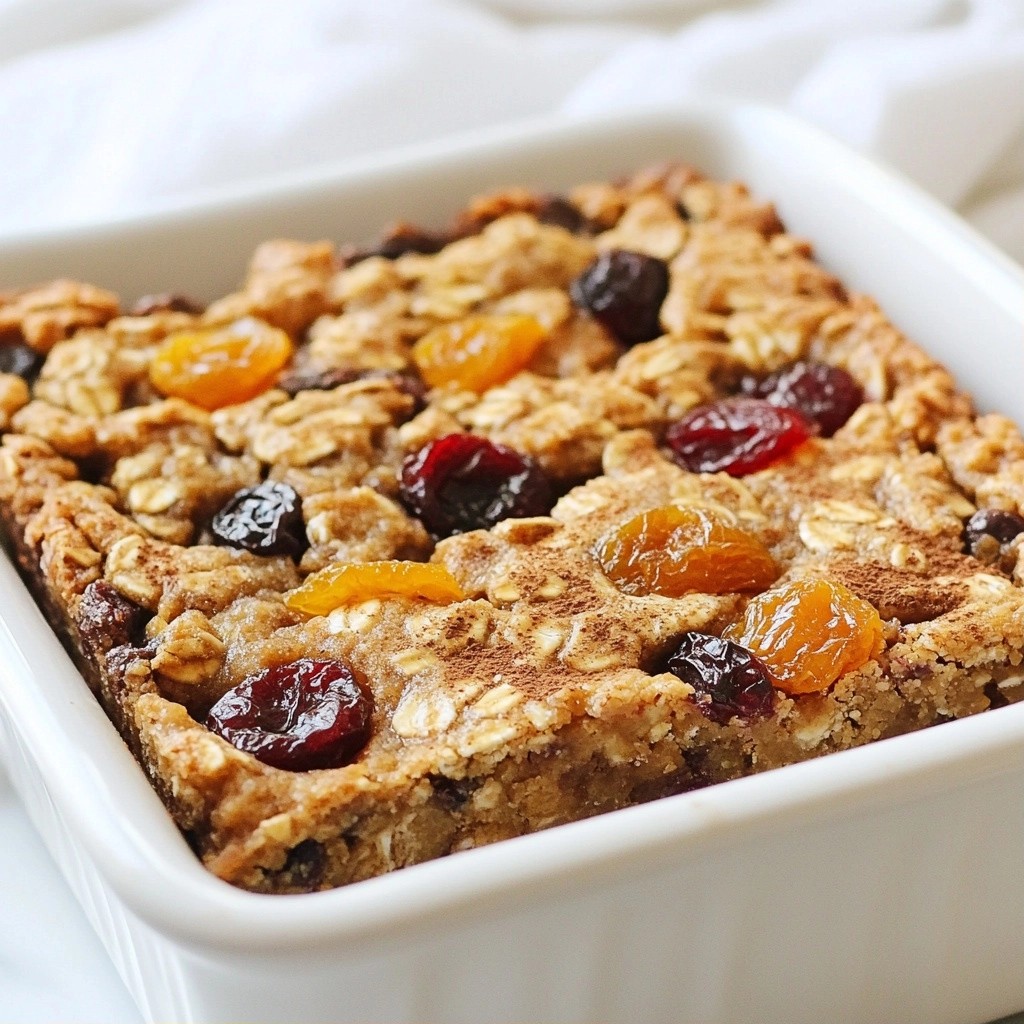
Are you looking for a quick, healthy snack that kids will love? I’ve got just the thing! These Sweet Kids-Friendly Fruit and Oatmeal Bars are perfect for busy days. Packed with fruits and oats, they are tasty and easy to make. Plus, you can customize them to fit your kids’ tastes! Join me as we dive into this fun recipe that the whole family will enjoy!
Why I Love This Recipe
- Kid-Friendly: This recipe is perfect for children, combining healthy ingredients with a naturally sweet flavor that they love.
- Easy to Make: With just a few simple steps and minimal prep time, these bars are a breeze to whip up, making them ideal for busy parents.
- Versatile Ingredients: You can customize these bars with different nuts, fruits, or even add in some chocolate chips for a delightful treat.
- Healthy Snack: These oatmeal bars are packed with wholesome ingredients, making them a nutritious snack option for kids and adults alike.
Ingredients
Essential Ingredients
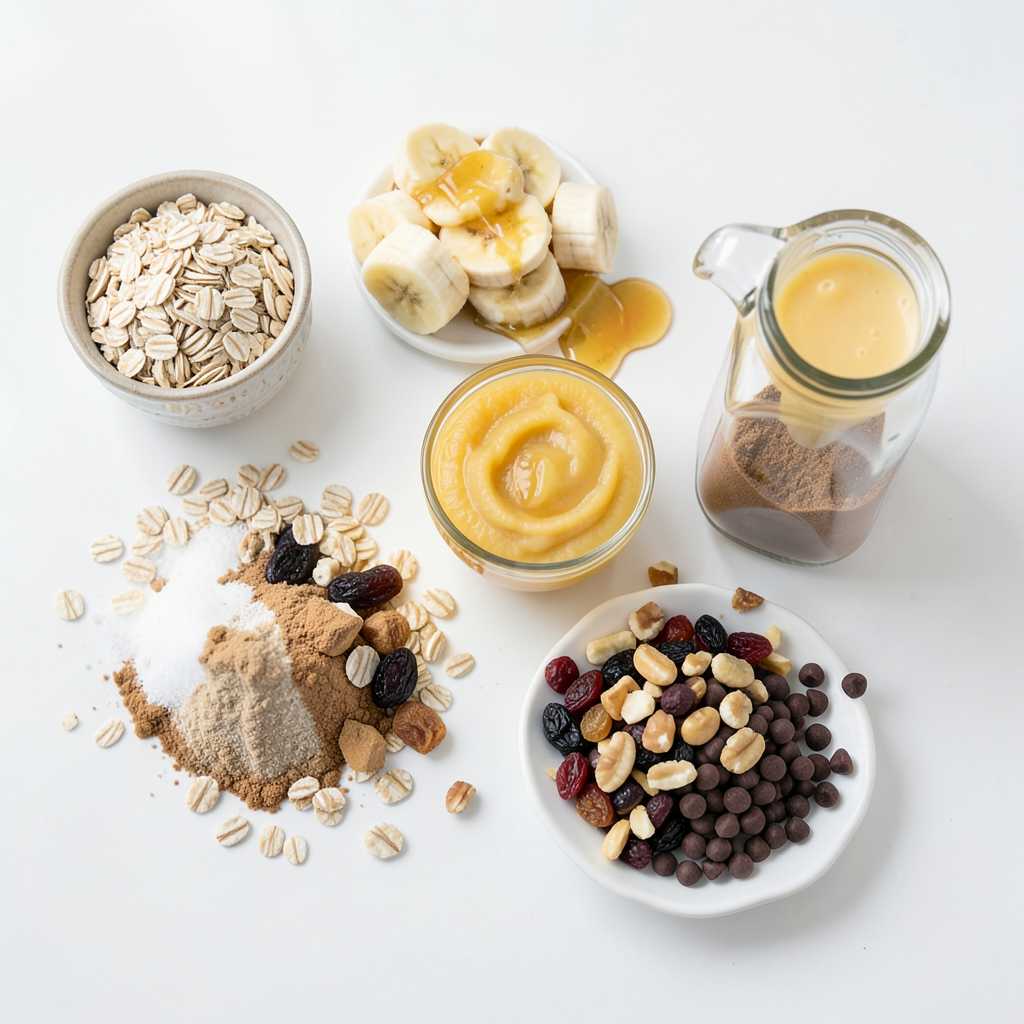
To make sweet kids-friendly fruit and oatmeal bars, you need:
- 2 cups rolled oats
- 1 cup mashed ripe banana (about 2 bananas)
- 1/2 cup honey or maple syrup
- 1/2 cup unsweetened applesauce
- 1/2 teaspoon vanilla extract
- 1 teaspoon ground cinnamon
- 1/2 teaspoon baking powder
- 1/4 teaspoon salt
- 1 cup mixed dried fruits (like raisins, cranberries, apricots)
These ingredients create a tasty base for the bars. The oats provide fiber, while bananas add natural sweetness. Applesauce keeps the bars moist.
Optional Ingredients
You can add extra fun with these ingredients:
- 1/2 cup chopped nuts (like walnuts or almonds)
- 1/2 cup mini chocolate chips
These add crunch and sweetness. Your kids may love the chocolate chips. Nuts can give a nice texture, but they are not a must.
Substitutions for Allergies
If you have allergies, here are some swaps:
- Use agave syrup instead of honey for a vegan option.
- Substitute sunflower seed butter for nuts if needed.
- Choose gluten-free oats if someone is gluten-sensitive.
These alternatives help everyone enjoy the bars, making them safe and delicious. Always check labels to ensure safety.
Step-by-Step Instructions
Preparation Process
First, gather your ingredients. You need:
- 2 cups rolled oats
- 1 cup mashed ripe banana
- 1/2 cup honey or maple syrup
- 1/2 cup unsweetened applesauce
- 1/2 teaspoon vanilla extract
- 1 teaspoon ground cinnamon
- 1/2 teaspoon baking powder
- 1/4 teaspoon salt
- 1 cup mixed dried fruits
- 1/2 cup chopped nuts (optional)
- 1/2 cup mini chocolate chips (optional)
Next, preheat your oven to 350°F (175°C). Line a 9x9-inch baking dish with parchment paper. Leave some paper hanging over the edges. This helps you lift the bars out later.
In a large bowl, mix the rolled oats, mashed banana, honey or maple syrup, applesauce, and vanilla extract. Stir well until everything is combined. This mixture is the base for your bars.
Now, add the ground cinnamon, baking powder, and salt. Mix until all ingredients blend well together.
Fold in the mixed dried fruits, nuts, and mini chocolate chips if you want. Make sure they are evenly spread throughout the mixture.
Baking Instructions
Pour the mixture into your prepared baking dish. Spread it out evenly. Use the back of a spatula to press it down. This helps the bars hold together.
Place the dish in the preheated oven. Bake for 25-30 minutes. Look for the edges to turn golden brown. This shows they are ready.
Cooling and Slicing Tips
After baking, remove the dish from the oven. Let it cool in the pan for about 10 minutes. Then, lift the bars out using the parchment paper. Place them on a cutting board to cool completely.
Once cool, slice the bars into squares or rectangles. Store them in an airtight container at room temperature. They stay fresh for a week. You can also refrigerate them for longer freshness.
Tips & Tricks
Making it Kid-Friendly
To make these bars more fun for kids, you can tweak the recipe. Use colorful dried fruits like cranberries or apricots. They add bright colors that kids love. You can also swap bananas for applesauce. This makes it less sweet but still yummy. Another fun idea is to add mini chocolate chips. Kids love chocolate!
Enhancing Flavor and Texture
To boost flavor, try adding spices. A pinch of nutmeg can give a warm taste. You can also mix in some peanut butter for creaminess. This adds healthy fats too. For a crunchy texture, choose nuts like walnuts or almonds. Just remember to chop them small. Kids like things easy to chew!
Presentation Ideas for Kids
Making these bars look great can excite kids. Cut them into fun shapes using cookie cutters. You can also drizzle a little melted chocolate on top. This adds sweetness and makes them eye-catching. Serve the bars on a colorful plate. Kids will want to grab one right away!
Pro Tips
- Choose Ripe Bananas: The riper the bananas, the sweeter and more flavorful your bars will be. Look for bananas with a few brown spots for optimal sweetness.
- Experiment with Fruits: Feel free to mix and match the dried fruits based on your kids' preferences. Try adding different combinations for variety!
- Use Nut Butters: For added creaminess and flavor, consider adding a few tablespoons of your favorite nut butter (like almond or peanut) into the mix.
- Perfect Storage: To keep the bars fresh, store them in an airtight container. You can also freeze them for longer storage, just thaw before serving.
Variations
Fruit Combinations
You can mix fruits to change the flavor. Try using dried apricots, chopped dates, or even dried cherries. Each fruit adds its own taste. For a fun twist, include a mix of fruits. The kids will love the surprise in each bite! Just keep the total amount at one cup.
Nut-Free Options
If your kids are allergic to nuts, no problem! You can skip the nuts altogether. The bars will still be tasty and filling. You can replace nuts with seeds like sunflower or pumpkin seeds. This keeps the crunch and makes it safe for all kids.
Adding Different Sweeteners
Honey and maple syrup are great, but you can use other sweeteners too. Try agave syrup or brown rice syrup for a different taste. If you want less sugar, use mashed dates instead. Just remember to adjust the amount based on your choice. Sweeteners can change the flavor, so pick what your kids like!
Storage Info
Short-Term Storage
You can store these bars at room temperature for up to one week. Place them in an airtight container. This keeps them fresh and chewy. Make sure they are completely cool before storing. If you want, you can also wrap them in plastic wrap for extra protection.
Long-Term Storage Options
For longer freshness, put the bars in the fridge. They can last up to two weeks when refrigerated. For even longer storage, freeze them. Wrap each bar in plastic wrap and then place them in a freezer bag. They will stay good for about three months in the freezer.
Reheating Instructions
To enjoy these bars warm, you can reheat them. Take a bar out of the fridge or freezer. If frozen, let it thaw in the fridge overnight. Then, place it in the microwave for 15 to 20 seconds. This warms it up nicely without making it too hot. Enjoy your warm, tasty treat!
FAQs
Can I use fresh fruits instead of dried?
Yes, you can use fresh fruits! Fresh fruits add moisture and flavor. Choose fruits like berries, apples, or peaches. You may need to adjust the amount of liquid in the recipe. Start with less applesauce if your fruits are juicy. Fresh fruits will change the texture, making it softer.
How can I make these bars vegan?
To make these bars vegan, replace honey with maple syrup. Use a mashed banana for sweetness. Ensure your chocolate chips are dairy-free. This keeps the bars plant-based while still tasty. You can also skip the nuts if you want a nut-free option.
What is the best way to customize the sweetness?
You can customize sweetness easily. Use ripe bananas for natural sweetness. Adjust the amount of honey or maple syrup to your taste. You can also add a bit of brown sugar if you want more. Just remember to mix it in well for even sweetness.
This post covered the key ingredients for making delicious bars. We explored essential and optional ingredients, plus tips for substitutions. The step-by-step guide made preparation easy, with clear baking and cooling tips. I shared tricks to make these bars fun for kids and flavorful. You learned about variations, storage methods, and ways to answer common questions.
In the end, you have the tools to create tasty bars that suit your needs. Enjoy experimenting and sharing with others!