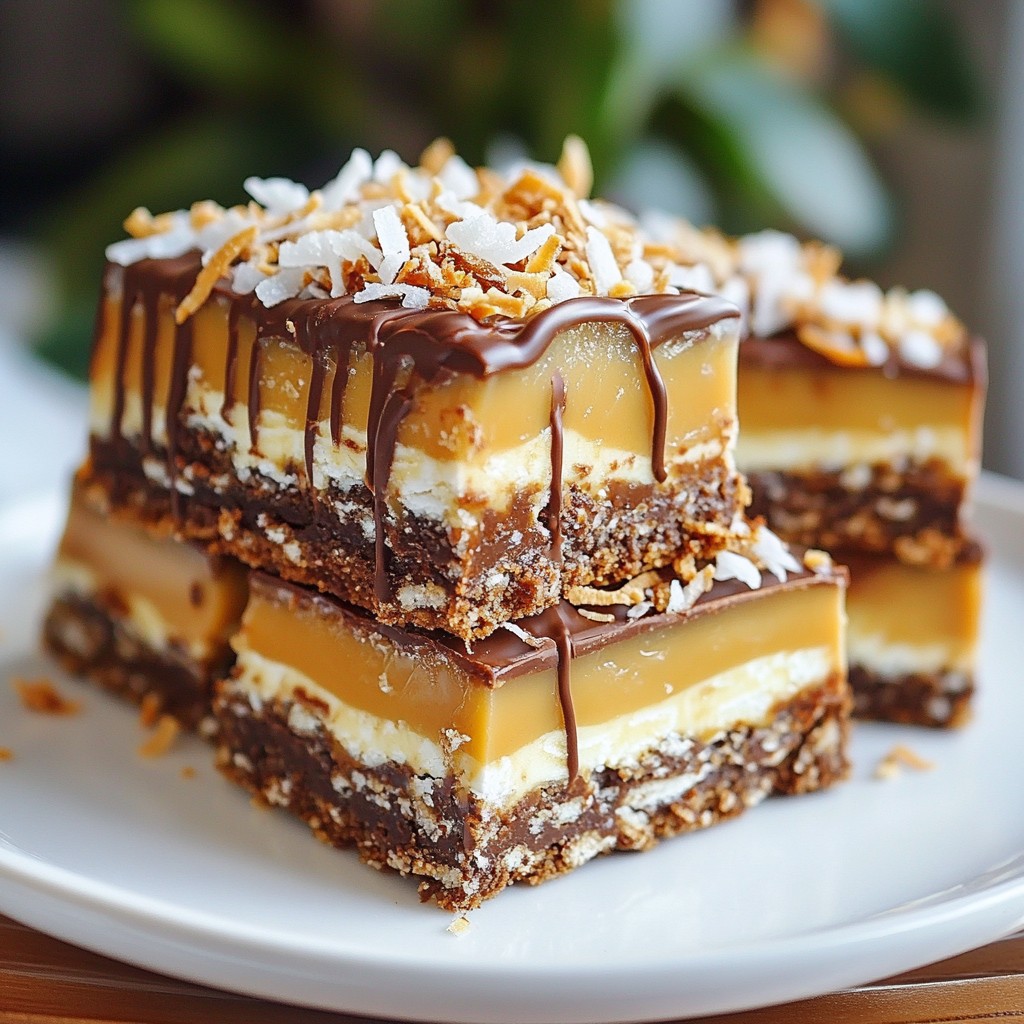
Get ready for a delicious treat with my easy No-Bake Samoa Cookie Bars! If you love the classic Samoa cookie, you’ll adore these quick bars that capture all the flavor without needing to turn on the oven. Packed with chocolate, coconut, and caramel, they are smooth and satisfying. Follow my simple guide to whip up this tasty dessert in no time. Let’s dive into the fun of making these sweet treats!
Why I Love This Recipe
- Easy to Make: This no-bake recipe means you can whip up these delicious bars without turning on the oven, making it a perfect treat for warm days.
- Decadent Flavors: The combination of chocolate, coconut, and caramel provides an indulgent flavor profile that mimics the beloved Samoa cookie.
- Customizable: You can easily modify the recipe by adding nuts or using different types of nut butter to suit your taste preferences.
- Great for Sharing: Cut these bars into squares for a perfect bite-sized treat that’s ideal for parties, potlucks, or simply enjoying with friends and family.
Ingredients
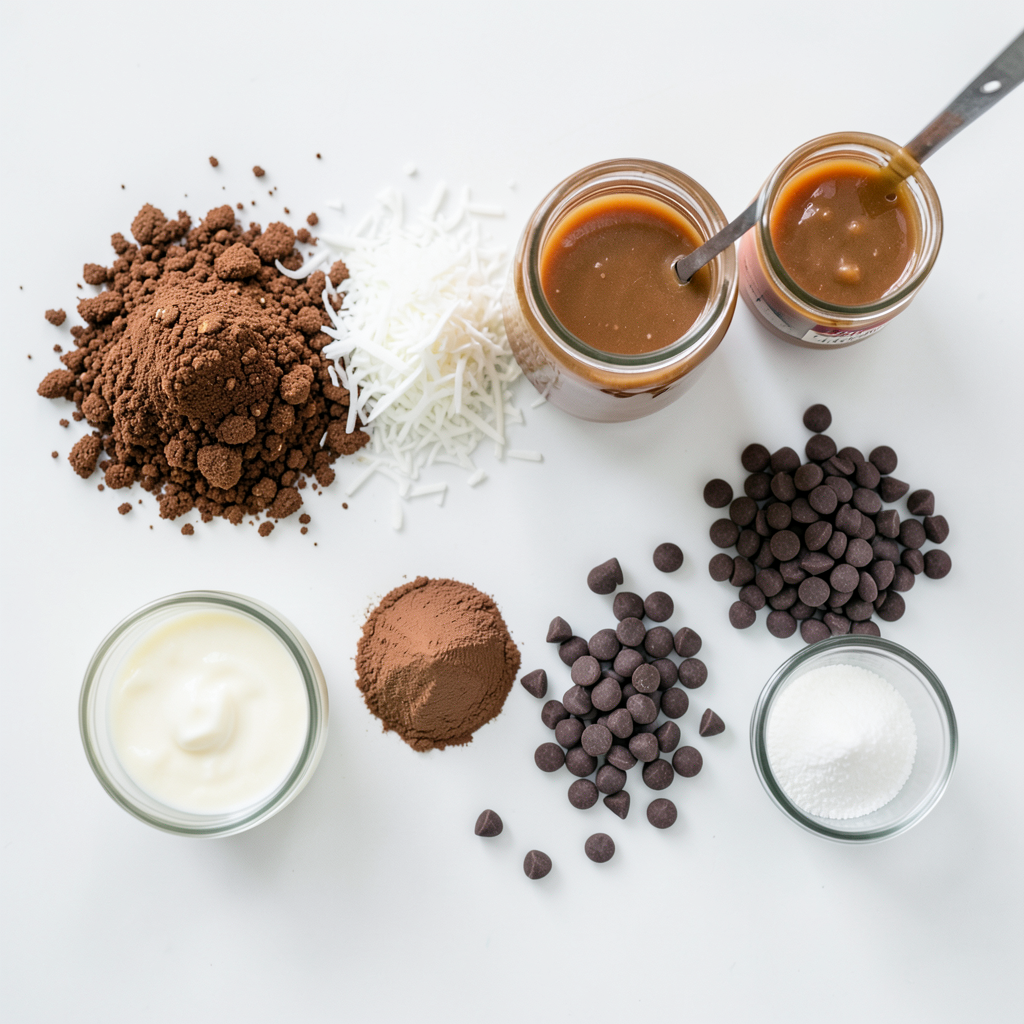
To make these No-Bake Samoa Cookie Bars, you'll need a few key ingredients. Each one adds a special touch to the bars. Here is the list of ingredients you will need:
- 2 cups chocolate graham cracker crumbs
- 1 cup unsweetened shredded coconut
- 1/2 cup unsweetened cocoa powder
- 1 cup sweetened condensed milk
- 3/4 cup semi-sweet chocolate chips (plus extra for drizzling)
- 1/4 cup unsweetened almond butter
- 1 teaspoon vanilla extract
- 1/4 teaspoon salt
- 1/2 cup caramel sauce
These ingredients come together to create a rich, chewy treat. The chocolate graham cracker crumbs give a nice base. The coconut adds a tropical twist. The cocoa powder boosts the chocolate flavor. Sweetened condensed milk binds everything, while almond butter adds creaminess.
Don't forget the caramel sauce! It gives a sweet, gooey layer. The semi-sweet chocolate chips melt beautifully on top. This mix of flavors and textures makes these bars truly special.
Step-by-Step Instructions
Mixing the Base
- Start by taking a large mixing bowl.
- Combine 2 cups of chocolate graham cracker crumbs, 1 cup of shredded coconut, and 1/2 cup of cocoa powder.
- Mix these dry ingredients well with a spoon.
- Next, add 1 cup of sweetened condensed milk, 1/4 cup of almond butter, 1 teaspoon of vanilla extract, and 1/4 teaspoon of salt.
- Stir until everything combines into a sticky dough.
Preparing the Baking Dish
- Grab an 8x8-inch baking dish.
- Line it with parchment paper, leaving some paper hanging over the edges.
- This will help you lift the bars out later.
- Now, take your dough and press it evenly into the bottom of the dish.
- Use a spatula to smooth out the top.
Adding Layers
- Drizzle 1/2 cup of caramel sauce over the pressed mixture.
- Spread it out evenly with a spoon.
- Now, melt 3/4 cup of semi-sweet chocolate chips.
- Use a microwave-safe bowl and heat them in 30-second intervals, stirring in between.
- Once melted, pour the chocolate over the caramel layer.
- Spread it evenly with a spatula.
- Finally, place the dish in the refrigerator for at least 2 hours.
- This helps the bars firm up.
Tips & Tricks
How to Achieve the Perfect Texture
To get the best texture for your no-bake Samoa cookie bars, proper mixing is key. Start by combining the chocolate graham cracker crumbs, shredded coconut, and cocoa powder in a large bowl. Mix them well so that the flavors meld together.
Next, add the wet ingredients: sweetened condensed milk, almond butter, vanilla extract, and salt. Stir until you form a sticky dough. This dough gives the bars their nice, chewy texture.
Refrigeration is also important. After you press the mixture into the baking dish, let it chill for at least two hours. This step helps the bars firm up and hold their shape when cut.
Presentation Suggestions
When it comes to serving, presentation matters. Serve your Samoa cookie bars on a decorative platter. This makes them look more appealing to guests.
For an extra touch, garnish with toasted coconut flakes. Sprinkle these on top to add texture and flavor. Not only does it look good, but it also enhances the coconut taste.
Common Mistakes to Avoid
One mistake to watch out for is overmixing the ingredients. If you stir too much, the texture can become tough. Mix just enough until ingredients are combined.
Another mistake is not allowing enough refrigeration time. If the bars don't set properly, they may fall apart when you cut them. Stick to the recommended refrigeration time for best results.
Pro Tips
- Use Fresh Ingredients: Always opt for fresh and high-quality ingredients, especially the coconut and chocolate, to enhance the flavor of your bars.
- Chill Thoroughly: Allow the bars to chill for at least 2 hours to ensure they set properly, making them easier to cut into perfect squares.
- Customize Toppings: Feel free to add toppings like chopped nuts or extra coconut flakes to personalize your bars and add texture.
- Store Properly: Keep any leftovers in an airtight container in the refrigerator to maintain freshness and prevent them from becoming too soft.
Variations
Nut-Free Options
If you want nut-free bars, you can easily swap almond butter for sunbutter. This keeps the bars creamy and rich without nuts. You can also choose other binders like oat flour or coconut cream. These options will change the texture a bit but will still hold everything together well.
Flavor Enhancements
To boost the flavor, consider adding a pinch of sea salt. It enhances the sweetness and gives a nice balance. You might also try adding espresso powder for a coffee kick. It adds depth without making the bars taste like coffee. Don't be shy to experiment with different types of chocolate, too. Dark chocolate or white chocolate can change the whole vibe.
Decorative Twists
For extra flair, think about adding toppings like chopped nuts or colored sprinkles. These add fun textures and colors. You can also use seasonal variations. For example, use peppermint extract for a winter treat or orange zest for a fresh summer twist. Each variation lets you enjoy these bars in new ways!
Storage Info
Best Storage Practices
To keep your No-Bake Samoa Cookie Bars fresh, use airtight containers. This helps keep moisture out and keeps the bars tasty. Store them in the fridge for the best results. The cold helps keep the texture firm and prevents melting.
Shelf Life
How long can these bars last? If stored well, they can last up to one week in the fridge. Look for signs of spoilage, such as a dry or hard texture. If the bars smell off or develop mold, it’s best to toss them.
Freezing Tips
Want to enjoy these bars later? You can freeze them! Wrap each bar tightly in plastic wrap. Then, place them in a freezer-safe bag. To thaw, simply take them out and leave them in the fridge overnight. This keeps the texture nice and smooth.
FAQs
Can I use regular graham crackers instead of chocolate?
You can use regular graham crackers. This change will make the bars less sweet. The chocolate flavor will also be less intense. The bars will still taste good but differ in taste. I suggest adding a bit of cocoa powder to keep some chocolate flavor.
What can I use instead of sweetened condensed milk?
You can use coconut cream or a mix of milk and sugar. Both options will keep the bars creamy. Coconut cream will add a nice tropical taste. You can also try silken tofu blended with sweetener for a dairy-free option. Each substitute will change the bars' texture and flavor, so choose what you like best.
How do I know when the bars are set?
The bars are ready when they are firm to the touch. The edges will pull away slightly from the sides of the dish. If you press gently, they should hold their shape. After about two hours in the fridge, check them. If they feel solid, they are ready to cut and enjoy!
This blog post guided you through making delicious bars using simple ingredients. You learned how to mix, prepare, and layer flavors to create a tasty treat. I shared tips on texture, presentation, and common mistakes. You also discovered variations that can suit different tastes. Finally, I covered storage methods to keep your bars fresh. Now, you have all the tools to create and enjoy these treats. Take your time and enjoy the process. Happy baking!