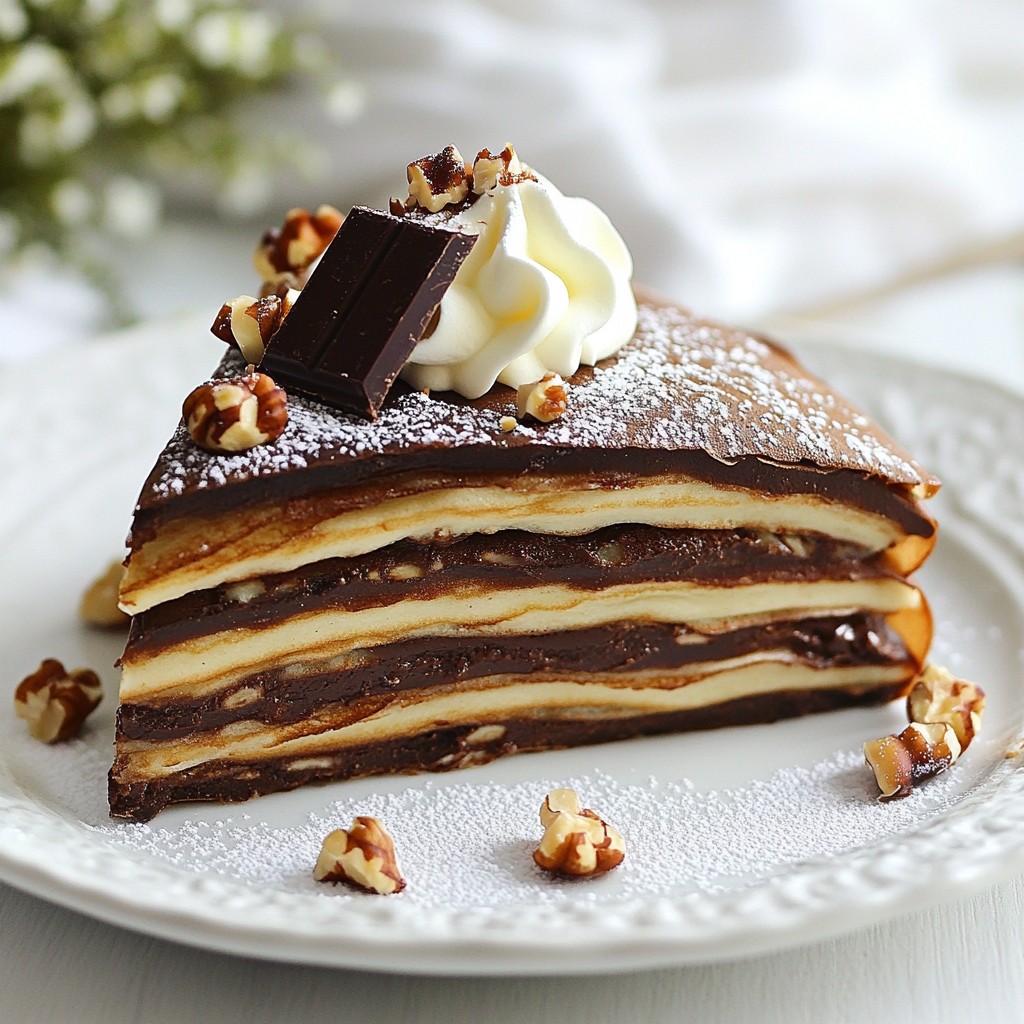
Get ready for a sweet treat that will impress everyone! My Chocolate Hazelnut Crepe Cake combines rich flavors and a fun texture. Layers of thin crepes filled with chocolate hazelnut goodness create a dessert that is both fancy and easy to make. Whether it’s for a birthday or a casual get-together, this cake will be the star of your table. Let’s dive into the ingredients and steps to craft this delightful dessert!
Why I Love This Recipe
- Decadent Layers: This crepe cake features multiple layers of delicate crepes and rich chocolate hazelnut filling, creating a luxurious dessert experience.
- Easy to Customize: You can easily adjust the filling and toppings to suit your taste, whether you prefer more hazelnuts or a different type of chocolate.
- Impressive Presentation: Stacking the crepes creates a stunning visual effect that will wow your guests and make any occasion special.
- Perfect for Make-Ahead: This cake can be made in advance and chilled, making it a convenient dessert option for busy days or gatherings.
Ingredients
Crepes Ingredients
- 1 cup all-purpose flour
- 2 large eggs
- 2 cups milk
- 2 tablespoons melted butter
- 2 tablespoons granulated sugar
- 1 teaspoon vanilla extract
- A pinch of salt
Chocolate Hazelnut Filling Ingredients
- 1 cup chocolate hazelnut spread (like Nutella)
- 1 cup heavy cream
- 2 tablespoons powdered sugar
- 1 teaspoon vanilla extract
- ¼ cup finely chopped hazelnuts (toasted)
Topping Ingredients
- Shaved chocolate (dark or milk)
- Additional toasted hazelnuts
- Whipped cream (optional)
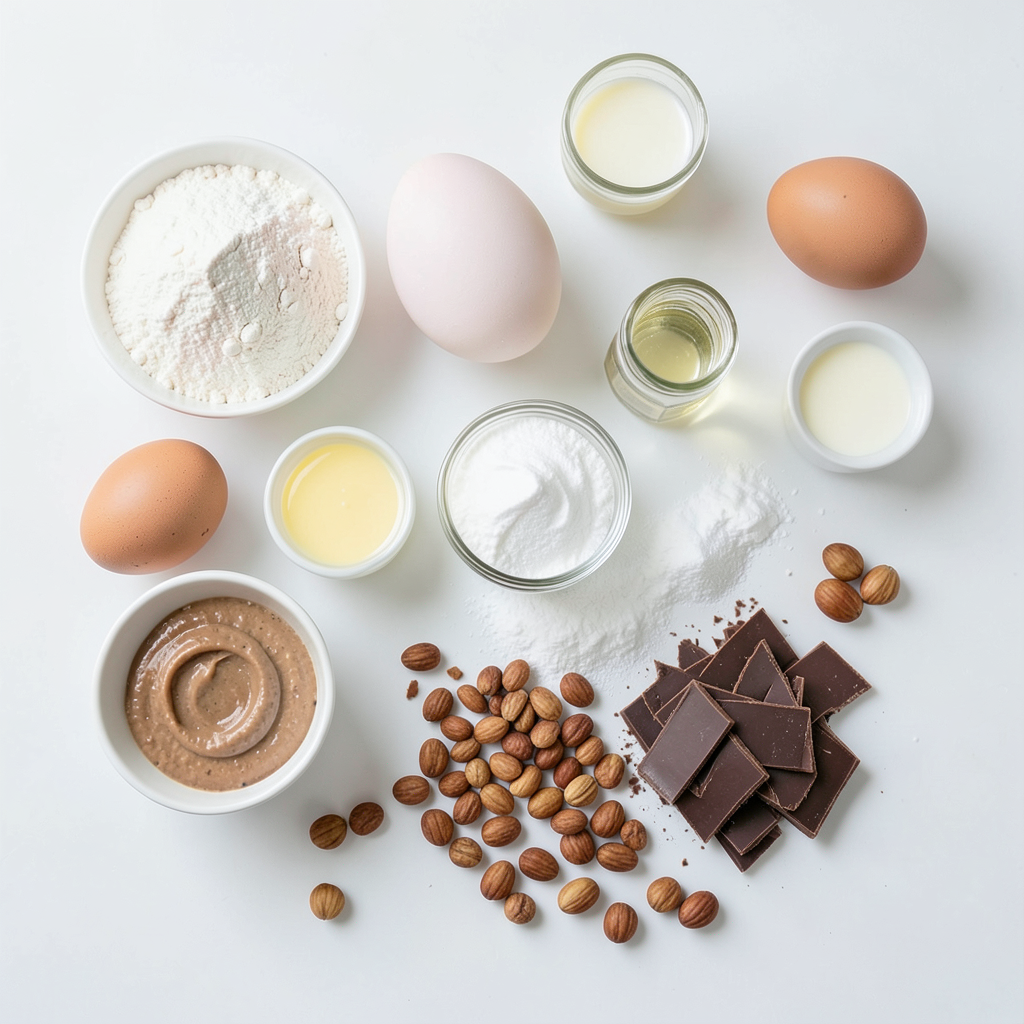
To make the Chocolate Hazelnut Crepe Cake, you need these simple ingredients. The crepes form the base, while the filling adds that rich chocolate and nutty flavor. Topping the cake with chocolate and hazelnuts gives it a delightful finish. You can find these ingredients at any grocery store. Always use fresh eggs and quality chocolate for the best taste.
Step-by-Step Instructions
Making the Crepes
To start, gather the ingredients for the crepes. You need:
- 1 cup all-purpose flour
- 2 large eggs
- 2 cups milk
- 2 tablespoons melted butter
- 2 tablespoons granulated sugar
- 1 teaspoon vanilla extract
- A pinch of salt
In a mixing bowl, whisk the flour, eggs, milk, melted butter, sugar, vanilla, and salt together. Mix until the batter is smooth. Let it rest for about 30 minutes. This step helps the crepes become light and tender.
Cooking the Crepes
Now it’s time to cook the crepes. Heat a non-stick skillet over medium heat. Lightly grease it with butter or oil. Pour about ¼ cup of batter into the skillet, swirling it around to create a thin layer. Cook for 1-2 minutes until the edges lift. Then, flip the crepe and cook for another minute. Remove the crepe and let it cool. Stack the crepes on a plate as you cook the rest.
Preparing the Chocolate Hazelnut Filling
Next, prepare the filling. Gather these ingredients:
- 1 cup chocolate hazelnut spread
- 1 cup heavy cream
- 2 tablespoons powdered sugar
- 1 teaspoon vanilla extract
- ¼ cup finely chopped toasted hazelnuts
In a large mixing bowl, whip the heavy cream with a mixer until soft peaks form. Gradually add the powdered sugar and vanilla while still mixing. Continue until stiff peaks form. Now, gently fold in the chocolate hazelnut spread. Make sure everything is smooth and well combined.
Assembling the Crepe Cake
It’s time to assemble your cake. Start with one crepe on a serving platter. Spread a thin layer of the chocolate hazelnut filling on top. Sprinkle some chopped hazelnuts for crunch. Place another crepe on top and repeat the steps until you use all the crepes and filling. Finish with a crepe on the top.
Chilling the Cake
Cover the cake and refrigerate it for at least 2 hours. Chilling helps the flavors mix and the cake to set. If you can, let it chill overnight for even better taste.
Serving Suggestions
When you are ready to serve, add some fun toppings. Garnish the top with shaved chocolate and more toasted hazelnuts. You can also add a dollop of whipped cream if you like. Slice and enjoy this delicious dessert!
Tips & Tricks
How to Achieve Perfectly Thin Crepes
To make thin crepes, you need a smooth batter. Whisk flour, eggs, milk, melted butter, sugar, vanilla, and salt well. Let the batter rest for 30 minutes. This helps the flour absorb moisture and creates a lighter texture. When cooking, heat your skillet to medium and grease it lightly. Pour about ¼ cup of batter into the pan. Swirl it to cover the bottom evenly. Cook just until the edges lift. Flip it gently and cook briefly on the other side. Thin crepes should be light and flexible.
Tips for the Ideal Chocolate Hazelnut Filling
For the filling, use high-quality chocolate hazelnut spread, like Nutella. It gives the best flavor. Start with cold heavy cream for better whipping. Beat it until soft peaks form, then add powdered sugar and vanilla. Whip until stiff peaks form. Gently fold in the chocolate hazelnut spread. Mixing slowly keeps the filling airy and smooth. Add finely chopped, toasted hazelnuts for a nice crunch. This adds texture and enhances the nutty flavor.
Common Mistakes to Avoid
Avoid these mistakes for the best results. First, do not skip resting the crepe batter. It’s important for texture. Second, do not overheat the skillet. If it’s too hot, the crepes will burn. Use low heat if needed. Also, do not rush the flipping. Wait until the edges lift before turning. Lastly, do not overfill the crepes. A thin layer of filling keeps the stack neat. Following these tips will help you create a perfect Chocolate Hazelnut Crepe Cake.
Pro Tips
- Rest the Batter: Allowing the crepe batter to rest for at least 30 minutes helps to relax the gluten, resulting in more tender crepes.
- Even Cooking: Use a non-stick skillet or a crepe pan to ensure even cooking and easy flipping of the crepes.
- Chill for Best Flavor: Refrigerating the assembled cake allows the flavors to meld beautifully, enhancing the overall taste and texture.
- Customization: Feel free to mix in other flavors to the filling, such as a splash of espresso or almond extract, for a unique twist!
Variations
Different Flavors of Crepes
You can change the flavor of your crepes. Try adding cocoa powder to the batter. This gives your crepes a rich chocolate taste. For a fruity twist, mix in lemon zest or orange zest. You can also use flavored extracts like almond or coconut. These small changes can make a big difference in taste.
Alternative Fillings
While chocolate hazelnut spread is delicious, you have many other options. Try using fruit preserves or fresh fruit for a lighter filling. Cream cheese mixed with berries creates a tasty and creamy layer. For a nutty flavor, use almond butter or peanut butter instead. Each filling brings a unique taste to your crepe cake.
Gluten-Free Crepe Options
If you need gluten-free crepes, you can easily swap the flour. Use almond flour or a gluten-free flour blend. Just be aware that the texture may change slightly. You can also add a bit of cornstarch to help the crepes hold together. This way, everyone can enjoy this tasty dessert!
Storage Info
Best Methods for Storing Leftovers
To keep your Chocolate Hazelnut Crepe Cake fresh, store it in the fridge. Use an airtight container to avoid moisture loss. You can also cover it with plastic wrap or aluminum foil. This helps keep the cake moist and tasty for up to three days. If you notice any excess moisture, pat the surface gently with a paper towel before covering.
How to Freeze the Crepe Cake
You can freeze the crepe cake for later enjoyment. First, let the cake cool completely in the fridge. Then, wrap it tightly in plastic wrap. For extra protection, wrap it in aluminum foil or place it in a freezer-safe container. This method helps prevent freezer burn. The cake can stay in the freezer for up to three months. When you are ready to enjoy it, simply move it to the fridge to thaw overnight.
Reheating Instructions
Reheating the crepe cake is simple. If you prefer it warm, slice a piece and place it on a microwave-safe plate. Heat it in the microwave for about 15-20 seconds. Check to see if it’s warm enough. If not, give it another quick burst. For those who enjoy it cold, serve it straight from the fridge. Either way, this cake always tastes great!
FAQs
What can I use instead of chocolate hazelnut spread?
You can use peanut butter or almond butter. These nut butters have a creamy texture. They can also add a unique flavor. If you want a chocolate fix, try using chocolate ganache. This will give a rich taste without hazelnuts.
Can I make the crepes ahead of time?
Yes, you can make the crepes ahead. After cooking, let them cool completely. Then, stack the crepes with parchment paper between them. Store them in the fridge for up to two days. This saves time when you assemble the cake.
How long does the Chocolate Hazelnut Crepe Cake last?
The cake lasts for about three days in the fridge. Just cover it well to keep it fresh. If you want to keep it longer, freeze it. However, the texture may change after thawing.
This post detailed how to make a chocolate hazelnut crepe cake, from ingredients to assembly. You learned about the best ways to create thin crepes and perfect fillings. I shared tips on variations, cool storage options, and how to reheat leftovers if needed.
Creating this cake is fun and rewarding. Enjoy experimenting with different flavors and fillings. You’ll impress every guest, and they'll love each delicious bite! Happy cooking!