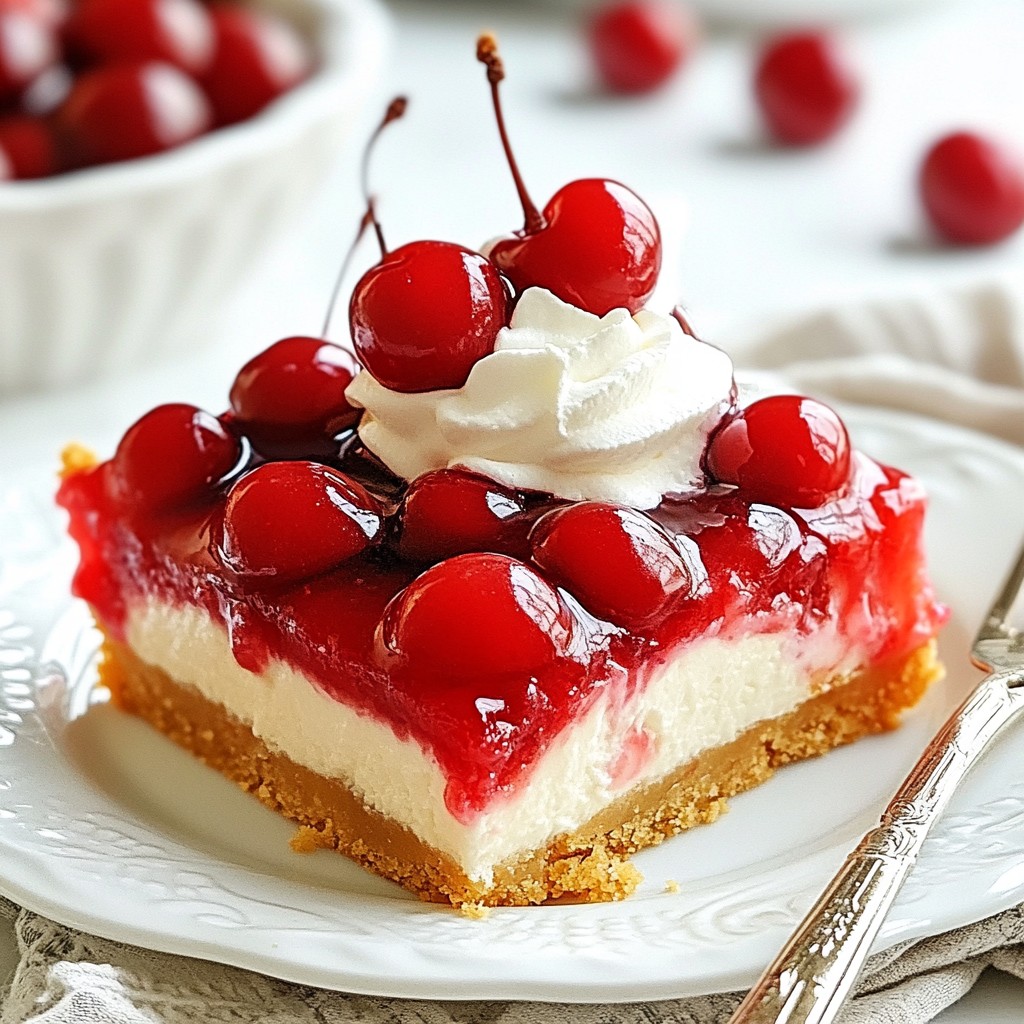
If you love desserts that are both rich and refreshing, you’ll adore these Cherry Pie Cheesecake Bars! This recipe brings together a creamy cheesecake blend and sweet cherry topping, making for a perfect treat. I’ll walk you through each step, from crafting the buttery crust to creating the delicious filling. Easy to make and fun to share, these bars will be a hit at any gathering. Let's dive in and get baking!
Why I Love This Recipe
- Delicious Flavor Combination: The rich cream cheese filling paired with sweet cherry topping creates a delightful balance that is hard to resist.
- Easy to Make: This recipe requires simple ingredients and straightforward steps, making it perfect for bakers of all skill levels.
- Perfect for Any Occasion: These cheesecake bars are a crowd-pleaser, ideal for parties, picnics, or a sweet treat at home.
- Make Ahead Convenience: The bars can be prepared in advance and stored in the refrigerator, making them a great option for busy days.
Ingredients
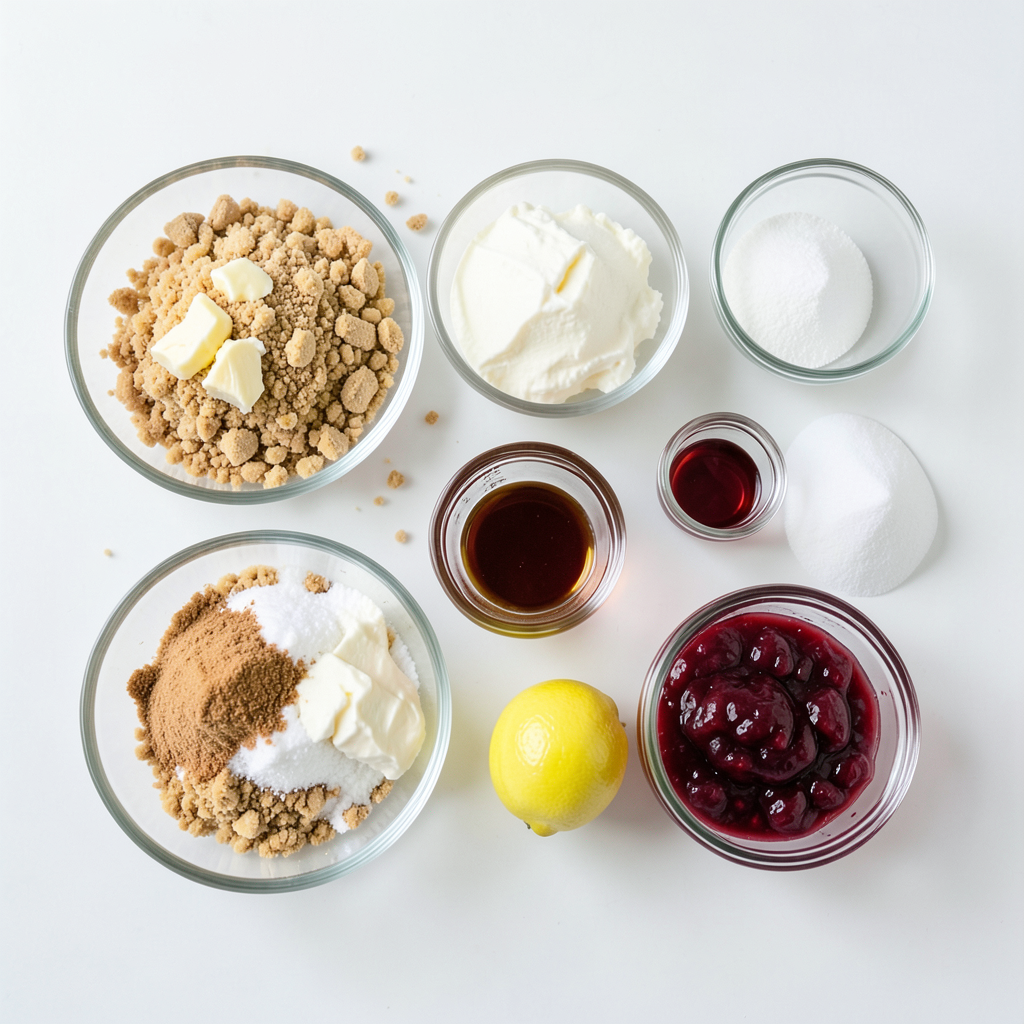
To make Cherry Pie Cheesecake Bars, gather the following ingredients:
- 1 ½ cups graham cracker crumbs
- ½ cup unsalted butter, melted
- ¼ cup brown sugar
- 1 (8 oz) package cream cheese, softened
- ½ cup granulated sugar
- 1 teaspoon vanilla extract
- 1 large egg
- 1 (21 oz) can cherry pie filling
- 1 teaspoon lemon juice
- 2 tablespoons cornstarch
- ¼ teaspoon almond extract (optional)
These ingredients work together to create a rich and creamy dessert. The graham cracker crumbs form a tasty crust. Melting the butter helps bind the crumbs. Brown sugar adds a hint of caramel flavor. Cream cheese gives the filling its smooth texture. Granulated sugar sweetens the cheesecake nicely. Vanilla extract adds warmth and depth. The egg helps the filling set during baking.
For the cherry topping, the canned cherry pie filling saves time. Lemon juice brightens the flavor, while cornstarch helps thicken the pie filling. Almond extract is optional but adds a lovely nutty note. Each ingredient plays a key role in making these bars a delightful treat. Grab these items, and let’s get ready to bake!
Step-by-Step Instructions
Preheat and Prepare Baking Pan
First, preheat your oven to 325°F (160°C). This temperature helps the cheesecake bake evenly. Next, take an 8x8-inch square baking pan. Grease it with butter to prevent sticking. Then, line the pan with parchment paper. Leave some paper hanging over the edges for easy removal later.
Make the Crust
In a large bowl, combine 1 ½ cups of graham cracker crumbs, ½ cup of melted unsalted butter, and ¼ cup of brown sugar. Mix these ingredients well until the crumbs are fully coated. Press the mixture firmly into the bottom of the prepared pan. This forms a solid crust for your bars.
Prepare the Cheesecake Filling
In another bowl, beat together 1 (8 oz) package of softened cream cheese, ½ cup of granulated sugar, and 1 teaspoon of vanilla extract. Mix until the blend is smooth and creamy. Next, add 1 large egg and mix just until combined. Be careful not to overmix, or the texture may change.
Assemble the Bars
Now, pour the cheesecake mixture over your pressed graham cracker crust. Spread it evenly across the crust, making sure it covers all corners. This layer creates a rich base for your cherry topping.
Prepare the Cherry Topping
In a medium bowl, mix 1 (21 oz) can of cherry pie filling with 1 teaspoon of lemon juice and 2 tablespoons of cornstarch. If you want, you can add ¼ teaspoon of almond extract for an extra flavor boost. Gently stir until the cherries are well coated with the mixture.
Bake and Chill
Pour the cherry topping over the cheesecake layer and spread it gently. Place the baking pan in your preheated oven. Bake for 30-35 minutes. The edges should be set, but the center can still jiggle a bit. Once finished, remove the pan from the oven and let it cool at room temperature for about 30 minutes. After that, refrigerate it for at least 2 hours. This chilling time helps the cheesecake set perfectly.
Tips & Tricks
Perfecting the Cheesecake Texture
- Avoiding overmixing: Mix the cream cheese, sugar, and vanilla only until smooth. Overmixing adds too much air, causing cracks during baking. Keep it simple to get a creamy texture.
- Ensuring cream cheese is softened: Always use softened cream cheese for the best results. Take it out of the fridge at least 30 minutes before you start. This makes mixing easier and helps avoid lumps.
Serving Suggestions
- Ideal toppings: I love to serve these bars with a dollop of whipped cream. Fresh cherries on top add color and flavor. You can also drizzle some chocolate sauce for extra sweetness.
- Best serving temperatures: These bars taste great cold or at room temperature. Chilling them makes the flavors richer. Let them sit for about 10 minutes after taking them out of the fridge for the best taste.
Troubleshooting Common Issues
- Addressing cracks in cheesecake: If you see cracks, don't worry! They often happen due to overmixing or baking too long. Reducing the oven temperature or using a water bath can help keep the cheesecake smooth.
- Fixing issues with crust texture: If your crust is too crumbly, try adding a bit more melted butter. If it’s too hard, reduce the baking time. A good crust should hold together but not be rock hard.
Pro Tips
- Use Cold Ingredients: Make sure your cream cheese is softened but not warm. Cold ingredients can lead to a lumpy cheesecake filling.
- Don’t Overmix: When adding the egg to the cheesecake mixture, mix just until combined to avoid incorporating too much air, which can cause cracks.
- Chill Before Serving: Allow the bars to chill for at least 2 hours. This helps the flavors meld and the cheesecake to set perfectly.
- Customize Your Toppings: Feel free to experiment with different fruit toppings or even a chocolate drizzle for a unique twist on these cheesecake bars.
Variations
Flavor Variations
You can change the fruit topping to fit your taste. Try strawberries or blueberries for a twist. These fruits can make your bars fresh and bright. You can also use flavored extracts. Instead of vanilla, almond extract brings a nice touch. It adds warmth to the cheesecake flavor.
Crust Alternatives
If you need a gluten-free option, swap graham cracker crumbs for gluten-free crumbs. This change keeps your bars tasty while meeting dietary needs. You can also try a cookie crust. Oreo or shortbread cookies make a rich base. These options add a fun and unique flavor to the bars.
Miniature Versions
Making individual bars or bites is simple. Use a muffin pan instead of a square pan. This method allows you to create perfect portions. Adjust the baking time to about 20-25 minutes. Keep an eye on them to avoid overbaking. These mini versions are perfect for parties or snacks.
Storage Info
How to Store Leftovers
To keep your Cherry Pie Cheesecake Bars fresh, store them in the fridge. Place the bars in an airtight container. This will help keep them moist and tasty. If you do not have an airtight container, use plastic wrap to cover the bars tightly.
Freezing Instructions
If you want to save some for later, freezing is a great option. First, let the bars cool completely. Then, cut them into squares. Wrap each piece in plastic wrap. After that, place them in a freezer-safe bag. Make sure to squeeze out as much air as possible. For best results, eat them within three months.
To thaw, take the bars out of the freezer. Place them in the fridge overnight. If you need them faster, leave them at room temperature for about an hour.
Shelf Life
In the fridge, these bars stay fresh for about five days. You will know they are bad if you see mold or if they smell off. Always check before eating. Enjoy your delicious Cherry Pie Cheesecake Bars while they are at their best!
FAQs
Can I use a different type of fruit filling?
Yes, you can! Some great options include:
- Blueberry pie filling
- Strawberry pie filling
- Peach pie filling
- Raspberry pie filling
You can mix and match these to find your favorite. Each fruit brings its own fun taste!
How long do these bars last in the fridge?
These bars stay fresh for about 4-5 days in the fridge. Make sure to store them in an airtight container. This helps keep them tasty and safe to eat.
Can I make this recipe ahead of time?
Absolutely! You can make these bars a day or two in advance. Just bake them, cool, and chill. They taste even better after resting in the fridge. This way, they are ready when you need them!
Is it possible to make these Cherry Pie Cheesecake Bars low-carb?
Yes, you can make low-carb versions! Here are a few swaps:
- Use almond flour instead of graham cracker crumbs.
- Choose a low-carb sweetener like erythritol or stevia.
- Use a low-carb pie filling or make your own with fresh cherries and sweetener.
These changes can help you enjoy the treat while keeping it lower in carbs!
What is the best way to cut cheesecake bars?
To cut these bars neatly, follow these steps:
- Use a sharp knife for clean cuts.
- Dip the knife in hot water before cutting. Wipe it dry after each cut.
- Cut the bars while they are chilled. This makes it easier to slice through the creaminess.
These tips will help you serve perfect squares every time!
You now have the perfect recipe for Cherry Pie Cheesecake Bars. We covered all the needed ingredients, step-by-step instructions, and helpful tips. Don’t forget to try different fruit toppings or crust options to make it your own. Proper storage and serving suggestions help keep your bars fresh and delicious. I hope you enjoy making these treats as much as I do. Happy baking!