Skip to content
DisclaimerTerms Of UseGDPR PolicyCookie Policy

momdishmagic

  • Home
  • Drinks
  • Appetizers
  • Dinner
  • Dessert
  • About
  • Contact
  • Privacy Policy
DisclaimerTerms Of UseGDPR PolicyCookie Policy

Emma

To make a delightful Mediterranean quinoa salad, gather these key items: - 1 cup quinoa, rinsed - 2 cups water or vegetable broth - 1 cup cherry tomatoes, halved - 1 cucumber, diced - 1 bell pepper (red or yellow), diced - 1/2 red onion, finely chopped - 1/2 cup Kalamata olives, pitted and sliced - 1/2 cup feta cheese, crumbled These main ingredients create a colorful and tasty base for your salad. Quinoa serves as a great source of protein and fiber. The fresh vegetables add crunch and nutrients. For extra flavor, consider using these fresh herbs and vegetables: - 1/4 cup fresh parsley, chopped - Fresh mint leaves, chopped - Baby spinach, chopped - Arugula, for peppery flavor These herbs and veggies boost the taste and health benefits of your salad. Fresh parsley brightens the dish, while mint adds a refreshing touch. The dressing enhances the salad’s flavors. Here’s what you need: - 1/4 cup olive oil - 2 tablespoons lemon juice - 1 teaspoon dried oregano - Salt and pepper to taste You can also try different dressings. Use balsamic vinegar for a sweet twist or add garlic for a more robust taste. The right dressing makes a big difference in your salad. For the full recipe, check out [Full Recipe]. To start, you need 1 cup of quinoa. Rinse it well under cold water to remove any bitterness. Next, combine the rinsed quinoa with 2 cups of water or vegetable broth in a medium saucepan. Bring it to a boil over high heat. Once boiling, reduce the heat to low, cover, and let it simmer for about 15 minutes. The quinoa is ready when it is fluffy and the liquid is absorbed. Remove it from heat and let it cool for a bit. While the quinoa cools, it’s time to prep the veggies. Grab a large mixing bowl. Add 1 cup of halved cherry tomatoes, 1 diced cucumber, and 1 diced bell pepper. I like to use either red or yellow for color. Next, toss in 1/2 finely chopped red onion, 1/2 cup of sliced Kalamata olives, and 1/2 cup of crumbled feta cheese. Finally, add 1/4 cup of chopped fresh parsley. This mix makes the salad bright and crunchy. Now, let’s make the dressing. In a small bowl, combine 1/4 cup of olive oil, 2 tablespoons of lemon juice, and 1 teaspoon of dried oregano. Add salt and pepper to taste. Whisk these ingredients together until well blended. This dressing adds a zesty flavor to the salad. Once the quinoa has cooled, fluff it with a fork. Add the quinoa to the bowl with the vegetables. Pour the dressing over the top. Gently toss everything together to coat the ingredients evenly. Taste the salad and adjust the seasoning if needed. Let it sit for at least 15 minutes before serving. This waiting time helps the flavors mix better. Serve it in a large bowl, garnished with extra parsley and feta. Enjoy the Mediterranean flavors with lemon wedges on the side for a fresh touch. For the full recipe, refer to the Mediterranean Quinoa Salad section. To cook quinoa well, rinse it first. This removes the bitter coating. Use a ratio of 1 cup quinoa to 2 cups water or broth. Bring it to a boil, then lower the heat. Cover and simmer for about 15 minutes. The quinoa is ready when fluffy and all the water is gone. Let it cool before mixing into your salad. To boost the flavor of your salad, add fresh herbs like parsley or mint. Use quality olive oil and fresh lemon juice for your dressing. You can also include spices like oregano or garlic powder. Toss the salad gently to keep the veggies crisp. Let it sit for about 15 minutes before serving. This helps the flavors meld beautifully. For a stunning display, serve your salad in a wide, shallow bowl. Top it with extra parsley and a sprinkle of feta cheese. This adds color and texture. You can also place lemon wedges on the side. They add a nice touch and extra flavor. If you want, serve it alongside grilled bread or pita chips for a complete meal. Check out the Full Recipe for more tips! {{image_2}} You can make this salad more filling by adding protein. Here are some great options: - Grilled chicken breast, diced - Chickpeas, drained and rinsed - Shrimp, cooked and peeled - Tofu, cubed and sautéed These proteins add flavor and make the dish more satisfying. You could also mix a few together for extra taste and texture. This salad is naturally vegetarian and can easily fit into vegan diets. Just swap the feta cheese for a vegan option. Here are some ideas: - Vegan feta cheese - Avocado slices for creaminess - Toasted nuts or seeds for crunch These swaps keep the salad fresh while catering to different diets. You can enjoy this meal no matter your eating style. Using seasonal ingredients can boost flavor and nutrition. Here are some swaps based on the season: - In spring, add asparagus or peas. - In summer, try zucchini or bell peppers. - In fall, include roasted sweet potatoes or butternut squash. - In winter, use kale or Brussels sprouts. These seasonal swaps keep your salad exciting and fresh all year long. You can enjoy a new flavor each season while sticking to the basic recipe. For the complete recipe, check out the Full Recipe section. To store your Mediterranean quinoa salad, place it in an airtight container. Make sure to cool it to room temperature before sealing. This helps keep it fresh for later. A glass container works great for this. It allows you to see the colors inside. Meal prep can save you time and effort. I recommend making a big batch at once. Divide the salad into individual portions. This makes it easy to grab for lunch or dinner. Use small containers to keep each serving fresh. Add dressing just before eating to keep the salad crisp. The salad lasts about three to four days in the fridge. If you want to enjoy it warm, heat the quinoa separately. Then mix it with cold veggies. This keeps the fresh flavors intact. Remember, avoid reheating the entire salad. It might make the veggies soft and less tasty. For full details on making this delightful dish, check the Full Recipe. Yes, you can make this salad ahead of time. It stays fresh in the fridge for up to three days. Just make sure to keep the dressing separate until you are ready to serve. This keeps the salad crisp and tasty. When you are ready, toss in the dressing and enjoy! Quinoa is a superfood packed with protein and fiber. It is gluten-free and has all nine essential amino acids. This makes it a great choice for vegans and vegetarians. Quinoa also contains vitamins and minerals like magnesium and iron. Eating quinoa can help with digestion and keep you feeling full longer. To make this salad gluten-free, simply ensure you use certified gluten-free quinoa. Most quinoa is gluten-free, but some brands may process it in facilities that handle gluten. Always check the label to be safe. The other ingredients in this salad are naturally gluten-free, so you’re good to go! Yes, you can substitute feta cheese with several options. Try goat cheese for a creamier taste. For a dairy-free option, use vegan feta or omit cheese altogether. You can also add nuts or seeds for extra flavor and texture. Make it your own! This salad pairs well with light, refreshing drinks. Try a crisp white wine like Sauvignon Blanc or a sparkling water with lemon. For non-alcoholic options, consider iced herbal tea or a fresh lemonade. These drinks enhance the bright flavors of the salad and make your meal more enjoyable. You learned about making a healthy Mediterranean quinoa salad today. We covered the main ingredients, step-by-step cooking, and tips to enhance flavor. You also discovered tasty variations and important storage tips. This salad is not just a meal; it’s a way to enjoy fresh foods. Try adding your favorite herbs or proteins. With simple steps, you can create a dish that fits your needs. Enjoy this recipe and all its fresh flavors!

Mediterranean Quinoa Salad Fresh and Flavorful Meal

Are you ready to enjoy a fresh and tasty meal? This Mediterranean Quinoa Salad is packed with vibrant flavors and

To make this tasty dish, you will need: - 4 boneless, skinless chicken breasts - 1/4 cup fresh lemon juice - 1 lemon, zested - 3 tablespoons olive oil - 3 cloves garlic, minced - 1 teaspoon dried oregano - 1 teaspoon dried thyme - 1 teaspoon dried rosemary - Salt and pepper to taste - Fresh parsley, chopped (for garnish) Fresh herbs bring bright flavors to the chicken. They are fragrant and vibrant. You can use fresh oregano, thyme, and rosemary if you have them. Fresh herbs can give your dish a lively taste. However, dried herbs are easy to store and use. They still add great flavor when fresh herbs are not available. If you use dried herbs, remember to use less. Dried herbs are stronger than fresh ones. A good rule is to use one-third the amount of dried herbs. You will need some basic tools to make this dish. Here is a list of what you need: - A medium bowl for mixing - A whisk for blending the marinade - A large resealable plastic bag or shallow dish for marinating - A grill for cooking - A meat thermometer to check the chicken's doneness - A cutting board and knife for slicing - Serving platter for presentation These tools help you create delicious and juicy chicken. When you have the right equipment, cooking becomes easier and more fun. Be sure to gather everything before you start! You can find the full recipe [here](#). To make the marinade, you need some simple ingredients. Start with a medium bowl. Whisk together 1/4 cup fresh lemon juice and the zest of one lemon. Add 3 tablespoons of olive oil and 3 minced garlic cloves. Then, mix in 1 teaspoon each of dried oregano, dried thyme, and dried rosemary. Finally, season with salt and pepper to taste. This blend will give your chicken a bright, zesty flavor. For the best taste, let the chicken soak in this mix for at least one hour. You can even marinate it overnight for a deeper flavor. Grilling is key to getting juicy chicken. First, preheat your grill to medium-high heat. Make sure the grill grates are clean and oiled to stop sticking. Once hot, take the chicken out of the marinade. Discard the leftover marinade to keep it safe. Place the chicken on the grill. Cook each side for about 6 to 7 minutes. Use a meat thermometer to check for doneness; it should be 165°F (75°C). You want nice grill marks and a juicy inside. After grilling, it is important to let the chicken rest. Take it off the grill and let it sit for about 5 minutes. This helps keep the juices inside. When ready, slice the chicken and garnish with chopped fresh parsley. Serve it on a wooden board with lemon wedges for a nice touch. Pair it with grilled veggies or a fresh salad for a complete meal. For the full recipe, check the section above. Marinating chicken is key to great flavor. Start with fresh lemon juice and zest. This adds brightness. Use a resealable bag to coat the chicken well. Let it sit in the fridge for at least one hour. For deeper flavor, marinate overnight. Always discard leftover marinade to avoid bacteria. Clean and oil the grill grates before cooking. This helps prevent sticking. Preheat your grill to medium-high heat. If the grill is too hot, the chicken may burn on the outside and stay raw inside. Do not flip the chicken too often. Let it cook for 6-7 minutes per side for even cooking. The best way to check chicken is with a meat thermometer. Insert it into the thickest part of the chicken. Look for an internal temperature of 165°F (75°C). If you do not have a thermometer, cut into the chicken. The juices should run clear and the meat should be white, not pink. {{image_2}} To give your Zesty Lemon Herb Grilled Chicken a kick, add some heat! You can mix in crushed red pepper flakes or diced jalapeños to the marinade. Start with half a teaspoon for a mild heat. Taste the marinade first to see if you want more spice. This twist will excite your taste buds and make your dish stand out. You can swap some ingredients based on what you have. For instance, if you don't have fresh lemon juice, try lime juice. If you are out of olive oil, canola or avocado oil work too. You can use fresh herbs instead of dried ones. Just double the amount for a fresh flavor. This flexibility keeps the dish fun and easy to make. Grilling is great for flavor, but you can use the oven too. If you choose to bake, preheat your oven to 400°F (200°C). Place the chicken on a baking tray lined with parchment paper. Bake for 20-25 minutes or until the chicken reaches 165°F (75°C). This method is easy and still gives you juicy chicken. Whether you grill or bake, you get a tasty meal every time! For the full recipe, check out the details above. After a tasty meal, you may have some grilled chicken left. Store leftovers in an airtight container. Let the chicken cool at room temperature for about 30 minutes before sealing. Keep the container in the fridge. It will stay fresh for up to three days. If you want to store it longer, you can freeze it. Wrap the chicken tightly in plastic wrap, then place it in a freezer bag. It will last for about three months in the freezer. When you're ready to eat the leftovers, you want them to taste great. If you have frozen chicken, let it thaw in the fridge overnight. For reheating, you have a few options. You can use the oven, microwave, or stovetop. If using the oven, preheat it to 350°F (175°C). Place the chicken in an oven-safe dish and cover it with foil. Heat for about 20-25 minutes, until warm. In the microwave, place the chicken on a plate and cover it loosely. Heat in short bursts of 1-2 minutes, checking often. For stovetop, heat a skillet over medium heat and add a splash of water or broth. Cook for about 5-7 minutes, flipping once. Grilled chicken is perfect for meal prep. You can slice it and add it to salads for lunch. It also works well in wraps with fresh veggies. Try using it in pasta dishes with lemon and herbs for a quick dinner. You can mix it with rice and steamed vegetables for a complete meal. Another fun idea is to chop it up for tacos. Just add your favorite toppings! This way, you can enjoy your zesty lemon herb grilled chicken all week long. For the complete recipe, check out the full recipe. The cooking time is about 12 to 14 minutes. Each side needs 6 to 7 minutes on medium-high heat. You want to see nice grill marks and an internal temperature of 165°F (75°C). Yes, you can use other proteins. Try turkey or fish for a change. Just adjust the cooking time as needed. Fish cooks faster than chicken, so watch it closely. You can marinate the chicken for at least 1 hour. For more flavor, marinate it up to overnight. This lets the flavors soak in, making the chicken taste great. For the full recipe, check out the Zesty Lemon Herb Grilled Chicken instructions. You learned how to make Zesty Lemon Herb Grilled Chicken. I shared a complete ingredient list and helpful tools. I showed you how to prepare the marinade and grill the chicken for juiciness. You got tips for marinating and avoiding mistakes. I also suggested fun variations and best storage practices. Now you can enjoy a tasty meal anytime. Cooking should be fun, so try it out!

Zesty Lemon Herb Grilled Chicken Flavorful Summer Dish

Get ready to fire up your grill! Zesty Lemon Herb Grilled Chicken is the perfect dish for summer. Its bright

To make creamy coconut mango oatmeal, gather these ingredients: - 1 cup rolled oats - 2 cups coconut milk (or any dairy-free milk) - 1 ripe mango, diced - 1 tablespoon honey or maple syrup (optional) - 1⁄4 cup shredded coconut (toasted for extra flavor) - 1 teaspoon vanilla extract - 1⁄2 teaspoon ground cinnamon - A pinch of salt - Chopped fresh mint (for garnish) You can easily swap ingredients in this recipe. Here are some ideas: - Use almond milk or oat milk instead of coconut milk. - If you don't have mango, any fruit like banana or berries works well. - Try agave nectar in place of honey or maple syrup. - For a nutty flavor, use chopped nuts instead of coconut. This dish is not only tasty but also healthy. Here’s a quick look: - Calories: Approximately 350 per serving - Protein: About 6 grams - Carbohydrates: Roughly 60 grams - Dietary Fiber: Around 8 grams - Sugars: Varies based on fruit and sweeteners used This creamy coconut mango oatmeal is a wholesome choice for breakfast or a snack. It packs nutrients and flavors that please everyone. For the full recipe, check out the earlier section. To make creamy coconut mango oatmeal, start by gathering your ingredients. You will need: - 1 cup rolled oats - 2 cups coconut milk (or any dairy-free milk) - 1 ripe mango, diced - 1 tablespoon honey or maple syrup (optional) - 1⁄4 cup shredded coconut (toasted for extra flavor) - 1 teaspoon vanilla extract - 1⁄2 teaspoon ground cinnamon - A pinch of salt - Chopped fresh mint (for garnish) Measure out everything. This helps keep your cooking smooth and fun. In a medium saucepan, combine the rolled oats, coconut milk, and a pinch of salt. Heat this over medium heat. Keep an eye on it and stir it gently. Cook for about 5 to 7 minutes. You want the oatmeal to be creamy and the oats soft. Once it looks just right, stir in the vanilla extract and ground cinnamon. If you want it sweeter, add honey or maple syrup now. Then, take it off the heat. Mix in the diced mango and toasted coconut, saving some for the top. Spoon the creamy coconut mango oatmeal into bowls. Top each bowl with the rest of the mango and coconut. Add some chopped fresh mint for a pop of color and flavor. This meal is great warm for breakfast or even as a snack. For the full recipe, check the earlier section. Enjoy your tasty creation! To make your oatmeal creamy, use coconut milk. It adds a rich texture. You can also mix in a bit of almond milk for more flavor. Stir the oats often while they cook. This helps release the starch and makes them velvety. If you want extra creaminess, add a small spoon of nut butter, like almond or cashew. It blends well with the coconut taste. To boost flavor, try adding a pinch of salt early in cooking. Salt brings out the sweetness of the mango. Cinnamon adds warmth. You can also add nutmeg for a cozy twist. If you like sweet oats, mix in honey or maple syrup at the end. Fresh mint as a garnish brightens up the dish and adds a refreshing note. Cook oats over medium heat for the best results. High heat can burn the oats and ruin the creaminess. Keep stirring to prevent clumping. For rolled oats, cook for about 5-7 minutes. If you use steel-cut oats, you’ll need more time and water. Always let the oats rest for a minute off the heat. This helps them thicken up. For the full recipe, check the instructions above. {{image_2}} You can change the fruit based on the season. In summer, use fresh berries like strawberries or blueberries. In fall, diced apples or pears pair well with cinnamon. In winter, add sliced bananas for a sweet touch. Each fruit brings a new flavor and keeps your oatmeal fun. If you want to cut sugar, skip the honey or maple syrup. You can also use unsweetened coconut milk for less sugar. For extra protein, add nuts or seeds. If you need gluten-free oats, make sure to check the label. Always look for certified gluten-free oats to be safe. This recipe is easy to make vegan. Just use dairy-free milk, like almond or oat milk. For a gluten-free version, ensure your oats are certified gluten-free. You can swap honey for maple syrup to keep it vegan and sweet. These small changes make it fit many diets while staying delicious. Remember to check the Full Recipe for all the details you need! To keep your creamy coconut mango oatmeal fresh, place it in an airtight container. You can store it in the fridge for up to three days. If you want to enhance flavor, wait to add mango and coconut until serving. This way, they stay fresh and bright. Reheat your oatmeal in a microwave or on the stove. If using a microwave, heat it in 30-second bursts, stirring between each. On the stove, add a splash of coconut milk or water to help it warm up. Stir it well to bring back the creamy texture. You can freeze your oatmeal for longer storage. Pour it into a freezer-safe container and leave some space at the top. Freeze for up to three months. To thaw, move it to the fridge overnight. Reheat as described above, adding liquid if needed. Enjoy your easy meal anytime! To make oatmeal creamier, use more liquid. Try adding extra coconut milk or water. You can also cook the oats longer. Stir gently while cooking to break down the oats. This helps create a smooth texture. Adding a bit of yogurt can also boost creaminess. Yes, you can use many fruits! Try bananas, berries, or peaches. Each fruit brings its own flavor and sweetness. Just remember to cut the fruit into small pieces. This way, they mix well in your oatmeal. Yes, this recipe is gluten-free. Use rolled oats that are certified gluten-free. Some oats may have gluten due to cross-contamination. Check the label to ensure they are safe for you. This makes it a great option for those with gluten sensitivity. The best toppings for oatmeal include nuts, seeds, or fresh fruit. You can add peanut butter or almond butter for a protein boost. Drizzling honey or maple syrup adds sweetness too. A sprinkle of cinnamon or a dollop of yogurt can enhance the flavor. Try different combinations to find your favorite! For more details on making this delicious dish, refer to the Full Recipe. This blog post covered all you need to make great oatmeal. We explored ingredients, substitutes, and nutritional facts. You learned step-by-step how to prepare, cook, and serve it. We shared tips for creaminess and flavor boosts. You discovered fun variations and learned best practices for storage. Oatmeal is versatile and healthy. You can adapt it to fit your taste and needs. Now, you have the tools to make oatmeal your way! Get cooking and enjoy your delicious creation.

Creamy Coconut Mango Oatmeal Delightful and Easy Meal

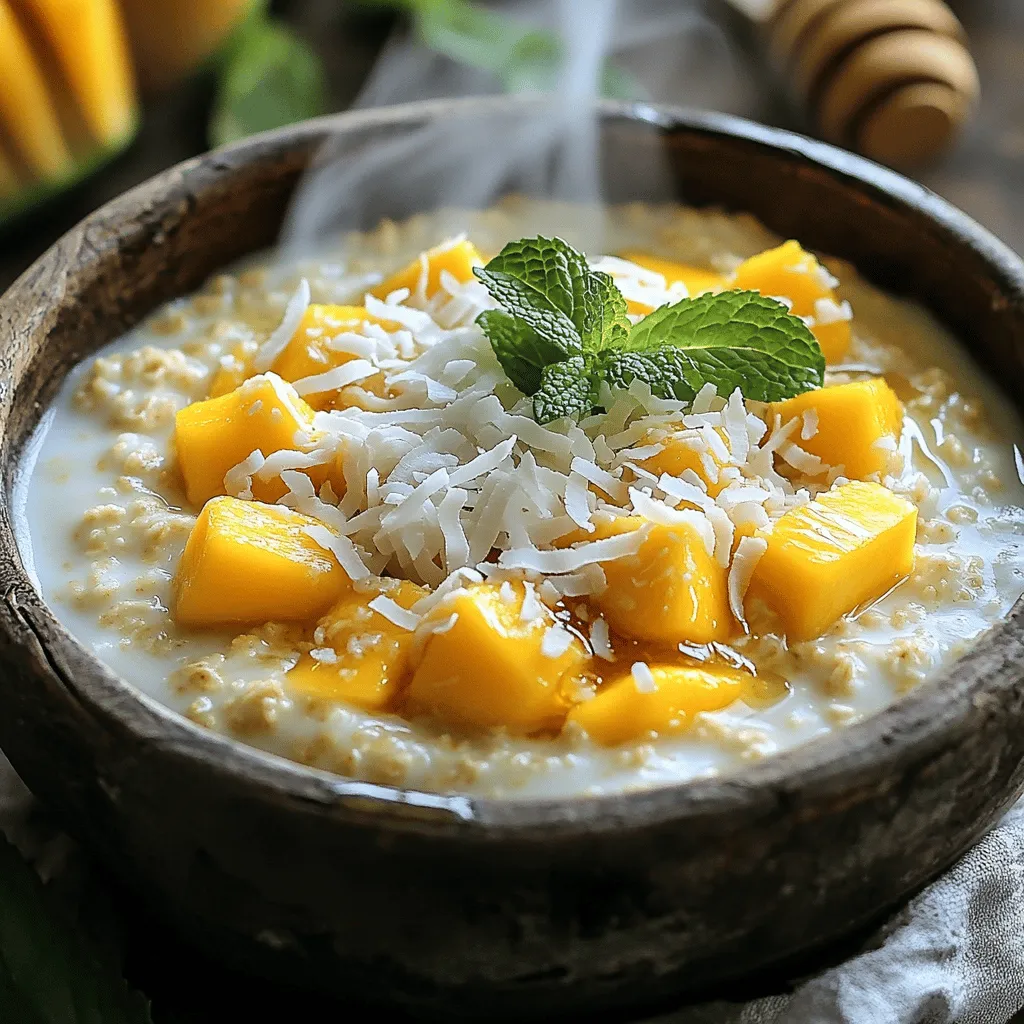
Looking for a breakfast that’s both tasty and easy to make? Let me introduce you to Creamy Coconut Mango Oatmeal.

To make the perfect maple mustard croissant sandwich, you will need: - 2 buttery croissants - 1/4 cup maple mustard (mix 2 tbsp maple syrup with 2 tbsp Dijon mustard) - 4 slices of smoked turkey or chicken breast - 1/2 avocado, sliced - 1/4 cup fresh arugula - 2 slices of provolone cheese - Salt and pepper to taste - Optional: sliced pickles for added crunch You can personalize your sandwich with these options: - Sliced tomatoes for freshness - Crispy bacon for extra flavor - A drizzle of honey for sweetness - Spinach instead of arugula for a different green - Different cheese types like cheddar or gouda If you’re missing an ingredient, consider these substitutes: - Use any flaky pastry instead of croissants - Honey mustard can replace maple mustard - Use roast beef or ham instead of turkey or chicken - A different spread like hummus for a vegan option - Lettuce can stand in for arugula These ingredients will help you create a tasty and satisfying sandwich. Don’t forget to check the Full Recipe for detailed steps! To make the Maple Mustard Croissant Sandwich, gather your ingredients first. You will need two buttery croissants, maple mustard, smoked turkey or chicken, avocado, arugula, provolone cheese, and optional pickles. This simple recipe takes about 10 minutes to prep. 1. Preheat your oven to 350°F (175°C). This step is key if you want warm croissants. 2. Slice the croissants in half horizontally, if you prefer. Place them on a baking sheet. 3. Warm the croissants in the oven for about 5 minutes. They should be lightly toasted. 4. In a small bowl, mix two tablespoons of maple syrup with two tablespoons of Dijon mustard. This makes the maple mustard spread. 5. Take the bottom half of each croissant and spread a generous layer of the maple mustard. 6. Layer four slices of smoked turkey or chicken breast evenly on the mustard. 7. Add half an avocado, sliced, on top of the turkey. Then, sprinkle fresh arugula for a nice crunch. 8. Place a slice of provolone cheese on the arugula. If you want, add sliced pickles here too. 9. Close the sandwich with the top half of the croissant. 10. If you want the cheese melted, return the whole sandwich to the oven for another 5 minutes. 11. Slice the sandwich in half, serve, and enjoy your tasty creation! To get the best toast on your croissants, watch the time closely. Five minutes is usually perfect. If you like them crispier, add another minute. You can also use a skillet on low heat for toasting. Just keep an eye on them to avoid burning. For an extra touch, brush the croissants lightly with butter before toasting. This will add flavor and a lovely golden color. Enjoy each bite of this delicious sandwich! To boost flavor, start with fresh ingredients. Use ripe avocados and quality turkey. The maple mustard blend is key. Adjust its sweetness by adding more maple syrup. You can also add a splash of lemon juice for a zesty kick. For a smoky taste, try smoked cheese instead of provolone. Texture makes a big difference. Use fresh, buttery croissants for a flaky bite. Lightly toasting them adds crunch and warmth. Be careful not to over-toast, as they can become too hard. The creamy avocado and melted cheese create a nice contrast. Adding pickles gives a satisfying crunch. Presentation matters when serving food. Arrange the sandwiches on a wooden board. Garnish with fresh arugula for color. Drizzle leftover maple mustard on the board for a touch of flair. For a fun twist, serve with sweet potato fries or a simple salad. Enjoy your beautiful and tasty creation! {{image_2}} You can make a tasty vegetarian version of the maple mustard croissant sandwich. Start with the same buttery croissants. Instead of turkey or chicken, use roasted veggies. Grilled zucchini, bell peppers, and mushrooms work great. Add slices of fresh mozzarella for creaminess. Top with arugula and your maple mustard mix. This version is just as filling and packed with flavor. If you need a gluten-free option, you can use gluten-free croissants. Many stores sell these now. You can also use gluten-free bread. Just make sure it’s fresh and soft. The maple mustard spread will still taste amazing on these alternatives. It keeps the sandwich tasty and satisfying without the gluten. You have many protein choices for your filling. Instead of turkey or chicken, try ham or roast beef. Tofu or tempeh can also work if you want a plant-based option. For a lighter choice, consider smoked salmon. Each option brings its own flavor to the sandwich. Mix and match to find your favorite! For the complete recipe, check out the Full Recipe section. To keep your leftover sandwiches fresh, wrap them tightly in plastic wrap or aluminum foil. This method prevents air from drying them out. You can also place them in an airtight container for added protection. Store your wrapped sandwiches in the fridge if you plan to eat them within two days. When you want to enjoy your sandwich warm, the oven is your best friend. Preheat your oven to 350°F (175°C). Remove the wrap and place the sandwich on a baking sheet. Warm it for about 5-7 minutes. This way, the croissant stays crispy, and the cheese melts nicely. You can also use a toaster oven for quicker heating. Your sandwiches are best eaten fresh, but they can last in the fridge for up to two days. If you want to store them longer, consider freezing. Wrap each sandwich tightly in plastic wrap and place them in a freezer bag. They can last in the freezer for up to a month. To reheat, let them thaw in the fridge overnight before warming them in the oven. Enjoy your Maple Mustard Croissant Sandwich anytime with these storage tips! You can make a maple mustard mix at home. Combine equal parts of maple syrup and Dijon mustard. If you don’t have Dijon, yellow mustard works too. For a sweet twist, try honey mustard. You can also use other sweeteners, like agave syrup, to create a similar flavor. Each option brings a unique taste. Yes, you can prep the sandwich ahead. Assemble it without the croissants and store it in the fridge. Just keep the croissants separate to stay fresh. When you're ready to eat, warm the croissants and add the filling. This way, you enjoy a fresh sandwich even if you made it earlier. Local cafes often serve great croissant sandwiches. You can also search online for restaurants that feature gourmet sandwiches. If you're adventurous, make your own using the full recipe I shared. This way, you can adjust flavors to your liking. Enjoy the fun of making it at home! We covered the key ingredients, easy steps, and useful tips for the Maple Mustard Croissant Sandwich. You learned how to customize it and find substitutes for common items. I shared storage tips and answered common questions to help you enjoy your sandwich even more. Don’t hesitate to experiment with flavors and textures. This sandwich is a fun dish that can fit your tastes. Enjoy making this recipe your own!

Delicious Maple Mustard Croissant Sandwich Recipe

If you love big flavor packed in a flaky croissant, you’re in for a treat! This Maple Mustard Croissant Sandwich

To make a warm bowl of classic chicken noodle soup, you need simple yet fresh ingredients. Here’s what I use: - 2 tablespoons olive oil - 1 medium onion, diced - 3 cloves garlic, minced - 3 medium carrots, sliced - 2 celery stalks, sliced - 8 cups low-sodium chicken broth - 2 cups cooked chicken, shredded - 1 teaspoon dried thyme - 1 bay leaf - 8 ounces egg noodles - Salt and pepper to taste - Fresh parsley, chopped for garnish Each ingredient plays a role in building flavor. The olive oil adds richness while the onion and garlic bring depth. Carrots and celery add sweetness and crunch. Chicken broth forms the soup's heart, making it warm and comforting. Shredded chicken gives it protein and satisfying texture. Dried thyme adds an earthy note, and the bay leaf enhances the aroma. Egg noodles soak up the broth, making each spoonful a delight. When you gather these ingredients, remember that quality matters. Fresh veggies make a big difference. You can find the complete recipe in the [Full Recipe] for detailed steps. 1. In a large pot, heat 2 tablespoons of olive oil over medium heat. 2. Add 1 medium diced onion and sauté until soft, about 5 minutes. 3. Next, add 3 cloves of minced garlic, 3 sliced carrots, and 2 sliced celery stalks. 4. Cook these together for another 5 minutes. This mix will start to smell great! 1. Now, pour in 8 cups of low-sodium chicken broth. 2. Bring the mixture to a gentle boil. It should bubble nicely. 3. Stir in 2 cups of shredded cooked chicken, 1 teaspoon of dried thyme, and 1 bay leaf. 4. Reduce the heat and let it simmer for 15 minutes. This allows the flavors to mix well. 1. Add 8 ounces of egg noodles to the pot. 2. Cook the noodles based on package instructions, usually 7 to 10 minutes, until they are al dente. 3. Remove the bay leaf. This step is important for taste! 4. Season the soup with salt and pepper as you like. 5. Serve hot and garnish with fresh chopped parsley for extra flavor and color. For a full recipe, check out the details above. Enjoy this warm, cozy dish! To get the best flavor, I always recommend using homemade stock. It adds depth and warmth that store-bought can’t match. If you’re short on time, use low-sodium broth, but taste it first. Adjust the seasoning based on your preference. Some like more salt, while others enjoy a dash of pepper. One common mistake is overcooking the noodles. They can become mushy and lose their texture. Cook them just until they're al dente. Another mistake is forgetting to remove the bay leaf before serving. It adds flavor during cooking, but it’s not meant to be eaten. Fresh herbs can take your soup to the next level. I love adding parsley or dill for a burst of freshness. You can also use lemon to brighten the flavors. Just a squeeze before serving makes a big difference. Enjoy these small tweaks to elevate your classic chicken noodle soup! {{image_2}} You can change the protein in your soup for fun. Instead of rotisserie chicken, try turkey. It works well and adds a nice twist. If you want a plant-based option, use tofu. Just make sure to press it first to remove excess water. This helps the tofu absorb flavors better. Adding veggies boosts nutrition and flavor. For summer, consider sweet corn or zucchini. These veggies add a fresh taste to your soup. You can also add greens like spinach or kale. They cook quickly and add a nice color. Just toss them in during the last few minutes of cooking. Switch up the noodles for a healthier option. Whole wheat noodles add fiber and a nutty taste. If you need gluten-free, use rice noodles or gluten-free pasta. Both options work well and keep the soup hearty. Just be sure to adjust cooking times based on the noodle type. For the full recipe, check the section above. Enjoy experimenting with these variations! To keep your chicken noodle soup fresh, store it in the fridge. Use an airtight container. This helps prevent spills and keeps flavors intact. Your soup will last about 3 to 4 days in the fridge. If you want to keep it longer, freeze it. Just make sure to leave some space in the container for expansion. In the freezer, the soup can last up to 3 months. When it’s time to enjoy your soup again, reheat it on the stove. This method warms it evenly. Stir occasionally to prevent sticking. If you prefer the microwave, use a microwave-safe bowl. Heat in short bursts and stir in between. If the soup thickens during storage, add a little water or broth. This will help restore its creamy texture. Enjoy your comforting bowl of chicken noodle soup! To freeze chicken noodle soup, let it cool first. Then, pour it into airtight containers. Leave space at the top for expansion. You can also use freezer bags. Lay them flat to save space. When ready to eat, thaw it overnight in the fridge. Heat on the stove or in the microwave. Add a bit of broth if it seems too thick. Yes, making chicken noodle soup in a slow cooker is easy. Start by adding olive oil, diced onion, minced garlic, carrots, and celery. Pour in the chicken broth, then add shredded chicken, thyme, and a bay leaf. Set your slow cooker on low for 6-8 hours or high for 3-4 hours. Add the egg noodles in the last 30 minutes of cooking. This method gives the soup a deep flavor. To make low-sodium chicken noodle soup, use low-sodium chicken broth. Avoid adding extra salt. You can enhance flavor with herbs like thyme and parsley. Fresh lemon juice can also add brightness without sodium. Always taste before adding any salt. This way, you keep the soup tasty and healthy. If you need a substitute for egg noodles, try whole wheat noodles. Rice noodles work well too. You can even use thin pasta like vermicelli. For a gluten-free option, choose gluten-free pasta. Cook them separately, then add them to the soup. This keeps the noodles from getting mushy. You now have a clear guide to making classic chicken noodle soup. We covered key ingredients, cooking steps, and helpful tips to boost flavor. Remember to avoid common mistakes, like overcooked noodles. You can try variations with different proteins and veggies for new tastes. Storing and reheating properly keeps your soup fresh. Use this knowledge to create your perfect bowl. Enjoy making this comfort food with confidence!

Classic Chicken Noodle Soup Simple Comfort Dish

When you crave a warm hug in a bowl, Classic Chicken Noodle Soup is the answer. This simple comfort dish

- 2 ripe avocados, peeled and pitted - 1/2 cup unsweetened cocoa powder - 1/2 cup maple syrup - 1/4 cup almond milk (or any plant-based milk) - 1 teaspoon vanilla extract - 1/4 teaspoon sea salt - Optional toppings: dairy-free whipped cream, fresh berries, shaved dark chocolate To make this vegan chocolate avocado mousse, you need simple, fresh ingredients. The ripe avocados form the base, giving the mousse its creamy texture. Cocoa powder provides the rich chocolate flavor that we all love. Maple syrup sweetens the mousse naturally, while almond milk adds a smooth consistency. The vanilla extract and sea salt enhance the flavors, making each bite delightful. - Alternative sweeteners: If you prefer, you can use agave syrup or mashed dates. - Different plant-based milk options: Soy milk or coconut milk work well, too. - Cocoa powder vs. dark chocolate: You can swap cocoa powder for melted dark chocolate for a different texture. These substitutions let you customize the mousse to your taste. Use what you have in your kitchen. The key is to keep the texture creamy and the flavor rich, no matter the choice. To make vegan chocolate avocado mousse, start by gathering your ingredients. You need ripe avocados, cocoa powder, maple syrup, almond milk, vanilla extract, and sea salt. Next, put all these ingredients in a food processor. Blend them until smooth and creamy. You want a thick, airy texture. If it seems too thick, add a bit more almond milk. Taste the mousse. If you want it sweeter, add more maple syrup. Blend it again until everything mixes well. While blending, you may need to stop and scrape down the bowl. This helps mix all the ingredients evenly. If you skip this step, some parts may stay chunky. Keep an eye on the blending time. Blend until your mousse is light and fluffy. It should take about 2 to 3 minutes. A smooth texture makes the mousse taste better. Once you have your perfect mousse, it’s time to serve. Spoon the mousse into small serving bowls or cups. This dessert looks great in clear dishes. After transferring, cover the bowls with plastic wrap. Place them in the refrigerator for at least 30 minutes. Chilling helps the flavors blend and makes the mousse even creamier. When ready to serve, you can add optional toppings. Dairy-free whipped cream, fresh berries, or shaved dark chocolate make it extra special. Enjoy your rich and creamy delight! To make a great mousse, start with ripe avocados. They should feel soft when you press them. If your avocados are hard, let them sit at room temperature for a few days. Ripe avocados give the mousse a creamy texture, which is key. Adjusting the sweetness is also important. Taste your mousse after blending. If it is not sweet enough, add more maple syrup. Blend again until it's just right. You can prepare this mousse a day before your event. Store it in an airtight container in the fridge. This keeps it fresh and ready to serve. Aim for at least 30 minutes of chilling time before serving. This allows the flavors to mix well. If you can chill it longer, that’s even better! Garnishing makes your mousse look fancy. You can top it with dairy-free whipped cream, fresh berries, or shaved dark chocolate. These toppings add color and texture. For parties, serve the mousse in small cups. This way, guests can grab their own. You can also layer it with fresh fruit or granola for a fun twist. {{image_2}} You can make this mousse even tastier by adding nut butter. Try peanut or almond butter. Both will give a rich flavor and creaminess. You can also mix in extracts like mint or almond. A little goes a long way to change the taste. Just remember to blend well after adding. If you need nut-free options, swap nut butter for sunflower seed butter. This keeps the mousse creamy without nuts. For sugar-free choices, you can use stevia or monk fruit sweetener. These options still taste great and keep it healthy. Serve your mousse in parfaits for a fun twist. Layer it with granola or fruit for extra texture. You can also stack it with other desserts like cakes or puddings. These ideas make your dessert look fancy and inviting. To keep your mousse fresh, store it in an airtight container. Place the mousse in the fridge right after serving. This helps preserve its rich flavor and creamy texture. If you want to keep it longer, you can freeze the mousse. Use a freezer-safe container and leave some space at the top. This allows the mousse to expand as it freezes. In the fridge, your vegan chocolate avocado mousse lasts about 3 to 5 days. Always check for signs of spoilage. If you see any discoloration or an off smell, it's best to toss it. Freshness is key for the best taste. If you froze the mousse, thaw it in the fridge overnight. Avoid using a microwave, as it can affect the texture. After thawing, stir gently to restore creaminess. If it feels too thick, mix in a splash of almond milk to regain that smooth, light texture. Can I use different types of chocolate? Yes, you can! Dark chocolate adds a rich flavor, while milk chocolate offers sweetness. Try using cocoa powder for a strong chocolate taste. Just ensure it's vegan! Is this mousse suitable for kids? Absolutely! Kids love the creamy texture and chocolate flavor. It's a fun and healthy treat for them. How many servings does the recipe make? This recipe makes four servings. Feel free to double it if you're hosting friends or family. What are the health benefits of avocados? Avocados are packed with healthy fats, fiber, and vitamins. They help keep your heart healthy and boost skin health. Plus, they make this mousse creamy without dairy! Is this dessert low in calories? Yes, this mousse is lower in calories than many traditional desserts. It uses avocados instead of cream, making it a lighter option. What if my mousse is too thick? If your mousse is too thick, add a bit more almond milk. Blend again until smooth. This helps achieve the right creamy texture. How to fix an overly sweet mousse? If your mousse tastes too sweet, add a pinch of sea salt. This balances the flavors. You can also blend in more cocoa powder to reduce sweetness. For the full recipe, check the earlier section. This vegan chocolate avocado mousse is easy and fun to make. You learned about the key ingredients, how to blend them, and tips for perfect texture. Remember to store any leftovers properly. Feel free to try different flavors and toppings to make it your own. This dessert is not only tasty but also healthy! I'm excited for you to enjoy it. Happy cooking!

Vegan Chocolate Avocado Mousse Rich and Creamy Delight

Are you ready to indulge in a rich and creamy dessert that’s both healthy and delicious? This Vegan Chocolate Avocado

To make chocolate chip cookie dough bites, gather these simple ingredients: - 1 cup all-purpose flour - 1/2 cup unsalted butter, softened - 1/3 cup brown sugar, packed - 1/3 cup granulated sugar - 1 teaspoon vanilla extract - 1/4 teaspoon salt - 1/2 cup mini chocolate chips - 2 tablespoons milk (or milk alternative) - 1 cup semi-sweet chocolate chips (for coating) These ingredients create a rich and tasty treat. Each one plays a key role. The butter gives a creamy base, while sugars add sweetness. The flour provides structure, and the mini chips add fun bursts of chocolate. You can also use different types of chocolate chips if you want. Make sure to use good-quality chocolate for coating. It makes a big difference in taste. If you want to get creative, add nuts or other mix-ins. The possibilities are endless! For the full recipe, check out the complete instructions. - In a medium bowl, combine the softened butter, brown sugar, and granulated sugar. Beat them until smooth. - Next, add one teaspoon of vanilla extract and two tablespoons of milk. Mix until blended. - Gradually add one cup of all-purpose flour and a quarter teaspoon of salt. Stir until just combined. - Now, fold in half a cup of mini chocolate chips. This adds the fun chocolatey touch. - Using a tablespoon or scoop, take small portions of dough and roll them into balls. - Place these balls on a baking sheet lined with parchment paper, then freeze them for about 30 minutes. - While the dough balls chill, melt one cup of semi-sweet chocolate chips in a bowl. Heat in 30-second intervals, stirring until smooth. - Once chilled, dip each cookie dough ball into the melted chocolate. Make sure they are fully coated. - Place the coated bites back on the parchment-lined sheet. Refrigerate them for another 30 minutes to set the chocolate. Now you have delicious chocolate chip cookie dough bites ready to enjoy! For the Full Recipe, check the earlier section. To make soft and chewy chocolate chip cookie dough bites, focus on the butter. Use softened butter to ensure a creamy mix. You can also try blending the butter and sugars longer for a smoother texture. If you want chewier bites, add a bit more flour. This helps keep them firm and less gooey. If you prefer a softer consistency, reduce the flour a little. Don’t forget to chill the dough before coating. Freezing helps the bites hold their shape. Get creative with how you serve these treats. Place the chocolate chip cookie dough bites on a colorful plate or in fun candy cups. For a twist, drizzle melted chocolate on top or sprinkle sea salt. Pair these bites with a glass of cold milk or hot chocolate for a tasty treat. You can also serve them with ice cream for an extra special dessert. Make your cookie dough bites look fancy with simple plating tricks. Use a large plate and arrange the bites in a circle. You can also stack them high for a fun look. Sprinkle some sea salt or crushed nuts on top for a nice finish. For a festive touch, add edible glitter or colorful sprinkles. These small details make your treats stand out. With these tips, your chocolate chip cookie dough bites will not only taste great but look great too! Check out the Full Recipe for all the details. {{image_2}} You can make your cookie dough bites more fun by adding flavors. Here are some ideas: - Nuts: Chopped walnuts or pecans add a nice crunch. - Peanut Butter: Swirl in some peanut butter for a rich taste. - Coconut: Shredded coconut gives a tropical flair. - Spices: A pinch of cinnamon or nutmeg can warm up the flavors. These twists keep the classic cookie dough bite exciting and fresh. Mix and match to find your favorite combo! You can also make these bites fit different diets. Here’s how: - Gluten-Free: Use almond flour or a gluten-free flour blend instead of all-purpose flour. - Vegan: Swap butter for coconut oil and use a plant-based milk. You can also find vegan chocolate chips. These changes let everyone enjoy cookie dough bites! No one needs to miss out on this tasty treat. For the complete recipe, check the Full Recipe section. To keep your chocolate chip cookie dough bites fresh, follow these steps: - Use an airtight container: This helps prevent moisture loss and keeps flavors intact. - Layer carefully: Place parchment paper between layers to avoid sticking. - Store in the fridge: They can last up to one week when refrigerated. I recommend using a glass or plastic container with a tight lid for best results. It keeps the bites fresh and ready to enjoy. For longer storage, you can freeze cookie dough bites. Here’s how: - Freeze individually: Place the bites on a baking sheet and freeze for about 30 minutes. This prevents them from sticking together. - Transfer to a freezer bag: Once firm, move them to a zip-top freezer bag. Remove as much air as possible. - Store for up to three months: This ensures you always have a tasty treat ready. When you want to enjoy them, thaw in the fridge for a few hours. You can also leave them at room temperature for about 30 minutes. Enjoy your delicious bites anytime! Chocolate chip cookie dough bites last about one week in the fridge. Store them in an airtight container. For longer storage, freeze them. They can stay good for up to three months in the freezer. Yes, you can eat unbaked cookie dough bites. However, they contain raw flour and could lead to foodborne illness. To make them safer, use heat-treated flour or skip the flour altogether. The best way to melt chocolate is in short bursts in the microwave. Start with 30 seconds, then stir. Repeat this until the chocolate is smooth. Avoid overheating, as chocolate can seize up. Yes, you can use different types of chocolate. Dark, milk, or white chocolate all work well. Each will give a unique taste and look. Feel free to mix chocolates for a fun twist! Yes, these bites are safe for kids. Make sure to prepare them with safe, edible ingredients. Just be mindful of any allergies to nuts or dairy. Enjoy making them together for a fun treat! This chocolate chip cookie dough bites recipe is simple and fun. It takes about 15 minutes to prep and 1 hour and 15 minutes total. You can make 12 to 15 tasty bites from this recipe. - 15 minutes - 1 hour 15 minutes - 12-15 bites Presentation tips can really bring these bites to life. I like to arrange them on a nice plate and sprinkle a bit of sea salt on top. This small touch makes them look fancy and special. You can also use cute candy cups if you plan to give them as gifts. In this post, I detailed how to make tasty chocolate chip cookie dough bites. We covered the key ingredients, step-by-step instructions, and helpful tips. You can customize the recipe with different flavors and dietary needs. Storing and serving ideas ensure your bites stay fresh and delicious. Don't be shy about trying these fun variations, and share them with friends or family. Enjoy making these treats whenever you like!

Chocolate Chip Cookie Dough Bites Easy and Fun Treat

Get ready for a sweet adventure with my easy and fun Chocolate Chip Cookie Dough Bites! These tasty treats combine

- 4 medium bell peppers (any color) - 1 cup quinoa - 1 can (15 oz) black beans, rinsed and drained For stuffed bell peppers, the bell peppers are the stars. They provide a sweet crunch and bright color. You can use any color—red, yellow, or green. Each adds a unique taste. Quinoa is a great base. It is packed with protein and fiber. Black beans add heartiness and depth. They also bring a rich flavor. - 1 teaspoon cumin - 1 teaspoon smoked paprika - 1 teaspoon chili powder Spices bring your dish to life. Cumin adds warmth and earthiness. Smoked paprika gives a nice smoky flavor. Chili powder adds a bit of heat. Adjust these spices to match your taste. You can make them mild or spicy. - 1 cup shredded cheese (cheddar or your choice) - Fresh cilantro, for garnish (optional) - Lime wedges, for serving (optional) Cheese is a great topping. It melts beautifully and adds richness. You can choose cheddar or any cheese you love. Fresh herbs like cilantro add a pop of flavor. Lime wedges brighten the dish. They add a zesty touch when squeezed over the peppers. For the full recipe, see the section above. 1. Rinse the quinoa under cold water. This removes any bitter taste. 2. In a medium saucepan, combine 1 cup of quinoa and 2 cups of vegetable broth. 3. Bring this mix to a boil over high heat. 4. Once boiling, reduce heat to low. Cover and simmer for about 15 minutes. 5. The quinoa is done when it is fluffy and the liquid is absorbed. 1. Take 4 medium bell peppers and slice the tops off. 2. Remove the seeds and ribs inside the peppers. 3. Position the peppers upright in a baking dish. This helps them hold the filling. 1. In a large skillet, add a drizzle of olive oil and heat over medium. 2. Sauté 1 medium onion until it turns translucent, about 5 minutes. 3. Add 2 minced garlic cloves and cook for 1 more minute until fragrant. 4. Stir in 1 can of black beans, 1 cup of corn, and 1 cup of diced tomatoes. 5. Mix in 1 teaspoon of cumin, 1 teaspoon of smoked paprika, and 1 teaspoon of chili powder. 6. Season with salt and pepper to taste. Cook for 5 minutes to blend the flavors. 1. Combine the cooked quinoa with the filling in the skillet. Stir until mixed well. 2. Stuff each bell pepper tightly with the quinoa mixture. 3. Sprinkle 1 cup of shredded cheese on top of each stuffed pepper. 4. Cover the baking dish with aluminum foil. Bake at 375°F (190°C) for 25 minutes. 5. Remove the foil for the last 10 minutes. This lets the cheese melt and brown. 6. After baking, let the peppers cool for a few minutes. Enjoy your tasty meal! Adjusting Seasoning to Taste Finding the right taste is key. After mixing in your spices, taste the filling. Add salt or pepper as needed. You can also add a splash of lime juice for a fresh twist. This gives your dish a nice kick. Adding Extra Veggies Feel free to get creative! Chopped zucchini, diced carrots, or spinach can boost nutrition. Just sauté these veggies with the onions and garlic. This adds color and flavor to your stuffed peppers. Checking Quinoa Doneness When cooking quinoa, look for fluffy grains. The water should fully absorb after about 15 minutes. If it seems wet, let it cook a bit longer. Perfect quinoa makes for a better filling. Baking Techniques Cover your stuffed peppers with foil at first. This keeps them moist. Remove the foil in the last 10 minutes to crisp the cheese. Baking at 375°F (190°C) works best for evenly cooked peppers. Garnishes Fresh cilantro adds a nice touch. Sprinkle it on top right before serving. Lime wedges on the side give a zesty flavor that brightens each bite. Pairing Ideas Serve these stuffed peppers with a simple salad or rice. They go well with tortilla chips and salsa, too. You can enjoy them as a hearty main dish or a tasty side. Check out the Full Recipe for more ideas! {{image_2}} Ground Meat Options You can use ground meat in your stuffed bell peppers. Ground beef, turkey, or chicken work well. Cook the meat in the skillet before mixing it with the quinoa and veggies. This adds flavor and protein. Just be sure to drain any excess fat before combining. Tofu or Tempeh Substitutes If you prefer a plant-based option, tofu or tempeh is great. Crumble tofu or chop tempeh into small pieces. Sauté them with the onions and garlic for added taste. This keeps the dish healthy and full of protein. Vegan Cheese Alternatives For a dairy-free version, try vegan cheese. There are many options available now. Nutritional yeast is a tasty substitute too. Sprinkle it on top before baking for a cheesy flavor without dairy. Gluten-Free Options This recipe is naturally gluten-free with quinoa and veggies. Always check labels on canned goods to ensure they are gluten-free. You can use gluten-free grains like brown rice or millet in place of quinoa if you want a different texture. Different Grains You can switch up the grains in your stuffed peppers. Try brown rice, farro, or even barley. Each grain brings its own flavor and texture. Adjust the cooking times as needed to ensure they are fully cooked. Assorted Vegetables Feel free to add other vegetables to your filling. Chopped zucchini, spinach, or mushrooms are great choices. They add nutrients and flavor to your dish. Just make sure to cook them down a bit before mixing with the quinoa. This keeps your filling moist and tasty. For the full recipe, visit the [Full Recipe] section above. To store leftover stuffed bell peppers, place them in a sealed container. Make sure the peppers cool down first. You can keep them in the fridge for about 3 to 5 days. When you want to eat them, just take them out. It’s best to reheat in the oven or microwave. For keeping them fresh, wrap each pepper in plastic wrap or foil. This will help prevent them from drying out. If you notice any moisture, it’s good to let them breathe a bit before sealing them. If you want to save stuffed bell peppers for later, freezing is a great option. First, let them cool completely. Then, wrap each one tightly in plastic wrap. After that, place them in a freezer-safe bag or container. They can last in the freezer for up to 3 months. When you’re ready to eat them, thaw in the fridge overnight. For reheating, put them in the oven at 350°F (175°C) for about 30 minutes. You can also microwave them, but the oven keeps the peppers nice and firm. Follow the Full Recipe to make sure they come out just right! Yes, you can make stuffed bell peppers ahead of time. Prepare the filling and stuff the peppers. Then, cover them and keep them in the fridge for up to two days. When you're ready to eat, just bake them. This saves time on busy days. To prevent soggy peppers, cook the quinoa with less broth. Also, bake the peppers uncovered for part of the time. You can also pre-bake the empty peppers for about 10 minutes before filling them. This helps them hold their shape and stay firm. Stuffed bell peppers pair well with a side salad or rice. You can also add a dollop of sour cream or yogurt on top. Fresh salsa or guacamole adds a nice touch too. These options enhance the meal and provide more flavor. Yes, you can use different types of peppers. Green, yellow, or red bell peppers all work well. You can even try poblano or banana peppers for a twist. Just make sure they are large enough to hold the filling. Leftovers of stuffed bell peppers last about three to four days in the fridge. Store them in an airtight container to keep them fresh. You can reheat them in the oven or microwave. Enjoy them again with the same great flavor! Stuffed bell peppers are tasty, healthy, and easy to make. We covered key ingredients like quinoa, black beans, and spices. You learned how to prep, cook, and store your stuffed peppers. Don’t hesitate to try different flavors or add-ons to match your taste. The beauty of this dish lies in its flexibility. Enjoy experimenting and share your creations with friends. Delicious meals can nourish both body and spirit.

Stuffed Bell Peppers with Quinoa Tasty and Nutritious

Are you ready to spice up your dinner routine? My stuffed bell peppers with quinoa are not only tasty, but

To make delicious veggie sushi rolls, you need these simple ingredients: - 2 cups sushi rice - 2 ½ cups water - 1/4 cup rice vinegar - 1 tablespoon sugar - 1 teaspoon salt - 4 sheets of nori (seaweed) - 1 medium cucumber, julienned - 1 medium carrot, julienned - 1 avocado, sliced - 1 bell pepper, thinly sliced - Soy sauce for dipping - Sesame seeds for garnish Having the right tools makes sushi making easy. Here are the must-haves: - Bamboo sushi mat - Sharp knife - Mixing bowl - Measuring cups and spoons - Rice cooker or saucepan - Plastic wrap (optional) Fresh veggies make your sushi taste great. Here are some tips: - Cucumber: Look for firm cucumbers with smooth skin. Avoid soft spots. - Carrot: Choose bright, crunchy carrots. They should feel heavy for their size. - Avocado: Pick avocados that are slightly soft but not mushy. They should yield gently to pressure. - Bell pepper: Select shiny peppers with no blemishes. The color should be vibrant. These tips will help you pick the best veggies for your rolls. Fresh ingredients make a big difference! To make sushi rice, start by rinsing the rice. Use cold water until it runs clear. This step removes extra starch. After rinsing, drain the rice well. Then, combine the rice and water in a medium saucepan. Bring it to a boil on high heat. Once it boils, lower the heat and cover the pot. Let it simmer for 20 minutes until the water is absorbed. After cooking, remove the pot from heat. Let the rice sit, covered, for 10 more minutes. In a small bowl, mix rice vinegar, sugar, and salt until they dissolve. Fluff the rice with a fork and stir in the vinegar mix. Allow the rice to cool to room temperature. Now that your rice is ready, grab a bamboo sushi mat. Place it on a clean, flat surface. Lay a sheet of nori shiny side down on the mat. Wet your hands to keep the rice from sticking. Take about 1/2 a cup of sushi rice and spread it over the nori. Leave a 1-inch border at the top edge. Next, arrange your veggies: cucumber, carrot, avocado, and bell pepper at the bottom. Start rolling the sushi away from you. Press gently but firmly to keep it tight. Roll until you reach the uncovered edge. Once your roll is complete, use a sharp knife. Wet the knife to prevent sticking. Slice the roll into 8 equal pieces. Repeat the process with the remaining ingredients. For a nice touch, sprinkle sesame seeds on top. Serve with soy sauce for dipping. Enjoy your homemade veggie sushi rolls! You can find the full recipe for these rolls above. One common mistake is not rinsing the sushi rice enough. Rinsing removes extra starch, which helps the rice cook well. If you skip this step, the rice may turn gummy. Another mistake is using too much filling. Overstuffing makes rolling hard and can lead to spills. Keep your fillings thin and balanced for the best rolls. To keep your sushi rice from sticking, wet your hands before handling the rice. This simple step helps the rice slide easily. You can also use a bowl of water nearby. Dip your fingers in the water if the rice starts to stick. Make sure your sushi mat is clean, too, to avoid any extra stickiness. When rolling sushi, start by pressing firmly but gently. This helps hold the shape without squishing the filling. Use the bamboo mat to guide the roll and keep it tight. Roll towards the uncovered edge of the nori. This helps seal the roll. Remember to slice with a sharp, wet knife to get clean cuts. This keeps your rolls looking great and easy to eat. For the complete experience, check out the Full Recipe for Easy Veggie Sushi Rolls. Enjoy your sushi-making adventure! {{image_2}} You can switch up your veggie sushi rolls with fun fillings. Here are some tasty options: - Radish: Adds a nice crunch and a bit of spice. - Zucchini: Light and refreshing, great for summer rolls. - Mango: Sweet and juicy, perfect for a tropical twist. - Tofu: Adds protein and a soft texture. Use grilled or marinated tofu. - Spinach: Fresh and healthy, adds a nice color. Feel free to mix and match! Get creative and use what you love. If you like heat, try making spicy veggie sushi rolls. Start with your usual ingredients and add some spice: 1. Spicy mayo: Mix mayonnaise with sriracha for a creamy kick. 2. Pickled ginger: Adds a zing that wakes up your taste buds. 3. Jalapeños: Thinly slice jalapeños and layer them with your veggies. 4. Wasabi: Spread a thin layer on the nori before adding the rice for extra heat. These additions will give your sushi rolls a fiery flavor. It’s a fun way to make your rolls stand out. Dipping sauces can elevate your sushi rolls. Here are some tasty ideas: - Soy sauce: The classic choice, perfect for dipping. - Sweet chili sauce: Adds a sweet and spicy touch. - Ponzu sauce: A citrus-based sauce that brightens flavors. - Sesame oil: Drizzle a bit for a nutty flavor. - Teriyaki sauce: Sweet and savory, great for dipping. Experiment with different sauces to find your favorite. Each one adds a unique twist to your rolls. For the full recipe, check out Easy Veggie Sushi Rolls 🥒. Enjoy your sushi adventure! To keep your leftover sushi rolls fresh, wrap them in plastic wrap. This helps prevent air from drying them out. Place the wrapped rolls in an airtight container. Store the container in the fridge. Do not leave sushi out at room temperature for long. It can spoil fast. Sushi is best fresh, but you can reheat it. If you want to warm it up, use a pan. Heat the pan on low. Place the sushi in the pan for a short time, about 10 to 15 seconds. This helps keep the rice soft. Avoid using a microwave, as it can make the rice tough. Homemade sushi stays good for about 24 hours in the fridge. After that, the rice can harden, and the veggies may lose their crunch. It's best to eat your veggie sushi rolls sooner rather than later. For a detailed recipe, check the Full Recipe. Yes, you can use brown rice. Brown rice offers a nutty taste and more fiber. However, it cooks longer than white sushi rice. Use short-grain brown rice for the best texture. It won’t be as sticky, but it will still hold together. You might need to adjust the water amount. Follow the cooking instructions closely for the best results. The best way to cut sushi rolls is with a sharp, wet knife. This helps prevent sticking. Start by slicing the roll in half, then cut each half into four pieces. Wipe the knife with a damp cloth between cuts. This keeps the slices clean and neat. A steady hand ensures even pieces and a beautiful presentation. You can keep homemade sushi in the fridge for up to 24 hours. After that, the rice may dry out or lose its taste. Store the sushi in an airtight container to maintain freshness. Make sure to consume it within this time frame for the best flavor and texture. If you have leftovers, enjoy them as a quick snack! For the full recipe, check out the Easy Veggie Sushi Rolls section above. Making sushi at home is fun and rewarding. You learned about the best ingredients, tools, and tips. Preparing sushi rice, rolling it well, and serving it perfectly can impress anyone. Avoid common mistakes, and try different veggie fillings for variety. Always store leftovers properly to enjoy them later. With these steps, delicious sushi is within your reach. Dive in, experiment with new flavors, and enjoy your sushi-making journey!

Easy Veggie Sushi Rolls Quick and Tasty Recipe Guide

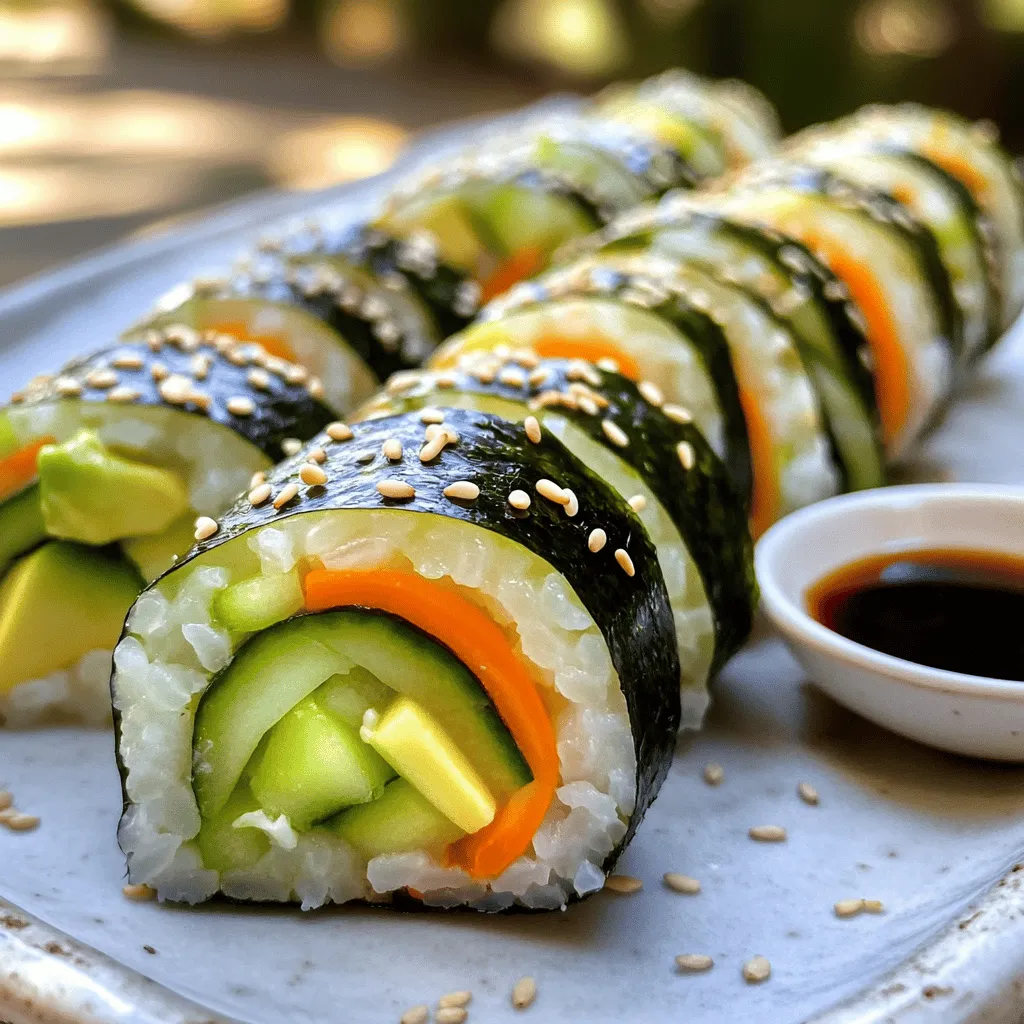
Craving a fresh and tasty dish that’s easy to make? Look no further! In this guide, I’ll show you how

To make zesty zucchini noodles, you need these key items: - 4 medium zucchinis - 1 ripe avocado - 1 cup fresh basil leaves - 2 cloves garlic - 2 tablespoons lemon juice - 1/4 cup pine nuts (or walnuts) - 1/4 cup nutritional yeast (for a cheesy flavor) - Salt and pepper to taste For extra taste, consider adding: - 1 tablespoon olive oil - Cherry tomatoes, halved (for garnish) - Crushed red pepper flakes (for heat) Each ingredient brings unique health benefits: - Zucchini: Low in calories and high in fiber, great for digestion. - Avocado: Packed with healthy fats, good for heart health. - Basil: Full of antioxidants, helps fight inflammation. - Garlic: Boosts the immune system and adds flavor. - Lemon juice: High in vitamin C, supports skin health. - Pine nuts: Provide protein and healthy fats, good for energy. - Nutritional yeast: Rich in B vitamins, great for energy and mood. - Salt and pepper: Enhance flavor, making meals more enjoyable. Using these fresh ingredients makes your zucchini noodles not only tasty but also nutritious. For the full recipe, check out the details above. To start, rinse and dry your zucchinis. Use a spiralizer to make long noodle shapes. If you don’t have one, a vegetable peeler works too. Just slice the zucchini into thin strips. After spiralizing, place the noodles in a colander. This lets excess water drain away, so your dish won’t be soggy. Next, grab a food processor. Add one ripe avocado, fresh basil leaves, and two cloves of garlic. Then, pour in two tablespoons of lemon juice. Toss in a quarter cup of pine nuts or walnuts. Add a quarter cup of nutritional yeast for a cheesy flavor. Season with salt and pepper. Blend until the mixture is smooth. If it feels too thick, add a bit of olive oil or water to loosen it up. Now, take the drained zucchini noodles and place them in a large mixing bowl. Pour the avocado pesto over the noodles. Toss gently until all the noodles are coated. For serving, plate the zoodles in a nice nest shape. Top with halved cherry tomatoes for color, and sprinkle with crushed red pepper flakes for some heat. Optionally, add a drizzle of olive oil for extra flavor. For the full recipe, check the details above! Enjoy your healthy and flavorful meal! To make zucchini noodles, the right cut matters. A spiralizer works best for long, thin strands. If you lack one, try a vegetable peeler. Just peel the zucchini into thin strips. You can also use a knife to slice them into thin ribbons. Aim for even cuts. This helps them cook uniformly if you choose to sauté them. If you have leftover zoodles, store them in a container. Use a paper towel to absorb excess moisture. This keeps them fresh longer. Zucchini noodles can last up to three days in the fridge. When you’re ready to use them, just toss them in a pan for a quick warm-up. To boost flavor, try adding fresh herbs like parsley or cilantro. Toss in some sautéed garlic for a nice kick. A squeeze of lemon can brighten the dish. You can also add protein. Grilled chicken or shrimp pairs well with zoodles. Don't forget to check the full recipe for more inspiration! {{image_2}} Adding protein to your zucchini noodles makes them a full meal. You can use grilled chicken, shrimp, or tofu. These proteins blend well with the fresh taste of zoodles. For a quick option, rotisserie chicken works great. Just shred it and mix it in. If you prefer plant-based options, try chickpeas or lentils. They add texture and protein without meat. Zucchini noodles are versatile and can pair with many sauces. Besides avocado pesto, you can try marinara or a creamy Alfredo. For a spicy kick, add sriracha or chili oil. You can also make a lemon-garlic sauce for a light touch. Each sauce changes the dish’s flavor, so feel free to experiment. Zucchini noodles can shine in salads too. Mix them with cherry tomatoes, cucumbers, and bell peppers for a fresh crunch. Add a simple vinaigrette made of olive oil and vinegar. For extra flavor, toss in herbs like parsley or cilantro. You can also add nuts or seeds for a nice crunch. Serve it cold for a refreshing summer meal. If you want to try a full recipe, check out the Zesty Zucchini Noodles with Avocado Pesto. To store zucchini noodles, first, let them dry. Place the zoodles in a colander to remove excess water. After they dry, pack them in an airtight container. Keep the container in the fridge. Zucchini noodles stay fresh for about 3 days. If you see any water, drain it out. This keeps the noodles crisp and tasty. For avocado pesto, use a jar with a tight lid. Store it in the fridge right after making it. To avoid browning, press plastic wrap against the pesto surface. This helps keep the color and flavor fresh. Use the pesto within 3 days for the best taste. You can freeze zucchini noodles for later meals. First, blanch them in boiling water for about one minute. Next, cool them quickly in ice water. Drain and dry the zoodles. Then, pack them in freezer-safe bags. Remove as much air as possible. Frozen zoodles are good for up to 3 months. When you’re ready to use them, thaw in the fridge overnight or cook directly from frozen. Enjoy your healthy zucchini noodles whenever you want! For the full recipe, check out the details in the previous sections. Zucchini noodles, or zoodles, are made from fresh zucchini. They look like pasta but are much lighter. You can eat them raw or cooked. They are a great alternative to traditional pasta. This makes them perfect for a healthier meal. You can enjoy the same flavors with fewer carbs. Zucchini noodles can last about 3 to 5 days in the fridge. Keep them in an airtight container. If you see moisture, try to drain it before storing. This helps them stay fresh longer. If they start to get slimy, it’s time to toss them out. You can certainly cook zucchini noodles! They work well in many dishes. Lightly sauté them for 2-3 minutes to warm them up. Avoid overcooking, or they may become mushy. You can serve them with sauces, like in the Full Recipe for zesty zucchini noodles with avocado pesto. Enjoy experimenting with different flavors! Zucchini noodles, or zoodles, offer a tasty, healthy twist to meals. We explored their key ingredients, from essential to optional, and learned about their nutrition. The step-by-step guide made it easy to prepare zoodles and avocado pesto. We shared tips on cutting, storing, and enhancing flavors. Variations let you customize for any meal. Lastly, proper storage keeps your zoodles fresh. Enjoy your cooking adventure with zoodles, and remember, there's a lot you can create with them!

Healthy Zucchini Noodles Easy and Flavorful Recipe

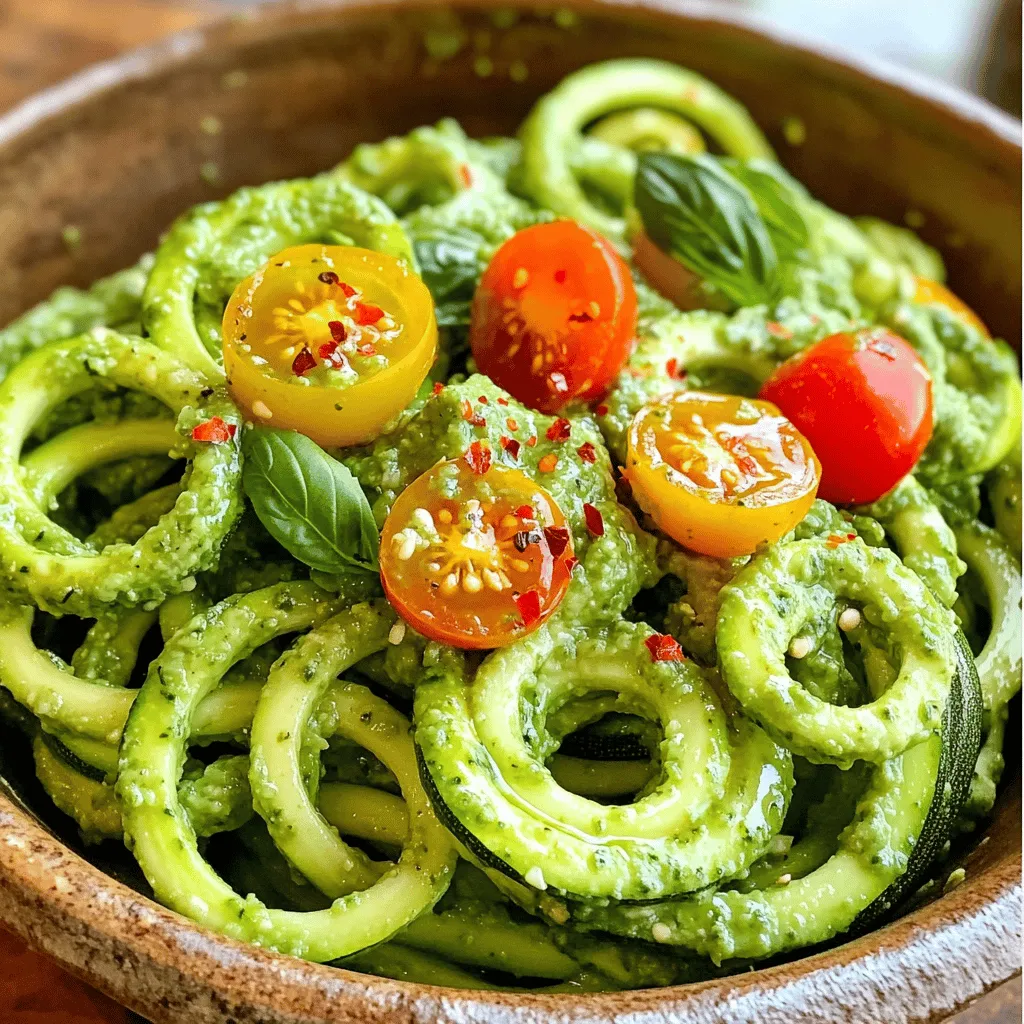
Ready to brighten up your meals with a healthy twist? Let’s dive into my easy and flavorful recipe for Healthy

Older posts
Newer posts
← Previous Page1 Page2 Page3 Page4 … Page6 Next →

dsad

© 2025 momdishmagic • Built with GeneratePress

Our Policies

  • Copyright Policy
  • Cookie Policy
  • GDPR Policy
  • Privacy Policy
  • Disclaimer
  • Terms Of Use

More Information

  • Home
  • About
  • Contact
  • Appetizers
  • Dessert
  • Dinner
  • Drinks
©2025, momdishmagic About Back To Top