Skip to content
DisclaimerTerms Of UseGDPR PolicyCookie Policy

momdishmagic

  • Home
  • Drinks
  • Appetizers
  • Dinner
  • Dessert
  • About
  • Contact
  • Privacy Policy
DisclaimerTerms Of UseGDPR PolicyCookie Policy

Emma

- 2 tablespoons coconut oil - 1 small onion, finely chopped - 3 cloves garlic, minced - 1 tablespoon fresh ginger, grated - 2 teaspoons curry powder - 1 teaspoon turmeric powder - 1 can (15 oz) chickpeas, drained and rinsed - 1 can (14 oz) coconut milk - 1 cup vegetable broth - 1 red bell pepper, diced - 1 cup fresh spinach - 1 tablespoon lime juice - Salt and pepper to taste - Fresh cilantro for garnish I love using fresh ingredients in my cooking. They make a big difference in flavor. For this recipe, you need coconut oil. It gives a rich taste. The small onion adds sweetness. Garlic and ginger bring warmth. Curry powder and turmeric are key spices. They make the dish bright and aromatic. Chickpeas are the star. They add protein and texture. Coconut milk makes the sauce creamy. Vegetable broth adds depth. The red bell pepper gives a nice crunch. Fresh spinach adds color and nutrients. Lime juice brightens the dish. Finally, fresh cilantro adds a pop of flavor. For the full recipe, check out the Full Recipe section. Each ingredient plays a role in creating a cozy meal. Enjoy experimenting with these flavors! Start by gathering all your ingredients. This makes cooking fun and easy. Here are some tips for chopping and mincing: - Onion: Cut the onion in half. Place the flat side down. Slice it into thin strips, then chop it into small pieces. - Garlic: Take the garlic cloves and peel them. Use a knife to press down and slightly crush each clove. This makes mincing easier. - Ginger: Peel the ginger with a spoon. Grate it finely to get the most flavor. These steps help bring out the best in your dish. Now let’s cook! Follow these detailed steps: 1. Heat 2 tablespoons of coconut oil in a large pot over medium heat until it melts. 2. Add the chopped onion, minced garlic, and grated ginger. Sauté them for 4-5 minutes until the onion turns soft and clear. 3. Stir in 2 teaspoons of curry powder and 1 teaspoon of turmeric powder. Cook for 1-2 minutes to wake up the spices. 4. Add 1 can of drained chickpeas. Mix well to coat them with the spices. 5. Pour in 1 can of coconut milk and 1 cup of vegetable broth. Stir until everything combines. Bring it to a gentle simmer. 6. Add 1 diced red bell pepper. Cook for 5-7 minutes until the peppers become tender. 7. Stir in 1 cup of fresh spinach. Cook for another 2-3 minutes until it wilts. 8. Finish with 1 tablespoon of lime juice and season with salt and pepper to taste. 9. Serve hot, garnished with fresh cilantro for a pop of color and flavor. Following these steps ensures your coconut curry chickpeas turn out tasty and cozy. Coconut curry chickpeas taste great on their own. However, you can elevate the meal by serving it with: - Rice: Jasmine or basmati rice pairs well. - Naan: Soft naan bread is perfect for dipping. - Salad: A fresh cucumber salad adds a nice crunch. - Yogurt: A dollop of plain yogurt can balance the spices. These ideas enhance the dish and make it a complete meal. Check out the Full Recipe for more details! To make your coconut curry chickpeas shine, balance the spices well. Start with the curry powder. Taste as you go. If it feels too strong, add more coconut milk. This will mellow the flavor. Add lime juice at the end. It gives a nice tartness that brightens the dish. Adjust salt and pepper carefully. These small tweaks really change the dish. For the best texture, use medium heat while cooking. This helps the onion and garlic soften without burning. Stir often to prevent sticking. When you add chickpeas, mix them well with the spices. This lets the flavors seep into them. Use fresh spinach; it wilts nicely and adds color. Serve right away to keep everything fresh. Avoid overcooking the vegetables. They should be tender but still crisp. If you cook them too long, they become mushy. Don't skip the lime juice. It adds needed acidity. Also, ensure you rinse the chickpeas. This removes excess sodium and helps them absorb flavors better. Follow these tips for a cozy and tasty meal. You can find the full recipe to guide you along! {{image_2}} You can easily make this coconut curry chickpeas recipe vegan and gluten-free. The main ingredients are naturally plant-based. The coconut milk adds creaminess without dairy. Using chickpeas keeps it hearty and filling. For gluten-free options, ensure that your vegetable broth is certified gluten-free. Most brands are, but it’s good to check. This dish is perfect for anyone who wants a warm meal without animal products or gluten. If you don’t have chickpeas, you can use lentils or white beans. They bring a nice texture and protein. For coconut milk, you can try almond milk or cashew cream. These options give a different flavor but still work well in the dish. You can also use fresh vegetables. Zucchini or carrots can replace the red bell pepper. They add color and crunch. Just remember to adjust cooking times for different veggies. To boost the flavor, add a splash of lime juice. It brings brightness and balances the spices. Fresh herbs like cilantro or basil can also add layers of taste. A pinch of red pepper flakes or a dash of hot sauce can add heat. If you love garlic, try roasting it before adding. Roasted garlic has a sweet, rich taste that changes the dish. Feel free to get creative. These changes let you make the recipe your own. For the full recipe, check out the details above. After you enjoy your coconut curry chickpeas, storing leftovers is simple. Use an airtight container to keep them fresh. Let the dish cool down to room temperature before sealing. They can last up to five days in the fridge. If you want to keep them longer, freezing is a great option. Just portion the curry into freezer-safe bags or containers. Be sure to remove excess air to prevent freezer burn. This way, you can enjoy a cozy meal anytime. When it's time to eat your leftovers, reheating is easy. You can use a microwave or a stovetop. If using a microwave, place the curry in a bowl and cover it. Heat it in short bursts, stirring in between. This keeps the flavor intact. On the stovetop, gently warm the curry over low heat. Stir occasionally to avoid sticking. If the curry seems thick, add a splash of water or broth. This helps restore the creamy texture. Coconut curry chickpeas can sit in the fridge for about five days. In the freezer, they can last up to three months. When you're ready to eat them, just thaw in the fridge overnight. Always check for any off smells or changes in texture before eating. Keeping track of shelf life ensures you enjoy the best flavors from your meals. Yes, you can use dried chickpeas! First, soak them overnight. Then, cook them until tender. This will take about 1-2 hours. Once cooked, use them just like canned chickpeas. Dried chickpeas add a nice texture. They are also more cost-effective. Just remember to adjust cooking time. Coconut curry chickpeas are versatile. You can serve them with: - Steamed jasmine rice - Quinoa for a nutty flavor - Warm naan bread to scoop up the curry - A fresh salad for crunch - Roasted veggies for added nutrition These sides will enhance the meal. They also balance the rich flavors of the curry. This recipe is mild to medium in spice. The curry powder gives warmth, but it's not overpowering. If you like more heat, add red pepper flakes or fresh chili. You can also use a spicier curry powder. Adjust to your taste! Enjoy this cozy meal without the fear of too much spice. For the full recipe, check out the earlier section. This blog post covers a tasty coconut curry with chickpeas. You learned about the main ingredients, step-by-step cooking, and storage tips. I shared advice to enhance flavors and avoid mistakes. You can adjust the recipe to fit your diet or taste. Cooking this dish is simple and rewarding. Enjoy your meal and the wonderful scents that fill your kitchen. With these tips, you're set for a great dish that brings warmth and joy to your table.

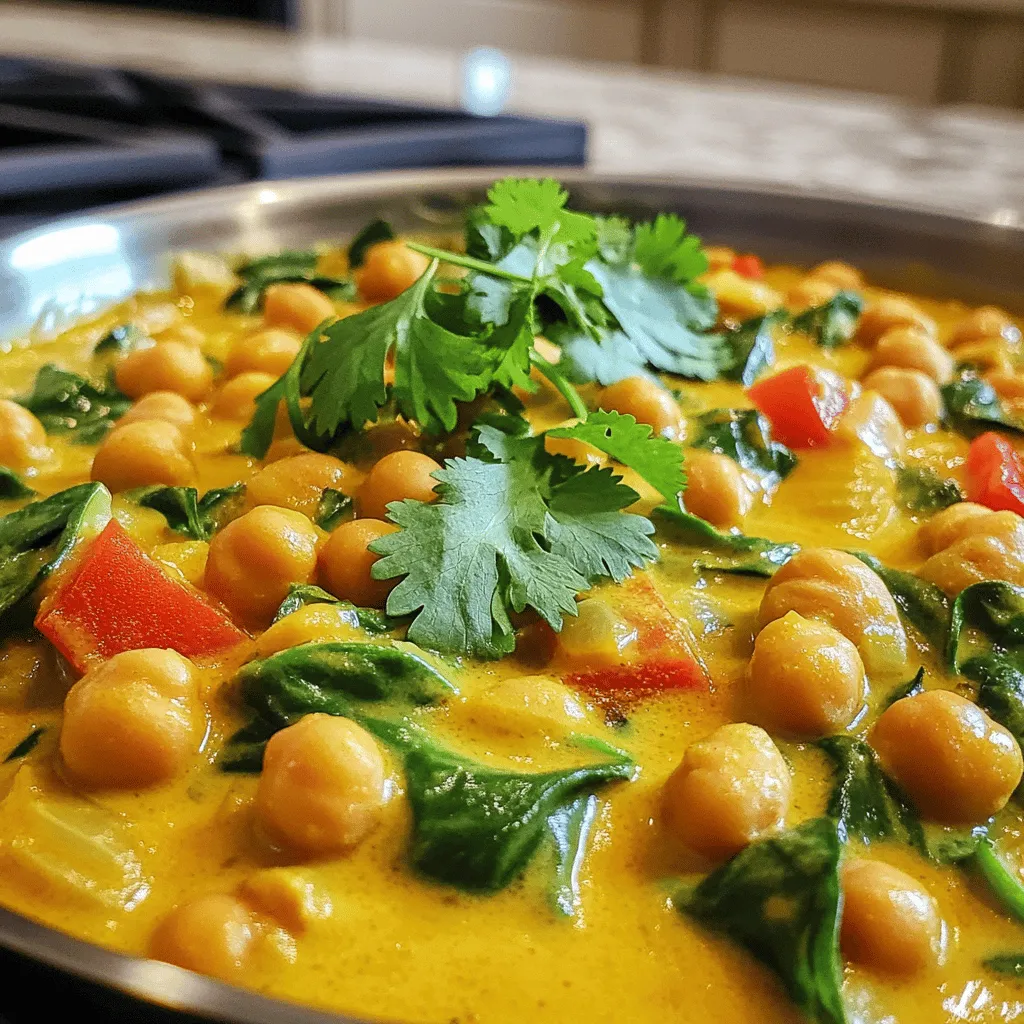
Coconut Curry Chickpeas Flavorful and Cozy Meal

Are you ready for a warm, cozy dish that packs a punch in flavor? This Coconut Curry Chickpeas recipe is

To make these vegan chocolate chip cookies, you need key ingredients. Here’s what you need: - 1 cup almond flour - 1 cup all-purpose flour - 1 teaspoon baking soda - 1/2 teaspoon salt - 1/2 cup coconut oil, melted - 1/2 cup brown sugar - 1/4 cup granulated sugar - 1/4 cup unsweetened applesauce - 1 tablespoon vanilla extract - 1 cup dairy-free chocolate chips These ingredients work well together to create a soft, chewy cookie. The almond flour adds a nice nutty flavor, while the coconut oil keeps cookies moist. If you want to change things up, consider adding: - 1/4 cup chopped walnuts - 1/4 cup shredded coconut - A pinch of cinnamon or sea salt These add-ins can give your cookies a fun twist. Walnuts add crunch, while coconut brings sweetness. A sprinkle of sea salt balances the flavors nicely. You can swap ingredients if you need to. Here are some ideas: - Use oat flour instead of almond flour. - Replace coconut oil with any neutral oil. - For sweetness, try maple syrup or agave instead of sugar. These swaps will still give you tasty cookies. Always remember to adjust the amounts when substituting for liquids. For the full recipe, check out the instructions provided earlier. Start by gathering your ingredients. You need almond flour, all-purpose flour, baking soda, salt, melted coconut oil, brown sugar, granulated sugar, unsweetened applesauce, vanilla extract, dairy-free chocolate chips, and optional walnuts. 1. Preheat your oven to 350°F (175°C). Line a baking sheet with parchment paper. 2. In a large bowl, whisk together the almond flour, all-purpose flour, baking soda, and salt. Make sure they blend well. 3. In another bowl, mix the melted coconut oil, brown sugar, and granulated sugar until creamy. This step adds a nice texture. 4. Add the applesauce and vanilla extract to the sugar mixture. Stir until everything is mixed well. 5. Gradually add the dry ingredients to the wet mix. Stir gently until just combined. Don’t overmix or the cookies will be tough. 6. Fold in the dairy-free chocolate chips and walnuts, if you choose to use them. Now, it’s time to bake. 1. Scoop out 1.5 tablespoons of dough. Place them on the prepared baking sheet, leaving about 2 inches between each scoop. 2. Gently flatten the dough balls with your palm. This helps them spread while baking. 3. Bake for 10-12 minutes. Look for golden edges and set tops. 4. If you want a softer cookie, take them out when they look set but not too brown. Let the cookies cool down to keep their shape. 1. Once baked, remove the cookies from the oven. Let them cool on the baking sheet for 5 minutes. 2. Transfer them to a wire rack to cool completely. This step prevents sogginess. 3. For serving, plate the cookies on a colorful platter. You can add a small bowl of dairy-free chocolate chips for dipping or sprinkling on top. Enjoy with a glass of almond milk. For the full recipe, check out the details above. Happy baking! To get that perfect chew in your cookies, use almond flour. This flour keeps the cookies moist. You can also add a bit more applesauce. Just a tablespoon more can make a big difference. Another key is not to overbake them. Watch for light golden edges. The centers should look soft when you take them out. To stop cookies from spreading too much, chill the dough. Place the dough in the fridge for about 30 minutes. This helps the fats firm up. Also, use a mix of flours. Almond flour helps with texture, while all-purpose flour gives structure. Lastly, space the dough balls apart on the baking sheet. This allows room for the cookies to puff up instead of spread out. When baking vegan, always check your ingredients. Make sure your chocolate chips are dairy-free. Read the labels carefully. Use fresh baking soda for the best rise. Measuring accurately is vital. Level off your flour and sugar for consistency. Finally, trust your taste! If the dough tastes good, the cookies will too. For a full guide, check out the Full Recipe. {{image_2}} You can make gluten-free vegan chocolate chip cookies. Just swap out regular flour for gluten-free flour. Use a cup-for-cup blend to keep the texture. This way, you get tasty cookies without gluten. Gluten-free cookies still taste great! Add fun flavors to your cookies. A few drops of mint extract give a fresh twist. For a citrusy taste, add orange zest. You can also mix in spices like cinnamon or nutmeg for warmth. These flavors can change the cookie experience and keep it exciting. If you want a nut-free cookie, skip the almond flour and walnuts. Use only all-purpose flour or a nut-free flour blend. This change makes it safe for those with nut allergies. Your cookies will still be soft and chewy, just without the nuts. For the full recipe, try the Heavenly Vegan Chocolate Chip Cookies. You’ll love these tasty treats! To keep your vegan chocolate chip cookies fresh, place them in an airtight container. This helps them stay soft and tasty. If you want to keep them longer, store them at room temperature for up to five days. For extra freshness, you can add a slice of bread in the container. The bread will help keep the cookies moist. Freezing these cookies is easy and smart. First, let them cool completely. Then, place the cookies in a single layer on a baking sheet. Freeze them for about two hours. Once frozen, transfer them to a freezer-safe bag or container. Label the bag with the date. You can freeze them for up to three months. When you want a cookie, just take one out! Reheating your vegan cookies brings back their warm goodness. Preheat your oven to 350°F (175°C). Place the cookies on a baking sheet and heat for about 5-10 minutes. You can also use the microwave. Just heat them for about 10-15 seconds. Enjoy them warm for a delightful treat! Yes, you can use different flours. Almond flour adds a nutty taste. Whole wheat flour makes the cookies more hearty. You might need to adjust the liquid if you switch flours. You want the dough to feel right, not too dry or too wet. You can swap out the sugars for natural sweeteners. Try using mashed bananas or dates. You can also add oats for fiber. Using less oil or swapping it for applesauce can cut down fat too. These changes make the cookies tasty and nutritious. To soften coconut oil, you can warm it slightly. Place the jar in hot water for a few minutes. You can also microwave it for about 10 seconds. Just make sure it does not melt completely. You want it soft, not liquid. Check out the Full Recipe above to make these delicious cookies! You learned how to make vegan chocolate chip cookies step-by-step. We covered the key ingredients, tips, and variations for perfect cookies. You can adjust flavors and ingredients to fit your needs. In the end, baking these cookies can be fun and easy. They taste great and are good for you too! Enjoy your delicious treats and share them with friends or family. Happy baking!

Vegan Chocolate Chip Cookies Delightful Easy Treat

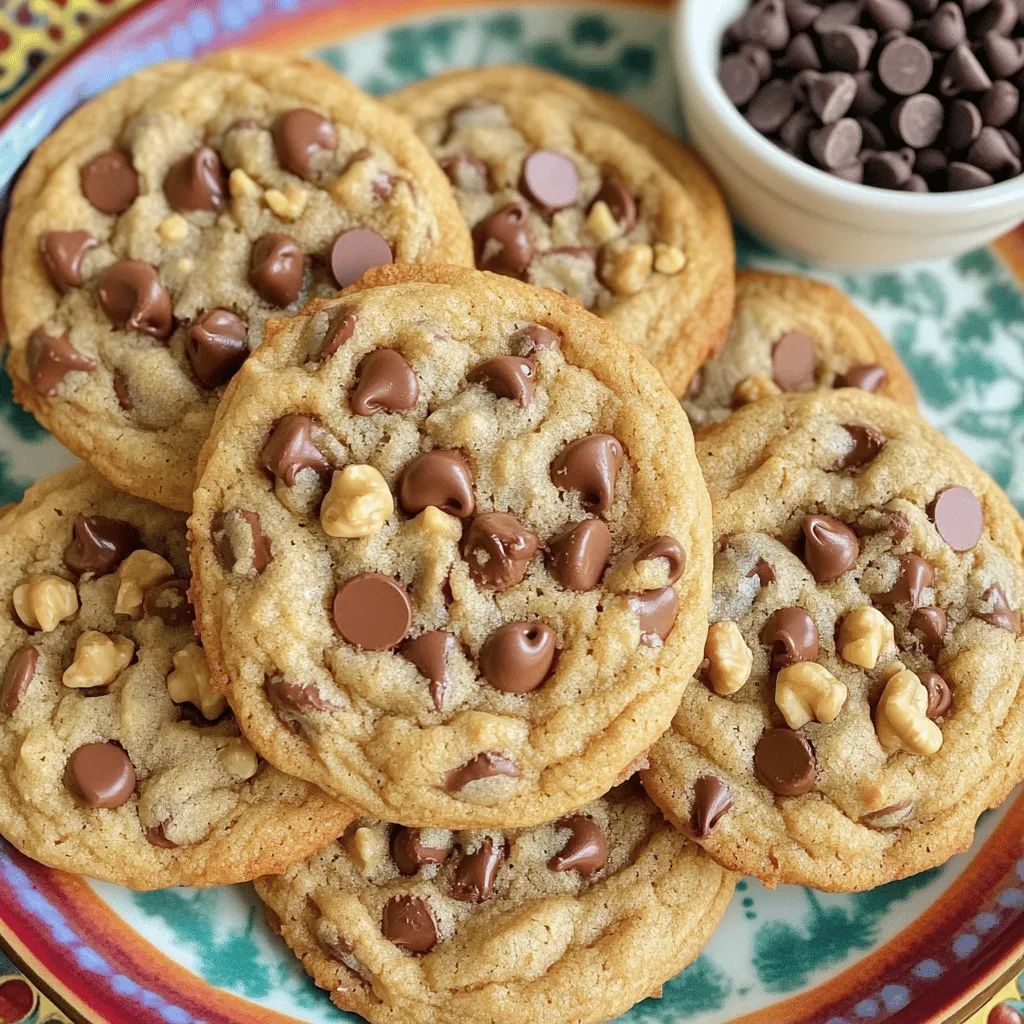
Craving a sweet treat that’s both delicious and plant-based? You’re in the right place! I’ll guide you through making vegan

To make this tasty salsa verde, you need a few fresh ingredients. Here’s what you will need: - 10 tomatillos, husked and rinsed - 1 small onion, quartered - 2 cloves garlic, peeled - 1-2 jalapeño peppers, stems removed (adjust for spice level) - 1 cup fresh cilantro, packed - 1 lime, juiced - Salt to taste - 1 tablespoon olive oil (optional) Tomatillos are the star of this dish. They give a bright and tangy flavor. The onion and garlic add depth. Jalapeños bring heat, but you can adjust them to your taste. Fresh cilantro gives it a fresh bite, while lime juice adds zing. Salt makes everything pop. Olive oil is optional but adds richness. Want to mix it up a bit? Here are some optional ingredients to consider: - Avocado for creaminess - A pinch of cumin for warmth - A handful of fresh mint for a unique twist - Roasted peppers for a smoky flavor Adding these can change your salsa verde. Use what you like or have on hand. Each addition brings a new taste to your table. If you can’t find tomatillos, use green tomatoes or even green bell peppers. For garlic, onion powder or shallots can work in a pinch. If you dislike cilantro, try parsley or basil instead. Lime juice can be swapped with lemon juice for a different tang. Don’t let missing ingredients stop you; be creative! For the full recipe, check out the detailed instructions to whip up this zesty delight. To make quick and easy salsa verde, you need to gather your ingredients first. The main star is tomatillos. They give the salsa its zesty green flavor. You'll also need onion, garlic, jalapeños, cilantro, lime, salt, and olive oil if you like. 1. Start by boiling water in a medium pot over high heat. 2. Once the water is boiling, add the husked tomatillos. Cook them for 5-7 minutes. They should become soft and their skin will wrinkle a bit. 3. While the tomatillos cook, prepare the rest of your ingredients. Quarter the onion and peel the garlic. Remove the stems from the jalapeños. 4. After the tomatillos are ready, drain them and let them cool slightly. 5. In a blender, combine the softened tomatillos, onion, garlic, jalapeños, and packed cilantro. Blend until the mix is smooth. After blending, squeeze in the fresh lime juice. Add salt to taste. If you want a richer flavor, blend in a tablespoon of olive oil. Taste the salsa and adjust the seasoning if needed. If you want it cooler, add more lime juice. Finally, transfer your salsa verde to a bowl. Chill it in the fridge for about 15 minutes. This step helps the flavors come together beautifully. Enjoy your salsa with chips or tacos! You can find the full recipe in the article. To make the best salsa verde, use fresh tomatillos. Choose ones that are firm and bright green. If they feel soft, they may be overripe. When blending, start with the tomatillos and add onion and garlic next. This helps create a smooth blend. Always taste the salsa before serving. Adjust the salt and lime juice to fit your taste. A little balance can make a big difference! This salsa verde shines with many foods. You can serve it with tortilla chips for a tasty snack. It also goes well with grilled meats, like chicken or pork. Try drizzling it over tacos or burritos for extra flavor. You can even add it to eggs for a zesty breakfast. The fresh taste brightens up any dish. To boost the flavor, let the salsa sit in the fridge for about 15 minutes. This step allows the flavors to mix well. If you want more heat, add a jalapeño while blending. For a smoky flavor, try roasting the tomatillos first. Adding a pinch of sugar can balance out the acidity, too. Remember, experimentation is key to finding your favorite blend! {{image_2}} If you love heat, try adding more jalapeños. Use two or three peppers for a kick. You can also add a serrano pepper for an extra layer of spice. Another great option is to toss in a pinch of cayenne pepper. This will add warmth without changing the flavor. For a low-carb version, skip the olive oil. You can also serve salsa verde with fresh veggies instead of chips. Celery sticks, cucumber slices, or bell pepper strips make great dippers. This keeps your dish light and fresh while still being full of flavor. Want to mix it up? Add fruit like mango or pineapple for a sweet twist. These fruits balance the heat and give a nice contrast. You can also try herbs like mint or parsley for a different taste. Each of these ideas can make your salsa verde unique and exciting. For the full recipe, check out Zesty Green Magic Salsa Verde. To keep your salsa verde fresh, store it in an airtight container. Glass jars work well. Make sure the lid is tight to keep out air. Place it in the fridge right after making it. This way, it stays tasty for longer. If you want to save salsa verde for later, freezing is a great option. Pour it into freezer-safe bags or containers. Leave some space at the top, as it will expand when frozen. Salsa verde can last up to three months in the freezer. When you want to use it, thaw it in the fridge overnight. Salsa verde will last about one week in the fridge. Look for signs of spoilage, like changes in color or a bad smell. If it looks dry or has mold, toss it. Always trust your nose and eyes. Keeping salsa verde fresh ensures you enjoy that burst of flavor every time! For the full recipe, check out Zesty Green Magic Salsa Verde. Yes, you can make salsa verde ahead of time. It actually tastes better after sitting for a while. This allows the flavors to blend nicely. Store it in an airtight container in the fridge. It will stay fresh for about a week. If you want to prep for a party, this is a great option. I often make a batch the day before. It saves time and makes serving easy. Salsa verde can be spicy, but you control the heat. Jalapeños add heat, so use one for mild salsa. If you want more spice, add two peppers. For less heat, remove the seeds and membranes from the jalapeños. You can also swap in a milder pepper, like a poblano. Taste as you go to find your perfect balance. This way, you make it just right for your taste buds. Salsa verde is very versatile. You can enjoy it with tortilla chips for a snack. It also makes a great topping for grilled meats like chicken or fish. Use it on tacos, enchiladas, or quesadillas for extra flavor. I love to drizzle it over roasted vegetables too. The zesty taste adds a fresh kick. Get creative and try it with your favorite dishes! Check out the Full Recipe for more ideas. In this post, we explored how to make quick and easy salsa verde. We covered key ingredients, along with options to change the flavor. I shared step-by-step instructions and tips for perfecting your salsa. You learned variations for spice levels and healthy swaps. Lastly, we discussed how to store salsa verde and answered common questions. Now, you can enjoy your salsa verde, tailored to your taste. Happy cooking!

Quick and Easy Salsa Verde Tasty and Simple Recipe

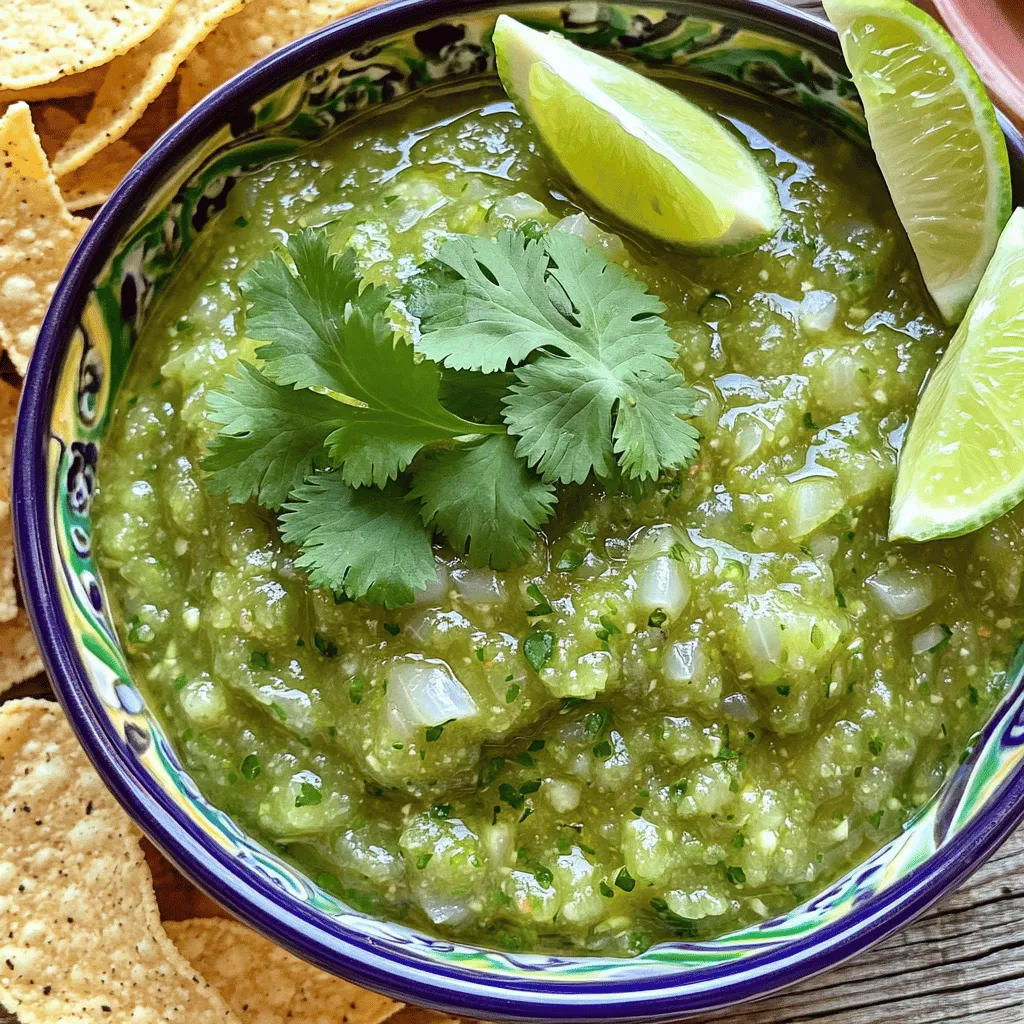
Are you craving a fresh and zesty dip? Look no further! This Quick and Easy Salsa Verde recipe is your

- 4 medium zucchinis - 1 cup ricotta cheese - 1 cup mozzarella cheese, shredded - 1/2 cup Parmesan cheese, grated - 1 tablespoon Italian seasoning - 1 egg - 1 cup marinara sauce - 1/2 pound ground turkey or beef (optional) - 2 cloves garlic, minced - Salt and pepper to taste - Fresh basil for garnish To make the best zucchini lasagna boats, start with fresh ingredients. I prefer using medium zucchinis because they are easy to handle and cook well. Next, I use a blend of cheeses for richness. Ricotta gives a creamy base. I add mozzarella for meltiness and Parmesan for that sharp touch. If you want extra protein, ground turkey or beef works great. Herbs and seasonings add lots of flavor. I always reach for Italian seasoning, garlic, salt, and pepper. These make the filling taste amazing. Finally, marinara sauce ties everything together. It adds moisture and a burst of tomato flavor. You can check out the Full Recipe for complete details. With these ingredients, you can create a healthy and simple dinner that everyone will love. 1. Preheating the oven Start by preheating your oven to 375°F (190°C). This step is key for even cooking. 2. Preparing the zucchini boats Grab your zucchinis and slice them in half lengthwise. Use a spoon to scoop out the center, making room for the filling. Keep the scooped-out flesh—it adds great flavor. 3. Cooking the ground meat (if using) If you opt for meat, heat a drizzle of olive oil in a skillet over medium heat. Add the ground turkey or beef, cooking it until it’s browned. Break it apart as it cooks. Add minced garlic and let it cook for one more minute. Once ready, take it off the heat. 1. Combining cheese and seasoning In a mixing bowl, combine ricotta cheese, 1/2 cup of mozzarella, and grated Parmesan cheese. Add Italian seasoning, one egg, salt, and pepper. Mix this until everything is well combined. 2. Incorporating zucchini flesh and meat Next, stir the reserved zucchini flesh into the cheese mixture. If you cooked meat, add that too. This mixture is the heart of your dish. 1. Layering marinara sauce Spread a layer of marinara sauce at the bottom of a baking dish. This prevents sticking and adds flavor. 2. Filling the zucchini boats Now, take each zucchini boat and fill it with the cheese and meat mixture. Press it down gently to fit everything in. 3. Topping with cheese Pour the remaining marinara sauce over the filled boats. Sprinkle the last bit of mozzarella cheese on top. This will create a bubbly, cheesy crust when baked. 1. Covering and baking Cover your baking dish with aluminum foil. Place it in the preheated oven and bake for 25 minutes. This step helps the zucchini cook through. 2. Final uncovered baking step After 25 minutes, remove the foil. Bake for another 10-15 minutes. You want the cheese to be bubbly and golden. Let the boats cool for a few minutes before serving. For the full recipe, refer to the earlier section. Fresh herbs can make your dish pop with flavor. I love using basil or oregano in my zucchini lasagna boats. These herbs bring a bright taste that dried herbs can't match. When choosing zucchini, look for firm, shiny ones. The best zucchinis are small to medium-sized. They will hold their shape and flavor better than larger ones. To avoid soggy boats, salt your zucchini. Slice them in half and sprinkle salt on the cut side. Let them sit for 15 minutes. This helps draw out excess moisture. Afterward, pat them dry with a paper towel. For baking, cover your dish for the first half of the time. This keeps steam in, making the cheese melt well. Remove the cover for the last part to get that golden top. You can switch up the cheeses in this recipe. Try feta or goat cheese for a different taste. If you want more protein, add cooked chicken or mushrooms. You can also toss in other veggies like spinach or bell peppers. This makes the dish more colorful and even healthier. The Full Recipe gives you a great base to start from, but feel free to get creative! {{image_2}} You can make these boats meat-free by using lentils or mixed veggies. Lentils add protein and fiber. You can use chopped bell peppers, spinach, or mushrooms for more flavor. Experiment with different types of cheese too. Try feta for a tangy twist or goat cheese for creaminess. Each cheese gives a unique taste and texture to your dish. For a low-carb meal, skip the meat and focus on cheese. Use a mix of ricotta, mozzarella, and Parmesan for a rich filling. You can also swap the pasta layers with cauliflower rice. This keeps the dish hearty while reducing carbs. The cauliflower adds fiber and blends well with the flavors. If you love heat, add spicy sausage or diced jalapeños. This brings a kick to your meal. You can also sprinkle chili flakes or drizzle hot sauce on top. The spice balances the creamy cheese and sweet marinara. This option is perfect for those who enjoy bold flavors. For more ideas and flavors, check the Full Recipe! To keep your zucchini lasagna boats fresh, store them in an airtight container. Place a layer of parchment paper between layers if stacking. Refrigerate them within two hours of cooking. They will last for about 3 to 4 days. If you want to freeze them, do this before baking. Wrap each zucchini boat tightly in plastic wrap, then place them in a freezer-safe bag. This way, they can stay fresh for up to three months. When you're ready to eat, just thaw them in the fridge overnight. For reheating, the oven works best. Preheat your oven to 350°F (175°C). Place the zucchini boats in an oven-safe dish. Cover them with foil to keep moisture in. Bake for about 20 minutes or until heated through. If you prefer the microwave, use it on medium heat for 2 to 3 minutes. However, this may make the zucchini a bit soft. To keep the texture right, avoid overcooking. Enjoy your delicious Zucchini Lasagna Boats! Yes, you can prepare zucchini lasagna boats ahead of time. First, make the filling and fill the zucchini boats. Then, cover them tightly with foil or plastic wrap. Store your boats in the fridge for up to two days. You can also freeze them for longer storage. Just make sure to wrap them well to prevent freezer burn. When ready to cook, thaw in the fridge overnight. Then, bake as instructed in the Full Recipe. If you're out of ricotta cheese, don't worry. You have options! You can use cottage cheese for a similar texture. Cream cheese can also work if you mix it with a bit of milk. If you want a dairy-free choice, try blended tofu. Add some seasoning to mimic the flavor of ricotta. Each of these options will give your zucchini lasagna boats a tasty twist. To check if the zucchini is cooked right, look for a few signs. The zucchini should be tender but not mushy. You can poke it gently with a fork. If it goes through easily, it's ready. The cheese on top should also be bubbly and golden brown. This means your delicious zucchini boats are done cooking! Zucchini lasagna boats are easy and fun to make. We covered the best ingredients, like fresh zucchini and cheese, for filling. I showed you steps from preparation to baking. You learned tips to avoid soggy boats and customize flavors. Plus, we explored tasty variations and storage methods for leftovers. Try these boats for a healthy meal. Explore different flavors that suit your taste. Enjoy your cooking!

Zucchini Lasagna Boats Healthy and Simple Dinner

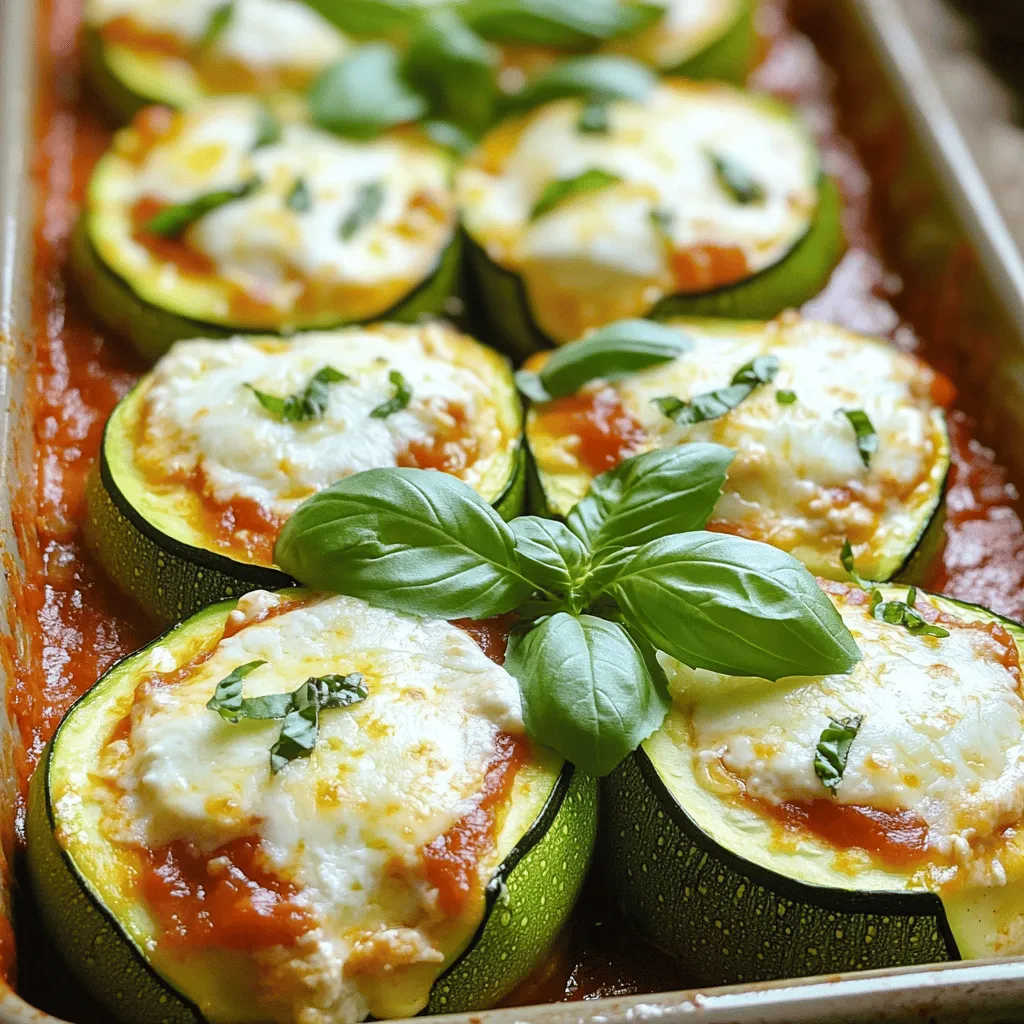
If you’re looking for a healthy and simple dinner, zucchini lasagna boats are perfect for you. They are easy to

- 2 pounds chicken wings - 1/2 cup honey - 1/4 cup soy sauce (low-sodium preferred) - 4 cloves garlic, minced - 1 tablespoon fresh ginger, grated - 1 tablespoon sesame oil - 1 teaspoon chili flakes (adjust to taste) - 1/4 cup green onions, sliced (for garnish) - Sesame seeds (for garnish) When making honey garlic chicken wings, you need to gather the main ingredients first. Chicken wings are the star of the show. They give you that juicy bite that everyone loves. Honey adds sweetness and caramelizes when cooked. Soy sauce brings a savory note that balances the honey. Next, we have the additional ingredients. Minced garlic gives your wings a strong, tasty punch. Fresh ginger adds warmth and a hint of spice. Sesame oil lends a rich flavor that ties everything together. Chili flakes bring heat, but you can adjust them to your liking. Finally, green onions and sesame seeds are perfect for garnishing. They add color and crunch to your dish. For the full recipe, check out the detailed steps to create your honey garlic chicken wings. Each ingredient plays a key role in making these wings a hit. First, we need to preheat the oven. Set it to 400°F (200°C). This step is key for crispy wings. While the oven heats, pat the chicken wings dry using paper towels. Dry wings help with crispiness. Next, season the wings with salt and pepper. This simple step adds essential flavor. Now, let's make the marinade. In a bowl, combine 1/2 cup honey, 1/4 cup soy sauce, and 4 cloves of minced garlic. Add 1 tablespoon of fresh ginger, 1 tablespoon of sesame oil, and 1 teaspoon of chili flakes. Whisk everything together until smooth. This marinade will give the wings a sweet and savory taste. It’s time to marinate the wings. Place the chicken wings in a large bowl or zip-top bag. Pour the marinade over the wings. Make sure each wing is coated well. For the best flavor, let them sit for at least 30 minutes. You can marinate them up to 2 hours in the fridge for even more flavor. Now we will bake the wings. Line a baking sheet with parchment paper. Arrange the marinated wings in a single layer on the sheet. Keep the leftover marinade for basting later. Bake the wings for 25 minutes. After 25 minutes, take the wings out and baste them with the reserved marinade. Switch the oven to broil and cook for an additional 5 to 7 minutes. This step makes the wings crispy and caramelized. Keep a close eye on them to prevent burning. Now, your Honey Garlic Chicken Wings are ready to enjoy. To get crispy chicken wings, you can try different cooking methods. Baking works well, but frying or grilling can add extra crispiness. For frying, heat oil to 375°F. Fry wings until golden brown, around 8-10 minutes. Grilling gives a smoky flavor while keeping wings crispy. Before cooking, dry the wings thoroughly. Use paper towels to pat them dry. Remove excess moisture for better crisping. You can even let them air-dry in the fridge for an hour. This step helps the skin get crunchy. You can customize the honey garlic sauce easily. Want it spicier? Add more chili flakes or fresh chopped chili. For a tangy twist, mix in a splash of rice vinegar or lime juice. Adding spices can also boost the flavor. Try garlic powder, onion powder, or smoked paprika for more depth. Experiment with flavors to find your perfect blend. When serving honey garlic chicken wings, consider dipping sauces. Ranch or blue cheese dressing pairs well. Sweet chili sauce adds a zesty kick. For side dishes, serve wings with celery and carrot sticks for crunch. French fries or a fresh salad also make great sides. Enjoy your wings with friends for a fun meal! {{image_2}} You can spice up your honey garlic chicken wings in fun ways. For a kick, try spicy honey garlic wings. Just add more chili flakes to your marinade. You can also mix in some hot sauce for extra heat. This gives you that sweet and spicy combo everyone loves. Another great option is smoky BBQ honey wings. Replace half the honey with your favorite BBQ sauce. This adds a rich, smoky taste that pairs perfectly with the sweetness of honey. Your friends will ask for this flavor again and again. You can make honey garlic chicken wings in different ways. If you have an air fryer, use it! Just place your marinated wings in a single layer. Cook at 400°F (200°C) for about 20 minutes. This makes the wings crispy without much oil. If you prefer slow cooking, you can adapt the recipe. Add the marinated wings to your slow cooker. Cook on low for about 4 hours. This method makes the wings tender and packed with flavor. If you need gluten-free options, use tamari instead of soy sauce. It gives you the same flavor without gluten. Also, check the honey to ensure it is pure and gluten-free. For those on a keto diet, swap honey with a sugar substitute. Erythritol or monk fruit sweetener works well. This keeps the sweetness while cutting down on carbs. Enjoy your wings guilt-free! For the full recipe, click here: [Full Recipe]. To keep your honey garlic chicken wings fresh, follow these tips: - Refrigeration: Place leftover wings in an airtight container. They will stay good for about 3 to 4 days in the fridge. Make sure to cool them to room temperature before sealing. - Freezing: For longer storage, freeze the wings. Use a freezer-safe bag or container. Remove as much air as possible to prevent freezer burn. They can last up to 2 months in the freezer. To enjoy your wings again, reheating is key. Here’s how: - Oven Method: Preheat your oven to 375°F (190°C). Place the wings on a baking sheet. Bake for about 10 to 15 minutes. This helps them get crispy again. - Microwave Tips: If you're short on time, use the microwave. Place wings on a microwave-safe plate. Heat for 1 to 2 minutes. Be careful, as they might not get crispy this way. If you want them crispier, follow the oven method. For more detailed cooking steps, check out the Full Recipe for honey garlic chicken wings. To make sure your chicken wings are safe to eat, check their internal temperature. Use a meat thermometer and aim for 165°F (75°C). Insert the thermometer into the thickest part of the wing, avoiding bone. This method gives you clear proof that your wings are cooked right. Always trust this step to keep your meal safe and tasty. Yes, you can make the marinade ahead of time! Mix together honey, soy sauce, garlic, ginger, and sesame oil. Store it in the fridge for up to three days. When you are ready to cook, just add your wings! Marinating for longer can help flavors soak in well. If you want a stronger taste, marinate overnight. To cut down on sweetness, reduce the amount of honey in the recipe. Try using half the honey and taste as you go. You can also swap honey for maple syrup or agave nectar. These options can give you a different flavor while still keeping your wings tasty. Honey Garlic Chicken Wings pair well with many sides. Consider serving them with: - Fresh veggie sticks (carrots, celery, or cucumbers) - Creamy ranch or blue cheese dip - Crispy fries or sweet potato fries - A light salad to balance the sweetness These options can make your meal more fun and filling. You can keep your cooked Honey Garlic Chicken Wings in the fridge for up to four days. Store them in an airtight container to keep them fresh. For longer storage, freeze them for up to three months. When reheating, make sure they reach an internal temperature of 165°F (75°C) again for safety. Honey garlic chicken wings are a tasty treat that anyone can make. We explored key ingredients like chicken, honey, and soy sauce to create a flavorful dish. You learned how to prepare, marinate, and cook your wings for crispy perfection. With tips for storage and serving, you can enjoy these wings anytime. Don't forget the exciting variations you can try! These wings can fit any meal or occasion. Use this guide to enjoy success every time you cook. Happy feasting!

Honey Garlic Chicken Wings Flavorful and Easy Recipe

Are you ready to impress your friends with an easy, mouthwatering dish? Honey Garlic Chicken Wings are here to save

When I make zucchini noodles with pesto, I start with fresh, simple ingredients. Here’s what you need: - 4 medium zucchini - 1 cup fresh basil leaves - 1/4 cup pine nuts (toasted) - 2 cloves garlic - 1/2 cup grated Parmesan cheese - 1/3 cup olive oil - 1 tablespoon lemon juice - Salt and pepper to taste - Optional: Cherry tomatoes, halved for garnish These ingredients blend perfectly to create a fresh and vibrant dish. The zucchini serves as a healthy base. The basil adds a bright, herbal flavor. Pine nuts give a nice crunch, while the garlic adds a punch. Grated Parmesan cheese brings in a savory touch. Olive oil makes the pesto smooth and rich. Lemon juice brightens everything up. I love to add cherry tomatoes as a garnish. They add color and a burst of flavor. Each ingredient plays a role in making this dish both simple and satisfying. You can find the full recipe for this dish [Full Recipe]. To start, grab 4 medium zucchini. You can use a spiralizer or a vegetable peeler. If you use a spiralizer, turn the zucchini to create long noodles. If you use a peeler, slice thin strips. Once you have your noodles, set them aside. This step is quick and fun. Zucchini noodles are light and healthy. Next, we will make the pesto. In a food processor, add 1 cup of fresh basil leaves. Then, toss in 1/4 cup of toasted pine nuts and 2 cloves of garlic. Add 1/2 cup of grated Parmesan cheese. Pulse the mixture until it becomes finely chopped. This will smell amazing! Gradually pour in 1/3 cup of olive oil while the processor runs. This helps make it smooth and creamy. Squeeze in 1 tablespoon of lemon juice. Season with salt and pepper to taste. Now, take a large bowl and add the zucchini noodles. Pour the pesto over the noodles and toss them together. Make sure the noodles are well-coated with the tasty pesto. This step is key for flavor. For a bright touch, serve your zucchini noodles on plates or bowls. You can top them with halved cherry tomatoes. They add color and a fresh bite. This dish is perfect for lunch or dinner. You can find the full recipe [here]. When picking zucchini, look for firm, smooth skin. The color should be bright green. Avoid zucchinis that are too large or have soft spots. Smaller zucchinis are often sweeter and more tender. They provide the best texture for noodles. To make your pesto creamier, add more olive oil slowly. This helps blend the ingredients smoothly. You can also mix in some Greek yogurt for extra creaminess. Just a spoonful will do. It gives a nice tangy flavor. For a flavor boost, try toasting your pine nuts. This adds a rich, nutty taste to your pesto. You can also add a pinch of red pepper flakes for some heat. Fresh lemon zest can brighten the dish too. Lastly, sprinkle some extra Parmesan cheese on top before serving. For the complete dish, refer to the Full Recipe. {{image_2}} If you want a vegan pesto, swap the Parmesan cheese for nutritional yeast. Nutritional yeast gives a cheesy flavor without dairy. You can also use cashews or sunflower seeds for added creaminess. Blend these with basil, garlic, and olive oil. This vegan twist keeps all the flavor and is still healthy. To boost your meal, add protein. Grilled chicken or shrimp works great. If you prefer plant-based options, try chickpeas or tofu. Simply sauté the protein in a pan, then mix it with the zucchini noodles and pesto. This adds taste and keeps you full longer. Zucchini noodles are tasty, but you can use other veggies too. Try using carrot or butternut squash noodles for a different flavor. You can also use whole wheat or gluten-free pasta if you want a more traditional dish. Choose what suits your taste best, and enjoy your meal! To keep leftover zucchini noodles fresh, place them in an airtight container. Add a paper towel to absorb moisture. Store them in the fridge for up to three days. Avoid freezing them, as they can turn mushy when thawed. To store leftover pesto, transfer it to a small jar. Pour a thin layer of olive oil on top to keep it fresh. Seal the jar tightly and keep it in the fridge for about one week. You can also freeze pesto in ice cube trays for longer storage. Reheat zucchini noodles gently to avoid overcooking. You can use a skillet over low heat. Add a splash of olive oil or a bit of water to help steam them. Heat just until warm and not mushy. For pesto, warm it slightly in a bowl before mixing it with the noodles again. Yes, you can use store-bought pesto. It saves time and still tastes good. Just look for a brand with fresh ingredients. I often do this when I am short on time. You can use sunflower seeds or walnuts instead of pine nuts. Both give a nice flavor. They also keep the pesto creamy. This is great if you have nut allergies. You can make zucchini noodles with a vegetable peeler. Just peel long strips from the zucchini. Keep peeling until you reach the seeds. You can also use a box grater for this. Yes, zucchini noodles are low in carbs. They have fewer carbs than regular pasta. This makes them a great choice for low-carb diets. They also add more vegetables to your meal. Yes, you can make this dish ahead of time. Prepare the zucchini noodles and pesto separately. Store them in the fridge. When you're ready, just combine them and serve. For the best taste, eat within a day or two. For the full recipe, check out the Zesty Zucchini Noodles with Pesto . Zucchini noodles and pesto make a fresh, tasty meal. We discussed ingredients like zucchini, nuts, and cheese. I shared steps to prepare noodles and a simple pesto. I also offered tips on storage and cooking. You can make this dish your own with variations. Try adding proteins or opt for vegan pesto. Keep it simple and enjoy. Cooking can be fun and healthy. Use this guide to create a dish you love.

Zucchini Noodles with Pesto Fresh and Flavorful Meal

Craving a fresh and flavorful meal? Zucchini Noodles with Pesto is your answer! This dish is quick, easy, and packed

To make the best chocolate chip cookie skillet, you need: - 1 cup all-purpose flour - 1/2 teaspoon baking soda - 1/4 teaspoon salt - 1/2 cup unsalted butter, melted - 1/3 cup brown sugar, packed - 1/3 cup granulated sugar - 1 teaspoon vanilla extract - 1 large egg - 1 cup semi-sweet chocolate chips - 1/2 cup chopped nuts (optional) - Vanilla ice cream (optional) These ingredients come together to create a warm, gooey treat that everyone loves. If you need gluten-free options, swap the all-purpose flour for a gluten-free blend. This works well in most recipes. For a vegan version, use a flax egg and coconut oil instead of butter and egg. Just mix one tablespoon of ground flaxseed with three tablespoons of water and let it sit for a few minutes. For the best flavor, I recommend using Ghirardelli or Guittard chocolate chips. They melt beautifully and taste great. When it comes to butter, choose a high-quality brand like Kerrygold for rich flavor. Use organic sugars for a cleaner taste. 1. Preheat your oven to 350°F (175°C). This step is key. A hot oven makes sure your cookie cooks evenly. 2. Prep your skillet. Use a 10-inch cast-iron skillet. Grease it well with non-stick spray or butter. This keeps the cookie from sticking. 3. Mix your dry ingredients. In a medium bowl, whisk together 1 cup flour, 1/2 teaspoon baking soda, and 1/4 teaspoon salt. Set this bowl aside. 4. Mix your wet ingredients. In a large bowl, combine 1/2 cup melted butter, 1/3 cup brown sugar, and 1/3 cup granulated sugar. Stir until it looks smooth. 5. Add the egg and 1 teaspoon vanilla extract to the wet mix. Stir until it is well combined. 6. Combine dry and wet. Gradually add the dry mix to the wet mix. Stir gently until just combined. Do not overmix or your cookie will be tough. 7. Fold in chocolate chips. Add 1 cup semi-sweet chocolate chips and 1/2 cup chopped nuts if you like. Mix gently to keep the chips intact. 1. Pour the dough into your greased skillet. Spread it evenly. Use a spatula to smooth the top. 2. Bake your cookie in the preheated oven. Set your timer for 20-25 minutes. Look for golden edges and a firm center. 1. Cool your cookie. Remove the skillet from the oven. Let it cool for a few minutes. This helps it set. 2. Serve warm. For a treat, top your cookie with a scoop of vanilla ice cream. It melts slightly and adds a creamy touch. 3. Get creative with toppings. Consider adding whipped cream, chocolate sauce, or nuts for extra flavor. Enjoy your delicious cookie skillet! For the full recipe, check out the details above. To get the right texture, you need to know the difference between chewy and crispy cookies. If you want chewy cookies, use more brown sugar. This sugar adds moisture. For crispy cookies, use more white sugar. It helps create a crunch. Do not overmix your dough. When you mix too much, the cookies become tough. Mix just until the flour disappears. This keeps your cookies soft and delicious. For the best results, use a cast-iron skillet. It heats evenly and gives a nice crust. An oven-safe non-stick skillet works too. Both options help prevent sticking. Also, have a good rubber spatula and measuring cups. A rubber spatula helps you mix without overdoing it. Accurate measuring cups ensure all ingredients are perfect. Avoid underbaking and overbaking. Underbaking makes the center gooey. Overbaking dries them out. A golden brown edge and set center mean they are done. Pay attention to measuring ingredients. Too much flour can make cookies dry. Use a spoon to scoop flour, then level it off. This method gives you the right amount every time. {{image_2}} You can make your chocolate chip cookie skillet truly special with flavor add-ins. Try different types of chocolate to create unique tastes. Here are some options: - Dark chocolate chips for a rich flavor - Milk chocolate chips for a sweet touch - White chocolate chips for a creamy twist You can also add other mix-ins to boost flavor and texture: - Toffee bits for a sweet crunch - Dried fruit like cranberries or cherries for a fruity kick You can cook your skillet cookie using various methods. If you want a smoky flavor, try grilling it. Just place your skillet on the grill and cook it the same way as in the oven. For those with dietary needs, make vegan or gluten-free variations. Use coconut oil instead of butter and a flax egg in place of the regular egg. For gluten-free, swap regular flour with a gluten-free blend. Seasonal and holiday-themed cookies can add fun to your dessert table. For fall, try pumpkin spice in the batter. You can add pumpkin puree and spices like cinnamon and nutmeg. During the holidays, decorate your skillet cookie with festive toppings. Use peppermint candy or colored sprinkles for a cheerful look. These variations make your dessert more exciting and perfect for any occasion. For the complete recipe, check the [Full Recipe]. To keep your chocolate chip cookie skillet fresh, store it properly. First, let the skillet cool completely. Then, cover it tightly with plastic wrap or aluminum foil. If you have a lid for your skillet, that works too. I recommend using an airtight container for best results. This helps keep it moist and tasty. Store it in the fridge for up to five days. When you want to enjoy your leftover cookie skillet, reheating is key. Preheat your oven to 350°F (175°C). Place the skillet in the oven for about 10-15 minutes. This brings back its warm, gooey texture. If you prefer, you can use the microwave. Heat it in 15-second bursts. Keep an eye on it to avoid sogginess. If you want to keep it crispy, the oven is the best choice. Yes, you can freeze cookie skillets! To freeze, first let it cool completely. Cut it into slices for easy portions. Wrap each slice in plastic wrap, then place them in a freezer-safe bag. Press out any air before sealing. You can freeze for up to three months. To defrost, simply place a slice in the fridge overnight. When you're ready to eat, reheat it using the tips above for a delicious treat. Baking a chocolate chip cookie skillet takes about 20 to 25 minutes. The time can change based on skillet size. A larger skillet may need a few extra minutes, while a smaller one may bake quicker. Check for golden edges and a set center for the best result. Yes, you can prepare chocolate chip cookie skillets in advance. Store the dough in the fridge for up to 24 hours. You can also bake it ahead and keep it in the fridge for up to three days. Just warm it up before serving for the best taste. You can serve chocolate chip cookie skillets with a scoop of vanilla ice cream. Whipped cream and chocolate sauce add extra flavor. Fresh fruit like strawberries or bananas also pairs well. Try adding nuts for some crunch. These choices make your dessert even more delightful! In summary, making a delicious chocolate chip cookie skillet is simple and fun. Start with essential ingredients and prepare your dough correctly. Remember to choose the right baking equipment and avoid common mistakes. Your variations can make each skillet unique, and proper storage keeps leftovers fresh. Enjoy this tasty treat with friends or family. Keep experimenting with flavors and techniques to find your favorite. Happy baking!

Chocolate Chip Cookie Skillet Delightful Dessert Recipe

Get ready to elevate your dessert game with a Chocolate Chip Cookie Skillet! This warm, gooey treat combines classic cookie

To make a tasty Cajun crab pasta, you need these key ingredients: - 8 ounces fettuccine pasta - 1 pound fresh crab meat, picked - 2 tablespoons olive oil - 1 small onion, finely chopped - 3 cloves garlic, minced - 1 bell pepper (red or green), diced - 1 cup cherry tomatoes, halved - 1 cup heavy cream - 2 tablespoons Cajun seasoning - 1 teaspoon smoked paprika - Salt and pepper, to taste - 2 tablespoons fresh parsley, chopped (for garnish) - Grated Parmesan cheese (optional for serving) These ingredients come together to create rich and bold flavors. The crab gives a sweet taste, while the Cajun seasoning adds a nice kick. You can enhance your dish with these optional additions: - Fresh lemon juice for brightness - Red pepper flakes for extra heat - Spinach or arugula for added greens - Green onions for a fresh crunch Feel free to mix and match these to fit your taste. They can add layers of flavor and texture. Having the right tools makes cooking easier. Here’s what I recommend: - Large pot for boiling pasta - Large skillet for sautéing - Wooden spoon for mixing - Colander for draining pasta - Measuring cups and spoons for precise amounts These tools help you create the dish smoothly. With the right setup, you'll enjoy cooking this Cajun crab pasta even more. For the full recipe, check out the detailed steps provided earlier. Start by boiling a large pot of salted water. Once it boils, add 8 ounces of fettuccine pasta. Cook it according to the package instructions until it is al dente. This usually takes around 8-10 minutes. Once done, drain the pasta and set it aside. Remember to save about 1/2 cup of the pasta water for later. This water helps to adjust the sauce's thickness. In a large skillet, heat 2 tablespoons of olive oil over medium heat. Once the oil is hot, add 1 small onion, finely chopped. Cook it for about 2-3 minutes until it becomes soft and translucent. Next, add in 3 cloves of minced garlic and 1 diced bell pepper. Sauté these for another 2 minutes. You want the kitchen to smell fragrant and inviting. Now it’s time to add the fun part! Stir in 1 pound of fresh crab meat and 1 cup of halved cherry tomatoes. Cook them for about 3-4 minutes. You’ll see the tomatoes start to soften. After that, pour in 1 cup of heavy cream. Sprinkle in 2 tablespoons of Cajun seasoning and 1 teaspoon of smoked paprika. Let this mixture simmer for about 5 minutes. If the sauce gets too thick, use some of that reserved pasta water to loosen it up. Finally, add the cooked fettuccine to the skillet. Toss it gently to combine everything well. Season with salt and pepper to taste. For the full recipe, check out the detailed instructions. To make your Cajun crab pasta shine, use the right seasonings. Cajun seasoning brings warmth and depth. You can adjust the amount to fit your taste. If you want more spice, add extra smoked paprika. Garlic and onion create a strong base. They add aroma and flavor. Fresh parsley adds a bright touch at the end. Always taste as you go. This way, you can adjust to your liking. Cooking pasta perfectly is key to a great meal. Start with a big pot of salted water. Bring it to a rolling boil before adding the fettuccine. Stir it well to avoid sticking. Cook until it's al dente, which means it has a slight bite. This helps it hold up in the sauce. Reserve some pasta water before draining. If your sauce is too thick, add this water to loosen it. Serving your dish well makes it even more special. Use a fork to twist the fettuccine into a nest on the plate. This gives a nice look. Drizzle the rich sauce around the pasta. Add a sprinkle of fresh parsley on top. If you like cheese, add grated Parmesan. These little details make your dish pop. With these tips, you can create a plate that looks as good as it tastes. Enjoy this Cajun crab pasta delight! For the full recipe, check out the link. {{image_2}} You can easily change the seafood in this dish. If you don’t have crab, try shrimp or lobster. They both work great and add a nice flavor. For a vegetarian option, use mushrooms or zucchini. These veggies soak up the sauce well and keep it tasty. Just make sure to sauté them until they are tender. If you love heat, add more Cajun seasoning or red pepper flakes. This will give your pasta a nice kick. For those who prefer a milder dish, reduce the Cajun spice. You can also skip the smoked paprika. This keeps the flavor but makes it less spicy. Adjust the spices to fit your taste. For a gluten-free option, use gluten-free fettuccine. Many brands offer pasta that cooks just like regular pasta. For dairy-free, swap heavy cream with coconut milk or a cashew cream. This gives you a creamy texture without dairy. You can still enjoy the flavors without worrying about gluten or dairy. Check out the Full Recipe for more details on making this delicious Cajun Crab Pasta. To store leftover Cajun crab pasta, let it cool first. Place it in an airtight container. This keeps the pasta fresh for up to three days in the fridge. Make sure to cover it well to prevent drying out. Reheating this dish is easy. You can use the stove or microwave. For the stove, add a splash of water or cream to a pan over low heat. Stir often to heat evenly. If you use the microwave, place it in a bowl. Cover it slightly and heat in short bursts. Stir in between to avoid hot spots. If you want to freeze Cajun crab pasta, do it right after cooking. Use a freezer-safe container. Leave some space at the top, as it expands when frozen. It can stay good for up to three months. To eat, thaw it in the fridge overnight before reheating. For Cajun Crab Pasta, fresh crab meat is best. Look for lump crab or backfin crab. These types have great flavor and texture. If fresh is not available, canned crab works too. Just drain it well. Avoid imitation crab meat; it lacks the real crab taste you want. Yes, you can use dried pasta. Dried fettuccine is a great choice. Just follow the package instructions for cooking time. Fresh pasta cooks faster, so keep an eye on it. The key is to cook it until al dente for the best bite. To adjust the heat, change the amount of Cajun seasoning. For less heat, use less seasoning. You can also add a pinch of sugar to balance the spice. If you want more heat, add crushed red pepper flakes. Just a little will spice things up without overwhelming the dish. Cajun crab pasta is a treat you can make at home. You learned about key ingredients, cooking steps, and tips for great flavor. You also discovered fun ways to change the recipe to fit your tastes. Storing and reheating leftovers is easy. Now, it's time for you to try this dish. Enjoy cooking, taste the bold flavors, and impress your friends!

Cajun Crab Pasta Flavorful and Simple Dinner Delight

Ready to spice up your dinner routine? Cajun Crab Pasta combines rich flavors and simple steps for a meal that

- 1 lb (450g) boneless chicken breasts - 1/2 cup cornstarch - 1/2 cup all-purpose flour - 1 teaspoon garlic powder - 1 teaspoon onion powder - 1 teaspoon smoked paprika - 1/2 teaspoon salt - 1/4 teaspoon black pepper - 1/2 cup mayonnaise - 2 tablespoons sweet chili sauce - 1 tablespoon sriracha - 1 tablespoon honey - 1 teaspoon lime juice To make Bang Bang Chicken, gather all your ingredients first. The chicken is key for a good meal. You want boneless chicken breasts. They cook well and stay juicy. The cornstarch and flour mix gives the chicken its crispy shell. Next, season the flour mix. Garlic and onion powders add flavor. Smoked paprika brings a warm taste. Salt and black pepper balance everything. This mix makes your chicken not just crispy but also tasty. For the sauce, use mayonnaise as the base. Sweet chili sauce adds a nice kick. Sriracha brings heat, but you can adjust it for your taste. Honey balances the heat with sweetness. Lime juice finishes the sauce with brightness. Don't forget to check the [Full Recipe] for all steps. - Mix dry ingredients for coating: In a bowl, combine 1/2 cup cornstarch, 1/2 cup all-purpose flour, 1 teaspoon garlic powder, 1 teaspoon onion powder, 1 teaspoon smoked paprika, 1/2 teaspoon salt, and 1/4 teaspoon black pepper. This mix gives the chicken a tasty crunch. - Dredge chicken strips in egg and flour mixture: Take your 1 lb of sliced chicken breasts. Dip each strip in the beaten egg, then coat it with the dry mix. Make sure the chicken is well-covered. This step is key to getting that crispy texture. - Heat oil and test for readiness: Pour about 1/2 inch of vegetable oil into a large skillet. Heat it over medium-high heat. To test if your oil is hot enough, sprinkle a little flour into it. If it sizzles and bubbles, you’re ready to fry. - Fry chicken strips to crispy perfection: Carefully place the breaded chicken strips in the hot oil. Don't crowd the pan; fry in batches if needed. Cook for about 4-5 minutes on each side. Look for a golden brown color. Once done, transfer the chicken to a plate lined with paper towels to soak up extra oil. - Whisk together all sauce ingredients until smooth: In a small bowl, mix 1/2 cup mayonnaise, 2 tablespoons sweet chili sauce, 1 tablespoon sriracha, 1 tablespoon honey, and 1 teaspoon lime juice. Whisk until smooth. The sauce adds a creamy, spicy kick to the chicken. For the full recipe, check out the details above! To get the perfect crispiness, focus on your coating. Use cornstarch and flour in equal parts. This blend gives a light and crunchy texture. Make sure to coat each chicken strip well. Press the mixture onto the chicken to help it stick. For frying, heat the oil to about 350°F (175°C). This temperature ensures quick cooking and a golden outside. To check if the oil is ready, drop a bit of the coating mix in. If it sizzles and floats, you’re good to go. Fry in small batches so the temperature stays steady. If you want a lighter dish, consider baking instead of frying. Preheat your oven to 425°F (220°C). Place the coated chicken strips on a baking sheet lined with parchment paper. Bake for about 20 minutes, flipping halfway through. This gives you a crispy texture without all the oil. You can also lighten the Bang Bang sauce. Swap out mayonnaise for Greek yogurt. This keeps the creaminess while adding protein. You can use less honey or a sugar-free option too. These changes make the dish healthier without losing flavor. Garnish your Bang Bang Chicken with fresh herbs like cilantro or green onions. This adds a pop of color and flavor. You can also sprinkle sesame seeds on top for extra crunch. When serving, consider a large platter. Arrange the chicken in a circle with a bowl of sauce in the center. This makes it easy for guests to dip. Pair it with steamed rice or a fresh salad for a complete meal. For more details, check the Full Recipe. {{image_2}} To make Bang Bang Chicken extra spicy, you can adjust the heat level easily. - Increasing sriracha for heat: Want more spice? Add more sriracha to the sauce. Start with a tablespoon and taste. - Adding chili paste for extra flavor: Mix in chili paste for a unique kick. This will add depth to the sauce. These changes will give your dish a new twist. Sometimes, you may need to switch ingredients. Here are some great options. - Gluten-free options for coating: Use a gluten-free flour mix instead of all-purpose flour. Cornstarch is also gluten-free and works well. - Vegan alternatives for Bang Bang Chicken: Try tofu or tempeh instead of chicken. Use plant-based mayo for the sauce. These swaps can still give you a tasty meal. Bang Bang Chicken is versatile. You can serve it in many fun ways. - Transform into Bang Bang Chicken Wraps: Place chicken strips in a wrap with veggies. Add sauce for flavor. This makes a great lunch. - Incorporating into salads or rice bowls: Toss crispy chicken on a fresh salad. Or mix it into a rice bowl for a hearty meal. These serving styles are perfect for any occasion. To keep your Bang Bang Chicken fresh, store it right. Place the cooked chicken in an airtight container. This helps keep the moisture in and prevents drying out. I recommend using glass containers or BPA-free plastic ones. They seal well and are easy to clean. If you want to keep it crispy, store the chicken separate from the sauce. This way, it stays crunchy. When you want to eat your leftovers, reheating is key. For the best results, use an oven or air fryer. Both keep the chicken crispy and warm. Preheat the oven to 375°F (190°C). Place the chicken on a baking sheet. Heat it for about 10-12 minutes, flipping halfway through. If using an air fryer, set it to 350°F (175°C) and heat for about 5-7 minutes. This will help retain that delightful crunch. If you want to store Bang Bang Chicken for longer, freezing works great. First, let the chicken cool completely. Then, place it in a freezer-safe bag or container. Make sure to remove as much air as possible. This helps avoid freezer burn. You can freeze it for up to three months. When you’re ready to eat, take it out and defrost in the fridge overnight. To reheat, follow the methods above, ensuring it stays crispy. Enjoy your Bang Bang Chicken anytime with these easy tips! Don’t forget to check the Full Recipe for more details. Bang Bang Chicken is a mix of crispy and creamy flavors. The chicken is crunchy on the outside and tender inside. The Bang Bang sauce adds a sweet and spicy kick. It has a rich taste from the mayonnaise and chili sauce. The lime juice gives it a fresh touch. Together, they create a flavor explosion that keeps you wanting more. Yes, you can prep Bang Bang Chicken ahead. You can coat the chicken strips in the dry mix and store them in the fridge. For the best crispiness, fry them just before serving. You can also make the sauce in advance. Just store it in a sealed container in the fridge until you’re ready to use it. This helps save time during busy meal days. Bang Bang Chicken can be a tasty treat. A serving has about 350 calories. It includes around 15 grams of fat, mostly from the frying oil and sauce. Each serving also has 25 grams of protein from the chicken. Keep in mind that these numbers may change based on the oil you use and the amount of sauce. For a full breakdown, refer to the Full Recipe. This blog post covered everything you need to know about Bang Bang Chicken. We explored main ingredients, step-by-step cooking, and tips for the best results. You learned how to make a tasty Bang Bang sauce and even healthier alternatives. The variations section provided options to fit your taste. Finally, we discussed storing and reheating tips for leftovers. Bang Bang Chicken is easy to prepare and full of flavor. You have the tools to impress your family and friends. Enjoy making this delicious dish!

Bang Bang Chicken Easy Crispy Delight Recipe

Are you ready to make a dish that’s equal parts crispy and delicious? This Bang Bang Chicken recipe will wow

- 2 ripe avocados, pitted and peeled - 2 cloves garlic, minced - 1 tablespoon lemon juice - 2 tablespoons extra virgin olive oil - 1/4 cup fresh basil leaves - 1/4 cup grated Parmesan cheese (optional) - Salt and pepper to taste - 250g spaghetti or your choice of pasta - Cherry tomatoes, halved (for garnish) - Toasted pine nuts (for garnish) To make creamy avocado pasta, you need fresh and ripe avocados. They should feel soft but not mushy. The garlic adds a nice kick, while lemon juice keeps the sauce bright. Extra virgin olive oil gives richness to the dish. Fresh basil brings a sweet aroma, and Parmesan adds a savory touch. Make sure to have salt and pepper nearby. They help bring out the flavors. Choose your favorite pasta, like spaghetti, for this recipe. Cherry tomatoes and toasted pine nuts add color and crunch to your meal. Using these ingredients, you can create a smooth and tasty sauce. It’s quick, easy, and perfect for a weeknight dinner. For the full recipe, check out the instructions above. To cook spaghetti to al dente, bring a large pot of salted water to a boil. Add the spaghetti and stir it gently. Cook it for about 8 to 10 minutes, or until it has a slight bite. Check the package for exact times. Reserving pasta water is important. This starchy water helps to thicken your sauce. It also adds flavor. Always keep about 1/2 cup of the water before draining the pasta. To make the avocado sauce, blend the following ingredients: - 2 ripe avocados, pitted and peeled - 2 cloves garlic, minced - 1 tablespoon lemon juice - 2 tablespoons extra virgin olive oil - 1/4 cup fresh basil leaves - 1/4 cup grated Parmesan cheese (optional) Blend until the mixture is smooth and creamy. If your sauce is too thick, add the reserved pasta water. Start with a little and mix well. Adjust until you reach your desired creaminess. Finally, add salt and pepper to taste. In a large mixing bowl, combine the cooked pasta with the avocado sauce. Toss gently until the pasta is well coated. For a beautiful presentation, add garnishes like halved cherry tomatoes and toasted pine nuts. They add color and a nice crunch. Serve your creamy avocado pasta right away for the best taste. Enjoy! To make creamy avocado pasta, you need ripe avocados. Look for avocados that feel slightly soft when you press them gently. They should not be too mushy. The skin should be dark green or nearly black. If the avocados are firm, give them a few days to ripen. To speed up ripening, place them in a paper bag with a banana. This method works well! If you want a vegan or dairy-free version, skip the Parmesan cheese. You can use nutritional yeast instead. It adds a cheesy flavor without dairy. For creaminess, blend in soaked cashews or silken tofu. Both options give a rich texture. To enhance the dish, add more herbs like parsley or cilantro. You can also sprinkle in some red pepper flakes for a kick. A dash of smoked paprika gives a nice depth. Experiment with these flavors to make the dish your own. Don’t forget to taste as you go! {{image_2}} You can add protein to your creamy avocado pasta for a heartier meal. Grilled chicken makes a great option. Just slice it thin and toss it with the pasta. If you prefer seafood, shrimp works well too. Simply grill or sauté the shrimp until pink, then mix it in. For a plant-based option, try chickpeas or black beans. These add fiber and protein without the meat. You can also use tofu or tempeh for extra texture. Just sauté them until golden before mixing into your pasta. You can switch up the pasta type for this dish. Gluten-free pasta is a good choice if you have dietary needs. Look for brands made from rice or quinoa. Whole grain pasta is another healthy option. It adds more fiber and a nutty flavor. Don’t forget about pasta shapes! You can use penne, fusilli, or even zucchini noodles. Each shape brings a different texture to your dish, making it fun and unique. Toppings can really enhance your dish. Nuts like toasted pine nuts or walnuts add a nice crunch. You can also sprinkle some seeds like pumpkin or sunflower seeds for a twist. Consider adding more vegetables for color and nutrition. Sliced bell peppers, spinach, or arugula make great choices. Just toss them in with your pasta for a fresh touch. Explore these variations to make your creamy avocado pasta truly yours. For the full recipe, check back on the ingredients and steps to create this delicious meal. To keep your creamy avocado pasta fresh, store it in an airtight container. This helps prevent air from getting in and causing browning. Place the pasta in the fridge as soon as you finish eating. Try to eat it within two days for the best taste. If you have extra avocado sauce, store it separately. Use lemon juice in the sauce to help slow down browning. Reheating avocado pasta can be tricky. You want to keep it creamy and tasty. The best way to reheat it is on the stove. Add a splash of olive oil or water to the pan. Heat it on low, stirring gently. This helps it warm up without burning. Avoid using the microwave, as it can make the sauce dry and thick. You can freeze avocado pasta, but it may change in texture. The avocado sauce can become grainy when thawed. If you still want to freeze it, store the pasta and sauce separately. Use a freezer-safe container and label it with the date. Enjoy it within a month for the best flavor. When ready to eat, thaw it in the fridge overnight and reheat it on the stove. Creamy avocado pasta stays fresh for about 2 days in the fridge. Store it in an airtight container. To keep it tasting good, eat it soon after making. The avocado can brown over time, so enjoy it quickly. Yes, you can prepare it ahead of time. Cook the pasta and store it in one container. Make the sauce and store it in another. Just mix them together when you're ready to eat. This way, you enjoy the best flavor and texture. If you want a low-carb or gluten-free option, try zucchini noodles or spaghetti squash. Cauliflower rice is another great choice. These options keep the meal light and healthy while still being delicious. Avocado sauce turns brown due to oxidation when exposed to air. To prevent this, add lemon juice to the sauce. You can also store the sauce with plastic wrap pressed against it. This keeps air out and helps it stay green. Yes, creamy avocado pasta is a healthy dish. Avocados are full of good fats, fiber, and vitamins. They promote heart health and keep you full. Pasta gives you energy. Together, they make a tasty and nutritious meal. You can find the full recipe [here](#). This blog post guided you through making creamy avocado pasta. We covered key ingredients, step-by-step cooking, and tips for choosing avocados. I shared ways to make it vegan and how to add proteins. We also discussed storage tips to keep leftovers fresh. In the end, this dish is simple and tasty. You can make it your own with ingredients you love. Enjoy your pasta adventure!

Creamy Avocado Pasta Quick and Easy Recipe

Looking for a quick and easy dinner? Creamy Avocado Pasta checks all the boxes. This dish is not only delicious

Older posts
Page1 Page2 … Page6 Next →

dsad

© 2025 momdishmagic • Built with GeneratePress

Our Policies

  • Copyright Policy
  • Cookie Policy
  • GDPR Policy
  • Privacy Policy
  • Disclaimer
  • Terms Of Use

More Information

  • Home
  • About
  • Contact
  • Appetizers
  • Dessert
  • Dinner
  • Drinks
©2025, momdishmagic About Back To Top