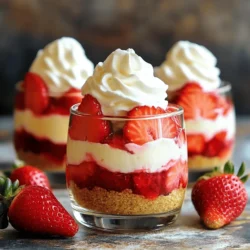
Are you ready for a sweet treat that requires no oven? I’m excited to share my easy recipe for No-Bake Strawberry Cheesecake Cups! With just a few simple ingredients and steps, you can create a delightful dessert that will impress your friends and family. Perfect for warm days or when you’re short on time, this recipe makes indulging a breeze. Let’s dive into the delicious world of no-bake cheesecake!
Ingredients
Detailed ingredients list
To make No-Bake Strawberry Cheesecake Cups, gather these items:
– 1 cup graham cracker crumbs
– 1/2 cup unsalted butter, melted
– 2 tablespoons sugar
– 8 oz cream cheese, softened
– 1/2 cup powdered sugar
– 1 teaspoon vanilla extract
– 1 cup heavy cream, cold
– 1 cup fresh strawberries, diced
– 2 tablespoons lemon juice
– Extra strawberries for topping
These ingredients create a creamy and sweet treat. The graham cracker crust gives a nice crunch.
Substitutions for common ingredients
If you don’t have all the ingredients, here are some swaps:
– Use digestive biscuits instead of graham crackers for the crust.
– Coconut oil can replace unsalted butter if you want a dairy-free option.
– For a lighter dessert, try using Greek yogurt in place of cream cheese.
– You can use honey or maple syrup instead of sugar for a natural sweetener.
These substitutions keep the flavors while meeting different needs.
Measuring tips for accuracy
Accurate measuring makes a big difference in baking. Here are some tips:
– Use dry measuring cups for dry ingredients, like graham cracker crumbs.
– For sticky items, like butter, pack it into the cup for a precise amount.
– When measuring liquids, use a clear liquid measuring cup. Check the measurement at eye level.
– For powder, like sugar, spoon it into the cup and level it off with a knife.
Following these tips ensures your cheesecake cups turn out perfectly every time!
Step-by-Step Instructions
Preparing the crust
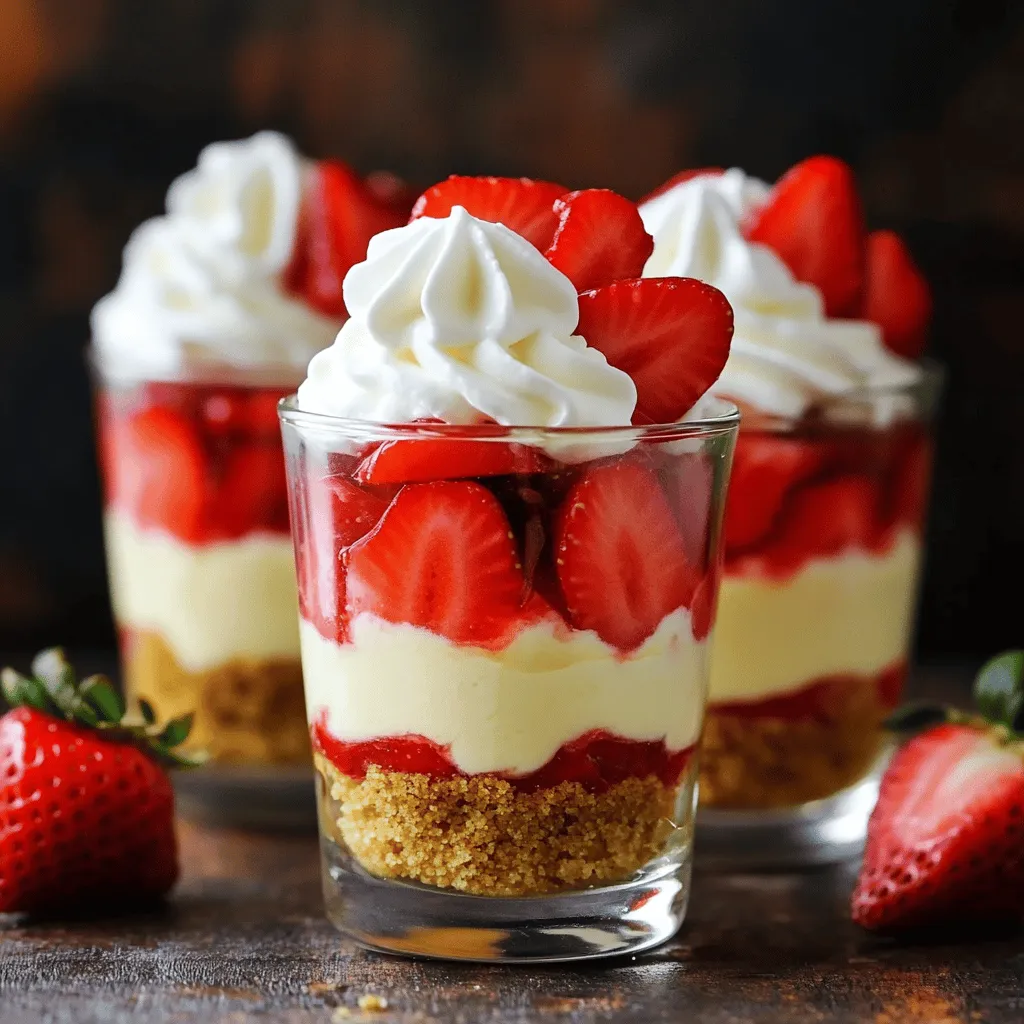
To make the crust, start with graham cracker crumbs. You need one cup of crumbs. Mix them with half a cup of melted butter and two tablespoons of sugar. Stir well until it looks like wet sand. Next, take your cups and spoon in about two tablespoons of this mixture. Press it down firmly to form a nice layer. This step is key for a solid base.
Making the cream cheese filling
Now, let’s make the cream cheese filling. In a bowl, add eight ounces of softened cream cheese. To that, mix in half a cup of powdered sugar and one teaspoon of vanilla extract. Beat this mixture until it is smooth and creamy. In another bowl, whip one cup of cold heavy cream until it forms stiff peaks. Gently fold this whipped cream into the cream cheese mix. This makes the filling light and fluffy.
Layering the dessert
It’s time to layer the dessert. First, add the cream cheese filling on top of your crust in each cup. Then, take one cup of diced fresh strawberries and mix them with two tablespoons of lemon juice. This helps the strawberries shine. Spoon a layer of strawberries over the cream cheese filling. Keep layering the cream cheese and strawberries until you reach the top of the cups. Finish with a dollop of whipped cream on top. Chill your cups in the fridge for at least two hours. This will help everything set nicely.
Tips & Tricks
How to achieve the perfect whipped cream
To make perfect whipped cream, start with cold heavy cream. Cold cream whips up better. Use a clean bowl and beaters. This helps the cream reach stiff peaks. Whip the cream on medium speed. Avoid over-whipping, as it can turn buttery. Fold the whipped cream gently into your cheese mix. This keeps it light and airy.
Common mistakes to avoid
One common mistake is not softening the cream cheese. If it’s too cold, it won’t mix well. Always beat the cream cheese until smooth. Another issue is mixing too aggressively. This can make your cheesecake dense. Also, don’t skip chilling the cups. They need time to set for the best flavor. Lastly, avoid using old strawberries. Fresh fruit is key for taste.
Enhancing flavor with additional ingredients
You can add zest from lemons or limes for a citrus kick. This brightens the flavor of the cheesecake. You could also mix in a bit of cocoa powder for a chocolate twist. Another idea is to fold in crushed cookies or nuts for extra texture.
Variations
Different fruit alternatives
You can change the strawberries for other fruits. Blueberries, raspberries, or peaches work well. Just chop them into small pieces. Each fruit brings a new taste. For a tropical twist, try mango or pineapple. Mix and match your favorites. The options are endless!
Gluten-free options
To make this dessert gluten-free, swap graham crackers with gluten-free crumbs. You can find these at most stores. Ensure all other ingredients are also gluten-free. This way, everyone can enjoy the treat without worry.
Flavor variations for the cheesecake filling
You can modify the cheesecake filling easily. Try adding lemon or orange zest for a citrus kick. You can also mix in chocolate or peanut butter for a richer flavor. For a hint of coffee, add espresso powder. These small tweaks can transform your cheesecake cups.
Storage Info
How to store leftover cheesecake cups
To keep your leftover cheesecake cups fresh, place them in the fridge. Use a tight lid or plastic wrap to cover them. They will stay good for up to three days. Make sure they do not touch any strong-smelling foods. This will help keep their sweet flavor.
Freezing tips for long-term storage
You can freeze the cheesecake cups if you have extras. First, chill them in the fridge for at least two hours. Then, cover each cup tightly with plastic wrap and aluminum foil. This will stop freezer burn. They can stay fresh for up to two months in the freezer. To eat, move them to the fridge overnight to thaw.
Best practices for serving after storage
When ready to serve, check the texture. If they feel too soft after thawing, pop them back in the fridge for a bit. This helps them firm up. Before serving, add fresh strawberries on top to make them look nice and tasty. Enjoy the flavors of your no-bake strawberry cheesecake cups again!
FAQs
How long do no-bake cheesecakes last?
No-bake cheesecakes can last in the fridge for about 3 to 5 days. Keep them in an airtight container. If you want them to last longer, store them in the back of the fridge where it’s coldest. Always check for any signs of spoilage before eating.
Can I use low-fat cream cheese?
Yes, you can use low-fat cream cheese. It will change the taste and texture a bit. The cheesecake may not be as rich and creamy. If you want a lighter option, low-fat cream cheese works well. Just make sure it is softened.
Can I make this recipe ahead of time?
Absolutely! You can make these cheesecake cups a day in advance. This actually helps the flavors develop more. Just keep them covered in the fridge. Take them out just before serving to enjoy their cool and creamy texture. For the best taste, add fresh strawberries right before serving.
You learned about the key ingredients and how to swap them if needed. We covered the steps to create a delicious no-bake cheesecake, from the crust to the filling. I shared tips for perfect whipped cream and common mistakes to avoid. You also explored tasty variations and proper storage to keep your cheesecake fresh.
With this knowledge, you can make a tasty dessert that fits your needs. Enjoy making your cheesecake and impress others with your skills!