Are you ready to indulge in a dessert that’s creamy, rich, and oh-so-easy to make? These No-Bake Peanut Butter Cheesecake Bars are the perfect treat for any peanut butter lover. With just a few simple ingredients and no oven required, you can whip up this delightful dessert in no time. Let’s dive in and learn how to create these scrumptious bars that will impress everyone at your next gathering!
Why I Love This Recipe
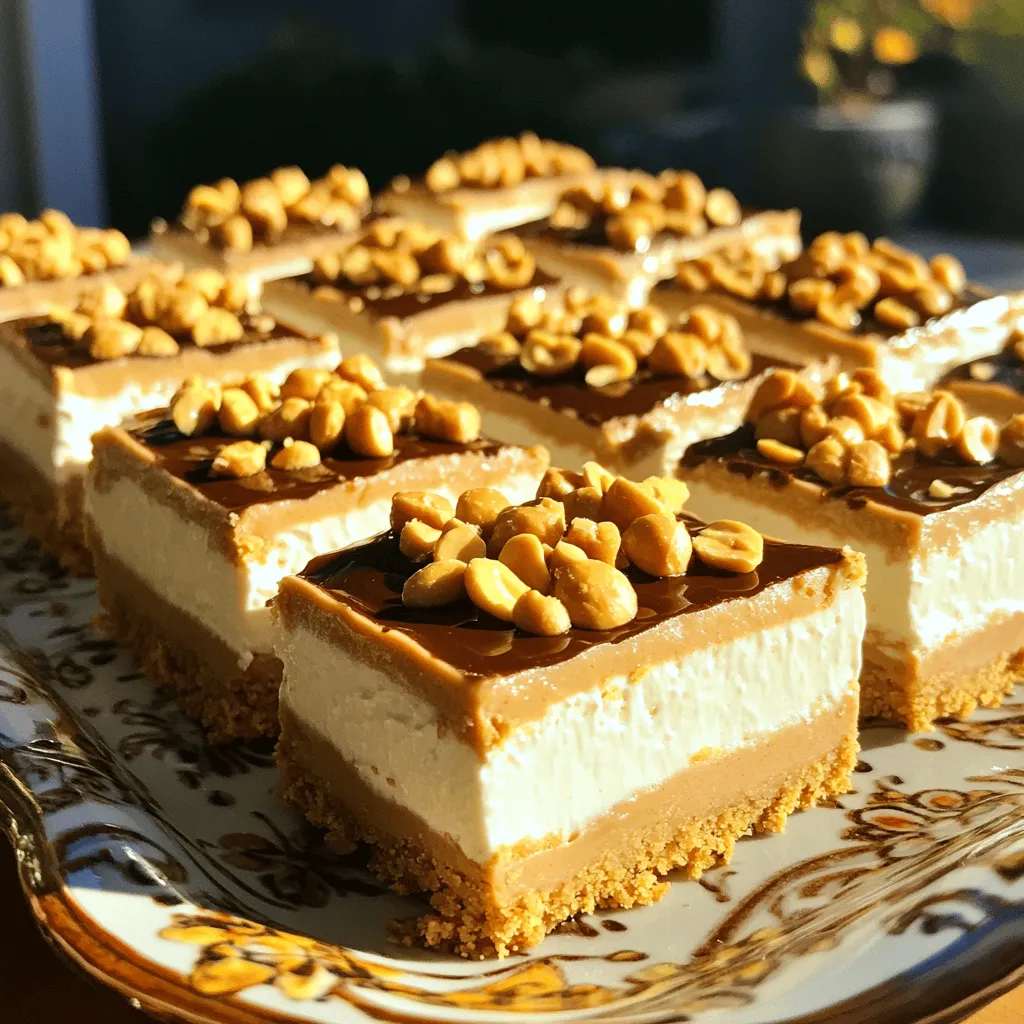
- Decadent Flavor: This cheesecake bars combine the rich taste of peanut butter with the creamy texture of cheesecake, creating a dessert that’s both indulgent and satisfying.
- No-Bake Convenience: Perfect for warm weather or busy days, these bars require no baking, making them an easy and quick treat to prepare.
- Customizable Topping: With options for chocolate syrup and chopped peanuts, you can easily personalize these bars to suit your taste or occasion.
- Perfect for Sharing: Cut into squares, these bars are ideal for parties or gatherings, allowing everyone to enjoy a delightful bite of peanut butter goodness.
Ingredients
List of Ingredients
– 1 1/2 cups graham cracker crumbs
– 1/2 cup unsalted butter, melted
– 2 cups cream cheese, softened
– 1 cup creamy peanut butter
– 3/4 cup powdered sugar
– 1 teaspoon vanilla extract
– 1 cup heavy whipping cream
– 1/4 cup chopped peanuts (for topping)
– Chocolate syrup (for drizzling, optional)
To create these no-bake peanut butter cheesecake bars, you need simple ingredients. Each one plays a key role in the taste and texture.
Graham cracker crumbs form the crust. They give a sweet and crunchy base. The melted unsalted butter binds the crumbs, making it firm.
For the filling, use softened cream cheese and creamy peanut butter. These two create a rich and smooth blend. Powedered sugar adds sweetness, while vanilla extract enhances flavor.
Heavy whipping cream is crucial. You whip it until stiff peaks form, which makes the filling light and airy.
For the topping, sprinkle chopped peanuts for crunch. If you love chocolate, drizzle some syrup on top for extra flavor.
Gather these ingredients to make a delicious treat that everyone will love!

Step-by-Step Instructions
Preparing the Crust
– In a medium bowl, combine 1 1/2 cups of graham cracker crumbs and 1/2 cup of melted unsalted butter.
– Mix until the crumbs are coated well.
– Next, press this mixture firmly into the bottom of an 8×8-inch baking dish. Make sure it is even.
Making the Peanut Butter Filling
– In a large mixing bowl, beat together 2 cups of softened cream cheese and 1 cup of creamy peanut butter.
– Mix until it becomes smooth and creamy.
– Gradually add in 3/4 cup of powdered sugar and 1 teaspoon of vanilla extract. Continue mixing until everything is well combined.
Combining and Setting the Layers
– In a separate bowl, whip 1 cup of heavy whipping cream until stiff peaks form.
– Gently fold the whipped cream into the peanut butter mixture. Be careful not to deflate it.
– Spread this filling evenly over the graham cracker crust in the baking dish.
– Smooth the top with a spatula and sprinkle 1/4 cup of chopped peanuts over the filling.
– Cover with plastic wrap and refrigerate for at least 4 hours, or until set.
Pro Tips
- Chill the Cream Cheese: For a smoother and creamier filling, ensure your cream cheese is fully softened at room temperature before mixing.
- Don’t Overwhip the Cream: When whipping the heavy cream, stop as soon as stiff peaks form to avoid a grainy texture in your cheesecake.
- Customize Your Toppings: Feel free to mix in chocolate chips or drizzle caramel sauce along with the chocolate syrup for added flavor.
- Let It Set: For best results, refrigerate the bars for at least 4 hours or overnight to achieve the perfect texture and flavor.
Tips & Tricks
How to Achieve the Best Texture
Using room temperature ingredients is key for a smooth filling. Cold cream cheese can create lumps. Let it sit out for about 30 minutes before mixing. This helps it blend well with the peanut butter.
When you whip the heavy cream, you want it to form stiff peaks. This makes your cheesecake light and fluffy. After whipping, gently fold the cream into the peanut butter mixture. Use a spatula and be careful. You don’t want to mix too hard or the whipped cream will deflate.
Presentation Ideas
For a lovely presentation, serve your cheesecake bars on a decorative platter. You can add a garnish to each bar. A whole peanut or a dollop of whipped cream works great. It makes each piece look special.
If you host a party, cut the bars into small squares. This way, guests can enjoy a bite-sized treat. Drizzle some chocolate syrup over the top for added flair. It also gives a nice contrast to the creamy peanut butter flavor.
Variations
Flavor Variations
You can make your no-bake peanut butter cheesecake bars even more exciting. One easy way is to add chocolate or caramel swirls. Just melt some chocolate or caramel and gently swirl it into the peanut butter filling. This gives a sweet twist and looks beautiful.
Another fun option is to use different nut butters. Instead of creamy peanut butter, try almond or cashew butter. Each nut butter adds its own unique flavor. You can mix and match to find your favorite.
Dietary Adjustments
If you need gluten-free options, you can easily adjust the crust. Use gluten-free graham cracker crumbs or crushed nuts. This way, everyone can enjoy these tasty bars.
For dairy-free alternatives, swap out cream cheese and whipped cream with plant-based versions. Look for coconut cream or cashew cream cheese. These options still give you a creamy texture without the dairy.
Making these changes helps you cater to different diets. It keeps the delicious taste while being mindful of your guests’ needs.
Storage Info
How to Store Leftovers
To keep your cheesecake bars fresh, refrigerate them right away. Use an airtight container to prevent drying. You can also cover the dish with plastic wrap. This protects the bars from odors in the fridge. Store them for up to 5 days.
Freezing Tips
You can freeze these cheesecake bars for later. Cut them into squares and wrap each piece in plastic wrap. Then, place them in a freezer-safe bag. This keeps them fresh for up to three months. When you’re ready to enjoy, thaw them in the fridge overnight. Avoid thawing at room temperature to keep the texture smooth.
FAQs
Can I make this recipe ahead of time?
Yes, you can make these no-bake peanut butter cheesecake bars ahead of time. This recipe is perfect for planning. You can prepare the bars a day or two before your event. Just store them in the fridge. They will taste even better as the flavors blend.
What can I substitute for graham cracker crumbs?
If you can’t find graham cracker crumbs, don’t worry! You can use crushed cookies, like Oreos or digestive biscuits. For gluten-free options, try almond flour or gluten-free cookie crumbs. These substitutes work well and still taste great!
How do I know when it’s set?
To check if your cheesecake bars are ready, gently touch the top. It should feel firm and not wobble. You can also look for a slight shine on the surface. If it looks smooth and set, it is ready to slice and serve!
This blog post shared an easy and tasty peanut butter cheesecake recipe. We went over the ingredients, step-by-step instructions, and tips for the best texture. You learned how to present this dessert to impress your guests. Remember, you can also customize it to fit different diets or flavors.
In the end, you hold the key to making this dessert your own. Enjoy the process and share the delicious results with others. Your kitchen adventure starts now!
.png)


