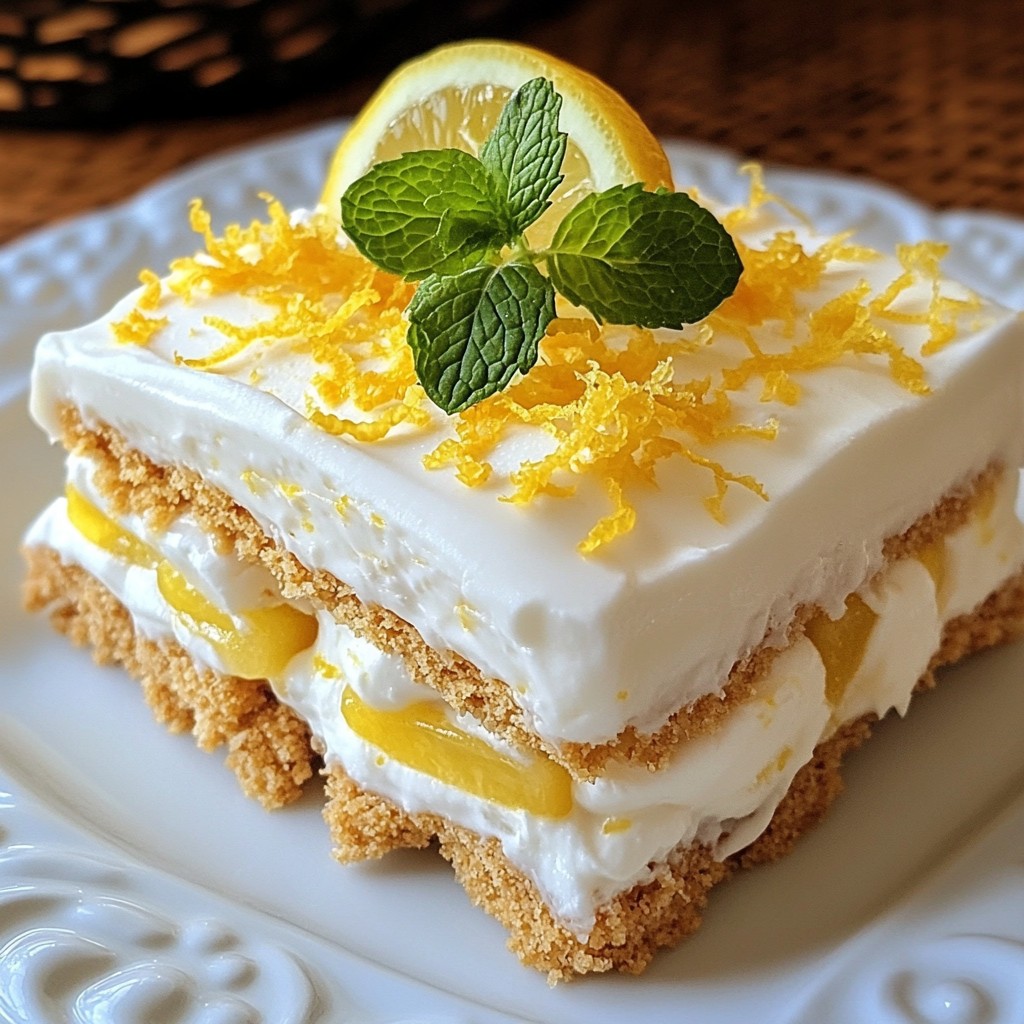
If you're craving a refreshing dessert, our No-Bake Lemon Icebox Cake is the answer! This easy recipe requires no oven and delivers a delightful burst of lemon flavor. With just a few simple ingredients like heavy cream, cream cheese, and lemon curd, you can impress family and friends. Join me in making this chilled treat that’s perfect for any occasion, and let’s dive into the sweet world of no-bake desserts!
Why I Love This Recipe
- Refreshing Flavor: This cake is bursting with bright lemon flavor, making it a perfect treat for warm days or any time you need a citrusy pick-me-up.
- No-Bake Convenience: This recipe is incredibly easy to make since it requires no baking, allowing you to whip it up quickly and enjoy without the oven heat.
- Light and Fluffy Texture: The combination of whipped cream and lemon curd creates a delightful lightness that melts in your mouth, making it a crowd-pleaser.
- Versatile Presentation: You can easily customize the garnishes, adding fresh mint or fruit slices for a stunning visual appeal that impresses guests.
Ingredients
Complete List of Ingredients
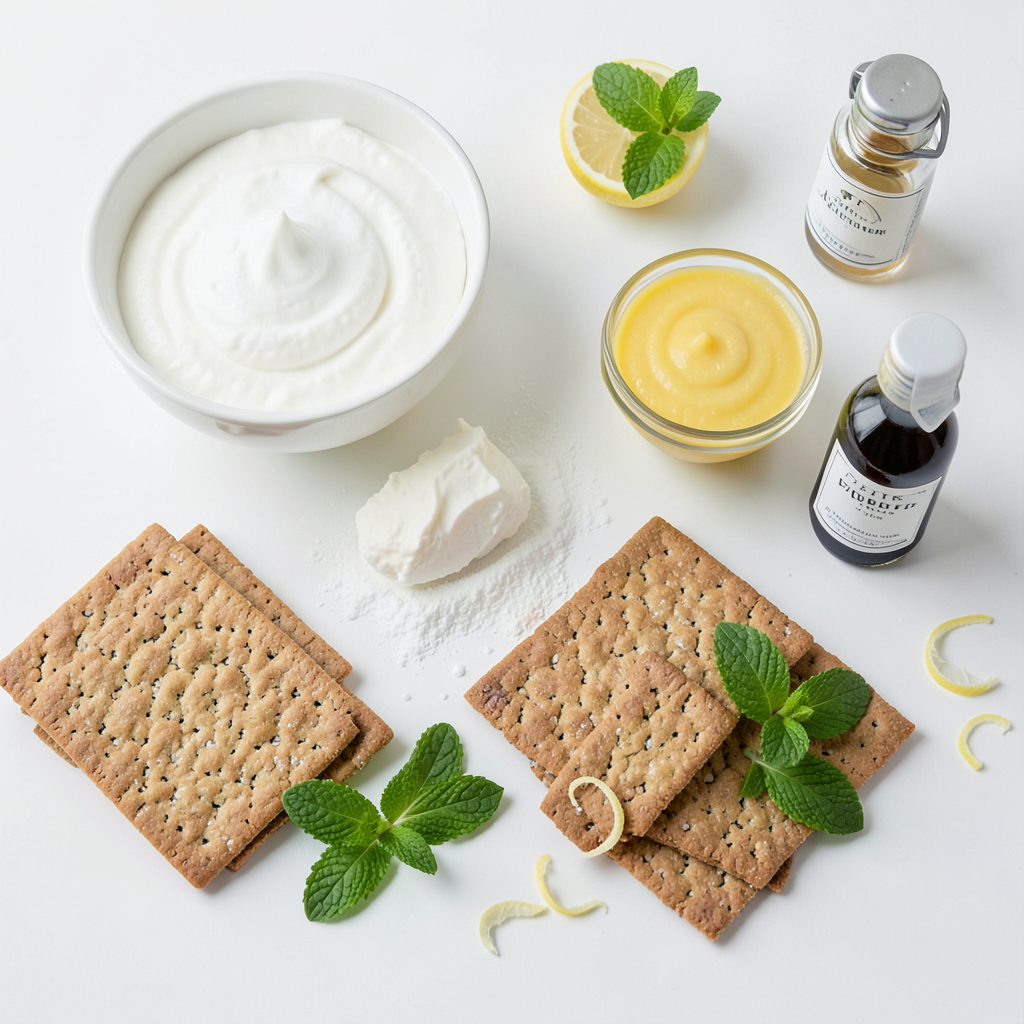
To make this delicious No-Bake Lemon Icebox Cake, you need:
- 1 cup heavy whipping cream
- 1/2 cup powdered sugar
- 8 ounces cream cheese, softened
- 1 cup lemon curd (store-bought or homemade)
- 1 teaspoon vanilla extract
- 12-15 graham cracker sheets
- Fresh mint leaves (for garnish)
- Lemon zest (for garnish)
These ingredients work together to create a zesty and creamy treat. The heavy whipping cream gives the cake its light texture, while the cream cheese adds richness. Lemon curd brings a bright flavor, and the graham crackers provide a crunchy base. You can choose store-bought lemon curd for ease or make your own if you feel adventurous. The fresh mint and lemon zest add color and a fresh taste to the final dish.
Gather these items before you start. This way, you can enjoy the fun of making this chilled delight. As you work, remember to keep the ingredients fresh for the best results.
Step-by-Step Instructions
Preparation of Lemon Filling
Start by whipping the cream. In a mixing bowl, add one cup of heavy whipping cream and half a cup of powdered sugar. Use a hand mixer or stand mixer. Whip until soft peaks form. This step gives the cake a light and airy texture.
Next, combine the cream cheese and lemon curd. In another bowl, beat eight ounces of softened cream cheese with one cup of lemon curd. Add one teaspoon of vanilla extract for flavor. Mix until smooth and creamy. Then, gently fold the whipped cream into the lemon curd mixture. This creates a fluffy filling that is key to your cake's success.
Assembling the Cake
Now it’s time to assemble the cake. Start by layering graham crackers in a rectangular baking dish. Place an even layer of 12 to 15 graham cracker sheets at the bottom.
Spread a generous layer of the lemon filling over the graham crackers. Use a spatula to smooth it out. Repeat this process, layering graham crackers and lemon filling. Keep going until you use all the filling, ending with a final layer of lemon filling on top. This layering creates a beautiful and tasty cake.
Chilling the Cake
Chilling is crucial for this cake. Cover the dish with plastic wrap and refrigerate for at least four hours. For the best results, let it chill overnight. This time allows the flavors to meld together and the cake to set properly.
To enhance the flavor, remember to garnish before serving. Fresh mint leaves and lemon zest add a pop of color and freshness. Enjoy this refreshing dessert chilled!
Tips & Tricks
Perfecting the Whipped Cream
To make the best whipped cream, start with cold heavy cream. Whip it until you see soft peaks. This means it should hold its shape but still be a bit loose. Be careful not to overwhip. If you do, the cream can turn grainy and become butter. Stop whipping as soon as it looks fluffy.
Substituting Ingredients
If you want to swap out cream cheese, you can use mascarpone cheese or Greek yogurt. Both will give you a rich flavor. For lemon curd, store-bought is fine, but homemade tastes better. Just mix fresh lemon juice, sugar, and eggs in a pot. Cook it until thick, then cool it down.
Serving Suggestions
To make your cake look great, cut it into neat squares. Place them on a nice plate. Add fresh mint leaves and thin lemon slices on top. This adds color and looks inviting. For drinks, pair this cake with iced tea or lemonade. The citrus flavor complements the cake well.
Pro Tips
- Chill Your Equipment: For an even fluffier whipped cream, chill your mixing bowl and beaters in the freezer for about 10-15 minutes before whipping the cream.
- Use Fresh Ingredients: Opt for fresh lemon juice and zest when making your lemon curd for a more vibrant flavor profile.
- Layering Technique: Ensure each layer of graham crackers is fully covered with the lemon filling to prevent them from becoming too soggy.
- Resting Time: For the best flavor and texture, let the cake chill overnight. This allows the flavors to meld beautifully.
Variations
Flavor Variations
You can easily change the flavor of your No-Bake Lemon Icebox Cake. Consider adding layers of fresh fruit or berries. Strawberries, blueberries, or raspberries pair well with lemon. Just slice the fruit thin and layer it between the graham crackers and lemon filling.
Another option is to try different citrus flavors. You can mix in lime or orange zest into the lemon curd. This twist adds a fun new taste. You can also use lime or orange juice instead of lemon juice for a refreshing change.
Gluten-Free Options
If you need a gluten-free dessert, you can use gluten-free graham crackers. Many brands offer these in stores now. Also, check other ingredients to ensure they are gluten-free. For example, some powdered sugars may contain gluten. Always read labels to be sure.
You can substitute regular cream cheese with a gluten-free option. Most cream cheese brands are naturally gluten-free. Just double-check the label to be safe.
Vegan Adaptation
Making this cake vegan is easy, too. Start by using plant-based cream cheese. Many brands offer delicious vegan cream cheese that works well in this recipe.
Instead of heavy whipping cream, try coconut cream. Chill a can of coconut milk overnight. When you open it, scoop out the thick cream. This will whip up nicely and add a tropical twist to your cake.
Storage Info
How to Store Leftovers
To keep your No-Bake Lemon Icebox Cake fresh, use an airtight container. I recommend a glass or plastic container with a tight lid. This helps lock in moisture. Place the cake in the refrigerator. It will stay fresh for about three days. The lemon flavor will still shine through.
Freezing the Cake
You can freeze this cake if you want to save some for later. First, cut it into squares. Wrap each piece tightly in plastic wrap. Then, put the wrapped pieces in a freezer-safe bag. You can freeze the cake for up to three months.
When you're ready to eat, move the cake to the fridge overnight. This slow thawing keeps the texture nice. Enjoy your chilled delight whenever you want!
FAQs
How long does it take to set?
This cake needs at least 4 hours to chill. For best results, chill it overnight. This extra time helps all the flavors mix well and gives the cake a nice, firm texture.
- Place the cake in the coldest part of your fridge.
- Keep it covered with plastic wrap to keep it fresh.
- Avoid opening the fridge too often, as it can raise the temperature.
Can I use homemade lemon curd?
Yes, homemade lemon curd is a great choice! It adds a fresh taste. Here’s how to make it:
1. Ingredients:
- 1 cup fresh lemon juice
- 1 cup sugar
- 4 large eggs
- 1/2 cup unsalted butter, cut into pieces
- Zest of 2 lemons
2. Instructions:
- In a saucepan, whisk together the lemon juice, sugar, and eggs.
- Cook over low heat, stirring constantly until thickened.
- Remove from heat and stir in butter and lemon zest until smooth.
- Let it cool before using in your icebox cake.
What is the best way to cut the cake?
Cutting this cake can be tricky. Here are some tips to get nice, clean slices:
- Use a sharp knife. A dull knife can crush the cake.
- Dip the knife in warm water before cutting. This helps the knife glide through easily.
- Wipe the knife clean after each cut. This keeps your slices neat.
- Cut slowly and gently to avoid breaking the layers apart.
These steps will help you serve beautiful slices of your no-bake lemon icebox cake!
This blog post covered the ingredients and steps for making a delicious lemon cake. We explored the key ingredients like heavy cream, cream cheese, and lemon curd. I shared tips for whipping cream and substituting ingredients to suit your taste. We also looked at serving suggestions and variations, including gluten-free and vegan options.
In conclusion, this lemon cake is easy and fun to make. With a few simple tricks, you can enjoy a tasty treat. Happy baking!
.png)