
Ready to bake something delightful? Maple Glazed Pumpkin Scones are the perfect mix of sweet and spice. They are easy to make and taste amazing! With just a few simple steps, you’ll create warm, flaky scones topped with a rich maple glaze. Whether it’s for breakfast, a snack, or a treat, I’m excited to share my favorite recipe with you. Let’s get started!
Why I Love This Recipe
- Delicious Flavor Combination: The blend of pumpkin and warm spices creates a comforting and aromatic experience that is perfect for fall.
- Easy to Make: This recipe comes together quickly, making it ideal for busy mornings or last-minute gatherings.
- Perfectly Sweet Glaze: The maple glaze adds just the right amount of sweetness, enhancing the overall taste without being overwhelming.
- Versatile Option: These scones can be enjoyed plain, with butter, or paired with your favorite jam, making them a delightful treat for any occasion.
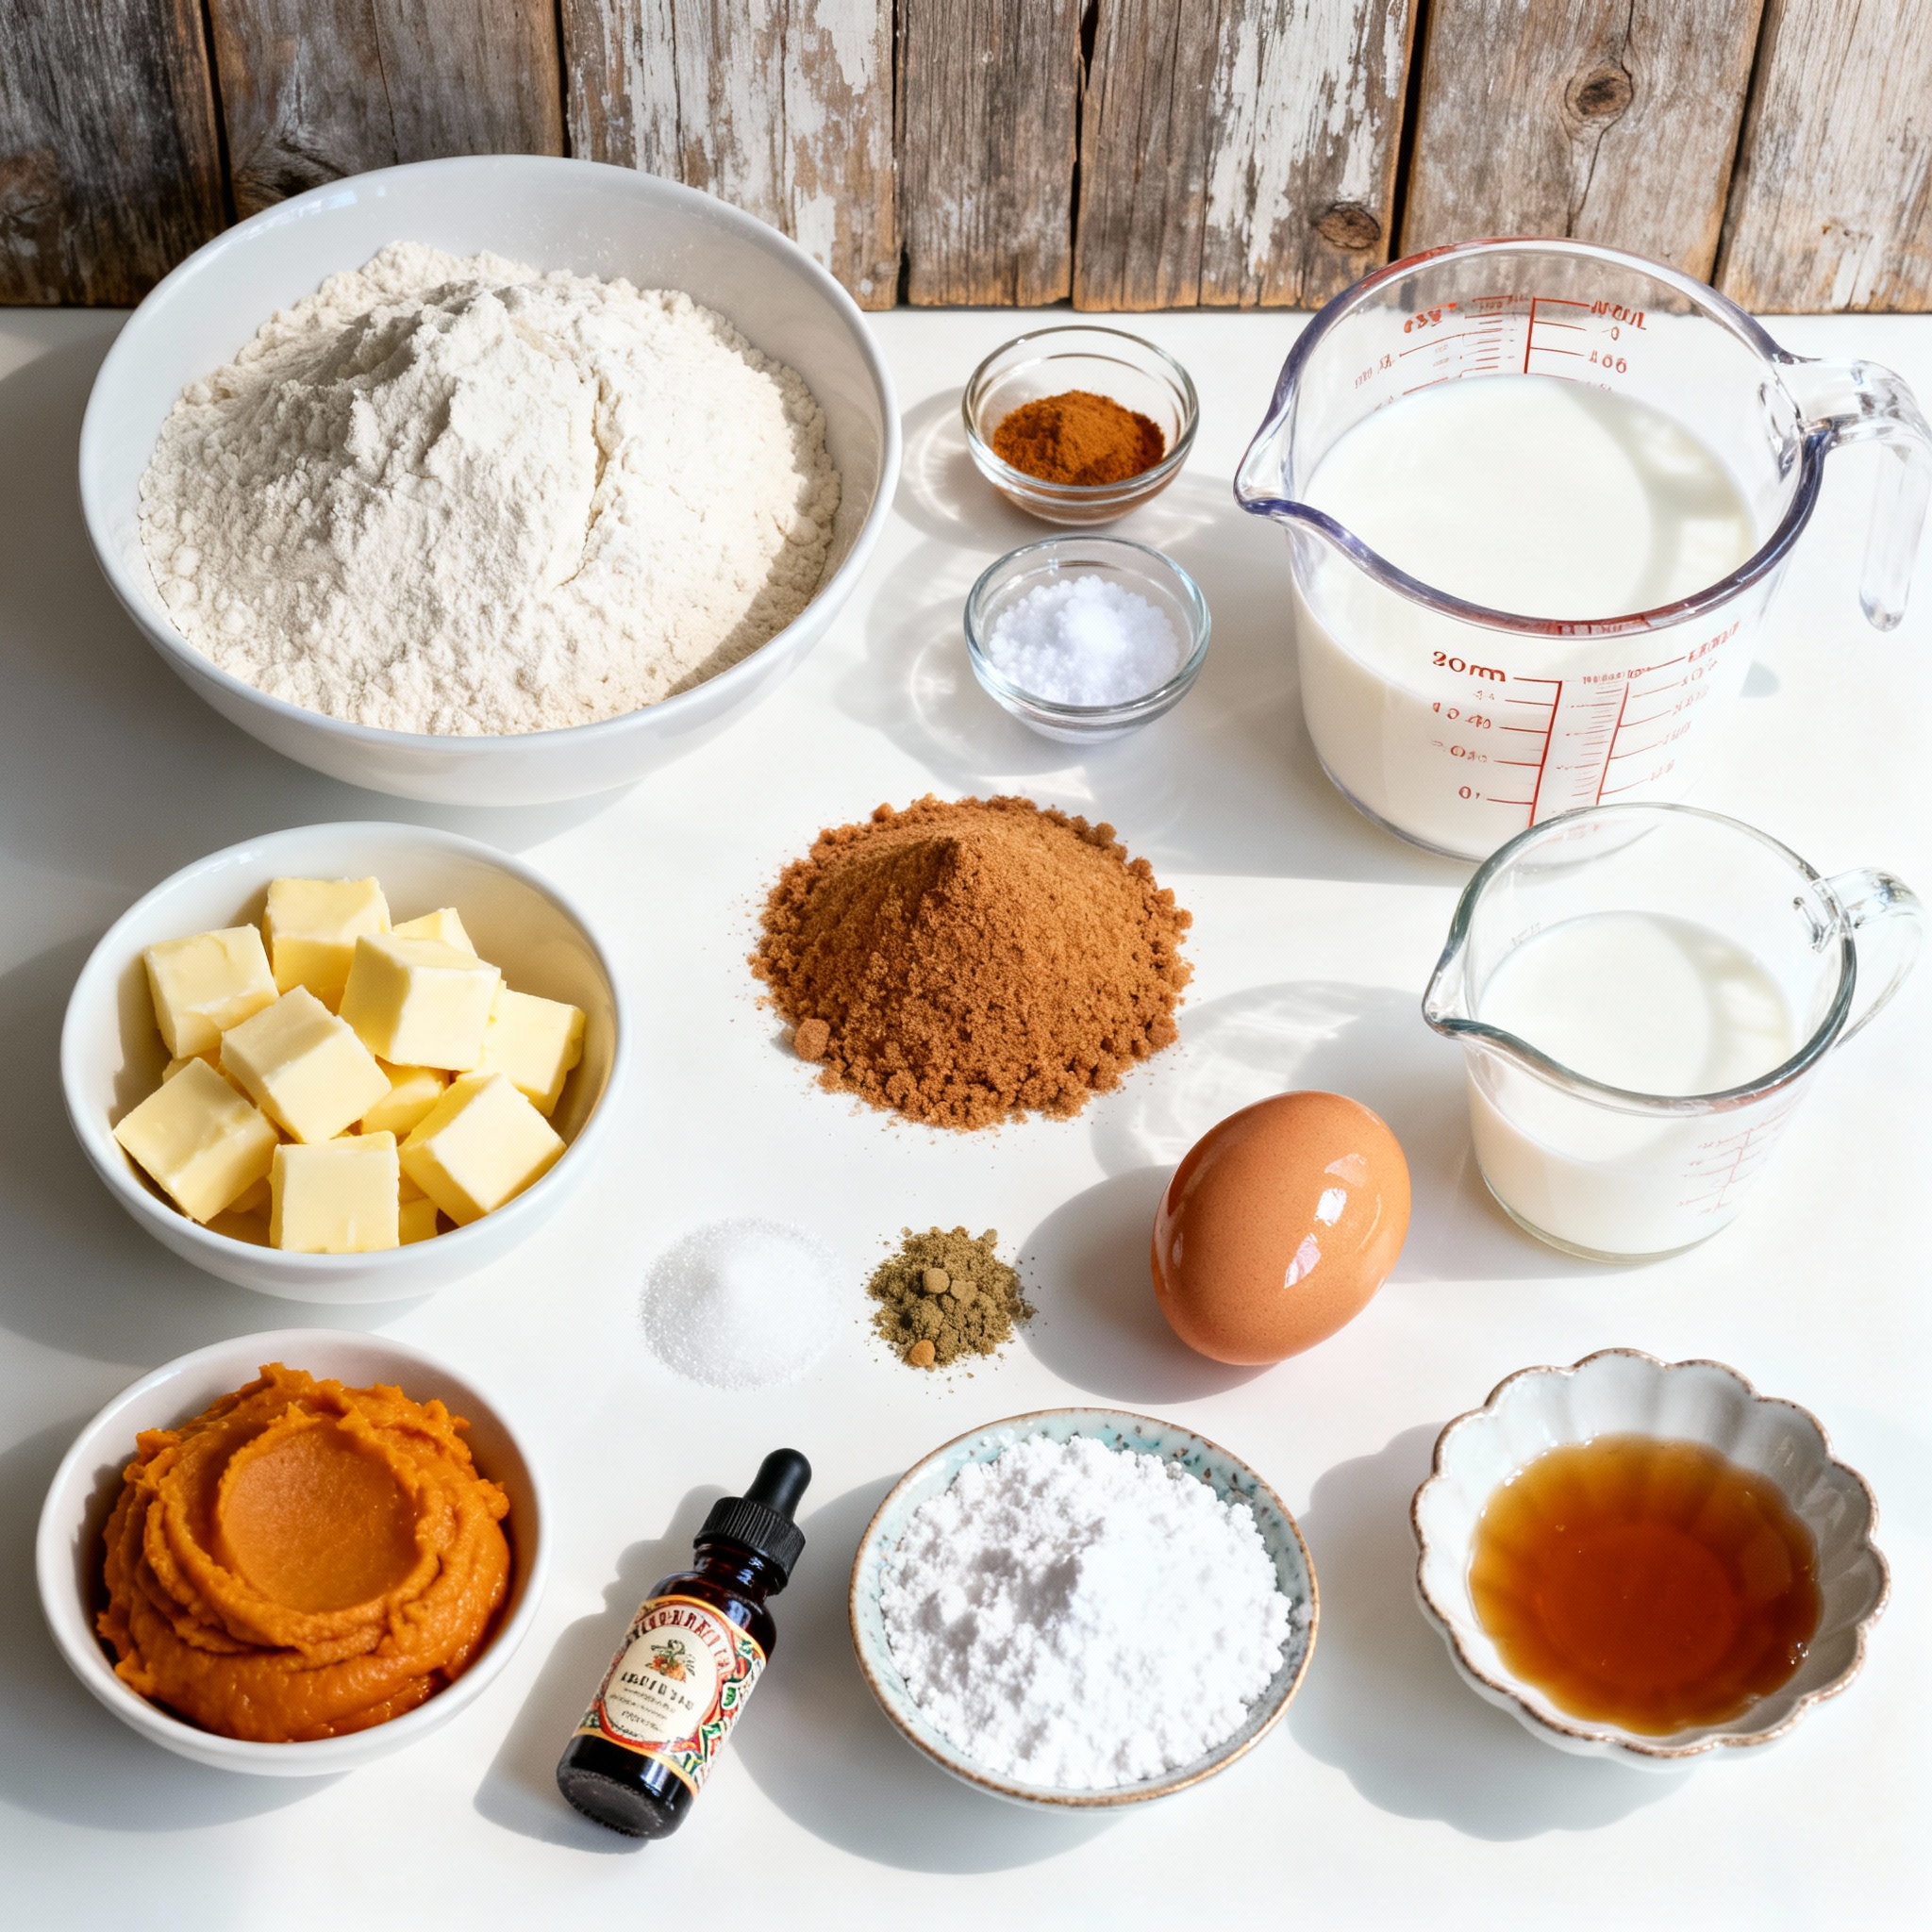
Ingredients
To make these tasty maple glazed pumpkin scones, gather the following ingredients:
Dry Ingredients
– 2 cups all-purpose flour
– 1/2 cup brown sugar, packed
– 1 tablespoon baking powder
– 1/2 teaspoon baking soda
– 1/2 teaspoon ground cinnamon
– 1/4 teaspoon ground nutmeg
– 1/4 teaspoon ground ginger
– 1/2 teaspoon salt
Wet Ingredients
– 1/2 cup unsalted butter, chilled and cubed
– 1/2 cup pumpkin puree (canned or fresh)
– 1/4 cup milk
– 1 large egg
– 1 teaspoon vanilla extract
Maple Glaze
– 1/2 cup powdered sugar
– 2 tablespoons maple syrup
Each ingredient plays a key role in flavor and texture. The flour gives structure. Brown sugar adds sweetness and moisture. Baking powder and baking soda help the scones rise. Spices like cinnamon, nutmeg, and ginger bring warmth, perfect for fall. Salt balances the sweetness.
For the wet ingredients, butter gives richness. Pumpkin puree provides moisture and a lovely flavor. Milk helps bind the dough, while the egg adds structure. Vanilla extract enhances the overall taste.
Finally, the maple glaze adds a sweet, sticky finish. It’s simple to make and takes these scones to the next level. Just whisk the powdered sugar and maple syrup together until smooth. Drizzle it over the scones for a beautiful touch.
These ingredients come together to create a delicious treat. You’ll love how easy these scones are to make. Happy baking!
Step-by-Step Instructions
Prepping the Oven and Baking Sheet
– Preheat your oven to 400°F (200°C).
– Line a baking sheet with parchment paper.
Preparing the Dough
– In a large bowl, combine the dry ingredients: flour, brown sugar, baking powder, baking soda, cinnamon, nutmeg, ginger, and salt.
– Add chilled, cubed butter to the dry mix. Use your fingers or a pastry cutter to blend until it looks like coarse crumbs.
– In a separate bowl, mix the wet ingredients: pumpkin puree, milk, egg, and vanilla extract. Stir until smooth.
– Pour the wet mix into the dry mix. Stir gently until just combined. It’s okay if there are a few lumps; don’t over-mix!
Shaping the Scones
– Turn the dough onto a floured surface. Pat it into a circle about 1 inch thick.
– Cut into 8 wedges like a pizza, or use a biscuit cutter for round shapes.
Baking the Scones
– Place the shaped scones on the lined baking sheet. Space them about 2 inches apart.
– Bake in the preheated oven for 15-20 minutes. They should be golden, and a toothpick should come out clean when inserted.
Making the Maple Glaze
– While the scones cool, whisk together powdered sugar and maple syrup in a bowl. Mix until smooth.
– Drizzle the glaze over the cooled scones. Let it drip down the sides for a nice look.
Pro Tips
- Use Cold Butter: Ensure your butter is very cold and cubed before incorporating it into the flour mixture. This helps create flaky scones.
- Don’t Overmix: Mix the dough until just combined to avoid tough scones. It’s okay to have a few lumps!
- Try Different Glazes: Experiment with other flavors in the glaze, such as adding a pinch of cinnamon or a splash of vanilla extract for extra depth.
- Store Properly: Keep leftover scones in an airtight container at room temperature for up to 2 days, or freeze for longer storage.
Tips & Tricks
Avoiding Common Mistakes
– Do not over-mix the dough. This makes the scones tough. You want them light and fluffy.
– Ensure ingredients are at the right temperatures. Cold butter helps create flaky layers.
Enhancing Flavor
– Consider adding extras like chocolate chips or nuts. They add fun and crunch.
– Experiment with different spices. Try cardamom or allspice for a unique taste.
Achieving Perfect Texture
– Use chilled butter for flaky scones. Cold butter melts slowly while baking, creating steam.
– Pat dough gently to maintain airiness. This helps keep the scones soft.
These tips will help you create the best maple glazed pumpkin scones. Enjoy the process!
Variations
Gluten-Free Option
You can make these pumpkin scones gluten-free. Just swap the all-purpose flour with a gluten-free blend. This change keeps the texture light and fluffy.
Alternative Flavors
Feel free to get creative with flavors. You can add cranberries or pecans for extra crunch. These add a fun twist to the scone. Another option is to replace the pumpkin with sweet potato puree. This gives a different taste while keeping it moist.
Seasonal Adaptations
You can change the spices for different seasons. For fall, use cinnamon and nutmeg. For winter, try allspice or cardamom. These spices will make your scones festive and fun for holidays.
Storage Info
Short-Term Storage
You can store your scones in an airtight container. Keep them at room temperature for up to 3 days. This keeps them fresh and tasty.
Long-Term Storage
For long-term storage, freeze the unglazed scones. They last up to 3 months in the freezer. When you’re ready to enjoy, remember to thaw them completely before glazing. This ensures the glaze sticks well.
Reheating Tips
To reheat your scones, the oven is best for texture. Preheat the oven to 350°F (175°C) and warm them for about 5-10 minutes. If you need a quick method, you can use the microwave. Heat them for about 20-30 seconds. Just be careful not to overheat, or they may get tough.
FAQs
Can I make the dough ahead of time?
Yes, you can refrigerate the dough for a few hours before baking. This helps the flavors blend. It also makes the dough easier to handle. Just wrap it well in plastic wrap. When ready to bake, let it sit at room temperature for about 15 minutes. This will soften it a bit, making it easier to shape.
What can I substitute for pumpkin puree?
You can use applesauce or other purees in a pinch. Applesauce adds moisture and sweetness. You could also use butternut squash puree or even mashed bananas. Each option will change the flavor slightly, but they all work well.
How do I know when the scones are done?
They should be lightly golden on top, and a toothpick should come out clean. If the toothpick has wet dough on it, give them a few more minutes. Baking times can vary by oven, so keep an eye on them. Perfectly baked scones should be soft inside and have a nice crust outside.
You now have all you need to make perfect pumpkin scones. With simple dry and wet ingredients, plus a glaze, you can create tasty treats. Remember to avoid over-mixing for that flaky texture. Consider fun variations to keep things fresh. Store your scones properly for long-lasting flavor. Enjoy making these delicious scones, and share your results with friends and family. Happy baking!
.png)


