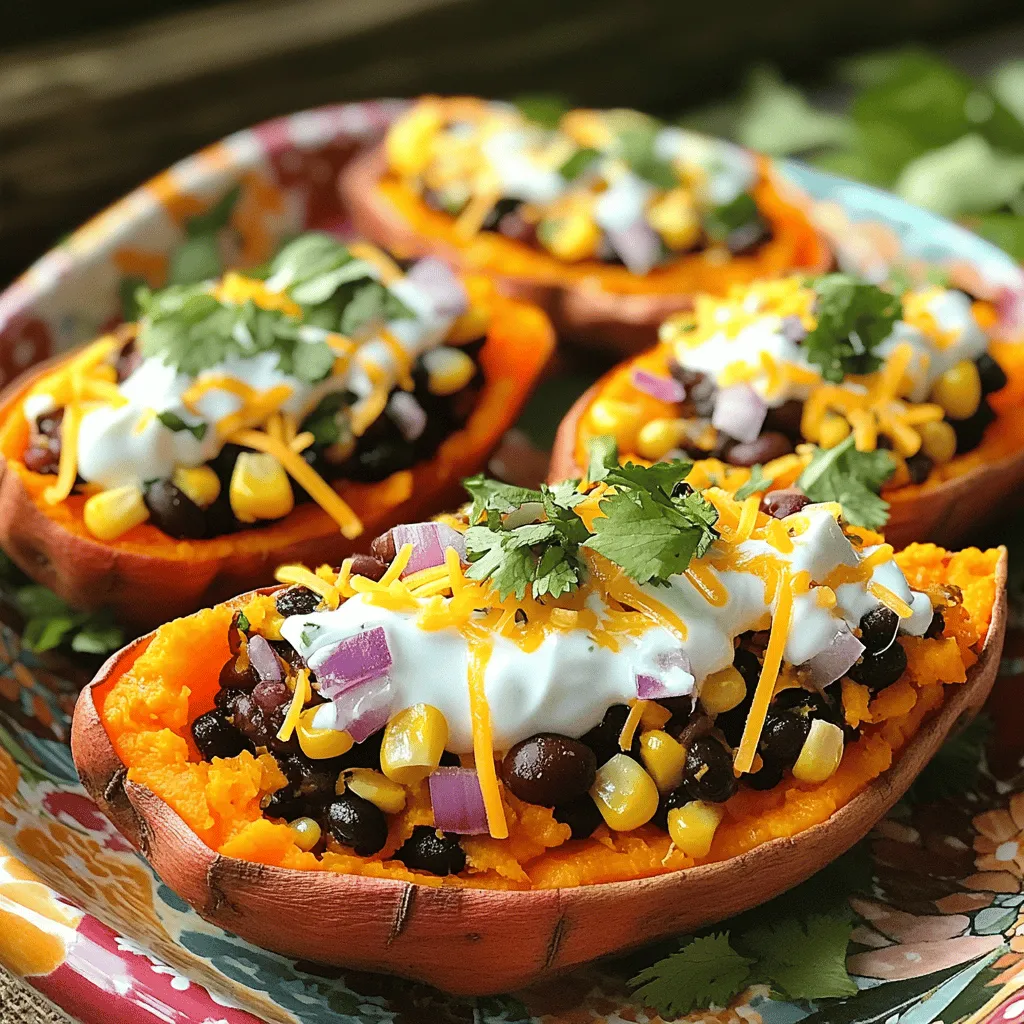
Get ready to wow your taste buds with my Loaded Sweet Potato Skins! This easy recipe packs a punch with bold flavors and vibrant colors. You’ll love the combo of savory cheese, fresh veggies, and creamy yogurt. Perfect for game day or a cozy family dinner, these skins are simple to make and sure to impress. Let’s dive into the ingredients and get cooking!
Why I Love This Recipe
- Delicious Flavor Combination: The sweet and savory blend of sweet potatoes, black beans, and cheese creates a mouthwatering experience that is hard to resist.
- Nutritious Ingredients: This recipe is packed with vitamins and minerals from sweet potatoes, beans, and corn, making it a healthy choice for any meal.
- Easy to Prepare: With simple steps and minimal prep time, these loaded sweet potato skins are perfect for busy weeknights or as a fun appetizer for gatherings.
- Customizable Toppings: You can easily swap ingredients or add your favorite toppings, allowing for endless variations based on your preferences.
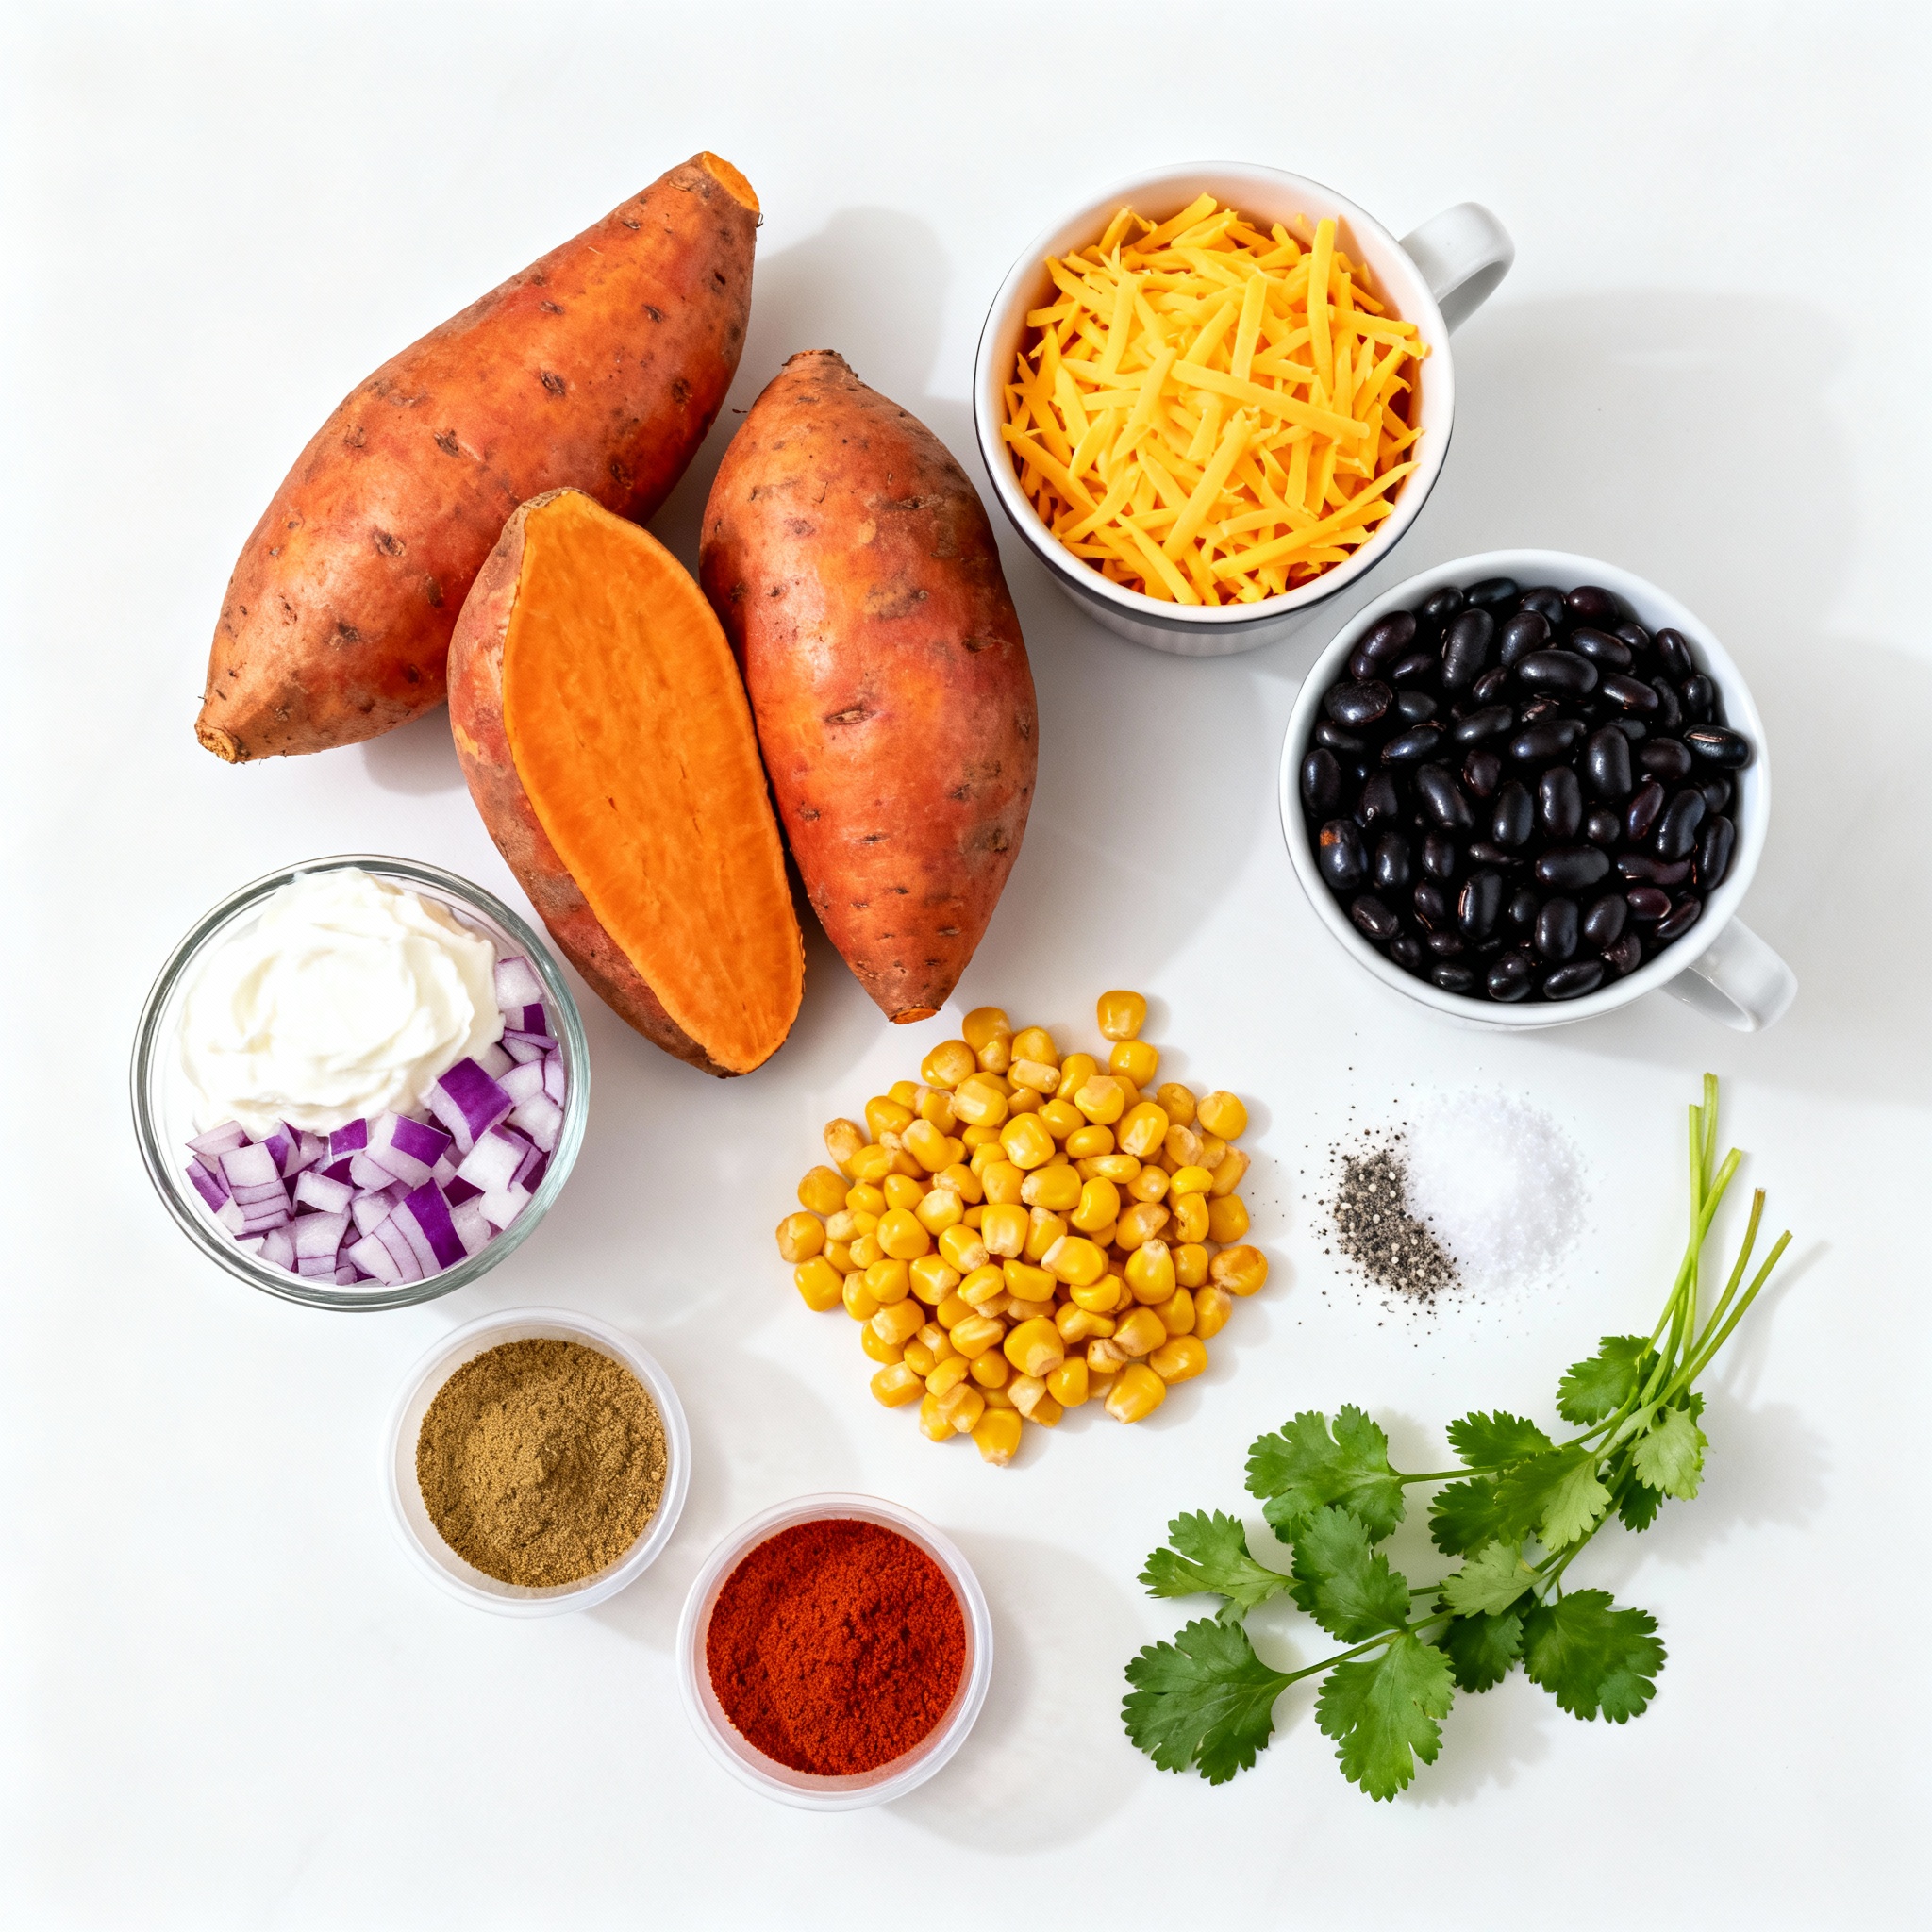
Ingredients
To make loaded sweet potato skins, you need some simple and tasty ingredients. Here’s what you will need:
– 4 medium sweet potatoes
– 1 cup shredded cheddar cheese
– 1/2 cup cooked black beans, rinsed and drained
– 1/2 cup corn kernels (fresh or frozen)
– 1/4 cup red onion, diced
– 1/2 cup Greek yogurt (or sour cream)
– 1 teaspoon cumin
– 1/2 teaspoon paprika
– Salt and pepper to taste
– Fresh cilantro, chopped (for garnish)
– Olive oil
These ingredients mix well together. The sweet potatoes give you a soft base. The black beans and corn add protein and fiber. Cheddar cheese melts beautifully on top, making it super cheesy. The Greek yogurt adds a creamy touch. You can switch things up with different spices or toppings if you like.
Step-by-Step Instructions
Preparing the Sweet Potatoes
1. Preheat your oven to 400°F (200°C). This helps cook the sweet potatoes evenly.
2. Scrub the sweet potatoes under running water. Use your hands to remove dirt and debris.
3. Pierce each potato several times with a fork. This allows steam to escape while baking.
4. Drizzle olive oil over the sweet potatoes. Use just enough to coat the skin.
5. Sprinkle salt on top for flavor. This step enhances the taste of the skins.
Filling the Skins
1. Once the sweet potatoes are cooked, remove them from the oven. Let them cool slightly for safety.
2. Slice each sweet potato in half lengthwise. Use a sharp knife for a clean cut.
3. Scoop out a portion of the flesh with a spoon. Leave a thin border to keep the skin sturdy.
4. In a bowl, mix the scooped flesh, black beans, corn, red onion, cumin, paprika, salt, and pepper.
5. Stir well until all ingredients are combined. This creates a tasty filling.
Baking and Serving
1. Spoon the filling back into the sweet potato skins. Pile it high for a hearty dish.
2. Top with shredded cheddar cheese. This adds a rich, melty layer to the skins.
3. Return the loaded sweet potato skins to the oven. Bake for another 15-20 minutes.
4. Once the cheese is melted and bubbly, remove them from the oven.
5. Let cool for a couple of minutes. Drizzle Greek yogurt over the top and garnish with chopped cilantro.Enjoy your delicious loaded sweet potato skins!
Pro Tips
- Choose the Right Sweet Potatoes: Look for firm, smooth-skinned sweet potatoes without any blemishes for the best flavor and texture.
- Customize Your Toppings: Feel free to add other toppings such as diced jalapeños, avocado, or bacon bits to personalize your loaded sweet potato skins.
- Keep Them Warm: If serving at a gathering, keep the sweet potato skins warm in the oven on low heat until ready to serve.
- Perfectly Melted Cheese: To achieve perfectly melted cheese, you can place the loaded skins under the broiler for the last few minutes, but watch closely to avoid burning.
Tips & Tricks
Cooking Tips
To get the best texture, choose medium sweet potatoes. They bake evenly and hold their shape well. Scrub them clean and pierce with a fork to let steam escape. This keeps them fluffy inside.
For seasoning, mix cumin and paprika into your filling. These spices add depth. Taste the filling before baking. Adjust salt and pepper as needed. This ensures each bite is flavorful.
Presentation Ideas
Serve your loaded sweet potato skins on a bright platter. This makes the colors pop. Add a dollop of Greek yogurt on top. It adds creaminess and looks great.
For garnishing, sprinkle chopped cilantro over the skins. This adds freshness and color. You can also add extra cheese on top before the final bake. It makes the dish even more inviting. Enjoy the vibrant look of your dish!
Variations
Different Cheese Options
For loaded sweet potato skins, cheese makes a big impact. Cheddar cheese is a classic choice. It melts well and adds a rich taste. But you can try other options.
– Monterey Jack: This cheese gives a creamy texture and mild flavor. It blends well with spices.
– Pepper Jack: If you like a kick, this cheese packs heat. The spicy flavor enhances the dish.
– Goat Cheese: For a tangy twist, use goat cheese. It adds creaminess and a unique taste.
If you need a vegan option, there are great alternatives too.
– Cashew Cheese: This cheese is creamy and rich. It offers a nutty flavor that complements sweet potatoes.
– Nutritional Yeast: It is a great way to add a cheesy taste. Sprinkle it on top for a nutritious boost.
Additional Toppings
You can customize your loaded sweet potato skins with fun toppings.
– Other Bean Varieties: While black beans are tasty, you can mix it up. Kidney beans or pinto beans work well too. They add different textures and flavors.
– Adding Proteins: Want to make it heartier? You can add cooked chicken or bacon. Both options bring savory flavors.
Simply mix in your choice of protein with the filling. Then load the skins and bake. Enjoy your tasty creations!
Storage Info
Storing Leftovers
After you enjoy your loaded sweet potato skins, you may want to save some for later. To store leftovers, let them cool completely first. Then, place them in an airtight container. This helps keep them fresh. You can store them in the refrigerator for up to three days.
When you’re ready to enjoy them again, reheating is simple. Preheat your oven to 350°F (175°C). Place the skins on a baking sheet and cover with foil. Heat them for about 15-20 minutes. This keeps the skins crispy while warming the filling.
Freezing Options
You can freeze loaded sweet potato skins if you want to save them for a longer time.
Freezing before cooking: If you want to freeze them raw, prepare the sweet potatoes and fill the skins. Instead of baking, wrap each skin tightly in plastic wrap. Place them in a freezer-safe bag. They can stay frozen for up to three months. When you want to cook them, just bake from frozen, adding a few extra minutes to the cooking time.
Freezing after cooking: If you have leftovers after baking, let them cool down. Then, wrap each one in plastic wrap and place them in a freezer bag. This way, you can enjoy them later without any loss of flavor. To reheat, bake them directly from frozen, following the same steps as before.
These easy storage tips will help you enjoy every bite of your loaded sweet potato skins.
FAQs
Can I make loaded sweet potato skins in advance?
Yes, you can make loaded sweet potato skins in advance. I recommend prepping them a day before you plan to serve. Bake the sweet potatoes and scoop them out. Store the skins in an airtight container in the fridge. You can also prepare the filling ahead of time. Mix the sweet potato flesh, beans, corn, and spices. Keep it in a separate container. When you are ready, simply fill the skins and bake them.
What other toppings can I use?
You can get creative with toppings! Here are some fun ideas:
– Sliced jalapeños for heat
– Crumbled bacon for a savory touch
– Diced avocado for creaminess
– Sautéed mushrooms for depth of flavor
– Chopped green onions for a fresh crunch
Feel free to mix and match any of these toppings based on your taste.
How can I customize the seasoning?
Customizing the seasoning is easy! Here are some spice variations:
– Add chili powder for more heat
– Use smoked paprika for a smoky flavor
– Sprinkle some garlic powder for extra depth
– Try a pinch of cayenne pepper for a kick
– Mix in fresh herbs like thyme or oregano
These simple changes can elevate your loaded sweet potato skins to new heights!
Loaded sweet potato skins are a tasty, easy dish to prepare. We covered ingredients, from sweet potatoes to spices, and how to mix them. The step-by-step guide helps you make perfect skins. I shared tips on cooking and presentation, plus fun variations like different cheeses and toppings. Storing leftovers can keep them fresh for later.
Get creative with your toppings to make this dish your own. Enjoy cooking and sharing these delicious bites!
.png)