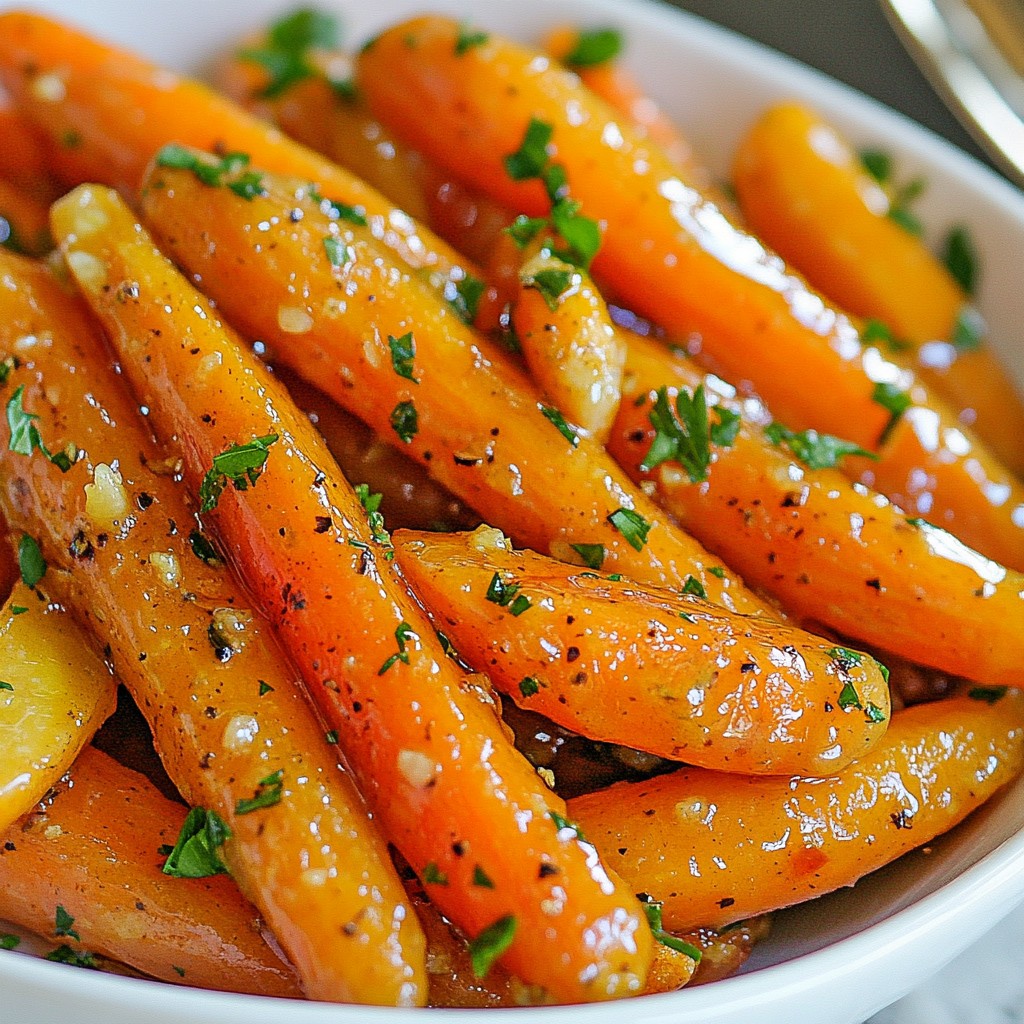
Looking for a quick and delicious side dish? Honey garlic glazed carrots are the answer! This simple recipe brings together the natural sweetness of carrots with a rich, flavorful glaze. You can whip it up in no time, making it perfect for any meal. I’ll walk you through the easy steps and share tips for perfecting the flavor. Let’s dive into this tasty treat that is sure to impress!
Why I Love This Recipe
- Sweet and Savory Balance: The combination of honey and garlic creates a deliciously sweet yet savory flavor that elevates the humble carrot to new heights.
- Quick and Easy: This recipe is simple to prepare, taking only 25 minutes from start to finish, making it perfect for busy weeknight dinners.
- Healthy Side Dish: Carrots are packed with vitamins and nutrients, making this dish a healthy addition to any meal while still being indulgent.
- Beautiful Presentation: The vibrant color of glazed carrots adds a pop of color to your plate, making it visually appealing and appealing to all ages.
Ingredients
Detailed List of Ingredients
- 1 pound baby carrots (or regular carrots, peeled and cut into sticks)
- 3 tablespoons honey
- 2 tablespoons unsalted butter
- 3 cloves garlic, minced
- 1 tablespoon soy sauce (or tamari for gluten-free option)
- 1 teaspoon fresh ginger, grated
- Salt and pepper to taste
- Fresh parsley, chopped for garnish
When making honey garlic glazed carrots, you need simple ingredients. The main star is carrots. You can use baby carrots or regular carrots. Just peel and cut them into sticks if you choose the regular kind.
Next, you need honey for sweetness. It makes the glaze sticky and tasty. Unsalted butter adds a rich flavor. Then, you’ll use garlic for a bold taste and fresh ginger for a zing.
Soy sauce brings some saltiness. It pairs well with honey. Add salt and pepper to taste. Finally, fresh parsley gives a pop of color and freshness when you serve it.
These ingredients come together to create a dish that is both sweet and savory. It's a simple way to make carrots shine on your plate.
Step-by-Step Instructions
Preparing the Ingredients
Melting the Butter Start by melting 2 tablespoons of unsalted butter in a large skillet over medium heat. Make sure it melts completely without browning. This butter will give the carrots a rich flavor.
Sautéing Garlic and Ginger Next, add 3 cloves of minced garlic and 1 teaspoon of grated fresh ginger to the skillet. Sauté these for about 1 minute. Watch as the kitchen fills with a wonderful aroma. This step adds depth to the dish.
Creating the Glaze
Mixing Honey and Soy Sauce Now, stir in 3 tablespoons of honey and 1 tablespoon of soy sauce. Mix them well to form a sticky glaze. The honey brings sweetness, while the soy sauce adds umami.
Adding Carrots Add 1 pound of baby carrots to the skillet. If you use regular carrots, peel and cut them into sticks. Toss the carrots in the honey garlic mixture until they are fully coated. This ensures each bite is full of flavor.
Cooking the Carrots
Covering and Reducing Heat Cover the skillet with a lid and reduce the heat to low. Cook the carrots for about 10 to 12 minutes. Stir occasionally until they become tender. This gentle cooking makes them sweet and soft.
Thicken the Glaze After the carrots are tender, remove the lid. Increase the heat to medium-high. Let the sauce reduce for 3 to 5 minutes until it thickens slightly. This step makes the glaze cling to the carrots perfectly.
Tips & Tricks
Perfecting the Flavor
Adjusting Sweetness with Honey You can change the sweetness by adding more or less honey. If you want a sweeter taste, use a bit more honey. If you prefer a less sweet flavor, cut back. Honey adds a nice glaze and rich taste to the carrots.
Balancing with Soy Sauce Soy sauce adds saltiness to balance the honey. A little soy sauce helps the flavors mix well. Start with one tablespoon and taste. If you want more salt, add a bit more soy sauce. This gives the dish depth and makes it more savory.
Cooking Techniques
How to Know When Carrots are Done To check if the carrots are done, poke one with a fork. If it goes in easily, they are ready. You want them tender but not mushy. Cooking time is about 10-12 minutes on low heat.
Sautéing vs. Steaming Sautéing gives the carrots a nice glaze and adds flavor. Steaming keeps them crunchy and bright. I prefer sautéing for this recipe, as it mixes the flavors better. If you steam, add the glaze after cooking. This keeps the carrots crisp.
Pro Tips
- Use Fresh Carrots: Fresh baby carrots provide the best flavor and texture. If using regular carrots, ensure they are sweet and tender.
- Adjust Sweetness: Feel free to adjust the amount of honey based on your taste preference. You can substitute some honey with maple syrup for a different flavor profile.
- Garnish for Flavor: Adding freshly chopped parsley not only enhances the presentation but also adds a fresh flavor contrast to the sweet glaze.
- Cook to Your Preference: If you prefer your carrots with a bit of crunch, reduce the cooking time slightly. Test for doneness by piercing them with a fork.
Variations
Alternative Vegetables
Using regular carrots is a great choice. They are easy to find and tasty. Just peel and cut them into sticks. This will keep the cooking time the same as baby carrots. You still get that sweet, sticky glaze. The flavor stays rich and bright.
Adding other root vegetables can bring new tastes. Try parsnips for a sweet twist. They cook well and blend nicely with the honey garlic glaze. You can also use sweet potatoes. Their creaminess pairs well with the sauce. Just cut them into small pieces for even cooking.
Dietary Adjustments
For a gluten-free option, use tamari instead of soy sauce. Tamari gives the same great flavor without gluten. It works well in this recipe, so you won’t miss a thing.
If you need a vegan substitute, swap the butter for olive oil. Use a plant-based honey or maple syrup instead of honey. This keeps the dish sweet and delicious. You can still enjoy the rich flavors without animal products.
Storage Info
Storing Leftovers
Refrigerating Honey Garlic Glazed Carrots After enjoying your honey garlic glazed carrots, let them cool first. Then, place them in an airtight container. They will stay fresh in the fridge for up to 4 days. This makes them easy to grab for lunch or dinner!
Freezing Tips If you want to keep them longer, freezing is an option. Place the cooled carrots in a freezer-safe bag. Remember to remove as much air as possible. These can last for about 3 months in the freezer. When you want to eat them, thaw in the fridge overnight.
Reheating Guidelines
Best Methods to Reheat Reheating is simple! You can use the microwave or stovetop. For the microwave, heat in short bursts, stirring in between. If using the stovetop, add a splash of water or broth to a pan. Heat over low until warm.
Maintaining Texture and Flavor To keep the carrots tender, avoid high heat. Stir gently as you reheat. If they seem dry, a bit of butter or olive oil can help. This keeps the glaze rich and tasty!
FAQs
Common Questions about Honey Garlic Glazed Carrots
Can I use different types of carrots? Yes, you can use different types of carrots. Regular carrots work well too. Just peel and cut them into sticks. This gives you the same great flavor.
Is this dish suitable for meal prep? Absolutely! Honey garlic glazed carrots are perfect for meal prep. They store well in the fridge. Just reheat them for quick side dishes all week.
How can I make the dish spicier? To add spice, try adding red pepper flakes. You can also use a dash of hot sauce. This will give your carrots a nice kick.
What are the nutritional benefits of carrots? Carrots are great for your health! They are rich in vitamins A and C. They also provide fiber, which helps digestion. Eating carrots can support good vision too.
Can I use maple syrup instead of honey? Yes, you can use maple syrup instead of honey. It will change the taste a bit, but it still tastes great. This option is also perfect for vegans!
This blog post shared a simple way to make honey garlic glazed carrots. You learned the ingredients and steps needed to create this flavorful side dish. I also offered tips on perfecting the flavor and suggested ways to store leftovers. Remember, you can adjust the recipe based on your taste and dietary needs. Enjoy making this dish and impressing your family or friends with your cooking skills!
.png)