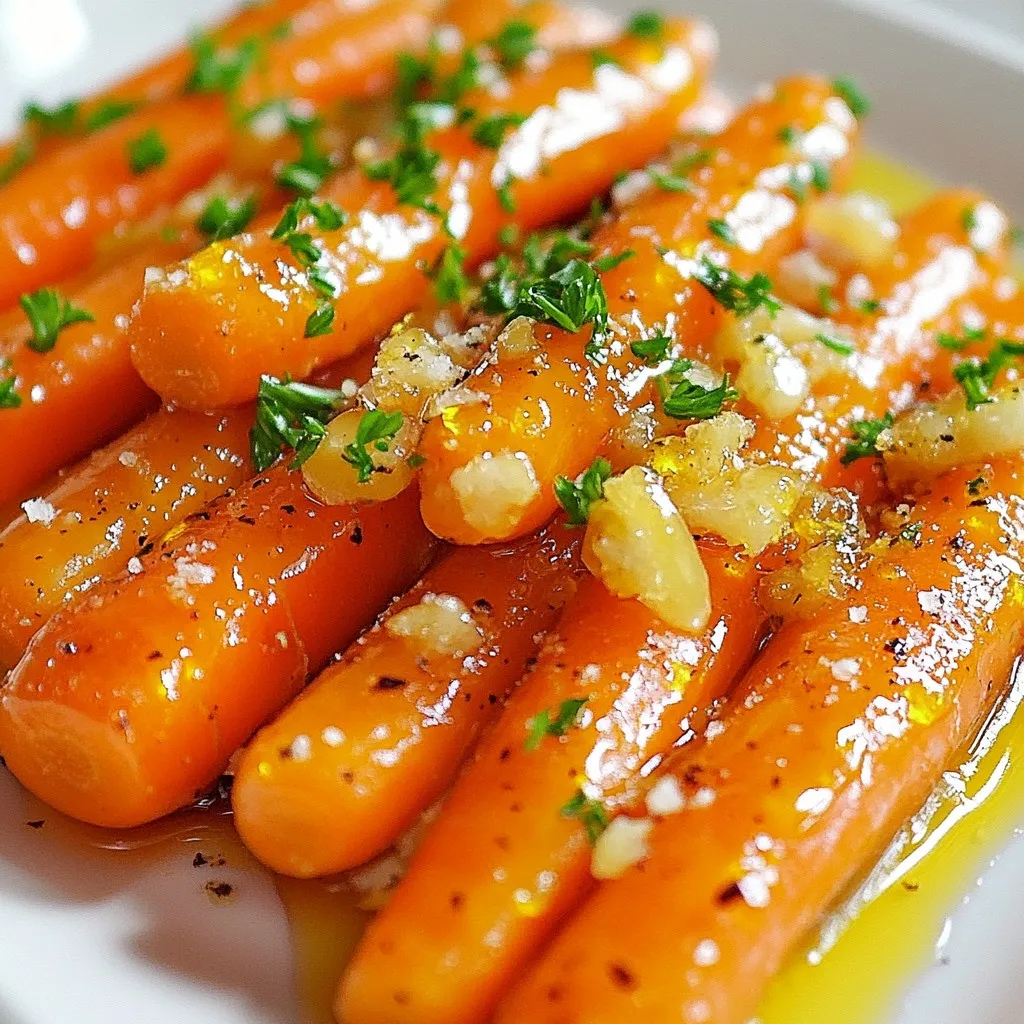
If you’re looking for a tasty and simple side dish, I’ve got just the recipe for you! Honey Garlic Glazed Carrots are not only flavorful but also easy to make. In this post, I’ll share how to transform fresh carrots into a sweet and savory delight. You’ll learn about the ingredients, tools, and step-by-step instructions to perfect this dish. Let’s get started and make your meals shine!
Why I Love This Recipe
- Deliciously Sweet and Savory: The combination of honey and garlic creates a perfect balance of flavors that elevates the natural sweetness of the carrots.
- Quick and Easy to Prepare: This recipe takes only 20 minutes from start to finish, making it a great side dish for busy weeknights.
- Versatile Ingredients: The simple ingredients used in this dish can easily be swapped or adjusted to suit your taste, allowing for creativity in the kitchen.
- Beautiful Presentation: The vibrant color of glazed carrots adds an appealing touch to any meal, making it not only tasty but also visually delightful.
Ingredients
List of Required Ingredients
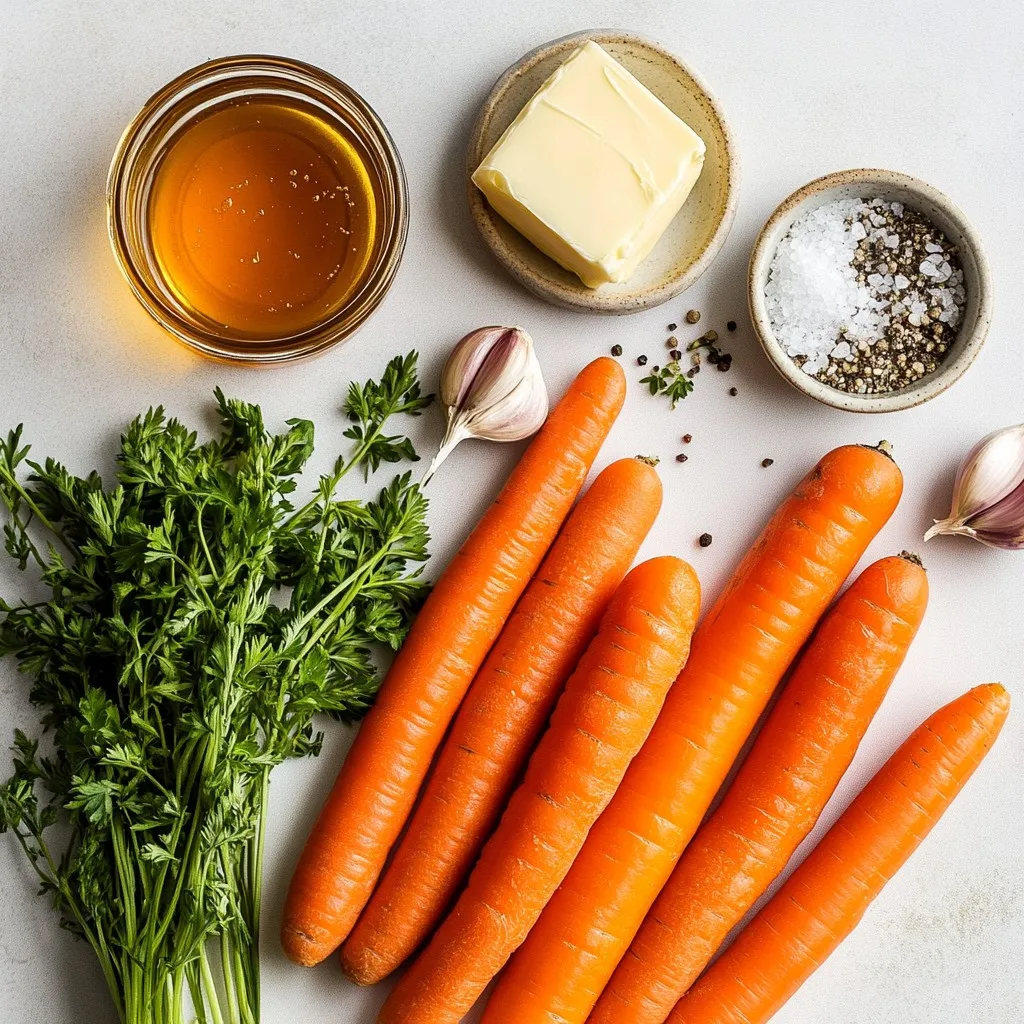
To make Honey Garlic Glazed Carrots, gather these items:
– 1 lb baby carrots (or regular carrots, peeled and cut into sticks)
– 3 tablespoons honey
– 2 tablespoons unsalted butter
– 3 cloves garlic, minced
– 1 teaspoon fresh thyme leaves (or 1/2 teaspoon dried thyme)
– Salt and pepper to taste
– Fresh parsley, chopped for garnish (optional)
Ingredient Substitutions
You can swap some ingredients if needed:
– Use maple syrup instead of honey for a different sweet flavor.
– Olive oil can replace unsalted butter for a dairy-free option.
– If you don’t have fresh thyme, dried thyme works well.
– Use any type of carrot, but baby carrots save time.
Tools and Utensils Needed
To cook these carrots, you will need:
– A large pot for boiling
– A large skillet for the glaze
– A cutting board and knife for prepping carrots
– A stirring spoon for mixing
– A colander to drain the carrots
Step-by-Step Instructions
Preparing the Carrots
Start by washing your carrots. If you use regular carrots, peel them first. Cut them into sticks. Aim for pieces that are about the same size as baby carrots. This helps them cook evenly.
Cooking the Carrots
In a large pot, fill it with water and add some salt. Bring the water to a boil. Once it bubbles, add the carrots. Cook them for about five minutes. You want them tender but still a bit crisp. After cooking, drain the carrots and set them aside.
Making the Honey Garlic Glaze
Grab a large skillet and place it on medium heat. Add the butter and let it melt. Once melted, add the minced garlic. Sauté it for about one minute. Be sure not to let it brown. After that, pour in the honey and add the thyme. Stir everything together. Let the mixture bubble gently for one to two minutes. This helps it thicken a bit.
Coating and Glazing Carrots
Now, add the cooked carrots to the skillet. Toss them in the honey garlic mixture. Make sure they are evenly coated. Cook for an extra three to four minutes. This heats the carrots through and makes them shine with glaze. Finally, season with salt and pepper to taste. If you like, sprinkle some chopped parsley on top before serving.
Tips & Tricks
How to Achieve Perfectly Glazed Carrots
To get perfectly glazed carrots, start by boiling them. Boil baby carrots for about five minutes. If you use regular carrots, cut them into sticks first. This way, they cook evenly. After boiling, drain them well. Next, melt butter in a skillet over medium heat. Add minced garlic and cook until fragrant. Be careful not to let it brown. Then, pour in honey and sprinkle in thyme. Let the mixture bubble gently for one to two minutes. Finally, toss the boiled carrots in the glaze. Cook them for three to four minutes to coat evenly.
Avoiding Common Mistakes
One common mistake is overcooking the carrots. They should be tender but still crisp. If they are too soft, they won’t hold their shape. Another mistake is burning the garlic. Keep an eye on it while it cooks. If it turns brown, the flavor will be bitter. Lastly, don’t skip seasoning. Salt and pepper enhance the dish’s overall flavor.
Enhancing Flavor with Additional Ingredients
You can easily add more flavor to your honey garlic glazed carrots. Try mixing in a pinch of red pepper flakes for heat. If you like nuts, toss in some toasted pecans or walnuts for crunch. A splash of lemon juice brightens up the dish too. For a richer taste, substitute brown sugar for honey. Fresh herbs, like dill or basil, can also elevate the flavor. Get creative and find what you like best!
Pro Tips
- Choose Fresh Carrots: Opt for vibrant, firm baby carrots or regular carrots for the best flavor and texture.
- Don’t Overcook: Boil the carrots just until tender to maintain a satisfying crunch and bright color.
- Adjust Sweetness: Feel free to modify the amount of honey based on your desired sweetness level.
- Herb Variations: Experiment with different herbs like dill or rosemary for a unique flavor twist.
Variations
Honey Garlic Carrots with Spices
You can spice up honey garlic carrots by adding a few simple herbs. Try using a pinch of cayenne pepper for heat. You can also add a bit of cumin or smoked paprika. These spices add depth and warmth. Just mix them in when you make the glaze. This will make your dish even more exciting.
Adding Vegetables for a Medley
You can create a colorful vegetable medley with honey garlic glaze. Consider adding sliced bell peppers, green beans, or zucchini. Cut all the veggies to the same size as the carrots. This ensures even cooking. Just boil them with the carrots for a few minutes. Then, follow the same steps to glaze them all together. This adds variety to your meal.
Alternative Sweeteners for the Glaze
If you want a different sweetness, consider using maple syrup or agave nectar. Both give a unique flavor. You can also try brown sugar for a richer taste. Simply replace honey with your choice in the recipe. The glaze will still be delicious, and you can customize it to your taste.
Storage Info
How to Store Leftover Carrots
To store leftover honey garlic glazed carrots, let them cool first. Place them in an airtight container. The carrots stay fresh in the fridge for up to four days. Make sure to keep any extra glaze in the container. This helps keep the flavor strong.
Reheating Instructions
When you’re ready to eat the leftovers, you can reheat them easily. Use a skillet over medium heat. Add a splash of water or broth to help steam the carrots. Stir them often for even heating. You can also use the microwave. Place the carrots in a bowl, cover, and heat for about one to two minutes. Stir halfway through to ensure even warmth.
Freezing Tips
If you want to freeze the glazed carrots, it’s best to do so before they lose crispness. Once cooled, place the carrots in a freezer-safe bag. Remove as much air as possible before sealing. They freeze well for up to three months. When you’re ready to enjoy them, thaw overnight in the fridge and reheat as mentioned above. Keep in mind that freezing may change the texture slightly, but the flavor will still shine through.
FAQs
Can I use other types of carrots?
Yes, you can use any type of carrots. Baby carrots work well for this dish. If you use regular carrots, just peel and cut them into sticks. Aim for equal sizes to cook evenly. Other types, like rainbow carrots, add color and fun.
How do I make the glaze thicker?
To thicken the glaze, let it bubble longer. This helps reduce the liquid. You can also add a small amount of cornstarch mixed with water. Stir it in while the glaze is hot. This will help it thicken nicely.
Is this recipe suitable for meal prep?
Yes, this recipe is great for meal prep. You can make the carrots ahead of time. Store them in an airtight container in the fridge. They last for about three days. Simply reheat them before serving.
What can I serve with honey garlic glazed carrots?
These carrots pair well with many dishes. Try serving them with roasted chicken or grilled fish. They also go great with rice or quinoa. For a vegetarian option, serve them with a hearty salad.
This blog post shared how to make tasty honey garlic glazed carrots. We covered the ingredients, tools needed, and step-by-step cooking instructions. You learned tips for perfect results and variations to try. We also discussed storing leftovers and answered common questions.
In the end, you now have all you need to create this dish. Enjoy the process and share your tasty result
.png)