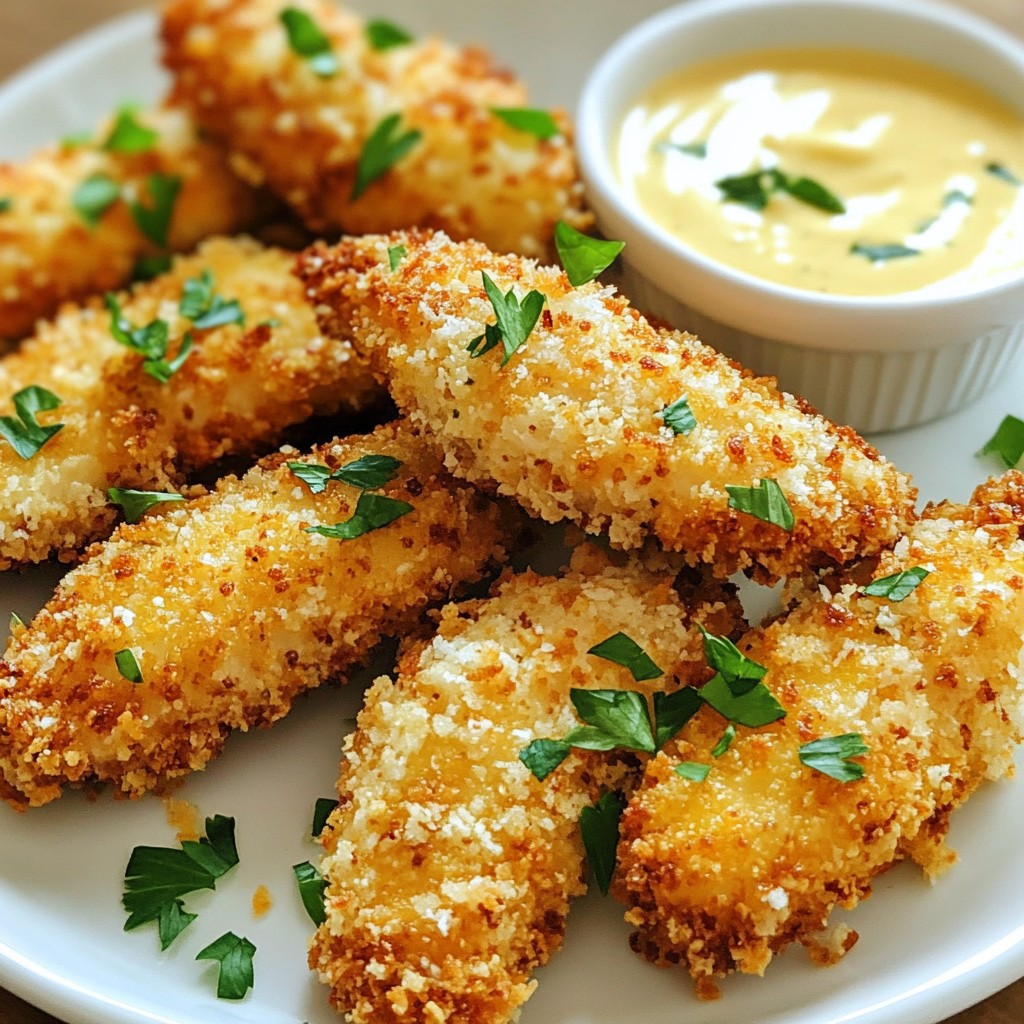
Looking for a meal that your kids will love and that’s easy to make? You've hit the jackpot! This Crispy Kid-Friendly Parmesan Chicken Tenders recipe brings the crunch and flavor that kids crave, while parents enjoy a simple cooking process. With just a few basic ingredients like juicy chicken, tasty cheese, and crunchy breadcrumbs, you'll whip up a dish that's perfect for family dinner or game day. Let's dive in!
Why I Love This Recipe
- Kid-Friendly: This recipe is perfect for picky eaters, making it an ideal choice for family dinners.
- Easy to Prepare: With simple ingredients and straightforward steps, these chicken tenders can be made in under 35 minutes.
- Crispy and Delicious: The combination of panko breadcrumbs and Parmesan cheese creates a delightful crunch that everyone loves.
- Customizable: You can easily add your favorite spices or serve with various dipping sauces to suit your family's taste.
Ingredients
Main Ingredients List
- 1 pound chicken tenders
- 1 cup panko breadcrumbs
- ½ cup grated Parmesan cheese
Seasonings
- 1 teaspoon garlic powder
- 1 teaspoon onion powder
- ½ teaspoon paprika
Wet Ingredients
- 2 large eggs
- 1 tablespoon Dijon mustard
- 2 tablespoons olive oil
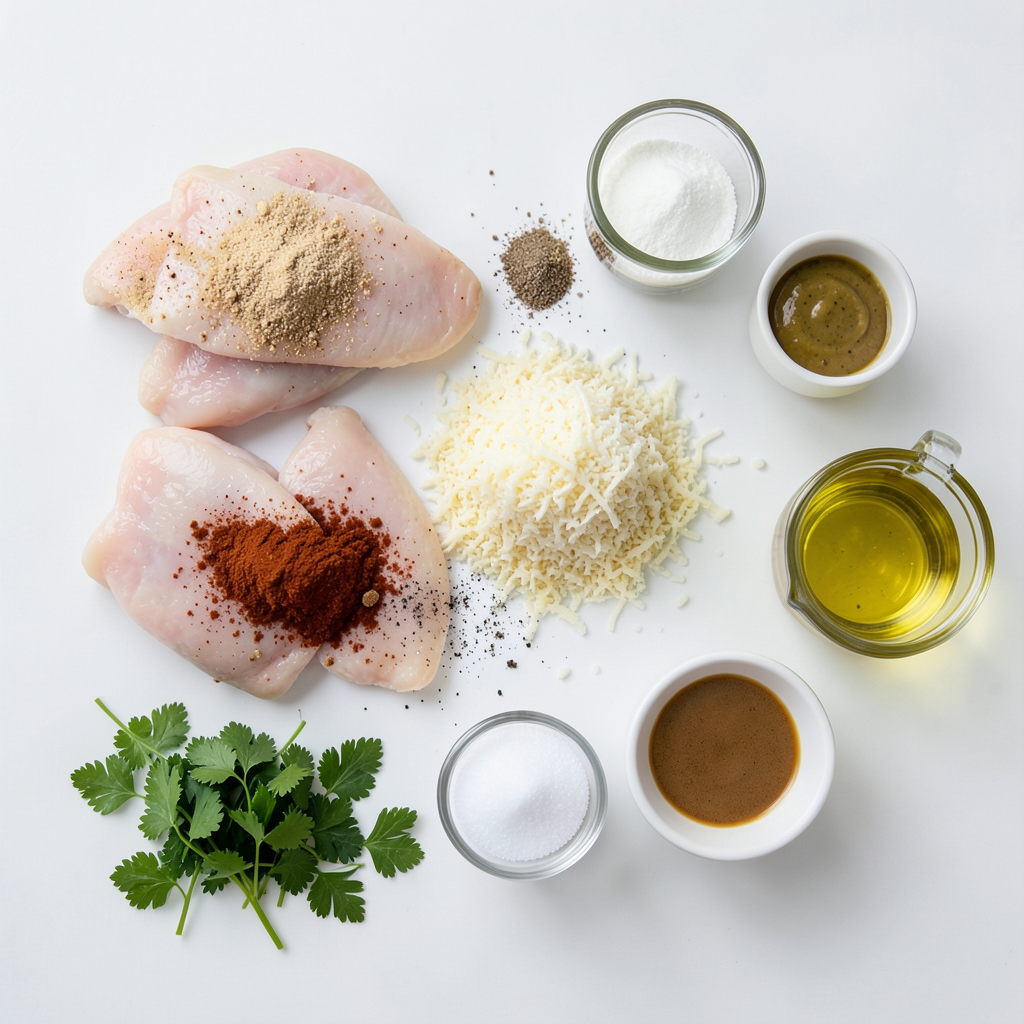
Gather these simple ingredients to make crispy kid-friendly Parmesan chicken tenders. You will need chicken tenders, which are tender and easy to eat. Use panko breadcrumbs for that extra crunch. The grated Parmesan cheese adds a creamy and salty flavor that kids love.
For seasonings, garlic powder brings a nice taste. Onion powder adds depth. Paprika gives a hint of color and flavor. Don't forget to add salt and pepper to taste.
For the wet ingredients, you will need eggs to help the breading stick. Whisk the eggs with Dijon mustard for a bit of zest. Olive oil helps the tenders crisp up nicely in the oven.
With these ingredients, you can create a meal that kids will enjoy and that parents will love for its ease and flavor.
Step-by-Step Instructions
Preheat the Oven
- Set to 400°F (200°C)
- Prepare the baking sheet
First, preheat your oven to 400°F (200°C). This helps the chicken tenders get crispy. While the oven heats, line a baking sheet with parchment paper. This makes for easy cleanup and keeps the tenders from sticking.
Prepare the Breading Station
- Mix breadcrumb and cheese mixture
- Whisk eggs with mustard
Next, create your breading station. In a shallow bowl, mix the panko breadcrumbs, grated Parmesan cheese, garlic powder, onion powder, paprika, salt, and pepper. This mix gives great flavor and crunch. In another bowl, crack the two large eggs and add the Dijon mustard. Whisk them together until the mixture is smooth and well combined.
Coat the Chicken
- Dip chicken in egg wash
- Press into breadcrumb mixture
Now it’s time to coat the chicken. Take each chicken tender and dip it into the egg wash. Let any extra egg drip off. Next, press the tender into the breadcrumb mixture, making sure it’s fully covered. This step is key for getting that crispy texture.
Baking Process
- Arrange on baking sheet
- Drizzle with olive oil
- Bake and flip timing
Place the coated chicken tenders on your prepared baking sheet. Space them out so they cook evenly. Drizzle a little olive oil over the top of each tender. This helps them crisp up nicely. Bake the tenders for about 18 to 20 minutes. Halfway through, flip each one to ensure they cook evenly on both sides. They should be golden brown and fully cooked when done.
Tips & Tricks
Achieving Maximum Crispiness
For the best crunch, use panko breadcrumbs. They are lighter and crispier than regular breadcrumbs. This texture gives the chicken tenders that satisfying crunch. Drizzling olive oil on top is key. The oil helps the breadcrumbs brown nicely. It also adds flavor, making your tenders taste even better.
Perfect Cooking Times
To ensure the chicken is fully cooked, you should bake it for 18-20 minutes. Use a meat thermometer to check. The chicken should reach an internal temperature of 165°F (75°C). Flip the tenders halfway through baking for even cooking. This method gives you crispiness on both sides.
Serving Suggestions
For a fun presentation, serve your chicken tenders on a colorful plate. Include a small bowl of ranch or honey mustard for dipping. These sauces add a tasty touch. Add some carrot and cucumber sticks on the side. This makes the meal balanced and healthy. Your kids will love it!
Pro Tips
- Choose the Right Breadcrumbs: For maximum crunch, opt for panko breadcrumbs instead of regular ones. They create a lighter, airier coating that crisps up beautifully.
- Flavor Boost: Add some Italian seasoning or dried herbs like oregano or thyme to the breadcrumb mixture for an extra layer of flavor.
- Even Cooking: Make sure to flip the chicken tenders halfway through baking to ensure they cook evenly and achieve a uniform golden color.
- Storage Tips: If you have leftovers, store them in an airtight container in the refrigerator. Reheat in the oven for a few minutes to restore their crispiness.
Variations
Spicy Parmesan Chicken Tenders
You can turn up the heat by adding some spice. For a kick, mix in cayenne pepper or chili flakes. Start with a small amount, maybe 1/4 teaspoon, to see how you like it. This adds flavor and heat without overpowering the dish. Kids may enjoy the extra zing, or you can tone it down for them.
Gluten-Free Option
If you need a gluten-free choice, you can use gluten-free breadcrumbs. They work just as well as regular ones. Look for brands that are light and crispy. This way, everyone can enjoy these tasty tenders without worry. You’ll still get that great crunch and flavor.
Different Cheese Variations
You can mix up the cheese for a fun twist. Try using mozzarella for a stretchy, cheesy bite. An Italian blend cheese adds a mix of flavors that kids will love. You can even combine different cheeses for a unique taste. Experimenting with cheese will keep your chicken tenders exciting!
Storage Info
Storing Leftovers
To keep your crispy chicken tenders fresh, store them in airtight containers. This keeps them from drying out. You can place parchment paper in the container for extra protection. The chicken should last in the fridge for about 3 to 4 days. After that, the quality may drop.
Reheating Instructions
When reheating chicken tenders, the oven is your best friend. Preheat your oven to 375°F (190°C). Place the chicken on a baking sheet. This helps them stay crisp. Heat for about 10-15 minutes, flipping halfway through. You can also use an air fryer for a quick method. It keeps the tenders crispy and ready to enjoy.
FAQs
What can I serve with chicken tenders?
You can serve chicken tenders with many fun sides and dips. Here are some great ideas:
- Dips: Serve with ranch dressing, honey mustard, or barbecue sauce. Kids love to dip!
- Vegetables: Add carrot sticks, cucumber slices, or cherry tomatoes for crunch.
- Fries: Pair with sweet potato fries or classic French fries for a tasty combo.
- Salads: A simple side salad with lettuce, cherry tomatoes, and a light dressing works well.
- Rice or Pasta: Serve with rice or macaroni and cheese for a filling meal.
Can I freeze chicken tenders?
Yes, you can freeze chicken tenders for later. Here’s how:
1. Cool Down: Let the cooked chicken tenders cool completely.
2. Wrap: Place them in a single layer on a baking sheet and freeze for about an hour.
3. Store: Once frozen, transfer the tenders to a freezer-safe bag or container. Remove as much air as possible.
4. Label: Write the date on the bag so you know when to use them.
To reheat, bake them from frozen at 400°F (200°C) for about 15-20 minutes until hot.
How do I know when chicken is fully cooked?
To check if chicken is done, look for these signs:
- Color: The meat should be white, not pink, in the thickest part.
- Juices: When you cut into it, the juices should run clear.
- Temperature: Use a meat thermometer. The chicken should reach 165°F (74°C) inside.
These tips ensure your chicken is safe to eat and delicious!
You’ve learned how to make crispy chicken tenders step by step. We covered the right ingredients, seasonings, and baking tips to ensure your chicken is tasty and fun to eat. Remember, panko breadcrumbs and the right baking process make all the difference. Experiment with flavors and sides for extra enjoyment. Enjoy your meal!