Welcome to a tasty adventure! In this article, I’m sharing my Crispy Chickpea Salad recipe, a colorful and healthy delight. With simple ingredients and easy steps, you’ll impress your family and friends. Plus, I’ll give you tips to make the chickpeas perfectly crispy and flavor-packed. Whether you want a filling meal or a fresh side dish, this salad fits the bill. Let’s get cooking and enjoy a dish that’s good for you and delicious!
Why I Love This Recipe
- Healthier Alternative: This salad uses chickpeas as a protein source, making it a nutritious and filling option.
- Easy to Prepare: With minimal prep time and straightforward steps, this recipe is perfect for busy weeknights.
- Versatile Ingredients: You can easily customize the salad with your favorite veggies or add proteins like chicken or tofu.
- Flavorful Crunch: The crispy roasted chickpeas add a delightful crunch that elevates the entire dish.
Ingredients
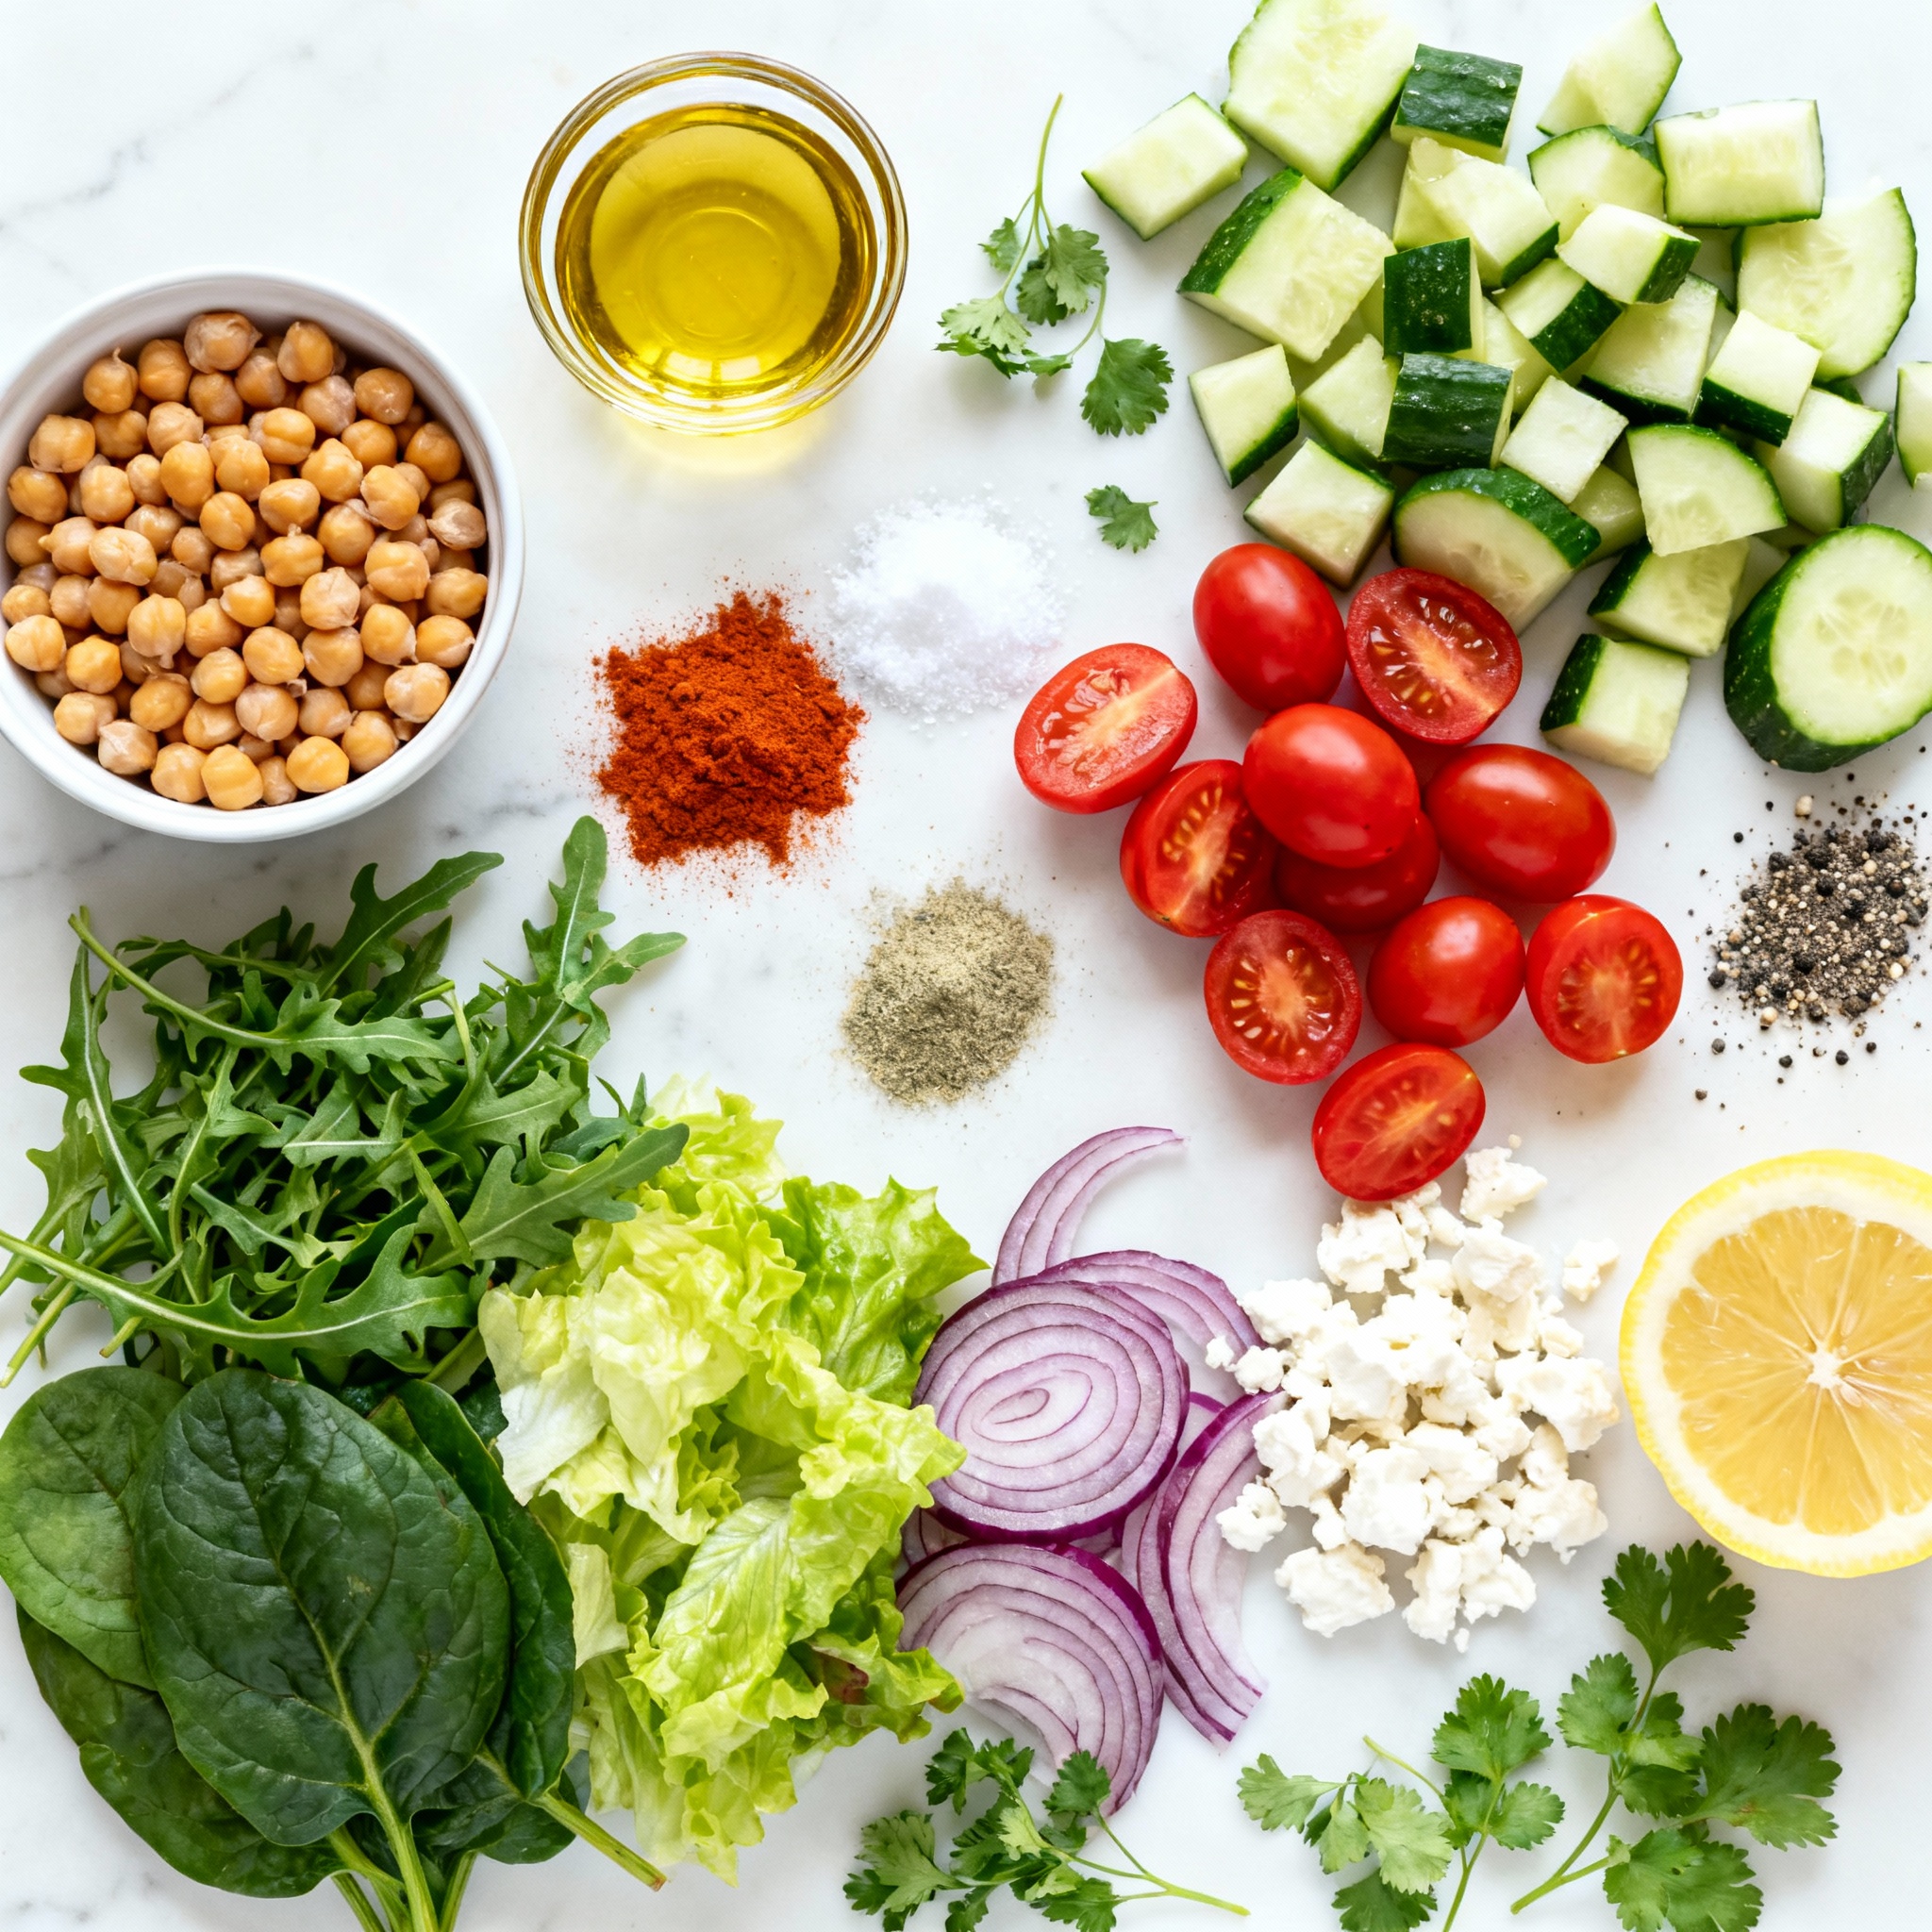
Main Ingredients for Crispy Chickpea Salad
For this salad, you need a few key items. Here’s what you’ll use:
– 1 can (15 oz) chickpeas, drained and rinsed
– 2 tablespoons olive oil
– 1 teaspoon smoked paprika
– 1/2 teaspoon garlic powder
– Salt and pepper to taste
– 4 cups mixed salad greens (arugula, spinach, and romaine)
– 1 cup cherry tomatoes, halved
– 1/2 cucumber, diced
– 1/4 red onion, thinly sliced
These ingredients come together to create a delightful mix of flavors and textures.
Optional Add-ins
You can make this salad your own with some fun add-ins. Here are some options:
– 1/4 cup feta cheese, crumbled (optional)
– Avocado slices for creaminess
– Nuts or seeds for crunch
– Bell peppers for extra color
Feel free to mix and match based on your taste!
Dressing Ingredients
The dressing brightens the salad and ties everything together. You only need:
– Juice of 1 lemon
– Fresh herbs (parsley or cilantro) for garnish
This simple dressing brings a fresh zing to your dish.
Step-by-Step Instructions
Preheating the Oven
First, set your oven to 400°F (200°C). This step is key for crispiness. The high heat will roast the chickpeas perfectly.
Preparing the Chickpeas
Next, grab a bowl and add your rinsed chickpeas. Pour in 2 tablespoons of olive oil. Then, sprinkle in 1 teaspoon of smoked paprika and 1/2 teaspoon of garlic powder. Add salt and pepper to taste. Use a spoon to mix everything well. You want each chickpea coated evenly. Now, spread the chickpeas on a baking sheet in a single layer. Roast them for 25–30 minutes. Shake the pan halfway through to help them cook evenly.
Assembling the Salad
While the chickpeas roast, prepare your salad. In a large bowl, combine 4 cups of mixed greens, 1 cup of halved cherry tomatoes, 1/2 diced cucumber, and 1/4 thinly sliced red onion. Once the chickpeas are golden and crispy, take them out of the oven. Let them cool for a bit, then add them to your salad mix. Squeeze the juice of 1 lemon over everything and toss gently. If you like, sprinkle 1/4 cup of crumbled feta cheese on top. Finish with fresh herbs like parsley or cilantro for garnish. You can serve this salad right away for that crunch.Enjoy your flavorful and healthy delight!
Pro Tips
- Use Fresh Ingredients: The quality of your salad greens and vegetables can greatly affect the overall flavor and texture of the salad. Choose the freshest veggies available for the best results.
- Adjust the Seasoning: Feel free to customize the spices used on the chickpeas. Adding cayenne pepper for heat or cumin for a different flavor profile can elevate your dish.
- For Extra Crispiness: Ensure that the chickpeas are thoroughly dried after rinsing; moisture can prevent them from getting crispy in the oven.
- Make It a Meal: To turn this salad into a complete meal, consider adding grilled chicken, quinoa, or avocado for added protein and healthy fats.
Tips & Tricks
Achieving Perfectly Crispy Chickpeas
To get those chickpeas nice and crispy, start with dry ones. Use a clean towel to pat them dry after rinsing. This helps them roast better. Toss the chickpeas with olive oil and spices well. The oil helps them crisp up. Spread them on a baking sheet in one layer. Crowding them makes them steam instead of roast. Bake them at 400°F for 25-30 minutes. Shake the pan halfway through. This helps them cook evenly and get crispy all around.
Flavor Enhancements
You can boost the flavor of your chickpeas easily. Try adding different spices like cumin or chili powder. These add warmth and depth. You can also mix in some lemon zest for a bright touch. If you want a kick, add a pinch of cayenne pepper. Fresh herbs like parsley or cilantro make a great finish. They add a fresh taste and color. You can also choose to add feta cheese for some creaminess.
Serving Suggestions
This salad is great on its own, but you can serve it with many things. It pairs well with grilled chicken or fish. For a heartier meal, add quinoa or brown rice. You can also serve it with a side of pita bread for some crunch. If you want to make it more filling, add sliced avocado. The creamy texture contrasts well with the crispy chickpeas. For the best taste, serve it fresh right after making it. If you want a chill, refrigerate it for a short time before serving.
Variations
Adding Protein Options
You can boost your crispy chickpea salad by adding protein. Try grilled chicken for a hearty touch. Shrimp works well too, giving a nice flavor. For a meatless option, consider adding tofu. Make sure to season and cook it well to get a nice crust. Lentils can also add protein and texture. Just remember to cook them before adding.
Vegetarian/Vegan Substitutions
This salad is great for all diets. If you want to keep it vegan, skip the feta cheese. You can replace it with avocado for creaminess. Nutritional yeast gives a cheesy flavor without dairy. If you want a different twist, add a scoop of hummus on top. It adds richness and pairs well with the salad.
Seasonal Ingredient Swaps
You can change this salad with seasonal ingredients. In spring, use fresh peas or radishes for crunch. Summer calls for fresh corn or bell peppers for sweetness. In fall, add roasted squash or apples for warmth. Winter is perfect for kale or hearty greens. These swaps keep the salad fresh and exciting all year. Try these ideas to make each salad unique!
Storage Info
How to Store Leftover Salad
To store leftover salad, place it in an airtight container. This keeps it fresh. You can store it in the fridge for up to three days. The crispy chickpeas may lose some crunch, but the flavor stays great.
Reheating Crispy Chickpeas
If you want to reheat the chickpeas, use the oven. Preheat it to 350°F (175°C). Spread the chickpeas on a baking sheet and heat for about 10 minutes. This helps them regain some crispiness. You can also enjoy them cold on a salad.
Best Practices for Freshness
To keep your salad fresh, store the dressing separately. Mix it in just before serving. This keeps the greens crisp and bright. If using fresh herbs, add them right before serving. This keeps their flavor strong. Always check for freshness before eating leftovers. Enjoy your crispy chickpea salad at its best!
FAQs
What Can I Serve with Crispy Chickpea Salad?
You can serve this salad with many dishes. Try grilled chicken, fish, or tofu. It pairs well with crusty bread or a light soup too. The flavors blend well with many sides. Add a dollop of hummus for a tasty twist. You can also enjoy it on its own as a light meal.
Can I Make This Salad Ahead of Time?
Yes, you can make this salad ahead of time. You can prepare the chickpeas and salad base separately. Store them in airtight containers in the fridge. This keeps the chickpeas crispy and the greens fresh. Just mix them together right before serving. This way, you maintain the best taste and texture.
Is Crispy Chickpea Salad Good for Meal Prep?
Absolutely! This salad is great for meal prep. It holds up well when stored. You can pack it for lunch or quick dinners. The chickpeas stay crunchy, while the veggies remain fresh. Just keep the dressing separate until you’re ready to eat. This helps keep everything crisp and tasty.
How can I make this salad gluten-free?
Making this salad gluten-free is easy! All the main ingredients are naturally gluten-free. Just ensure your chickpeas and any add-ins are certified gluten-free. If you use any store-bought dressings, check the label. Most of the ingredients in this salad are safe for gluten-free diets. Enjoy it worry-free!
This blog post covered how to make a tasty crispy chickpea salad. We looked at the key ingredients, step-by-step instructions, and helpful tips. I shared fun ways to change the recipe, store leftovers, and answered common questions.
With this knowledge, you can enjoy a fresh, healthy meal. Try different add-ins and see what you like best. Enjoy your cooking and experimenting!
.png)