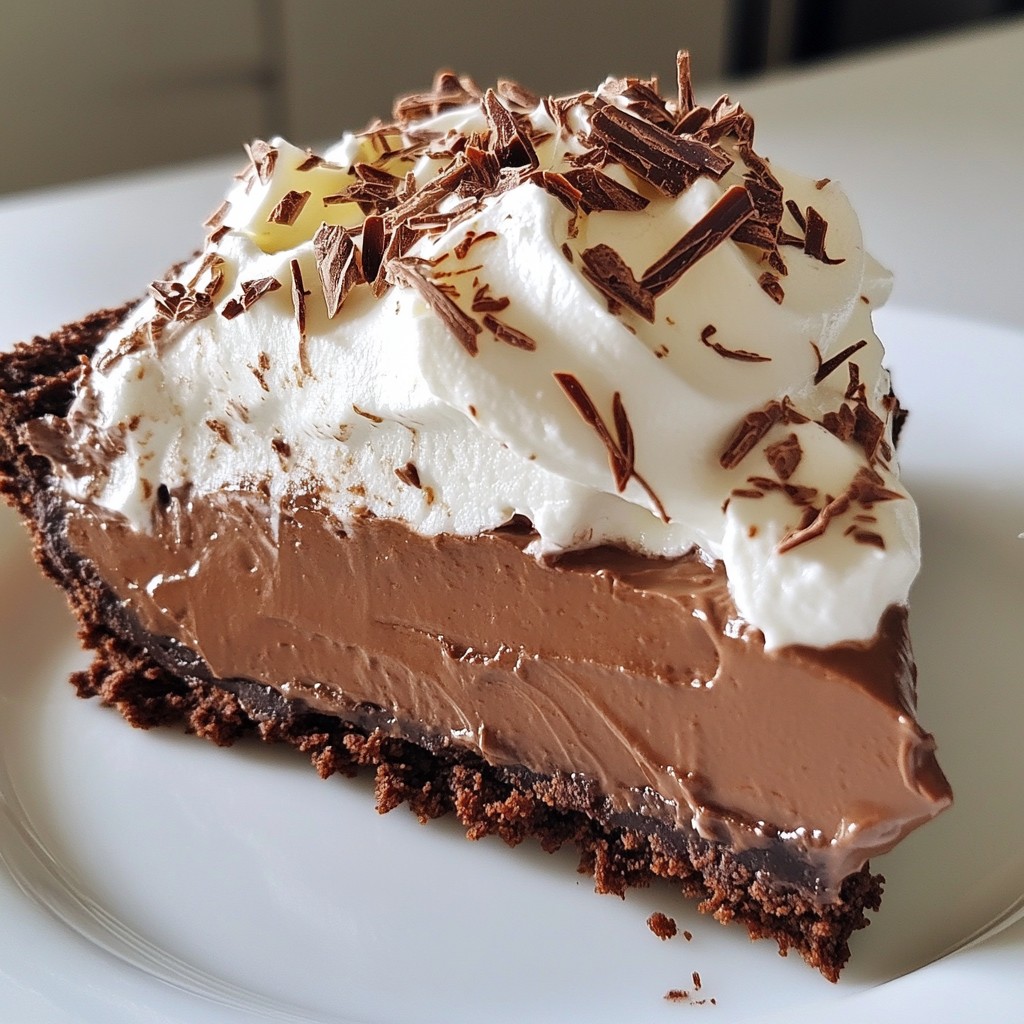
Are you ready to indulge in a rich dessert that’s both easy and delicious? My Chocolate Silk Pie recipe combines a crisp cookie crust with a creamy, dreamy filling that melts in your mouth. You don’t need to be a master chef to make this treat; it's simple enough for anyone. Get your taste buds ready—let’s dive into this decadent delight that will impress your friends and family!
Why I Love This Recipe
- Decadent Flavor: This pie offers an incredibly rich and smooth chocolate experience that satisfies any chocolate lover's cravings.
- Easy to Make: With simple ingredients and straightforward steps, this recipe is perfect for both novice and experienced bakers.
- Impressive Presentation: The combination of whipped cream and chocolate shavings on top makes it visually stunning for any occasion.
- Perfect for Sharing: This recipe serves 8, making it an ideal dessert for gatherings, parties, or family dinners.
Ingredients
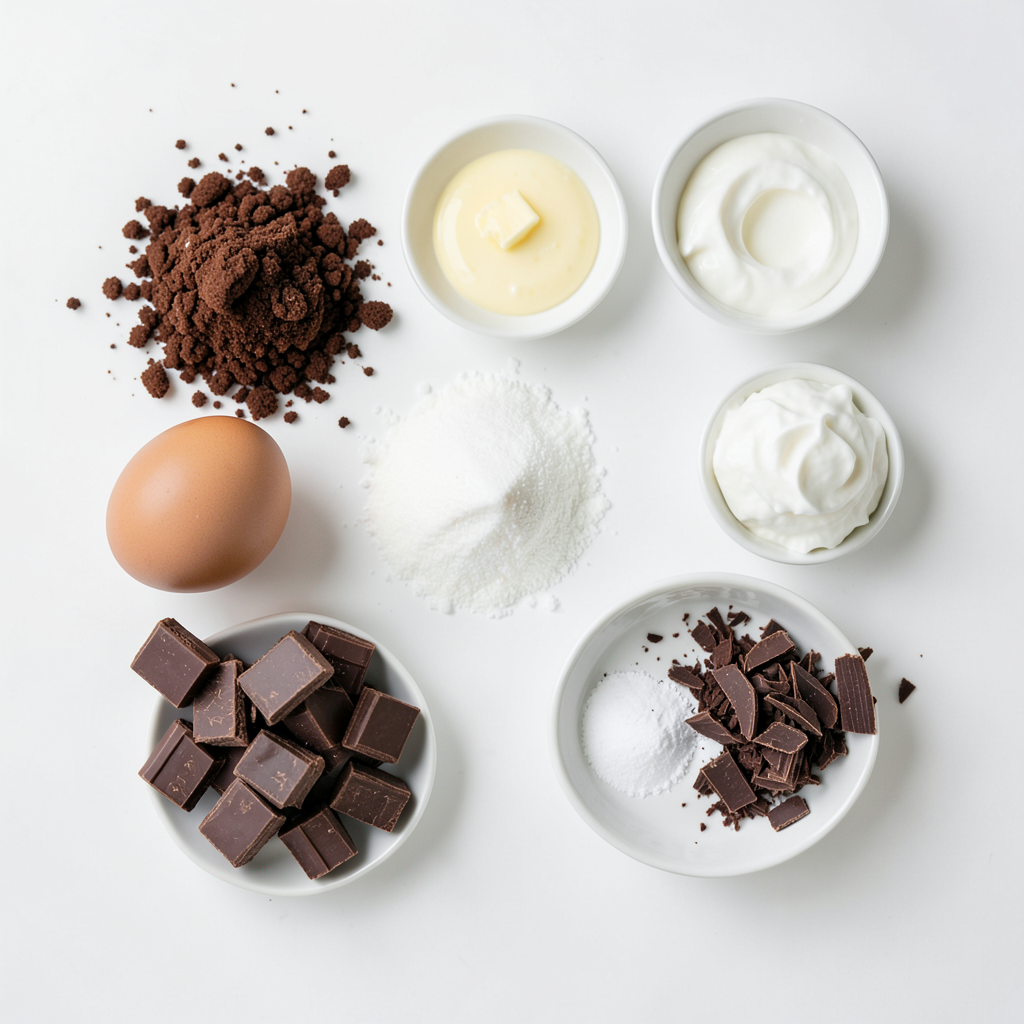
To make a rich Chocolate Silk Pie, you need a few simple ingredients. Here’s what you will need:
- Chocolate Cookie Crust
- 1 ½ cups chocolate cookie crumbs
- ½ cup unsalted butter, melted
- Chocolate Silk Filling
- 1 cup granulated sugar
- 3 large eggs
- 12 oz semi-sweet chocolate, chopped
- 1 cup heavy cream
- 2 teaspoons vanilla extract
- Pinch of salt
- Topping Suggestions
- Whipped cream for topping
- Chocolate shavings for garnish
Each ingredient plays a key role in the flavor and texture of the pie. The cookie crust adds a nice crunch. The chocolate filling is smooth and creamy. Toppings like whipped cream and chocolate shavings make it look fancy. You can mix and match these ingredients to suit your taste!
Step-by-Step Instructions
Preparing the Crust
First, heat your oven to 350°F (175°C). In a mixing bowl, mix together 1 ½ cups of chocolate cookie crumbs and ½ cup of melted unsalted butter. Use a fork or your hands to blend them well. This mixture should feel like wet sand. Next, press this mixture into a 9-inch pie dish. Make sure to cover the bottom and the sides evenly. Bake your crust for 10 minutes. After baking, take it out and let it cool completely. This step gives the crust a nice, firm texture.
Making the Chocolate Silk Filling
In a medium saucepan, melt 12 ounces of chopped semi-sweet chocolate over low heat. Stir it until smooth, then remove it from the heat and let it cool slightly. In a separate bowl, beat 1 cup of granulated sugar with 3 large eggs. Use an electric mixer for about 5 minutes. You want it to be light and fluffy. Slowly mix the melted chocolate into the egg mixture. Add 1 cup of heavy cream, 2 teaspoons of vanilla extract, and a pinch of salt. Gently fold these ingredients until they are fully combined. This filling is rich and smooth.
Assembling and Chilling the Pie
Pour the chocolate silk filling into your cooled cookie crust. Use a spatula to smooth the top so it looks nice. Cover the pie with plastic wrap. Place it in the fridge for at least 4 hours, or overnight for the best taste and texture. When you’re ready to serve, top the pie with whipped cream. You can also add chocolate shavings for a fun garnish. Enjoy your beautiful, decadent pie!
Tips & Tricks
Perfecting the Crust Texture
To make a great crust, use fresh chocolate cookie crumbs. You can crush store-bought cookies or make your own. Mix the crumbs with melted butter until it feels like wet sand. Press the mix firmly into the pie dish. This helps the crust hold its shape. Bake the crust for ten minutes. Let it cool completely before adding the filling. This step is key for a crisp texture.
Achieving the Right Chocolate Consistency
Melt the semi-sweet chocolate slowly over low heat. Stir it often to avoid burning. You want a smooth and glossy chocolate. When mixing chocolate with eggs, add it slowly. This helps keep the eggs from cooking. The filling should be light and fluffy. Fold in the cream gently to keep air in the mix. This makes the texture rich and smooth.
Serving and Presentation Tips
For a stunning finish, use whipped cream on top. Spread it evenly or create peaks for a fancy look. Sprinkle chocolate shavings over the whipped cream for a touch of elegance. Serve each slice with a drizzle of chocolate sauce if you want extra flair. Keep the pie chilled until serving to maintain its shape. Enjoying it cold adds to the creamy experience.
Pro Tips
- Use High-Quality Chocolate: The flavor of your pie heavily relies on the chocolate you choose. Opt for a high-quality semi-sweet chocolate for the best taste.
- Chill for Best Texture: Allowing the pie to chill overnight will enhance the silkiness of the filling, giving it a smoother texture when served.
- Serve with Fresh Whipped Cream: Freshly whipped cream adds a delightful lightness to the rich pie. Avoid store-bought whipped cream for the best results.
- Experiment with Flavors: Consider adding a teaspoon of espresso powder or a splash of liqueur to the chocolate filling for an extra depth of flavor.
Variations
Alternative Crust Options
You can change the crust for your chocolate silk pie. Try using graham cracker crumbs instead. They add a sweet, buttery flavor. Another option is a nut crust made from ground almonds or pecans. This gives a nice crunch and pairs well with chocolate. You can also go gluten-free by using almond flour or gluten-free cookies. Each option brings its own unique taste.
Flavor Enhancements and Add-ins
Want to boost the flavor? You can add a dash of espresso powder to the filling. This deepens the chocolate taste. You could also mix in some orange zest for a fresh twist. For a nutty flavor, add finely chopped hazelnuts or walnuts. If you like mint, a few drops of mint extract can make it special. These add-ins make the pie even more fun and tasty.
Healthier Ingredient Substitutions
You can make some swaps for a lighter pie. Use coconut cream instead of heavy cream. This adds a different flavor and cuts calories. You can also use a sugar substitute like stevia or monk fruit. This makes the pie lower in sugar. For the chocolate, opt for dark chocolate with a high cocoa content. This adds rich flavor and is better for you. These swaps help you enjoy your pie without the guilt.
Storage Info
How to Store Chocolate Silk Pie
Store your Chocolate Silk Pie in the fridge. Use plastic wrap to cover it tightly. This keeps it fresh and tasty. Make sure you chill it before serving. The cool temperature makes the chocolate silk even better.
Freezing Guidelines
You can freeze Chocolate Silk Pie if needed. First, cut the pie into slices. Wrap each slice in plastic wrap. Then place the slices in a freezer bag. Remove as much air as possible before sealing. This helps avoid freezer burn. The pie can stay frozen for up to three months.
Shelf Life and Best Practices
Chocolate Silk Pie is best enjoyed fresh. It lasts about 3 to 4 days in the fridge. After that, the texture may change. If you freeze it, let it thaw in the fridge overnight. This keeps the creamy texture intact. Always check for any off smells or changes in color before eating.
FAQs
How do you serve Chocolate Silk Pie?
You serve Chocolate Silk Pie chilled. Slice it into wedges using a sharp knife. Place each slice on a plate. Top with whipped cream and chocolate shavings. This adds a nice touch to each serving. You can also add fresh berries for color.
Can I make Chocolate Silk Pie ahead of time?
Yes, you can make Chocolate Silk Pie ahead of time. It tastes better when it chills overnight. Make the pie a day in advance for best results. Just cover it well with plastic wrap. This keeps it fresh and prevents it from drying out.
What can I substitute for heavy cream?
If you need a substitute for heavy cream, use coconut cream. It works well and adds a nice flavor. You can also use half-and-half, but it will be less rich. Another option is to blend silken tofu with a little milk. This gives a creamy texture without dairy.
This blog post covered how to make a delicious chocolate silk pie. We discussed the crust, filling, and toppings. You learned step-by-step instructions to create the perfect pie. Tips on texture and presentation will help you impress everyone. You can even try different crusts and healthier options.
Keep this guide handy, and enjoy making chocolate silk pie anytime! Your dessert game will improve, and your friends will love it.
.png)