If you love a warm treat, you’ll adore these Chocolate Chip Scones! They’re easy to make and perfect for breakfast or a snack. In this post, I’ll walk you through the essential ingredients and simple steps to create a tasty scone that melts in your mouth. Plus, I’ll share tips, tricks, and variations to elevate your baking game. Let’s dive into the delicious world of chocolate chip scones!
Why I Love This Recipe
- Delicious Flavor: The combination of rich chocolate and buttery scones creates a delightful treat that everyone loves.
- Easy to Make: This recipe is straightforward, making it perfect for both novice bakers and experienced cooks.
- Perfect for Any Occasion: Whether it’s breakfast, brunch, or a snack, these scones fit perfectly into any time of the day.
- Customizable: You can easily substitute different add-ins like nuts or dried fruit to suit your taste preferences.
Ingredients
Essential Ingredients for Chocolate Chip Scones
To make chocolate chip scones, you need a few key ingredients. These are:
– 2 cups all-purpose flour
– 1/3 cup granulated sugar
– 1 tablespoon baking powder
– 1/2 teaspoon baking soda
– 1/2 teaspoon salt
– 1/2 cup cold unsalted butter, cubed
– 1/2 cup heavy cream
– 1 large egg
– 1 teaspoon vanilla extract
– 1 cup semi-sweet chocolate chips
These ingredients create a tasty base for your scones. The butter gives them a rich flavor. The chocolate chips provide that sweet surprise in every bite.
Optional Ingredients for Added Flavor
You can add some extra ingredients for more flavor. Here are a few options:
– Extra cream for brushing on top
– Coarse sugar for sprinkling
– A pinch of cinnamon for warmth
– Chopped nuts for crunch
Adding these can elevate your scones. A sprinkle of coarse sugar adds a nice crunch. A dash of cinnamon gives warmth and spice.
Measuring and Substitutions Tips
Accurate measuring is key to great scones. Use dry measuring cups for flour and sugar. Level off the top with a knife. For butter, cut it into small cubes for easy mixing.
If you’re out of an ingredient, here are some swaps:
– You can use whole wheat flour for a nuttier taste.
– Buttermilk works well instead of heavy cream.
– Dark chocolate chips can replace semi-sweet ones.
These tips help you customize your scones. They keep your baking fun and adaptable.

Step-by-Step Instructions
Prepping the Oven and Baking Sheet
First, you need to preheat your oven to 400°F (200°C). This step is crucial for perfect scones. While the oven warms up, line a baking sheet with parchment paper. This will stop the scones from sticking and help them bake evenly.
Mixing Dry Ingredients
In a large mixing bowl, combine the dry ingredients. Whisk together 2 cups of all-purpose flour, 1/3 cup of granulated sugar, 1 tablespoon of baking powder, 1/2 teaspoon of baking soda, and 1/2 teaspoon of salt. Make sure everything is well mixed for a nice balance of flavors.
Blending in Butter and Adding Wet Ingredients
Now, let’s add the cold butter. Cut 1/2 cup of unsalted butter into cubes. Add these cubes to the flour mixture. Use your fingertips or a pastry cutter to blend until the mix looks like coarse crumbs. Next, in another bowl, mix 1/2 cup of heavy cream, 1 large egg, and 1 teaspoon of vanilla extract. Pour this mix into the flour mix and stir gently until everything is combined. Finally, fold in 1 cup of semi-sweet chocolate chips. The dough will be slightly sticky but still easy to handle.
Forming and Cutting the Dough
Turn the dough out onto a floured surface. Gently pat the dough into a round disc about 1 inch thick. Use a sharp knife or pastry cutter to slice this disc into 8 equal wedges. Make sure to cut all the way through for even baking.
Baking the Scones
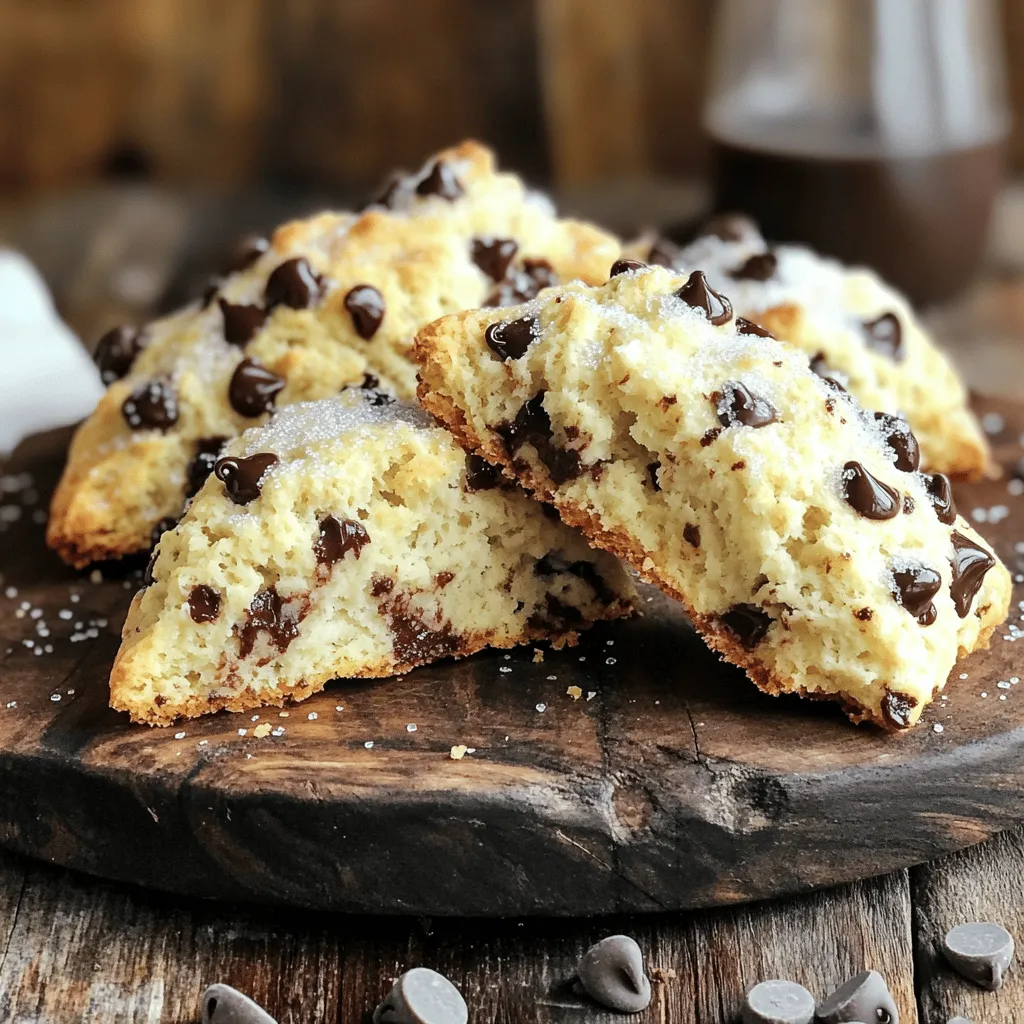
Transfer the scones onto your prepared baking sheet. Place them about 2 inches apart to allow room to rise. Brush the tops with a bit of extra cream. If you like, sprinkle some coarse sugar on top for a crunchy finish. Bake for 15-20 minutes until they turn golden brown. The chocolate chips might melt, but that’s part of the charm! Let the scones cool for a few minutes before moving them to a wire rack to cool completely.
Now you’re ready to enjoy these tasty delights!
Pro Tips
- Use Cold Butter: Ensure the butter is very cold and cubed to create flaky layers in your scones.
- Don’t Overmix: Mix the dough just until combined to keep the scones tender and light.
- Chill the Dough: If you have time, chill the cut scones for 15 minutes before baking for extra height.
- Experiment with Mix-ins: Feel free to substitute chocolate chips with dried fruits or nuts for different flavor variations.
Tips & Tricks
How to Avoid Dry Scones
To keep your scones moist, use cold butter. This helps create layers. When mixing, avoid overworking the dough. Stop as soon as it comes together. Adding too much flour can dry them out. If your dough feels dry, add a bit more cream. You want a slightly sticky texture.
Ensuring Perfect Chocolate Chip Distribution
To spread the chocolate chips evenly, fold them in gently. This way, they won’t sink. Place the chips in the flour mixture first. This helps them stick better. Make sure to use high-quality chocolate chips. They melt beautifully and add great flavor.
Tips for the Best Texture
For a light and fluffy scone, don’t skip the baking powder. It’s key for rise. Pat the dough gently instead of rolling it out. This keeps the air in. Bake right away after forming the scones. This helps them stay tall and tender.
Variations
Alternative Add-Ins like Nuts or Dried Fruits
You can easily change your chocolate chip scones by adding nuts or dried fruits. Chopped walnuts or pecans add a nice crunch. You can also try dried cranberries or raisins for a sweet bite. Add about a half cup of your choice to the dough. Mix them in gently to keep the dough soft. This gives your scones a new twist while keeping them tasty.
Gluten-Free and Vegan Adaptations
If you want to make gluten-free scones, use a gluten-free flour blend. Look for one with xanthan gum, as it helps with texture. For vegan scones, swap the butter for coconut oil or a vegan butter substitute. Use a non-dairy milk instead of heavy cream. You can also replace the egg with a flax egg. Just mix one tablespoon of flaxseed meal with two and a half tablespoons of water. Let it sit for a few minutes before adding it to your dough.
Flavor Variations (e.g., using different types of chocolate)
You can play with flavors by using different types of chocolate. Dark chocolate chips give a rich taste, while white chocolate offers sweetness. You can even mix them together for a fun look and flavor. Try adding a splash of orange or almond extract for a special twist. These small changes can make each batch unique and exciting.Enjoy experimenting!
Storage Info
Best Ways to Store Leftover Scones
To keep your scones fresh, store them in an airtight container. This will help them stay soft for up to two days. If you have more scones than you can eat, don’t worry! You can also wrap them tightly in plastic wrap. This keeps air out and helps with freshness.
Freezing Chocolate Chip Scones for Later Use
Freezing is a great option if you want to save some scones for later. Let the scones cool completely after baking. Then, wrap each one in plastic wrap. Place the wrapped scones in a freezer bag. They can last up to three months in the freezer. When you want to enjoy a scone, just take it out and let it thaw in the fridge overnight.
Reheating Tips for Freshness
To reheat your scones, preheat your oven to 350°F (175°C). Place the scones on a baking sheet. Heat them for about 5 to 10 minutes. This will warm them up and make them soft again. You can also microwave them for about 10-15 seconds for a quick reheat. Enjoy your scones warm, just like when they came out of the oven!
FAQs
How do I know when my scones are done baking?
You can tell your scones are done when they turn golden brown on top. The edges should look firm, and the tops will feel slightly springy when touched. If you insert a toothpick, it should come out clean or with a few crumbs.
Can I make the dough ahead of time?
Yes, you can make the dough ahead of time. After mixing, wrap it tightly in plastic wrap. Store it in the fridge for up to 24 hours. When you are ready to bake, just cut and shape the scones.
What can I serve with chocolate chip scones?
Chocolate chip scones pair well with many tasty options. You can serve them with:
– Whipped cream
– Fresh fruit
– Butter
– Jam
– A hot cup of tea or coffee
How long will the scones last?
Your scones will stay fresh for about 2-3 days at room temperature. Store them in an airtight container. You can also freeze them for up to 3 months for later enjoyment.
What are the differences between scones and biscuits?
Scones and biscuits differ in texture and flavor. Scones are often sweeter and denser. They may have added ingredients like chocolate or fruit. Biscuits are flaky and more savory, often served with meals. Scones usually contain eggs and cream, while biscuits rely more on butter and buttermilk.
We explored the key ingredients to make delicious chocolate chip scones. Knowing how to measure and substitute ensures your scones turn out great. The step-by-step guide helps you mix and bake perfectly every time. With tips to avoid dry scones and variations to try, you can get creative. Plus, proper storage keeps them fresh longer. Enjoy making your scones, and share them with friends or family for a sweet treat!
.png)


