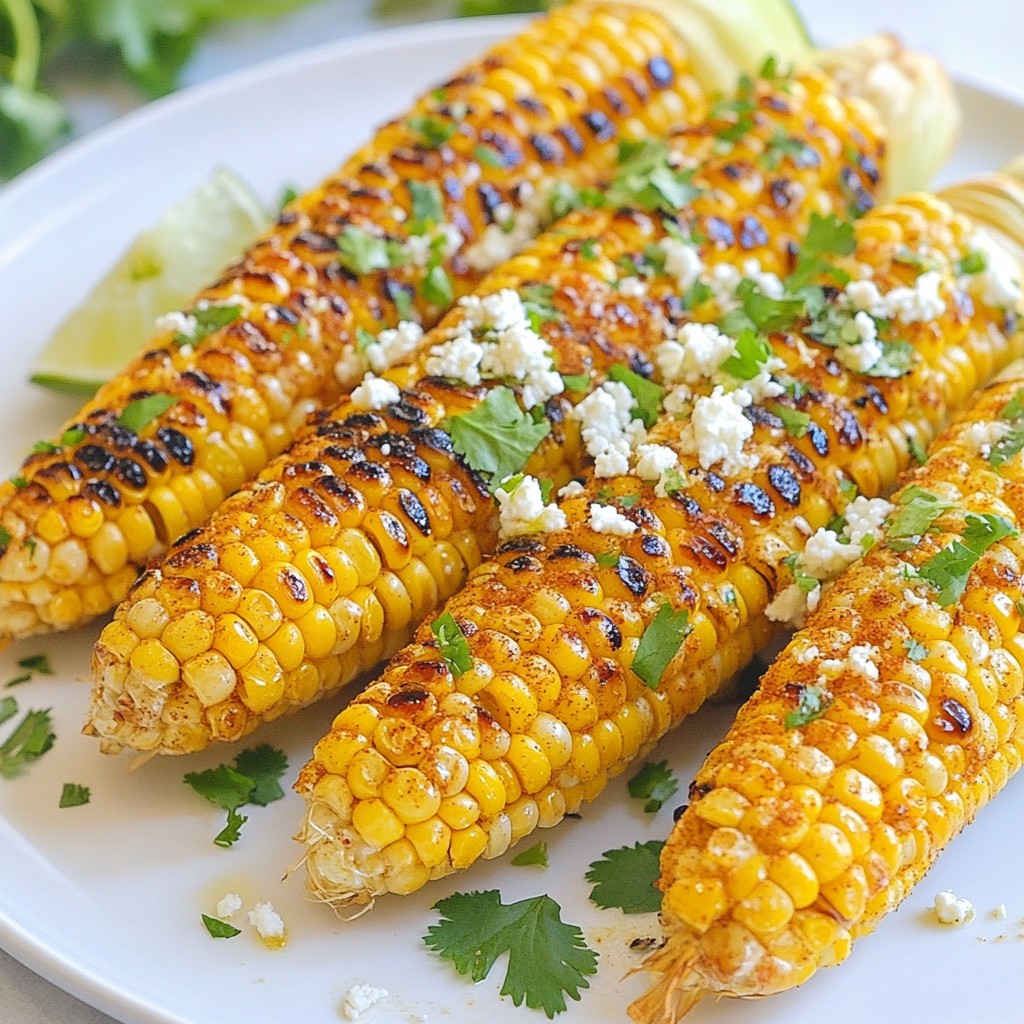
Are you ready to jazz up your summer cookouts? Chili Lime Grilled Corn is a quick, tasty treat that everyone will love. With a zesty kick from chili and lime, this dish will steal the show. In this post, I'll guide you through easy steps, make ingredient swaps simple, and share tips for the perfect grill. Let’s make your summer BBQ unforgettable with this flavorful delight!
Why I Love This Recipe
- Bold Flavor Combination: The blend of chili powder and lime creates a vibrant, zesty flavor that perfectly complements the sweetness of the corn.
- Quick and Easy: This recipe requires minimal prep time and cooks quickly on the grill, making it a perfect side dish for busy weeknights or summer gatherings.
- Customizable Heat Level: You can easily adjust the amount of cayenne pepper to suit your heat preference, allowing everyone to enjoy it just the way they like.
- Fresh and Colorful Presentation: The addition of lime zest and fresh cilantro not only enhances the flavor but also adds a beautiful pop of color to your plate.
Ingredients
List of Ingredients
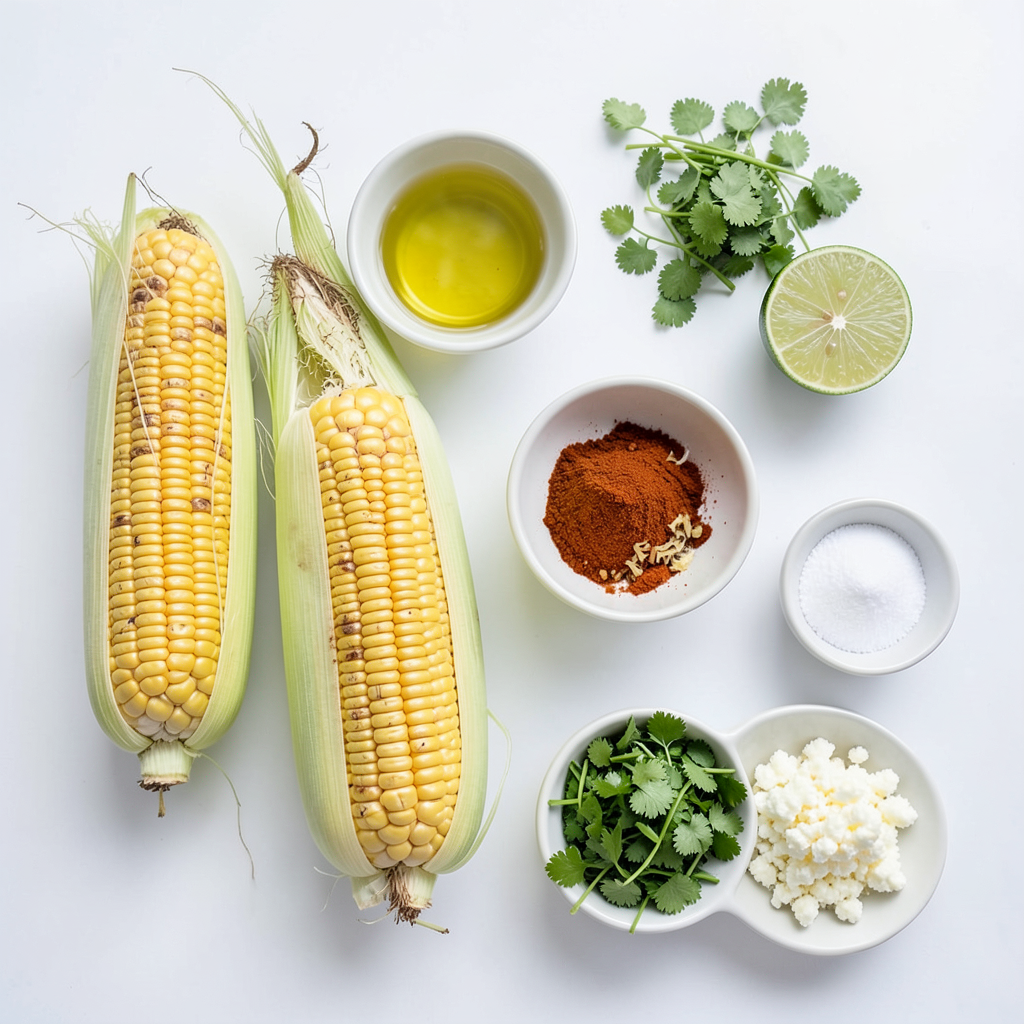
To make chili lime grilled corn, you will need:
- 4 ears of corn, husked
- 2 tablespoons olive oil
- 1 teaspoon chili powder
- 1/2 teaspoon smoked paprika
- 1 lime, zested and juiced
- 1/4 teaspoon cayenne pepper (adjust for heat preference)
- Salt to taste
- 2 tablespoons fresh cilantro, chopped (for garnish)
- 1/4 cup crumbled queso fresco (optional)
Ingredient Substitutions
You can switch some ingredients if needed. Instead of olive oil, use melted butter for a richer taste. If you can’t find chili powder, use paprika or a mix of spices. Lime can be replaced with lemon for a different zing. If you want less heat, skip the cayenne pepper. Use feta or goat cheese in place of queso fresco. Fresh cilantro can be swapped for parsley if you prefer.
Fresh vs. Frozen Corn
Fresh corn is best for grilling. It has a sweet, juicy flavor and a nice crunch. When you grill fresh corn, it gets a beautiful char that adds depth. Frozen corn can work in a pinch, but it won’t have the same texture or taste. If using frozen corn, thaw it first and grill it quickly. This way, you can still enjoy a tasty dish, though it won't have the same magic as fresh corn.
Step-by-Step Instructions
Prepping the Corn
Start with fresh ears of corn. I use four ears for this recipe. Husk the corn and remove all silk. This step is key for even cooking. Rinse the ears under cool water to clean them. Pat them dry with a towel. Now, they are ready for the grill!
Making the Chili Lime Seasoning
In a small bowl, combine the following ingredients:
- 2 tablespoons olive oil
- 1 teaspoon chili powder
- 1/2 teaspoon smoked paprika
- Juice from 1 lime
- 1/4 teaspoon cayenne pepper
- Salt to taste
Mix these until well combined. This seasoning brings the chili lime flavor. Brush it generously on all sides of the corn. Make sure every inch gets covered for great taste.
Grilling the Corn to Perfection
Preheat your grill to medium-high heat. Place the seasoned corn directly on the grill. Grill the corn for about 10-15 minutes. Turn the corn every few minutes. You want it to be tender and have a nice char. Once done, take the corn off the grill and let it cool a bit.
While it cools, sprinkle lime zest over each ear. If you like, add crumbled queso fresco for creaminess. Finally, top it off with fresh chopped cilantro. Enjoy your flavorful summer delight!
Tips & Tricks
Achieving the Perfect Char
To get a great char on your corn, start with a hot grill. Preheat it to medium-high heat. This helps the corn cook fast and evenly. Brush the seasoning mixture all over the corn. Make sure to coat every side. Place the corn directly on the grill. Turn it every few minutes. Grill for 10-15 minutes. Look for those dark grill marks. They mean your corn is perfectly charred and ready to eat.
Adjusting Spice Levels
If you want more heat, add more cayenne pepper. Start with 1/4 teaspoon, then taste. You can always add more, but you can't take it out. If you like it milder, skip the cayenne. The chili powder and smoked paprika add flavor without too much heat. This gives you a balanced taste. Your corn will still be delicious and full of flavor.
Serving Suggestions and Pairings
Serve your chili lime grilled corn warm. Add lime wedges on the side for extra zing. Crumbled queso fresco adds creaminess and richness. Fresh cilantro makes a bright and tasty garnish. Pair this corn with grilled meats or a fresh salad. It goes well with BBQ dishes too. You can also enjoy it as a snack on its own. This dish is perfect for summer cookouts or family gatherings.
Pro Tips
- Grill Temperature: Ensure your grill is preheated to medium-high. This helps achieve that perfect char and tenderness without burning the corn.
- Corn Selection: Choose fresh, sweet corn with bright green husks and plump kernels for the best flavor and juiciness.
- Adjusting Heat: Modify the amount of cayenne pepper according to your heat preference. You can also add more or less chili powder for varying spice levels.
- Garnishing: For a pop of color and flavor, consider adding crumbled feta or cotija cheese along with the cilantro for extra creaminess.
Variations
Alternative Seasoning Options
You can change the flavor of your chili lime grilled corn easily. Try adding garlic powder, cumin, or even taco seasoning. These options bring new tastes to your corn. For a sweet twist, mix in some honey or maple syrup with the olive oil. This gives a nice balance to the heat.
Vegetarian and Vegan Adaptations
This recipe is already vegetarian-friendly, but you can make it vegan too. Simply skip the queso fresco or use a vegan cheese instead. You can also add a splash of coconut milk to the seasoning mix for a creamy texture. The lime and chili will still shine through.
Grilled Corn with Different Cheeses
Cheese can take your grilled corn to the next level. Instead of queso fresco, try feta or cotija cheese. Both add a salty and tangy flavor. You can sprinkle the cheese on while the corn is still hot. This way, it melts slightly and sticks well to the corn. Don't forget to add more lime zest for an extra burst of flavor!
Storage Info
How to Store Leftovers
To store leftover chili lime grilled corn, let it cool first. Wrap each ear in plastic wrap or foil. Place the wrapped corn in an airtight container. Store it in the fridge for up to three days. This keeps the corn fresh and tasty.
Reheating Grilled Corn
Reheating grilled corn is simple. You can use a grill, oven, or microwave. If using a grill, preheat it to medium heat. Grill the corn for about 5 minutes, turning often. For the oven, wrap corn in foil and heat at 350°F for 10-15 minutes. In the microwave, place the corn on a plate, cover with a damp paper towel, and heat for 1-2 minutes. This keeps the corn juicy and flavorful.
Freezing Corn for Future Grilling
Freezing corn is a great way to save it for later. First, grill the corn as usual and let it cool completely. Next, wrap each ear in plastic wrap or foil tightly. Place the wrapped corn in a freezer-safe bag. Remove excess air and seal it. Frozen corn can last up to six months. When you are ready to grill again, thaw it in the fridge overnight. Then, grill it like fresh corn for that delicious flavor.
FAQs
Can I use canned corn for this recipe?
You can use canned corn, but fresh corn is best. Canned corn lacks the crisp texture you get from fresh ears. If you choose canned, drain it well and skip the grilling step. Instead, mix the corn with the seasoning and heat it on the stove.
How can I make this corn recipe spicy?
To spice up your corn, add more cayenne pepper to the seasoning. You can also use a spicy chili powder or hot sauce. Mix in diced jalapeños for extra heat. Adjust the spice to fit your taste. Always start small and add more as needed.
What is the best way to grill corn?
Grilling corn is easy and fun! Start by preheating your grill to medium-high heat. Husk the corn and coat it with the seasoning mix. Place the corn directly on the grill. Turn it often for even cooking. Grill for 10-15 minutes until it is tender and charred. Enjoy the smoky flavor!
This blog post covered how to make perfect grilled corn with tasty seasonings. I discussed important ingredients, substitutions, and how to prep the corn. You learned to grill it right, achieve the best char, and add your favorite spices. I also shared ideas for serving, storage, and variations to try.
Grilled corn is easy and fun! Use this guide to impress family and friends. Enjoy experimenting with flavors and make it your own. Happy grilling!
.png)