
Are you looking for a fun way to sneak more veggies into your kids' meals? Try my cheesy kid-friendly veggie mini quiches! These tasty bites are simple to make and perfect for little hands. Packed with eggs, cheese, and colorful veggies, they make a great snack or meal. Plus, I'll share tips to get your kids involved in the kitchen. Let’s dive into this delicious recipe!
Why I Love This Recipe
- Kid-Friendly: This recipe is perfect for getting kids involved in the kitchen, as they can help mix and fill the muffin tins with their favorite veggies.
- Versatile Ingredients: You can easily customize these mini quiches with whatever vegetables you have on hand, making it a great way to use up leftovers.
- Quick and Easy: With a prep time of just 15 minutes, these mini quiches are a fantastic option for busy mornings or quick snacks.
- Deliciously Cheesy: Who can resist the gooey, melted cheese inside? It makes these mini quiches a delightful treat for both kids and adults alike!
Ingredients
List of Ingredients
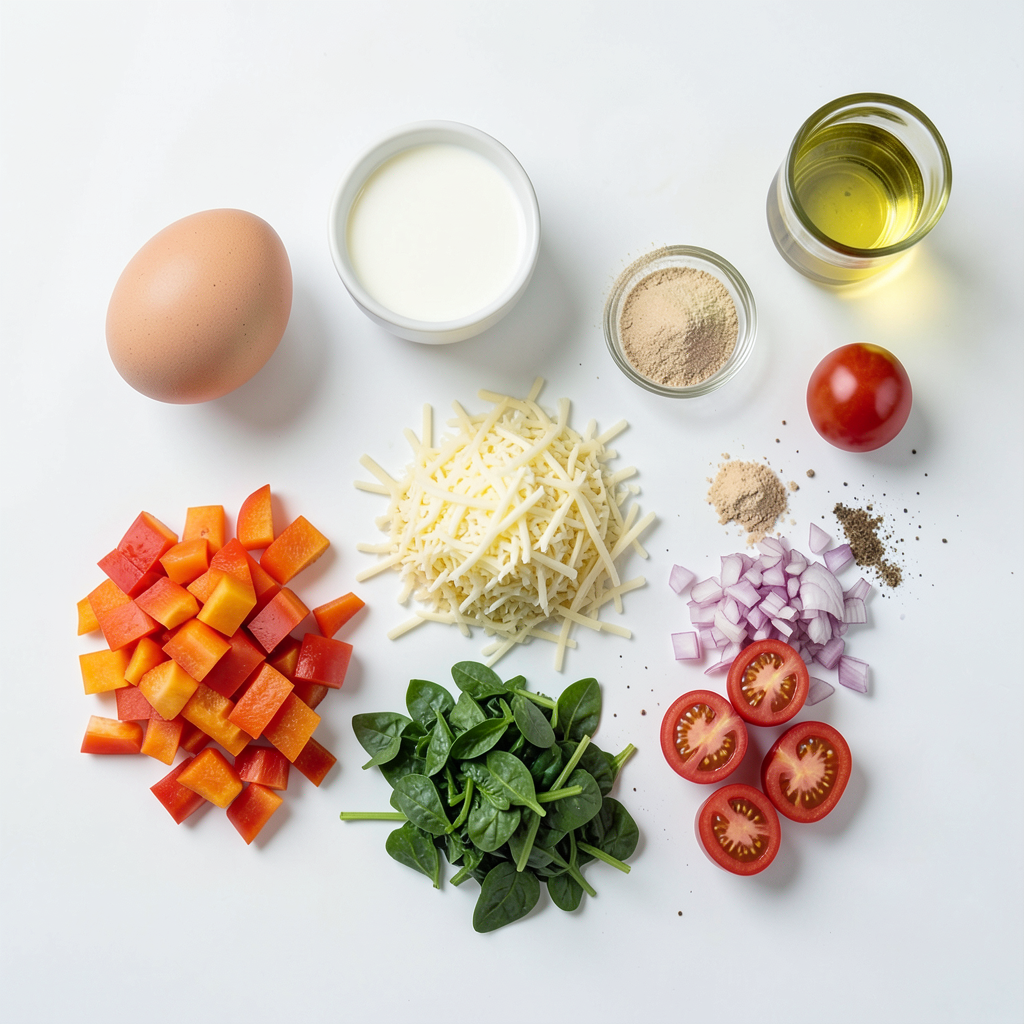
- 6 large eggs
- 1/2 cup milk
- 1 cup shredded cheese (cheddar or mozzarella)
- 1/2 cup bell peppers, diced (mix of colors for fun)
- 1/2 cup spinach, chopped (fresh or frozen)
- 1/4 cup red onion, finely chopped
- 1/2 cup cherry tomatoes, halved
- 1 teaspoon garlic powder
- Salt and pepper to taste
- Olive oil or cooking spray for greasing the muffin tin
Measuring Tips
Accurate measurements matter. They help your mini quiches turn out just right. Use a liquid measuring cup for milk and a dry one for the cheese. For the eggs, crack them into a bowl before adding to get rid of any shell bits. This step ensures your mix is smooth and tasty.
Optional Ingredients
You can add more veggies for fun. Try zucchini, broccoli, or mushrooms. These veggies not only boost flavor but also add nutrients. Kids often love colorful food. Mixing in different colors can make them more excited to eat!
Step-by-Step Instructions
Prepping for Baking
Start by preheating your oven to 375°F (190°C). This heat will help the quiches rise and cook evenly. Next, grab a 12-cup muffin tin. Grease it well with olive oil or cooking spray. This step is key to ensure the mini quiches do not stick. A well-greased tin makes for easy removal later.
Mixing the Filling
In a large bowl, whisk together 6 large eggs and 1/2 cup milk. Make sure these two mix well. Next, stir in 1 cup of shredded cheese. You can use cheddar or mozzarella; both work great! Now, add 1 teaspoon of garlic powder, along with salt and pepper to taste. Mix this all together until it looks smooth and creamy.
Now it's time for the fun part! Toss in your veggies. Add 1/2 cup of diced bell peppers, 1/2 cup of chopped spinach, 1/4 cup of finely chopped red onion, and 1/2 cup of halved cherry tomatoes. Stir gently so the veggies are evenly spread throughout the egg mix.
Assembling and Baking
Pour the egg and veggie mixture into the prepared muffin cups. Fill each one about 3/4 full to give them room to puff up. Place the muffin tin in the preheated oven. Bake for 18 to 20 minutes. You want them to be puffed and golden brown on top. Keep an eye on them!
When done, let the mini quiches cool in the pan for a few minutes. Then gently remove them using a small spatula or knife. Enjoy your delicious cheesy kid-friendly veggie mini quiches!
Tips & Tricks
Making it Kid-Friendly
Involve your kids in the cooking fun. Let them help crack the eggs and whisk. They can also mix in the cheese and veggies. This makes cooking exciting for them. Kids feel proud when they help create meals. You can ask them to choose their favorite veggies. This way, they are more likely to eat what they make.
Flavor Enhancements
Seasoning is key for tasty mini quiches. Garlic powder adds a nice touch. You can also try adding a pinch of paprika for warmth. Fresh herbs like parsley or basil bring bright flavors. Allow your kids to sprinkle in the seasonings. This can make it feel like their own creation.
Perfecting Texture
For fluffier quiches, whisk the eggs well. Mix the eggs and milk until frothy. This helps to add air and lightness. Don’t overfill the muffin cups; fill only about 3/4 full. This allows room for the quiches to puff up. Bake until they are golden brown for the best texture.
Pro Tips
- Customize Your Veggies: Feel free to swap in your kids' favorite vegetables or whatever you have on hand. Zucchini, mushrooms, or even grated carrots can be delicious additions!
- Make Ahead: These mini quiches can be made in advance and stored in the fridge for up to 3 days. Simply reheat in the microwave for a quick breakfast or snack!
- Experiment with Cheese: Try different types of cheese to change up the flavor. Feta, pepper jack, or a blend can add a unique twist to your mini quiches.
- Perfect Portion Control: These mini quiches are great for portion control, making them perfect for lunchboxes or as party snacks. Just be sure to make enough to share!
Variations
Cheese Options
You can mix and match cheese for your quiches. Cheddar gives a sharp flavor. Mozzarella adds a mild, stretchy texture. Try feta for a tangy kick. Cream cheese makes them rich and creamy. Each cheese brings a unique taste, so feel free to explore!
Vegetable Substitutions
Kids love a colorful plate! You can swap bell peppers for carrots or zucchini. Broccoli florets add crunch and nutrition. Peas are sweet and fun to eat. Try corn for a pop of sweetness. Choose veggies your kids enjoy most.
Dietary Adjustments
Want to make it gluten-free? Use gluten-free bread crumbs instead of flour. For dairy-free quiches, choose almond milk and dairy-free cheese. This way, everyone can enjoy the meal. Always check labels to ensure your ingredients fit the dietary needs.
Storage Info
Refrigeration
To store leftovers, keep mini quiches in an airtight container. They stay fresh for up to four days. Make sure they cool fully before sealing. This helps prevent sogginess. You can place parchment paper between layers to avoid sticking.
Freezing Options
If you want to save some for later, freezing is a great option. Wrap each mini quiche in plastic wrap. Then, place them in a freezer-safe bag or container. They can last up to three months in the freezer. When you’re ready to eat them, just take out what you need.
Reheating Instructions
To reheat mini quiches, the oven is the best method. Preheat your oven to 350°F (175°C). Place the quiches on a baking sheet. Heat them for about 10-15 minutes until warm. You can also use a microwave, but be careful. Microwaving can make them rubbery. To avoid this, heat in short bursts.
FAQs
How long do mini quiches last in the fridge?
Mini quiches last about 3 to 5 days in the fridge. Store them in an airtight container. This keeps them fresh and tasty. If you want them to last longer, consider freezing.
Can I make mini quiches ahead of time?
Yes, you can make mini quiches ahead of time. Prepare them and let them cool. Then, store them in the fridge or freezer. When you’re ready, just reheat them for a quick meal.
What can I serve with veggie mini quiches?
- Ideas for Accompaniments and Sides
You can serve mini quiches with many tasty sides. Here are some fun ideas:
- Fresh fruit salad for a sweet touch.
- A simple green salad with light dressing.
- Crispy hash browns for a hearty bite.
- Yogurt or sour cream for dipping.
- A side of ketchup or ranch for extra flavor.
These sides make the meal more fun and balanced. Enjoy mixing and matching!
You learned how to make delicious mini quiches with simple ingredients and steps. Accurate measurements and cooking tips help you get the best results. You can even engage kids in the kitchen for fun and flavor. Remember, you can swap ingredients to fit any diet or taste. Store leftovers properly to enjoy later. Mini quiches are versatile and perfect for any meal. Try experimenting with different veggies and cheeses to keep it fresh. Happy cooking!