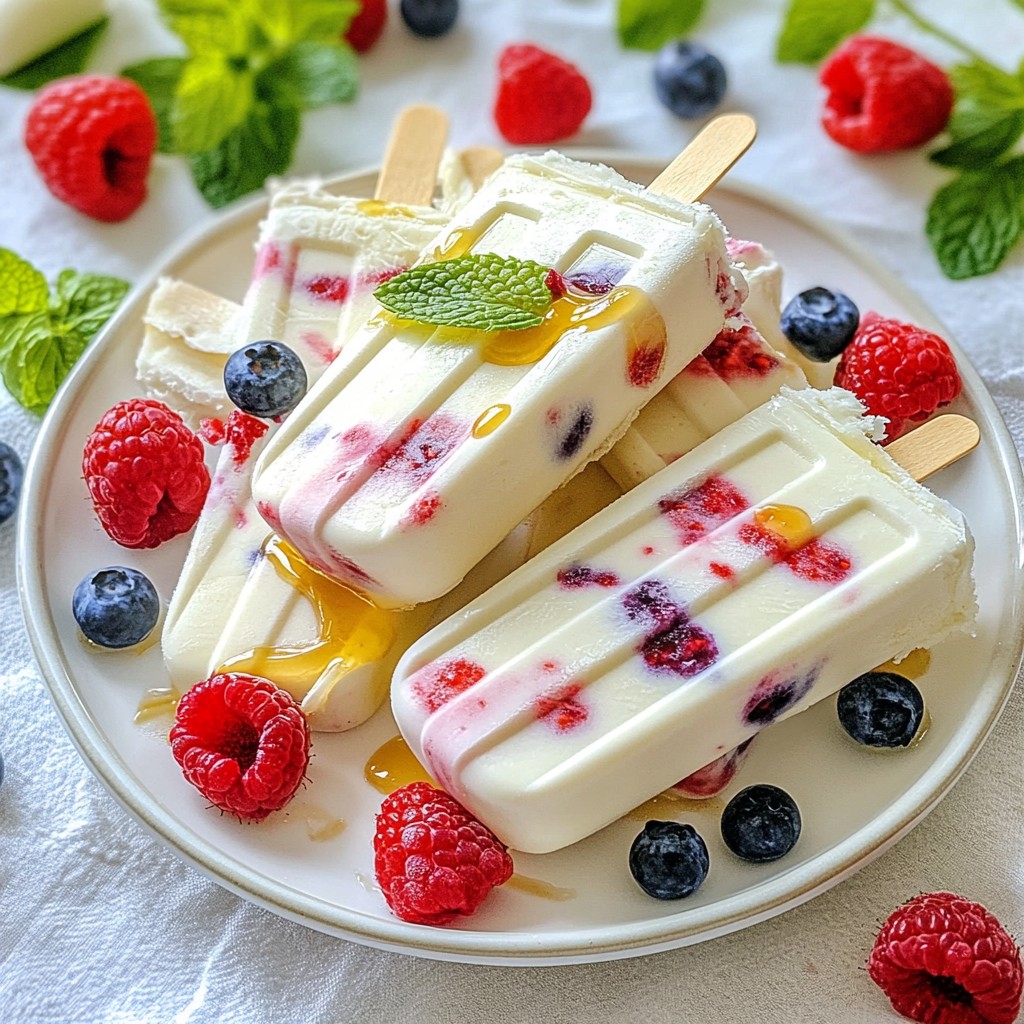
Looking for a tasty way to beat the heat? These Berry Yogurt Popsicles are a fun and healthy treat for hot days! With just a few simple ingredients, you can create creamy, berry-filled popsicles that the whole family will love. In this post, I’ll guide you through the ingredients, steps, and tips for making your refreshing summer delight. Let’s dive into this cool kitchen adventure!
Why I Love This Recipe
- Refreshing Treat: These popsicles are a perfect way to cool down on a hot day, offering a burst of fruity flavor.
- Healthy Ingredients: Made with Greek yogurt and fresh berries, they provide a nutritious snack that satisfies your sweet tooth.
- Customizable Flavors: You can easily adjust the sweetness and experiment with different fruits to suit your taste.
- Fun to Make: This recipe is simple and enjoyable, making it a great activity to do with kids or friends.
Ingredients
List of Ingredients
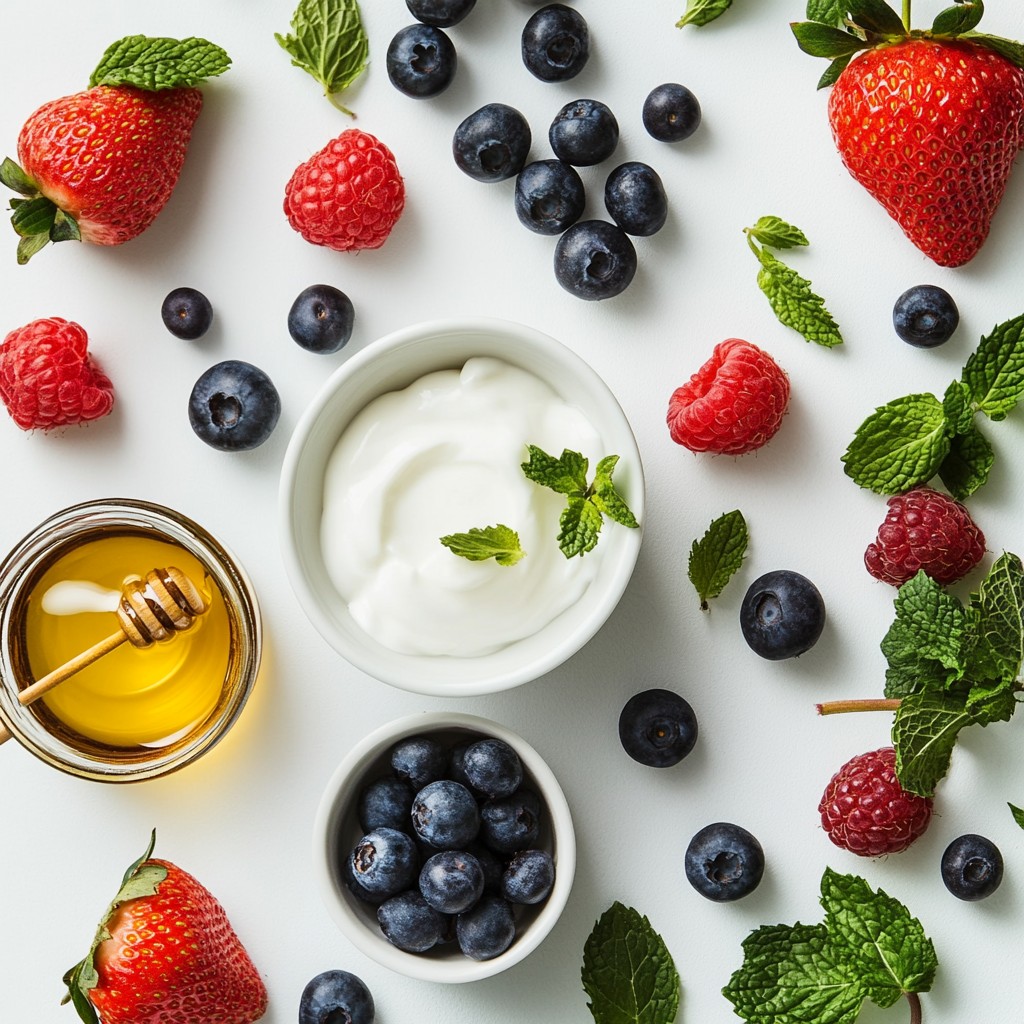
- Mixed Berries: For this recipe, I use strawberries, blueberries, and raspberries. These berries are fresh and sweet in summer. You can find them at local farms or grocery stores. They are ripe from June to August. Frozen berries work too, but fresh gives the best taste.
- Greek Yogurt: Choose between plain or vanilla Greek yogurt. Plain yogurt has a tangy taste. It pairs well with sweet berries. Vanilla yogurt adds extra sweetness. Both options are rich in protein, which is great for a healthy treat.
- Sweeteners: I like using honey or maple syrup. They add natural sweetness. You can adjust the amount to your taste. If you want something low-calorie, try stevia or agave syrup as alternatives.
- Optional Ingredients: You can add coconut water or fruit juice for more flavor. Coconut water adds a tropical vibe. Fruit juice, like orange or apple, gives a nice sweetness. Both options make the popsicles extra refreshing on hot days.
These ingredients create a tasty and colorful summer treat. Enjoy making your Berry Yogurt Popsicles!
Step-by-Step Instructions
Preparation Steps
1. Washing and preparing the berries
Start by washing your mixed berries well. This step is key to removing dirt. If you use strawberries, hull them first. Slice them into smaller pieces to blend easily. Blueberries and raspberries can go in whole.
2. Blending the ingredients for a smooth mixture
Grab your blender and add the washed berries. Next, add Greek yogurt, honey or maple syrup, and vanilla extract. If you want a hint of extra flavor, pour in some coconut water or fruit juice. Blend everything until the mixture is smooth. Taste it and adjust the sweetness if you want it sweeter.
3. Filling and prepping the popsicle molds
Now, take your popsicle molds. Pour the blended mixture into the molds, filling them about three-quarters full. This gives the popsicles room to expand as they freeze. Insert the popsicle sticks and gently pack down the mixture to avoid air bubbles.
Freezing and Serving
1. Recommended freezing time and tips for optimal results
Place the molds in the freezer for at least 4 to 6 hours. This time ensures the popsicles become completely solid. For the best results, try not to open the freezer too often. This keeps the temperature steady.
2. How to release popsicles from molds effectively
When you're ready to enjoy your popsicles, run warm water over the outside of the molds for a few seconds. This will help loosen them. Gently pull the popsicles out. If they stick, just give them a little wiggle. Enjoy your tasty treat right away!
Tips & Tricks
Perfecting Texture and Flavor
To make your berry yogurt popsicles just right, adjusting sweetness is key. Start with 1/4 cup of honey or maple syrup. After blending, taste the mix and add more sweetener if you want. Some berries are sweeter than others, so this step helps you find your perfect balance.
Achieving a creamy texture is also important. Use Greek yogurt for a rich and thick base. If you want it even creamier, add a splash of coconut water or fruit juice. This small addition brings a lightness to your popsicles while keeping them smooth.
Choosing the Best Ingredients
Selecting ripe berries makes a big difference. Look for berries that are vibrant in color and firm to the touch. If they smell sweet, they are usually ready to eat. Avoid any that feel mushy or have dark spots.
For yogurt, Greek yogurt is a great choice. It has more protein and gives a nice thickness. You can also use flavored yogurt if you want extra taste. Just check the sugar content to keep it healthy. This way, your popsicles will be both tasty and nutritious!
Pro Tips
- Use Frozen Berries: For a creamier texture, consider using frozen mixed berries instead of fresh. They will blend smoothly and help keep your popsicles colder longer.
- Experiment with Flavors: Feel free to mix and match different types of fruit for unique flavors. Try adding bananas or mangoes for a tropical twist!
- Layering Technique: For a fun presentation, layer the blended mixture with whole berries in the molds. This creates a beautiful visual effect when the popsicles are removed.
- Sweetness Adjustment: Always taste your mixture before pouring it into the molds. You can adjust the sweetness by adding more honey or maple syrup based on your preference.
Variations
Flavor Combinations
You can switch up the berry yogurt popsicles with fun flavors. For a tropical twist, add mango or pineapple. These fruits bring a sweet and bright taste. They also pair well with berries. Just blend them in with your berry mix.
Another great option is a nutty delight. You can add nut butter like almond or peanut butter. This adds creaminess and a rich flavor. It also boosts protein, making them more filling.
Dietary Alternatives
If you need dairy-free options, try coconut yogurt. It has a creamy texture and a light coconut flavor. This works well with berries. You won't miss the dairy at all.
For those watching sugar intake, consider low-sugar variations. Use stevia or monk fruit as sweeteners. These options keep the popsicles sweet without extra calories. Adjust the amount to fit your taste.
Storage Info
Best Practices for Freezing
To keep your berry yogurt popsicles fresh, store them in an airtight container. You can also wrap them in plastic wrap. This helps to keep out air and moisture. Label the container with the date you made them. This way, you’ll remember when they were made.
To avoid freezer burn, ensure the popsicles are tightly sealed. Freezer burn happens when air touches the popsicles. It can make them taste bad. If you notice frost on them, it's a sign of freezer burn.
Shelf Life
Berry yogurt popsicles can stay fresh in the freezer for up to three months. After that, they may lose flavor and texture.
Look for signs of spoilage, like ice crystals or a weird smell. If they smell strange or have an odd color, it's best to throw them away. Always trust your senses when checking for freshness.
FAQs
Common Questions About Berry Yogurt Popsicles
Can I use frozen berries instead of fresh? Yes, you can use frozen berries. They work just as well! Frozen berries can make the popsicles cold and smooth. Just remember to thaw them a bit before blending. This helps blend them easier.
How can I make popsicles without molds? You can use small cups or ice cube trays as molds. Pour the mixture into these. Then, insert a stick or a spoon. Freeze until solid. This method works perfectly for homemade popsicles.
Are these popsicles healthy for children? Yes, these popsicles are healthy. They have fresh fruit and yogurt. The yogurt gives protein and calcium. Berries are full of vitamins and fiber. You can control the sweetness, too.
What yogurt is best for popsicles? Greek yogurt is best for popsicles. It gives a creamy texture. You can use plain or flavored yogurt. If you prefer a lighter version, go for regular yogurt. Just make sure it is thick enough for a good taste.
You now have a simple guide to make delicious berry yogurt popsicles. We covered the best ingredients, preparation steps, and tips for flavor and texture. Knowing these details helps you create a treat that your whole family will love. Don’t forget to try different flavors and dietary options. Enjoy making these tasty popsicles and experimenting with your favorite ingredients. With practice, you will master these refreshing snacks in no time!
.png)


