Skip to content
DisclaimerTerms Of UseGDPR PolicyCookie Policy

momdishmagic

  • Home
  • Drinks
  • Appetizers
  • Dinner
  • Dessert
  • About
  • Contact
  • Privacy Policy
DisclaimerTerms Of UseGDPR PolicyCookie Policy

Emma

- 2 ripe avocados, peeled and pitted - 1/2 cup unsweetened cocoa powder - 1/2 cup maple syrup - 1/4 cup almond milk (or any plant-based milk) - 1 teaspoon vanilla extract - 1/4 teaspoon sea salt - Optional toppings: dairy-free whipped cream, fresh berries, shaved dark chocolate To make this vegan chocolate avocado mousse, you need simple, fresh ingredients. The ripe avocados form the base, giving the mousse its creamy texture. Cocoa powder provides the rich chocolate flavor that we all love. Maple syrup sweetens the mousse naturally, while almond milk adds a smooth consistency. The vanilla extract and sea salt enhance the flavors, making each bite delightful. - Alternative sweeteners: If you prefer, you can use agave syrup or mashed dates. - Different plant-based milk options: Soy milk or coconut milk work well, too. - Cocoa powder vs. dark chocolate: You can swap cocoa powder for melted dark chocolate for a different texture. These substitutions let you customize the mousse to your taste. Use what you have in your kitchen. The key is to keep the texture creamy and the flavor rich, no matter the choice. To make vegan chocolate avocado mousse, start by gathering your ingredients. You need ripe avocados, cocoa powder, maple syrup, almond milk, vanilla extract, and sea salt. Next, put all these ingredients in a food processor. Blend them until smooth and creamy. You want a thick, airy texture. If it seems too thick, add a bit more almond milk. Taste the mousse. If you want it sweeter, add more maple syrup. Blend it again until everything mixes well. While blending, you may need to stop and scrape down the bowl. This helps mix all the ingredients evenly. If you skip this step, some parts may stay chunky. Keep an eye on the blending time. Blend until your mousse is light and fluffy. It should take about 2 to 3 minutes. A smooth texture makes the mousse taste better. Once you have your perfect mousse, it’s time to serve. Spoon the mousse into small serving bowls or cups. This dessert looks great in clear dishes. After transferring, cover the bowls with plastic wrap. Place them in the refrigerator for at least 30 minutes. Chilling helps the flavors blend and makes the mousse even creamier. When ready to serve, you can add optional toppings. Dairy-free whipped cream, fresh berries, or shaved dark chocolate make it extra special. Enjoy your rich and creamy delight! To make a great mousse, start with ripe avocados. They should feel soft when you press them. If your avocados are hard, let them sit at room temperature for a few days. Ripe avocados give the mousse a creamy texture, which is key. Adjusting the sweetness is also important. Taste your mousse after blending. If it is not sweet enough, add more maple syrup. Blend again until it's just right. You can prepare this mousse a day before your event. Store it in an airtight container in the fridge. This keeps it fresh and ready to serve. Aim for at least 30 minutes of chilling time before serving. This allows the flavors to mix well. If you can chill it longer, that’s even better! Garnishing makes your mousse look fancy. You can top it with dairy-free whipped cream, fresh berries, or shaved dark chocolate. These toppings add color and texture. For parties, serve the mousse in small cups. This way, guests can grab their own. You can also layer it with fresh fruit or granola for a fun twist. {{image_2}} You can make this mousse even tastier by adding nut butter. Try peanut or almond butter. Both will give a rich flavor and creaminess. You can also mix in extracts like mint or almond. A little goes a long way to change the taste. Just remember to blend well after adding. If you need nut-free options, swap nut butter for sunflower seed butter. This keeps the mousse creamy without nuts. For sugar-free choices, you can use stevia or monk fruit sweetener. These options still taste great and keep it healthy. Serve your mousse in parfaits for a fun twist. Layer it with granola or fruit for extra texture. You can also stack it with other desserts like cakes or puddings. These ideas make your dessert look fancy and inviting. To keep your mousse fresh, store it in an airtight container. Place the mousse in the fridge right after serving. This helps preserve its rich flavor and creamy texture. If you want to keep it longer, you can freeze the mousse. Use a freezer-safe container and leave some space at the top. This allows the mousse to expand as it freezes. In the fridge, your vegan chocolate avocado mousse lasts about 3 to 5 days. Always check for signs of spoilage. If you see any discoloration or an off smell, it's best to toss it. Freshness is key for the best taste. If you froze the mousse, thaw it in the fridge overnight. Avoid using a microwave, as it can affect the texture. After thawing, stir gently to restore creaminess. If it feels too thick, mix in a splash of almond milk to regain that smooth, light texture. Can I use different types of chocolate? Yes, you can! Dark chocolate adds a rich flavor, while milk chocolate offers sweetness. Try using cocoa powder for a strong chocolate taste. Just ensure it's vegan! Is this mousse suitable for kids? Absolutely! Kids love the creamy texture and chocolate flavor. It's a fun and healthy treat for them. How many servings does the recipe make? This recipe makes four servings. Feel free to double it if you're hosting friends or family. What are the health benefits of avocados? Avocados are packed with healthy fats, fiber, and vitamins. They help keep your heart healthy and boost skin health. Plus, they make this mousse creamy without dairy! Is this dessert low in calories? Yes, this mousse is lower in calories than many traditional desserts. It uses avocados instead of cream, making it a lighter option. What if my mousse is too thick? If your mousse is too thick, add a bit more almond milk. Blend again until smooth. This helps achieve the right creamy texture. How to fix an overly sweet mousse? If your mousse tastes too sweet, add a pinch of sea salt. This balances the flavors. You can also blend in more cocoa powder to reduce sweetness. For the full recipe, check the earlier section. This vegan chocolate avocado mousse is easy and fun to make. You learned about the key ingredients, how to blend them, and tips for perfect texture. Remember to store any leftovers properly. Feel free to try different flavors and toppings to make it your own. This dessert is not only tasty but also healthy! I'm excited for you to enjoy it. Happy cooking!

Vegan Chocolate Avocado Mousse Rich and Creamy Delight

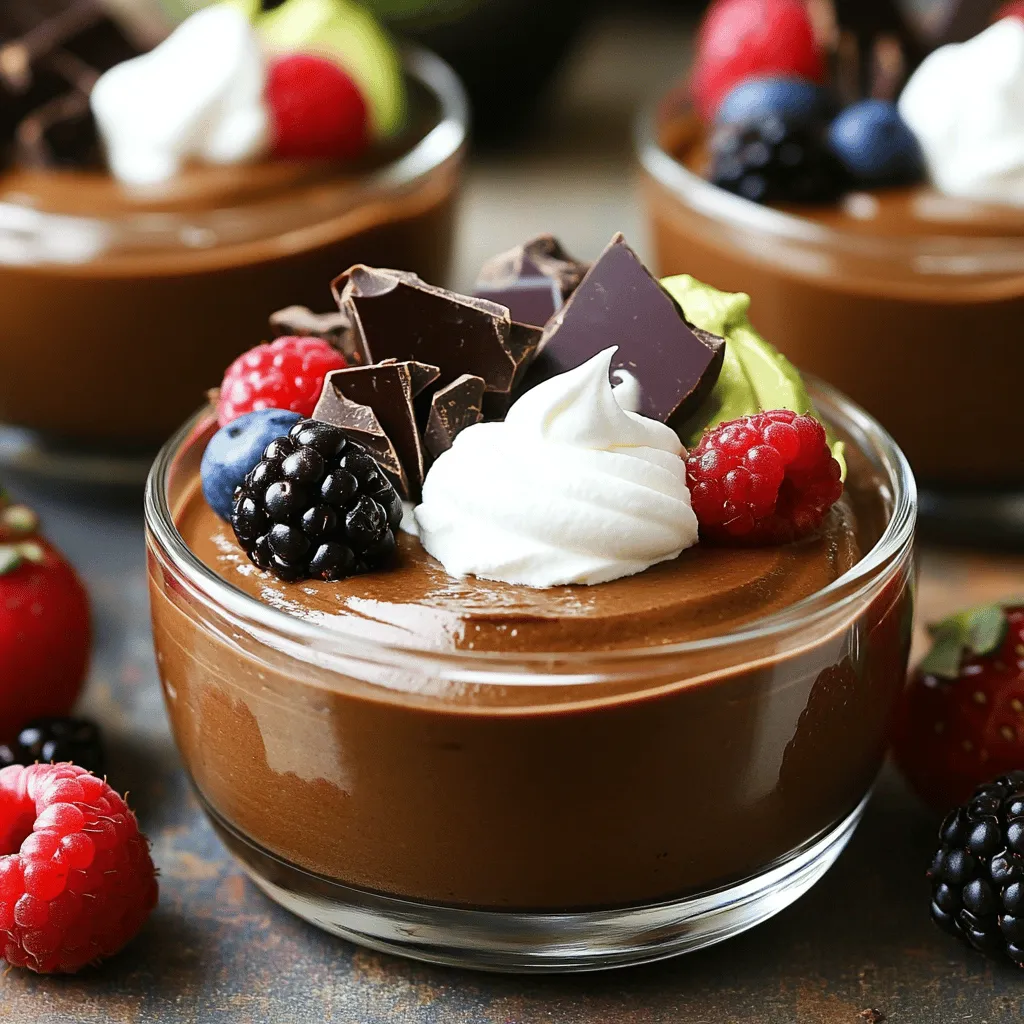
Are you ready to indulge in a rich and creamy dessert that’s both healthy and delicious? This Vegan Chocolate Avocado

To make chocolate chip cookie dough bites, gather these simple ingredients: - 1 cup all-purpose flour - 1/2 cup unsalted butter, softened - 1/3 cup brown sugar, packed - 1/3 cup granulated sugar - 1 teaspoon vanilla extract - 1/4 teaspoon salt - 1/2 cup mini chocolate chips - 2 tablespoons milk (or milk alternative) - 1 cup semi-sweet chocolate chips (for coating) These ingredients create a rich and tasty treat. Each one plays a key role. The butter gives a creamy base, while sugars add sweetness. The flour provides structure, and the mini chips add fun bursts of chocolate. You can also use different types of chocolate chips if you want. Make sure to use good-quality chocolate for coating. It makes a big difference in taste. If you want to get creative, add nuts or other mix-ins. The possibilities are endless! For the full recipe, check out the complete instructions. - In a medium bowl, combine the softened butter, brown sugar, and granulated sugar. Beat them until smooth. - Next, add one teaspoon of vanilla extract and two tablespoons of milk. Mix until blended. - Gradually add one cup of all-purpose flour and a quarter teaspoon of salt. Stir until just combined. - Now, fold in half a cup of mini chocolate chips. This adds the fun chocolatey touch. - Using a tablespoon or scoop, take small portions of dough and roll them into balls. - Place these balls on a baking sheet lined with parchment paper, then freeze them for about 30 minutes. - While the dough balls chill, melt one cup of semi-sweet chocolate chips in a bowl. Heat in 30-second intervals, stirring until smooth. - Once chilled, dip each cookie dough ball into the melted chocolate. Make sure they are fully coated. - Place the coated bites back on the parchment-lined sheet. Refrigerate them for another 30 minutes to set the chocolate. Now you have delicious chocolate chip cookie dough bites ready to enjoy! For the Full Recipe, check the earlier section. To make soft and chewy chocolate chip cookie dough bites, focus on the butter. Use softened butter to ensure a creamy mix. You can also try blending the butter and sugars longer for a smoother texture. If you want chewier bites, add a bit more flour. This helps keep them firm and less gooey. If you prefer a softer consistency, reduce the flour a little. Don’t forget to chill the dough before coating. Freezing helps the bites hold their shape. Get creative with how you serve these treats. Place the chocolate chip cookie dough bites on a colorful plate or in fun candy cups. For a twist, drizzle melted chocolate on top or sprinkle sea salt. Pair these bites with a glass of cold milk or hot chocolate for a tasty treat. You can also serve them with ice cream for an extra special dessert. Make your cookie dough bites look fancy with simple plating tricks. Use a large plate and arrange the bites in a circle. You can also stack them high for a fun look. Sprinkle some sea salt or crushed nuts on top for a nice finish. For a festive touch, add edible glitter or colorful sprinkles. These small details make your treats stand out. With these tips, your chocolate chip cookie dough bites will not only taste great but look great too! Check out the Full Recipe for all the details. {{image_2}} You can make your cookie dough bites more fun by adding flavors. Here are some ideas: - Nuts: Chopped walnuts or pecans add a nice crunch. - Peanut Butter: Swirl in some peanut butter for a rich taste. - Coconut: Shredded coconut gives a tropical flair. - Spices: A pinch of cinnamon or nutmeg can warm up the flavors. These twists keep the classic cookie dough bite exciting and fresh. Mix and match to find your favorite combo! You can also make these bites fit different diets. Here’s how: - Gluten-Free: Use almond flour or a gluten-free flour blend instead of all-purpose flour. - Vegan: Swap butter for coconut oil and use a plant-based milk. You can also find vegan chocolate chips. These changes let everyone enjoy cookie dough bites! No one needs to miss out on this tasty treat. For the complete recipe, check the Full Recipe section. To keep your chocolate chip cookie dough bites fresh, follow these steps: - Use an airtight container: This helps prevent moisture loss and keeps flavors intact. - Layer carefully: Place parchment paper between layers to avoid sticking. - Store in the fridge: They can last up to one week when refrigerated. I recommend using a glass or plastic container with a tight lid for best results. It keeps the bites fresh and ready to enjoy. For longer storage, you can freeze cookie dough bites. Here’s how: - Freeze individually: Place the bites on a baking sheet and freeze for about 30 minutes. This prevents them from sticking together. - Transfer to a freezer bag: Once firm, move them to a zip-top freezer bag. Remove as much air as possible. - Store for up to three months: This ensures you always have a tasty treat ready. When you want to enjoy them, thaw in the fridge for a few hours. You can also leave them at room temperature for about 30 minutes. Enjoy your delicious bites anytime! Chocolate chip cookie dough bites last about one week in the fridge. Store them in an airtight container. For longer storage, freeze them. They can stay good for up to three months in the freezer. Yes, you can eat unbaked cookie dough bites. However, they contain raw flour and could lead to foodborne illness. To make them safer, use heat-treated flour or skip the flour altogether. The best way to melt chocolate is in short bursts in the microwave. Start with 30 seconds, then stir. Repeat this until the chocolate is smooth. Avoid overheating, as chocolate can seize up. Yes, you can use different types of chocolate. Dark, milk, or white chocolate all work well. Each will give a unique taste and look. Feel free to mix chocolates for a fun twist! Yes, these bites are safe for kids. Make sure to prepare them with safe, edible ingredients. Just be mindful of any allergies to nuts or dairy. Enjoy making them together for a fun treat! This chocolate chip cookie dough bites recipe is simple and fun. It takes about 15 minutes to prep and 1 hour and 15 minutes total. You can make 12 to 15 tasty bites from this recipe. - 15 minutes - 1 hour 15 minutes - 12-15 bites Presentation tips can really bring these bites to life. I like to arrange them on a nice plate and sprinkle a bit of sea salt on top. This small touch makes them look fancy and special. You can also use cute candy cups if you plan to give them as gifts. In this post, I detailed how to make tasty chocolate chip cookie dough bites. We covered the key ingredients, step-by-step instructions, and helpful tips. You can customize the recipe with different flavors and dietary needs. Storing and serving ideas ensure your bites stay fresh and delicious. Don't be shy about trying these fun variations, and share them with friends or family. Enjoy making these treats whenever you like!

Chocolate Chip Cookie Dough Bites Easy and Fun Treat

Get ready for a sweet adventure with my easy and fun Chocolate Chip Cookie Dough Bites! These tasty treats combine

- 4 medium bell peppers (any color) - 1 cup quinoa - 1 can (15 oz) black beans, rinsed and drained For stuffed bell peppers, the bell peppers are the stars. They provide a sweet crunch and bright color. You can use any color—red, yellow, or green. Each adds a unique taste. Quinoa is a great base. It is packed with protein and fiber. Black beans add heartiness and depth. They also bring a rich flavor. - 1 teaspoon cumin - 1 teaspoon smoked paprika - 1 teaspoon chili powder Spices bring your dish to life. Cumin adds warmth and earthiness. Smoked paprika gives a nice smoky flavor. Chili powder adds a bit of heat. Adjust these spices to match your taste. You can make them mild or spicy. - 1 cup shredded cheese (cheddar or your choice) - Fresh cilantro, for garnish (optional) - Lime wedges, for serving (optional) Cheese is a great topping. It melts beautifully and adds richness. You can choose cheddar or any cheese you love. Fresh herbs like cilantro add a pop of flavor. Lime wedges brighten the dish. They add a zesty touch when squeezed over the peppers. For the full recipe, see the section above. 1. Rinse the quinoa under cold water. This removes any bitter taste. 2. In a medium saucepan, combine 1 cup of quinoa and 2 cups of vegetable broth. 3. Bring this mix to a boil over high heat. 4. Once boiling, reduce heat to low. Cover and simmer for about 15 minutes. 5. The quinoa is done when it is fluffy and the liquid is absorbed. 1. Take 4 medium bell peppers and slice the tops off. 2. Remove the seeds and ribs inside the peppers. 3. Position the peppers upright in a baking dish. This helps them hold the filling. 1. In a large skillet, add a drizzle of olive oil and heat over medium. 2. Sauté 1 medium onion until it turns translucent, about 5 minutes. 3. Add 2 minced garlic cloves and cook for 1 more minute until fragrant. 4. Stir in 1 can of black beans, 1 cup of corn, and 1 cup of diced tomatoes. 5. Mix in 1 teaspoon of cumin, 1 teaspoon of smoked paprika, and 1 teaspoon of chili powder. 6. Season with salt and pepper to taste. Cook for 5 minutes to blend the flavors. 1. Combine the cooked quinoa with the filling in the skillet. Stir until mixed well. 2. Stuff each bell pepper tightly with the quinoa mixture. 3. Sprinkle 1 cup of shredded cheese on top of each stuffed pepper. 4. Cover the baking dish with aluminum foil. Bake at 375°F (190°C) for 25 minutes. 5. Remove the foil for the last 10 minutes. This lets the cheese melt and brown. 6. After baking, let the peppers cool for a few minutes. Enjoy your tasty meal! Adjusting Seasoning to Taste Finding the right taste is key. After mixing in your spices, taste the filling. Add salt or pepper as needed. You can also add a splash of lime juice for a fresh twist. This gives your dish a nice kick. Adding Extra Veggies Feel free to get creative! Chopped zucchini, diced carrots, or spinach can boost nutrition. Just sauté these veggies with the onions and garlic. This adds color and flavor to your stuffed peppers. Checking Quinoa Doneness When cooking quinoa, look for fluffy grains. The water should fully absorb after about 15 minutes. If it seems wet, let it cook a bit longer. Perfect quinoa makes for a better filling. Baking Techniques Cover your stuffed peppers with foil at first. This keeps them moist. Remove the foil in the last 10 minutes to crisp the cheese. Baking at 375°F (190°C) works best for evenly cooked peppers. Garnishes Fresh cilantro adds a nice touch. Sprinkle it on top right before serving. Lime wedges on the side give a zesty flavor that brightens each bite. Pairing Ideas Serve these stuffed peppers with a simple salad or rice. They go well with tortilla chips and salsa, too. You can enjoy them as a hearty main dish or a tasty side. Check out the Full Recipe for more ideas! {{image_2}} Ground Meat Options You can use ground meat in your stuffed bell peppers. Ground beef, turkey, or chicken work well. Cook the meat in the skillet before mixing it with the quinoa and veggies. This adds flavor and protein. Just be sure to drain any excess fat before combining. Tofu or Tempeh Substitutes If you prefer a plant-based option, tofu or tempeh is great. Crumble tofu or chop tempeh into small pieces. Sauté them with the onions and garlic for added taste. This keeps the dish healthy and full of protein. Vegan Cheese Alternatives For a dairy-free version, try vegan cheese. There are many options available now. Nutritional yeast is a tasty substitute too. Sprinkle it on top before baking for a cheesy flavor without dairy. Gluten-Free Options This recipe is naturally gluten-free with quinoa and veggies. Always check labels on canned goods to ensure they are gluten-free. You can use gluten-free grains like brown rice or millet in place of quinoa if you want a different texture. Different Grains You can switch up the grains in your stuffed peppers. Try brown rice, farro, or even barley. Each grain brings its own flavor and texture. Adjust the cooking times as needed to ensure they are fully cooked. Assorted Vegetables Feel free to add other vegetables to your filling. Chopped zucchini, spinach, or mushrooms are great choices. They add nutrients and flavor to your dish. Just make sure to cook them down a bit before mixing with the quinoa. This keeps your filling moist and tasty. For the full recipe, visit the [Full Recipe] section above. To store leftover stuffed bell peppers, place them in a sealed container. Make sure the peppers cool down first. You can keep them in the fridge for about 3 to 5 days. When you want to eat them, just take them out. It’s best to reheat in the oven or microwave. For keeping them fresh, wrap each pepper in plastic wrap or foil. This will help prevent them from drying out. If you notice any moisture, it’s good to let them breathe a bit before sealing them. If you want to save stuffed bell peppers for later, freezing is a great option. First, let them cool completely. Then, wrap each one tightly in plastic wrap. After that, place them in a freezer-safe bag or container. They can last in the freezer for up to 3 months. When you’re ready to eat them, thaw in the fridge overnight. For reheating, put them in the oven at 350°F (175°C) for about 30 minutes. You can also microwave them, but the oven keeps the peppers nice and firm. Follow the Full Recipe to make sure they come out just right! Yes, you can make stuffed bell peppers ahead of time. Prepare the filling and stuff the peppers. Then, cover them and keep them in the fridge for up to two days. When you're ready to eat, just bake them. This saves time on busy days. To prevent soggy peppers, cook the quinoa with less broth. Also, bake the peppers uncovered for part of the time. You can also pre-bake the empty peppers for about 10 minutes before filling them. This helps them hold their shape and stay firm. Stuffed bell peppers pair well with a side salad or rice. You can also add a dollop of sour cream or yogurt on top. Fresh salsa or guacamole adds a nice touch too. These options enhance the meal and provide more flavor. Yes, you can use different types of peppers. Green, yellow, or red bell peppers all work well. You can even try poblano or banana peppers for a twist. Just make sure they are large enough to hold the filling. Leftovers of stuffed bell peppers last about three to four days in the fridge. Store them in an airtight container to keep them fresh. You can reheat them in the oven or microwave. Enjoy them again with the same great flavor! Stuffed bell peppers are tasty, healthy, and easy to make. We covered key ingredients like quinoa, black beans, and spices. You learned how to prep, cook, and store your stuffed peppers. Don’t hesitate to try different flavors or add-ons to match your taste. The beauty of this dish lies in its flexibility. Enjoy experimenting and share your creations with friends. Delicious meals can nourish both body and spirit.

Stuffed Bell Peppers with Quinoa Tasty and Nutritious

Are you ready to spice up your dinner routine? My stuffed bell peppers with quinoa are not only tasty, but

To make delicious veggie sushi rolls, you need these simple ingredients: - 2 cups sushi rice - 2 ½ cups water - 1/4 cup rice vinegar - 1 tablespoon sugar - 1 teaspoon salt - 4 sheets of nori (seaweed) - 1 medium cucumber, julienned - 1 medium carrot, julienned - 1 avocado, sliced - 1 bell pepper, thinly sliced - Soy sauce for dipping - Sesame seeds for garnish Having the right tools makes sushi making easy. Here are the must-haves: - Bamboo sushi mat - Sharp knife - Mixing bowl - Measuring cups and spoons - Rice cooker or saucepan - Plastic wrap (optional) Fresh veggies make your sushi taste great. Here are some tips: - Cucumber: Look for firm cucumbers with smooth skin. Avoid soft spots. - Carrot: Choose bright, crunchy carrots. They should feel heavy for their size. - Avocado: Pick avocados that are slightly soft but not mushy. They should yield gently to pressure. - Bell pepper: Select shiny peppers with no blemishes. The color should be vibrant. These tips will help you pick the best veggies for your rolls. Fresh ingredients make a big difference! To make sushi rice, start by rinsing the rice. Use cold water until it runs clear. This step removes extra starch. After rinsing, drain the rice well. Then, combine the rice and water in a medium saucepan. Bring it to a boil on high heat. Once it boils, lower the heat and cover the pot. Let it simmer for 20 minutes until the water is absorbed. After cooking, remove the pot from heat. Let the rice sit, covered, for 10 more minutes. In a small bowl, mix rice vinegar, sugar, and salt until they dissolve. Fluff the rice with a fork and stir in the vinegar mix. Allow the rice to cool to room temperature. Now that your rice is ready, grab a bamboo sushi mat. Place it on a clean, flat surface. Lay a sheet of nori shiny side down on the mat. Wet your hands to keep the rice from sticking. Take about 1/2 a cup of sushi rice and spread it over the nori. Leave a 1-inch border at the top edge. Next, arrange your veggies: cucumber, carrot, avocado, and bell pepper at the bottom. Start rolling the sushi away from you. Press gently but firmly to keep it tight. Roll until you reach the uncovered edge. Once your roll is complete, use a sharp knife. Wet the knife to prevent sticking. Slice the roll into 8 equal pieces. Repeat the process with the remaining ingredients. For a nice touch, sprinkle sesame seeds on top. Serve with soy sauce for dipping. Enjoy your homemade veggie sushi rolls! You can find the full recipe for these rolls above. One common mistake is not rinsing the sushi rice enough. Rinsing removes extra starch, which helps the rice cook well. If you skip this step, the rice may turn gummy. Another mistake is using too much filling. Overstuffing makes rolling hard and can lead to spills. Keep your fillings thin and balanced for the best rolls. To keep your sushi rice from sticking, wet your hands before handling the rice. This simple step helps the rice slide easily. You can also use a bowl of water nearby. Dip your fingers in the water if the rice starts to stick. Make sure your sushi mat is clean, too, to avoid any extra stickiness. When rolling sushi, start by pressing firmly but gently. This helps hold the shape without squishing the filling. Use the bamboo mat to guide the roll and keep it tight. Roll towards the uncovered edge of the nori. This helps seal the roll. Remember to slice with a sharp, wet knife to get clean cuts. This keeps your rolls looking great and easy to eat. For the complete experience, check out the Full Recipe for Easy Veggie Sushi Rolls. Enjoy your sushi-making adventure! {{image_2}} You can switch up your veggie sushi rolls with fun fillings. Here are some tasty options: - Radish: Adds a nice crunch and a bit of spice. - Zucchini: Light and refreshing, great for summer rolls. - Mango: Sweet and juicy, perfect for a tropical twist. - Tofu: Adds protein and a soft texture. Use grilled or marinated tofu. - Spinach: Fresh and healthy, adds a nice color. Feel free to mix and match! Get creative and use what you love. If you like heat, try making spicy veggie sushi rolls. Start with your usual ingredients and add some spice: 1. Spicy mayo: Mix mayonnaise with sriracha for a creamy kick. 2. Pickled ginger: Adds a zing that wakes up your taste buds. 3. Jalapeños: Thinly slice jalapeños and layer them with your veggies. 4. Wasabi: Spread a thin layer on the nori before adding the rice for extra heat. These additions will give your sushi rolls a fiery flavor. It’s a fun way to make your rolls stand out. Dipping sauces can elevate your sushi rolls. Here are some tasty ideas: - Soy sauce: The classic choice, perfect for dipping. - Sweet chili sauce: Adds a sweet and spicy touch. - Ponzu sauce: A citrus-based sauce that brightens flavors. - Sesame oil: Drizzle a bit for a nutty flavor. - Teriyaki sauce: Sweet and savory, great for dipping. Experiment with different sauces to find your favorite. Each one adds a unique twist to your rolls. For the full recipe, check out Easy Veggie Sushi Rolls 🥒. Enjoy your sushi adventure! To keep your leftover sushi rolls fresh, wrap them in plastic wrap. This helps prevent air from drying them out. Place the wrapped rolls in an airtight container. Store the container in the fridge. Do not leave sushi out at room temperature for long. It can spoil fast. Sushi is best fresh, but you can reheat it. If you want to warm it up, use a pan. Heat the pan on low. Place the sushi in the pan for a short time, about 10 to 15 seconds. This helps keep the rice soft. Avoid using a microwave, as it can make the rice tough. Homemade sushi stays good for about 24 hours in the fridge. After that, the rice can harden, and the veggies may lose their crunch. It's best to eat your veggie sushi rolls sooner rather than later. For a detailed recipe, check the Full Recipe. Yes, you can use brown rice. Brown rice offers a nutty taste and more fiber. However, it cooks longer than white sushi rice. Use short-grain brown rice for the best texture. It won’t be as sticky, but it will still hold together. You might need to adjust the water amount. Follow the cooking instructions closely for the best results. The best way to cut sushi rolls is with a sharp, wet knife. This helps prevent sticking. Start by slicing the roll in half, then cut each half into four pieces. Wipe the knife with a damp cloth between cuts. This keeps the slices clean and neat. A steady hand ensures even pieces and a beautiful presentation. You can keep homemade sushi in the fridge for up to 24 hours. After that, the rice may dry out or lose its taste. Store the sushi in an airtight container to maintain freshness. Make sure to consume it within this time frame for the best flavor and texture. If you have leftovers, enjoy them as a quick snack! For the full recipe, check out the Easy Veggie Sushi Rolls section above. Making sushi at home is fun and rewarding. You learned about the best ingredients, tools, and tips. Preparing sushi rice, rolling it well, and serving it perfectly can impress anyone. Avoid common mistakes, and try different veggie fillings for variety. Always store leftovers properly to enjoy them later. With these steps, delicious sushi is within your reach. Dive in, experiment with new flavors, and enjoy your sushi-making journey!

Easy Veggie Sushi Rolls Quick and Tasty Recipe Guide

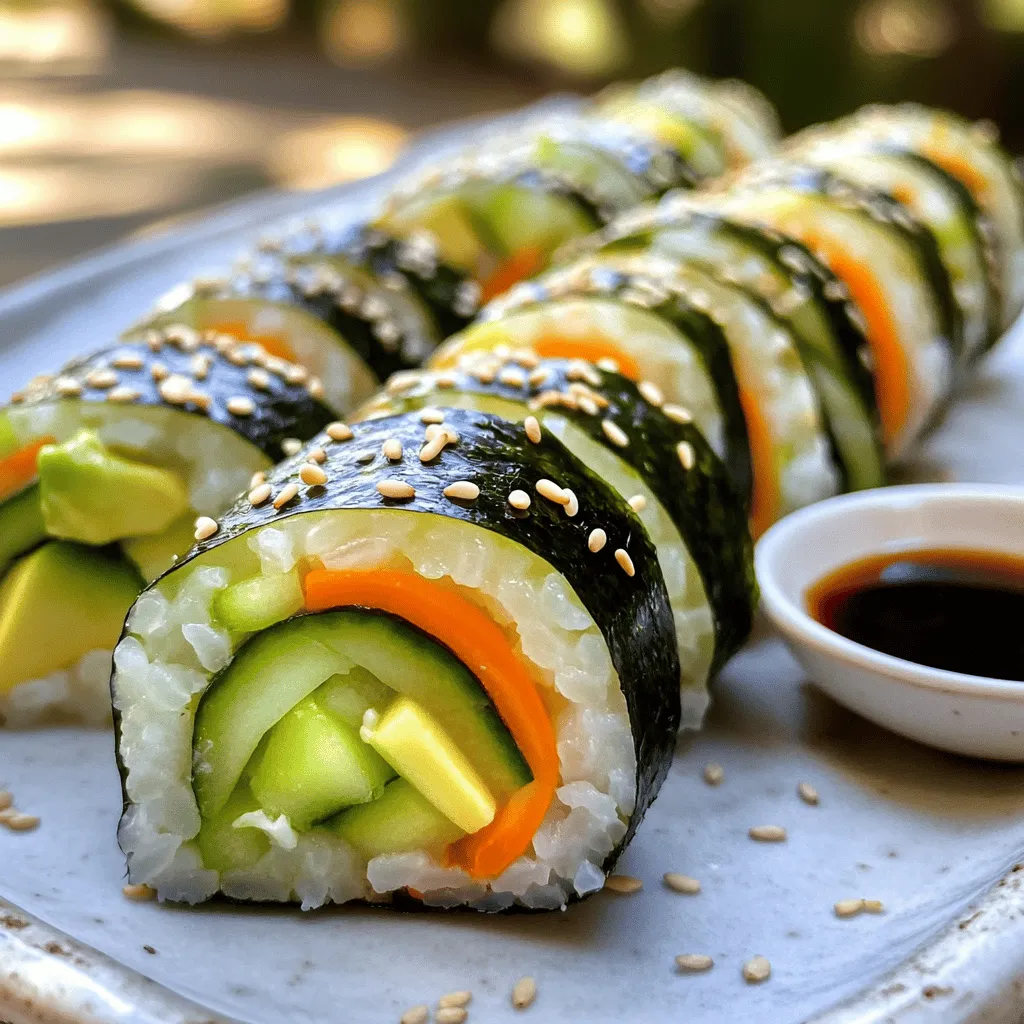
Craving a fresh and tasty dish that’s easy to make? Look no further! In this guide, I’ll show you how

To make zesty zucchini noodles, you need these key items: - 4 medium zucchinis - 1 ripe avocado - 1 cup fresh basil leaves - 2 cloves garlic - 2 tablespoons lemon juice - 1/4 cup pine nuts (or walnuts) - 1/4 cup nutritional yeast (for a cheesy flavor) - Salt and pepper to taste For extra taste, consider adding: - 1 tablespoon olive oil - Cherry tomatoes, halved (for garnish) - Crushed red pepper flakes (for heat) Each ingredient brings unique health benefits: - Zucchini: Low in calories and high in fiber, great for digestion. - Avocado: Packed with healthy fats, good for heart health. - Basil: Full of antioxidants, helps fight inflammation. - Garlic: Boosts the immune system and adds flavor. - Lemon juice: High in vitamin C, supports skin health. - Pine nuts: Provide protein and healthy fats, good for energy. - Nutritional yeast: Rich in B vitamins, great for energy and mood. - Salt and pepper: Enhance flavor, making meals more enjoyable. Using these fresh ingredients makes your zucchini noodles not only tasty but also nutritious. For the full recipe, check out the details above. To start, rinse and dry your zucchinis. Use a spiralizer to make long noodle shapes. If you don’t have one, a vegetable peeler works too. Just slice the zucchini into thin strips. After spiralizing, place the noodles in a colander. This lets excess water drain away, so your dish won’t be soggy. Next, grab a food processor. Add one ripe avocado, fresh basil leaves, and two cloves of garlic. Then, pour in two tablespoons of lemon juice. Toss in a quarter cup of pine nuts or walnuts. Add a quarter cup of nutritional yeast for a cheesy flavor. Season with salt and pepper. Blend until the mixture is smooth. If it feels too thick, add a bit of olive oil or water to loosen it up. Now, take the drained zucchini noodles and place them in a large mixing bowl. Pour the avocado pesto over the noodles. Toss gently until all the noodles are coated. For serving, plate the zoodles in a nice nest shape. Top with halved cherry tomatoes for color, and sprinkle with crushed red pepper flakes for some heat. Optionally, add a drizzle of olive oil for extra flavor. For the full recipe, check the details above! Enjoy your healthy and flavorful meal! To make zucchini noodles, the right cut matters. A spiralizer works best for long, thin strands. If you lack one, try a vegetable peeler. Just peel the zucchini into thin strips. You can also use a knife to slice them into thin ribbons. Aim for even cuts. This helps them cook uniformly if you choose to sauté them. If you have leftover zoodles, store them in a container. Use a paper towel to absorb excess moisture. This keeps them fresh longer. Zucchini noodles can last up to three days in the fridge. When you’re ready to use them, just toss them in a pan for a quick warm-up. To boost flavor, try adding fresh herbs like parsley or cilantro. Toss in some sautéed garlic for a nice kick. A squeeze of lemon can brighten the dish. You can also add protein. Grilled chicken or shrimp pairs well with zoodles. Don't forget to check the full recipe for more inspiration! {{image_2}} Adding protein to your zucchini noodles makes them a full meal. You can use grilled chicken, shrimp, or tofu. These proteins blend well with the fresh taste of zoodles. For a quick option, rotisserie chicken works great. Just shred it and mix it in. If you prefer plant-based options, try chickpeas or lentils. They add texture and protein without meat. Zucchini noodles are versatile and can pair with many sauces. Besides avocado pesto, you can try marinara or a creamy Alfredo. For a spicy kick, add sriracha or chili oil. You can also make a lemon-garlic sauce for a light touch. Each sauce changes the dish’s flavor, so feel free to experiment. Zucchini noodles can shine in salads too. Mix them with cherry tomatoes, cucumbers, and bell peppers for a fresh crunch. Add a simple vinaigrette made of olive oil and vinegar. For extra flavor, toss in herbs like parsley or cilantro. You can also add nuts or seeds for a nice crunch. Serve it cold for a refreshing summer meal. If you want to try a full recipe, check out the Zesty Zucchini Noodles with Avocado Pesto. To store zucchini noodles, first, let them dry. Place the zoodles in a colander to remove excess water. After they dry, pack them in an airtight container. Keep the container in the fridge. Zucchini noodles stay fresh for about 3 days. If you see any water, drain it out. This keeps the noodles crisp and tasty. For avocado pesto, use a jar with a tight lid. Store it in the fridge right after making it. To avoid browning, press plastic wrap against the pesto surface. This helps keep the color and flavor fresh. Use the pesto within 3 days for the best taste. You can freeze zucchini noodles for later meals. First, blanch them in boiling water for about one minute. Next, cool them quickly in ice water. Drain and dry the zoodles. Then, pack them in freezer-safe bags. Remove as much air as possible. Frozen zoodles are good for up to 3 months. When you’re ready to use them, thaw in the fridge overnight or cook directly from frozen. Enjoy your healthy zucchini noodles whenever you want! For the full recipe, check out the details in the previous sections. Zucchini noodles, or zoodles, are made from fresh zucchini. They look like pasta but are much lighter. You can eat them raw or cooked. They are a great alternative to traditional pasta. This makes them perfect for a healthier meal. You can enjoy the same flavors with fewer carbs. Zucchini noodles can last about 3 to 5 days in the fridge. Keep them in an airtight container. If you see moisture, try to drain it before storing. This helps them stay fresh longer. If they start to get slimy, it’s time to toss them out. You can certainly cook zucchini noodles! They work well in many dishes. Lightly sauté them for 2-3 minutes to warm them up. Avoid overcooking, or they may become mushy. You can serve them with sauces, like in the Full Recipe for zesty zucchini noodles with avocado pesto. Enjoy experimenting with different flavors! Zucchini noodles, or zoodles, offer a tasty, healthy twist to meals. We explored their key ingredients, from essential to optional, and learned about their nutrition. The step-by-step guide made it easy to prepare zoodles and avocado pesto. We shared tips on cutting, storing, and enhancing flavors. Variations let you customize for any meal. Lastly, proper storage keeps your zoodles fresh. Enjoy your cooking adventure with zoodles, and remember, there's a lot you can create with them!

Healthy Zucchini Noodles Easy and Flavorful Recipe

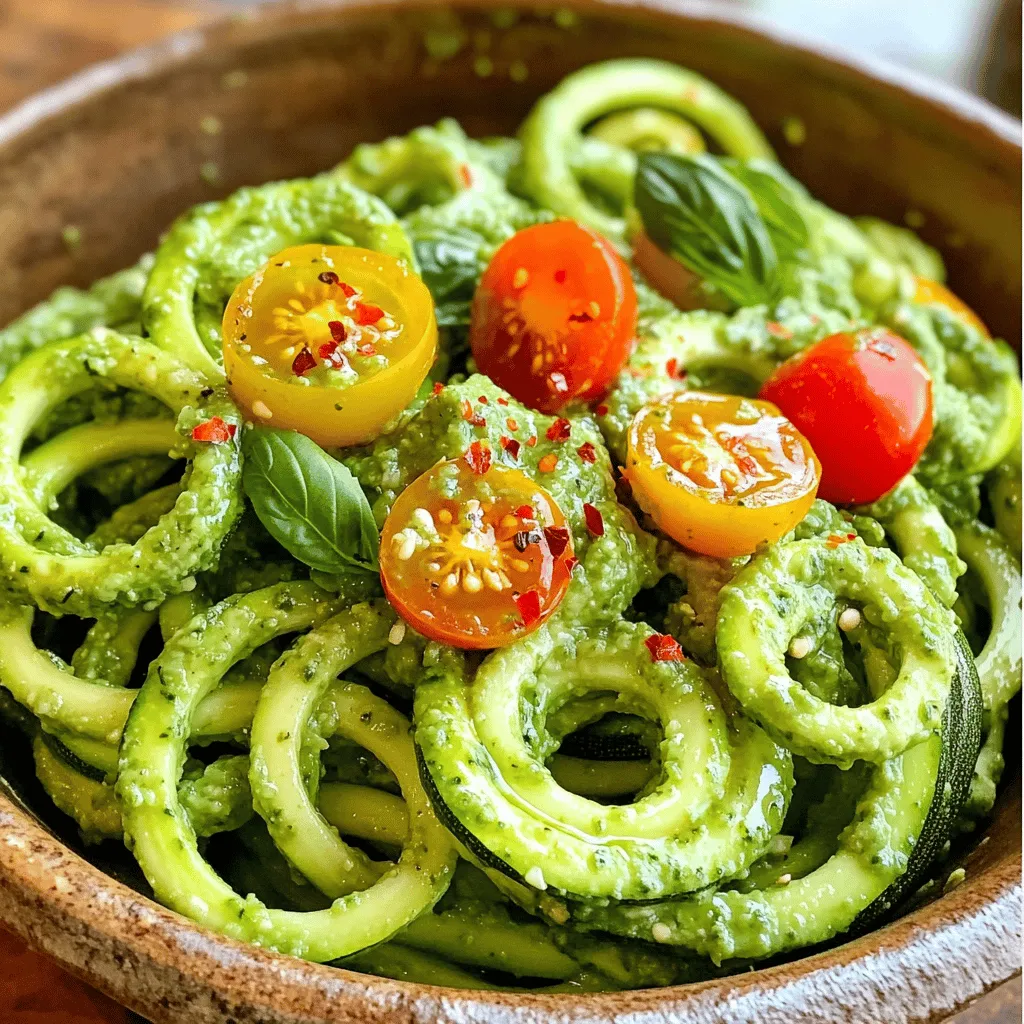
Ready to brighten up your meals with a healthy twist? Let’s dive into my easy and flavorful recipe for Healthy

To make a tasty Chicken Ranch Casserole, you need some key items. Here’s my list of must-haves: - 3 cups cooked chicken, shredded - 1 cup ranch dressing - 2 cups cooked pasta (corkscrew or penne) - 1 cup frozen mixed vegetables (carrots, peas, and corn) - 1 cup shredded cheddar cheese - 1/2 cup sour cream - 1 teaspoon garlic powder - 1 teaspoon onion powder - Salt and pepper to taste - 1/2 cup crushed tortilla chips (for topping) - 2 tablespoons fresh parsley, chopped (for garnish) These ingredients come together to create a creamy, flavorful dish that everyone will love. You can add some optional items to boost flavor and texture. Here are a few ideas: - Cooked bacon bits for extra crunch - Diced bell peppers for a fresh taste - Sliced green onions for a bit of bite - Extra cheese varieties like mozzarella or pepper jack - A pinch of cayenne pepper for heat These extras can make the casserole even more exciting and personalized. Sometimes you might need to swap out ingredients. Here are some easy substitutions: - Use turkey instead of chicken for a lighter option. - Try Greek yogurt instead of sour cream for a healthy twist. - Gluten-free pasta works well if you need a gluten-free meal. - Swap ranch dressing for a homemade version if you prefer. - Use fresh vegetables instead of frozen if you have them on hand. These substitutions can help you adapt the recipe to fit your needs while keeping it delicious. For the complete recipe, check out the Full Recipe section. Start by preheating your oven to 350°F (175°C). Grease a 9x13 inch baking dish lightly. This step helps the casserole not stick. Next, grab a large mixing bowl. Combine the shredded chicken, ranch dressing, sour cream, garlic powder, onion powder, and salt and pepper. Mix well until the chicken is fully coated. This mixture will be the heart of your casserole. Now, it's time to add the cooked pasta and frozen mixed vegetables. Stir the mixture until all ingredients are evenly combined. This ensures every bite is packed with flavor. Pour the chicken and pasta mixture into your prepared baking dish. Spread it out evenly to create a nice base for the casserole. Sprinkle shredded cheddar cheese generously over the top of the casserole. Then, add crushed tortilla chips for a crunchy topping. Bake your casserole in the preheated oven for 25-30 minutes. You want the cheese to melt and bubble. The edges should turn golden brown. When done, remove it from the oven and let it cool for a few minutes. Garnish with chopped parsley before serving. Enjoy this creamy chicken ranch casserole! To make your chicken ranch casserole shine, focus on fresh ingredients. Use good-quality ranch dressing for a richer taste. Shredded chicken should be moist. If you cook it yourself, add spices while cooking. This adds depth. A mix of pasta shapes can create fun textures. Don’t skip the cheese; it makes everything creamy and delicious. You can prepare this casserole a day in advance. Just follow the recipe and stop before baking. Cover it tightly with foil and place it in the fridge. When you are ready to bake, remove the foil. Add 10 extra minutes to your baking time. This ensures it heats through evenly. If you freeze it, thaw overnight in the fridge before baking. To modify for low-carb or keto diets, swap the pasta for zucchini noodles or cauliflower rice. Use full-fat ranch dressing and cheese for richer flavors. You can also add more veggies, like bell peppers or spinach, to bulk it up without carbs. Always check dressing labels for hidden sugars. These changes keep the casserole tasty and on track with your diet. For the full recipe, check the section above! {{image_2}} You can switch up the protein in your casserole. Turkey works well if you want a lighter option. You can even use tofu or chickpeas for a vegetarian meal. Just make sure to season them well so they blend nicely with the ranch flavor. Each protein adds its own twist to the dish. Feel free to experiment! The veggies in the casserole are flexible. You can swap frozen mixed vegetables for fresh ones. Bell peppers, spinach, or broccoli add great color and taste. If you want a sweeter touch, try adding sweet corn. The key is to use what you love or have on hand. This way, your casserole stays fresh and exciting. You can make your casserole pop with exciting flavors. For a spicy kick, add diced jalapeños or hot sauce to the mix. If you prefer herbs, sprinkle in dried oregano or thyme. You can also try adding lemon zest for a bright touch. Each of these options can elevate your dish and make it truly your own. To keep your Chicken Ranch Casserole fresh, store it in an airtight container. Allow it to cool completely before sealing. Place it in the fridge within two hours of cooking. This helps prevent bacteria growth. Leftovers can stay fresh for up to three days. If you want to enjoy it later, freezing is a great option. To freeze the casserole, first let it cool down. Then, cut it into portions. Wrap each piece tightly in plastic wrap. You can also use aluminum foil for added protection. Place the wrapped portions in a freezer-safe bag or container. Make sure to label it with the date. The casserole can stay frozen for up to three months. When ready to eat, take the casserole out of the fridge or freezer. If frozen, let it thaw overnight in the fridge. For best results, reheat it in the oven. Preheat your oven to 350°F (175°C). Place the casserole in a baking dish, cover it with foil, and heat for about 20-25 minutes. This keeps it moist and tasty. If you like, remove the foil for the last 5-10 minutes to crisp up the top. Enjoy your delicious Chicken Ranch Casserole again! For the full recipe, check out the details above. Yes, you can prepare Chicken Ranch Casserole ahead. Just mix the ingredients as the recipe states. Then, cover it and store it in the fridge. You can do this up to a day before baking. When you’re ready, bake it straight from the fridge. This saves time on busy nights! You can serve many tasty sides with Chicken Ranch Casserole. Here are some ideas: - Fresh green salad - Garlic bread - Steamed broccoli - Corn on the cob - Fruit salad These sides add color and flavor to your meal. Chicken Ranch Casserole stays fresh for about 3 to 5 days in the fridge. Store it in an airtight container. If you have leftovers, make sure to enjoy them within this time for the best taste. You can also reheat it for lunch or dinner. For the full recipe, check the details above. In this blog post, we covered essential ingredients for Chicken Ranch Casserole. You learned how to prepare, combine, and bake your dish for tasty results. Tips also showed how to customize flavors and make it ahead of time. Remember, variations can elevate your casserole, whether you swap proteins or add new veggies. Store any leftovers properly for future meals. Overall, this dish is simple, versatile, and loved by many. Enjoy creating your version of Chicken Ranch Casserole!

Chicken Ranch Casserole Flavorful Dinner Delight

Are you ready to whip up a meal that’s both tasty and easy? Let me share my favorite Chicken Ranch

For the Chocolate Cake Dreams, you need a few key ingredients: - 1 ¾ cups all-purpose flour - 1 ¾ cups granulated sugar - ¾ cup unsweetened cocoa powder - 1 ½ teaspoons baking powder - 1 ½ teaspoons baking soda - 1 teaspoon salt - 2 large eggs - 1 cup whole milk - ½ cup vegetable oil - 2 teaspoons vanilla extract - 1 cup boiling water - ½ cup chocolate chips (semi-sweet or dark) Each ingredient plays a special role in making this cake amazing: - All-purpose flour gives the cake structure. - Granulated sugar adds sweetness and moisture. - Cocoa powder brings rich chocolate flavor. - Baking powder and baking soda help the cake rise. - Salt enhances all the flavors. - Eggs bind the ingredients and add richness. - Whole milk keeps the cake moist. - Vegetable oil adds tenderness. - Vanilla extract boosts the cake's flavor. - Boiling water helps melt the cocoa, making it more flavorful. - Chocolate chips add bites of chocolate in every slice. You can also have fun with some optional ingredients: - Use dark chocolate for a richer flavor. - Add a splash of coffee for depth. - Consider orange zest for a bright twist. These choices let you make your cake unique and special! For the full recipe, follow along to create this delightful treat. 1. Preheat your oven to 350°F (175°C). Grease and flour two 9-inch round cake pans. 2. In a large bowl, sift together: - 1 ¾ cups all-purpose flour - 1 ¾ cups granulated sugar - ¾ cup unsweetened cocoa powder - 1 ½ teaspoons baking powder - 1 ½ teaspoons baking soda - 1 teaspoon salt 3. Add to the dry mix: - 2 large eggs - 1 cup whole milk - ½ cup vegetable oil - 2 teaspoons vanilla extract Beat these on medium speed for about 2 minutes until smooth. 4. Slowly mix in 1 cup of boiling water. The batter will be thin. Stir until well combined, then fold in: - ½ cup chocolate chips 5. Pour the batter evenly into the prepared pans. Bake for 30 to 35 minutes. Check for doneness by inserting a toothpick in the center. If it comes out clean, your cakes are ready! 6. Let the cakes cool in the pans for 10 minutes. Carefully transfer them to wire racks to cool completely. 7. For frosting, you can choose a rich chocolate buttercream or cream cheese frosting. 8. Once cooled, layer the cakes with frosting in between. Frost the top and sides as well. 9. For decoration, sprinkle extra chocolate chips on top. You can also add chocolate shavings or fresh raspberries. This adds a nice touch to the presentation. For more details, check the Full Recipe. - Common pitfalls to avoid while baking a chocolate cake One big mistake is overmixing the batter. This can make the cake dense. Another common error is not preheating your oven. Always preheat for even baking. Lastly, avoid opening the oven door too often. This can cause the cake to sink. - Importance of measuring ingredients accurately Accurate measurements are key in baking. Use a kitchen scale for the best results. If you measure by volume, spoon the flour into the cup. Don’t scoop directly from the bag. This prevents packing and gives you the right amount. - How to achieve a moist cake texture To keep your cake moist, use oil instead of butter. Oil keeps the cake tender. Adding boiling water also helps. It creates steam that adds moisture. Don’t skip this step; it makes a big difference. - Creative ideas for decorating your Chocolate Cake Dreams You can layer your cake with chocolate frosting. Add fresh fruit like raspberries for color. Drizzle melted chocolate over the top for a stunning look. Use edible flowers for a fancy touch. - Suggested pairings with toppings like fresh fruit or whipped cream Fresh berries work great with chocolate cake. Whipped cream adds lightness. You can even try a scoop of vanilla ice cream. It melts slowly and pairs nicely with the warm cake. - Using chocolate shavings and sprinkles for a dreamy effect Chocolate shavings give a nice texture. They look beautiful on top. You can also add colorful sprinkles for fun. This makes the cake look festive for parties. - Suggestions for adding unique flavors Try adding a teaspoon of espresso powder to enhance the chocolate flavor. A bit of orange zest gives a nice citrus twist. You can also mix in some peppermint extract during the batter stage for a refreshing taste. - Pairing chocolate cake with various dessert wines or coffee A rich red wine, like a Cabernet Sauvignon, complements chocolate well. If you prefer coffee, a dark roast works nicely. It balances the sweetness and enhances the flavors. {{image_2}} You can create unique flavors with Chocolate Cake Dreams. Try adding white chocolate or raspberry. These flavors add a twist and keep things exciting. To meet dietary needs, you can adapt this cake. For gluten-free, use almond flour instead of all-purpose flour. For vegan options, substitute eggs with flax eggs and use almond milk. Frosting plays a key role in your cake experience. You can choose from cream cheese, buttercream, or ganache. Each type offers a different taste. To make your frosting special, add flavor extracts. A hint of mint or orange can elevate the taste. Let your imagination run wild with themed cakes! For holidays, decorate with festive colors and shapes. For birthdays, try adding fun sprinkles or candles. You can even mix flavors, like chocolate and peanut butter, for special occasions. This makes your Chocolate Cake Dreams a showstopper! For the full recipe, check the details above. Enjoy creating your own delicious variations! To keep your chocolate cake fresh, follow these tips: - Use an airtight container: This helps keep moisture in and air out. - Cake covers: These can work well, but they might not seal as tightly. - Room temperature: Store it on the counter for up to three days. - Refrigeration: If you want to keep it longer, place it in the fridge. Freezing your chocolate cake is easy. Here’s how to do it: 1. Cool completely: Let the cake cool down fully before freezing. 2. Wrap it well: Use plastic wrap to cover the cake tightly. 3. Use foil: Add a layer of aluminum foil over the plastic wrap for extra protection. 4. Label it: Write the date on the foil so you know when to use it. To thaw and reheat: - Thaw in the fridge: Leave the cake in the fridge overnight before serving. - Reheat gently: To warm, place it in the oven at 300°F (150°C) for about 10 minutes. Your chocolate cake can last in different ways: - Room temperature: It lasts about 3 days. - Refrigerated: It can stay fresh for up to a week. - Frozen: It can last up to three months. Watch for these signs your cake has gone bad: - Dry texture: If it feels too dry, it’s time to toss it. - Off smell: A bad smell means it’s no longer good. - Mold: If you see any mold, throw it away right away. For the complete chocolate cake recipe, check the [Full Recipe]. What is the best type of cocoa powder for chocolate cake? I recommend using unsweetened cocoa powder. It gives your cake rich flavor. You can choose between Dutch-process or natural cocoa. Dutch-process cocoa gives a smoother taste, while natural cocoa adds a nice brightness. Can I replace boiling water with coffee in the recipe? Yes, you can use coffee instead of boiling water. Coffee enhances the chocolate flavor. Just make sure it's hot to keep the batter smooth. How do I make the cake less sweet? To cut the sweetness, reduce the sugar by a quarter. You can also add a pinch of salt. This helps balance the flavors and makes the cake taste richer. Why did my chocolate cake sink? A sinking cake often means it did not bake long enough. Check your oven temperature with a thermometer. If it’s too high or too low, adjust your baking time. How can I make my cake more moist? To add moisture, try using buttermilk or yogurt in place of whole milk. Also, adding an extra egg can help. Don’t forget to check your baking time; overbaking dries out cakes. Why is my cake crumbly and not holding together? If your cake is crumbly, you may need more moisture or fat. Ensure you have the right egg amount, and check your flour measurement. Too much flour can lead to a dry cake. What to serve with Chocolate Cake Dreams? This cake pairs well with fresh fruits, like raspberries or strawberries. You can also serve it with whipped cream or vanilla ice cream for a delicious contrast. How to pair with beverages for an ultimate treat? Try serving chocolate cake with coffee, milk, or even a dessert wine. A rich red wine can enhance the flavors in your cake, making every bite even better. Can this cake be made ahead of time? Yes, you can bake the cake a day or two in advance. Just store it in an airtight container. For best results, frost it just before serving. You can find the Full Recipe for more details. You now have everything needed to create your own Chocolate Cake Dreams. We covered the key ingredients and their roles, plus the essential steps for baking and frosting. I shared tips to avoid common mistakes and ideas for unique variations. Don’t forget to store any leftovers properly for later enjoyment. With these insights, you can bake confidently and impress your friends and family with a delicious, dreamy cake. Enjoy the baking journey and let your creativity shine!

Chocolate Cake Dreams Delightful and Decadent Recipe

Do you dream of rich, chocolatey delight? You’re in the right place! This Chocolate Cake Dreams Delightful and Decadent Recipe

- 2 cups glutinous rice - 1 cup coconut milk - 3/4 cup sugar - 1/2 teaspoon salt - 1 teaspoon vanilla extract - 1/2 cup grated coconut - Banana leaves (optional) - If you can't find glutinous rice, try using sweet rice or sushi rice. - You can swap coconut milk with almond milk or soy milk for a lighter taste. - Use maple syrup or agave nectar instead of sugar for a vegan option. - Choose glutinous rice that is white and shiny for the best texture. - Fresh grated coconut gives a rich flavor, but desiccated coconut works too. - Rinse the glutinous rice. - Soak the rice for at least 4 hours. - Set up your steaming equipment. Use a bamboo steamer or a heatproof dish. If you have banana leaves, line your steamer. This adds flavor and makes it look nice. - Mix the drained rice with coconut milk. - Add sugar, salt, and vanilla extract. Stir until smooth. - Pour the mixture into the lined steamer or dish. Spread it evenly. - Boil water in a pot. Place the steamer over the boiling water. Cover it well. Steam for 30-40 minutes. Check the rice for doneness. - In the last 10 minutes, sprinkle grated coconut on top. This adds extra texture. - Once cooked, let it cool for a few minutes. - Cut the sticky rice cake into squares or shapes. - Serve it warm or at room temperature. It tastes best when fresh! For the complete recipe, refer to the [Full Recipe]. Soaking the rice is key. It helps the grains absorb water. I suggest soaking for at least four hours. If you can, soak it overnight. This gives the rice a soft texture. Steaming also matters. Use a bamboo steamer if you have one. Line it with banana leaves for extra flavor. Place your rice mixture evenly in the steamer. Ensure the water is boiling before you start steaming. This keeps the rice from getting too soggy. Want to boost the flavor? Try adding a pinch of cinnamon or a dash of nutmeg. These spices work well with coconut milk. You can also use vanilla extract. It adds a nice touch. Garnishing makes it pretty too. Sprinkle some grated coconut on top before serving. You can also add sliced mango or a drizzle of honey for extra taste. Be careful not to overcook or undercook. Check the rice around the 30-minute mark. It should be tender but not mushy. Adjust your steaming time as needed. Watch your ingredient amounts. Too much coconut milk can make the cake too wet. Make sure to follow the Full Recipe closely. This helps you avoid any misproportions. {{image_2}} Filipino sticky rice cakes, or kakanin, come in many forms. Each type has its own taste and look. Some popular kakanin include: - Bibingka: A soft rice cake often served warm. It has a unique flavor from the banana leaves used in cooking. - Puto: These are steamed rice cakes that are light and fluffy. They can be topped with cheese or salted egg for extra flavor. - Suman: This type is rolled and wrapped in banana leaves. It has a chewy texture and is often served with sugar. You can also try flavors like: - Mango: Add fresh mango pieces for a sweet twist. - Ube: This purple yam gives a vibrant color and a rich taste. Adding fruits can make your sticky rice cake even better. Try mixing in: - Bananas: Sliced bananas add sweetness. - Pineapple: This gives a tropical flair. - Coconut: Fresh or dried coconut adds a chewy texture. You can also change the sweetener. Instead of regular sugar, consider: - Honey: This gives a distinct, natural taste. - Coconut sugar: It has a lower glycemic index and a caramel flavor. If you have dietary needs, there are many ways to adjust the recipe. - Gluten-free options: Use glutinous rice, which is naturally gluten-free. - Low-sugar recipes: Reduce the sugar amount or use sugar substitutes like stevia to cut down on sweetness. These variations ensure that everyone can enjoy Filipino sticky rice cake. For the full recipe, check out the detailed instructions included earlier. To keep your Filipino sticky rice cake fresh, store leftovers in an airtight container. This helps prevent drying and keeps flavors intact. If you do not have an airtight container, you can wrap the cake tightly in plastic wrap. Avoid using foil, as it may cause sticking. Make sure to keep it in a cool, dry place away from direct sunlight. You can freeze the sticky rice cake for up to three months. To do this, cut the cake into squares first. Wrap each piece tightly in plastic wrap, then place them in a freezer-safe bag. When you're ready to eat, thaw the pieces in the fridge overnight. For quicker thawing, leave them at room temperature for about an hour. In the refrigerator, this rice cake lasts about four to five days. After this, it may start to lose its taste and texture. Signs of spoilage include a sour smell or a dry, hard texture. If you notice any of these signs, it's best to discard the cake. Enjoy the freshness while you can! Filipino sticky rice cake, called "kakanin," is a beloved treat. It holds a special place in Filipino culture. Families often serve it during festivals, birthdays, and holidays. The cake represents togetherness and joy. Its sweet taste and chewy texture make it a favorite for many. Yes, you can easily make this recipe vegan! Just replace the sugar with a plant-based sweetener. You can use maple syrup or agave syrup. Both options keep the cake sweet without any animal products. You can tell the sticky rice cake is done by its look and feel. The top should be firm and shiny. When you poke it, it should feel soft but not sticky to your fingers. If it holds its shape when you lift it, it is ready. You can enjoy the sticky rice cake with many tasty sides. A hot cup of sweetened coffee or tea pairs well. Fresh fruit like mango or banana adds a nice touch. You can also serve it with a drizzle of coconut cream for extra flavor. In this blog post, we explored the essential ingredients for making delicious Filipino sticky rice cake, including glutinous rice, coconut milk, and sugar. I shared tips for quality ingredients and the best substitutes to suit various diets. You learned how to prepare and cook the cake, along with common mistakes to avoid. My final thoughts? Don't be afraid to experiment with flavors and variations. Each attempt brings you closer to a perfect treat that celebrates Filipino culture. Enjoy making this tasty dish and sharing it with others!

Filipino Sticky Rice Cake Simple and Tasty Recipe

Do you crave a sweet, chewy treat that screams comfort? Filipino sticky rice cake is your answer! This simple and

- 1 lb (450g) chicken breast - 3 tablespoons honey - 3 tablespoons soy sauce - 2 tablespoons fresh garlic - 1 tablespoon olive oil - Optional toppings: chopped green onions, sesame seeds To make Honey Garlic Chicken Skewers, you need a few simple yet key ingredients. The chicken breast serves as the main protein. It’s juicy and tender when cooked right. Honey gives a sweet touch, balancing the saltiness of soy sauce. Together, they create a delightful flavor. Fresh garlic adds a zesty kick. The olive oil helps keep the chicken moist while it cooks. For added flair, you can top your skewers with chopped green onions or sesame seeds. These optional toppings not only look great but also add extra taste. When you gather these ingredients, you set the stage for a fun and tasty dish. This recipe, which you can find in the Full Recipe section, will guide you step by step. Enjoy the process and get ready for a delicious meal! To start, I mix the marinade. In a big bowl, I combine honey, soy sauce, minced garlic, minced ginger, olive oil, sesame oil, rice vinegar, salt, and pepper. I whisk it until it is smooth. Next, I add the chicken cubes. I make sure each piece is coated well. Cover the bowl and place it in the fridge. I let it marinate for at least 30 minutes. If I have time, I let it sit for up to 2 hours. This helps the flavors soak in. If I use wooden skewers, I soak them in water for about 30 minutes. This step keeps them from burning on the grill. If I go with metal skewers, I just clean them and set them aside. Then, I preheat my grill or grill pan to medium-high heat. This ensures a great sear on the chicken. Now, it’s time to assemble the skewers. I thread the marinated chicken cubes onto the skewers. I leave a little space between each piece for even cooking. Once they are all set, I place the skewers on the preheated grill. I cook them for about 10 to 12 minutes. I turn them occasionally to get nice grill marks. I check the chicken’s internal temperature, making sure it reaches 165°F (75°C). This step is key to ensuring it's safe to eat. For the full recipe, check the section above. To get the best flavor from your Honey Garlic Chicken Skewers, marinate the chicken for at least 30 minutes. If you have more time, aim for 2 hours. This longer marination gives the chicken a deeper taste. Mix honey, soy sauce, garlic, ginger, and a dash of salt. Whisk them well and coat the chicken thoroughly. If you want more sweetness, add a bit more honey. For saltiness, increase the soy sauce a little. Grilling your skewers requires the right heat. Set your grill to medium-high for the best results. This allows the chicken to cook evenly and get nice grill marks. Cook the skewers for about 10 to 12 minutes. Turn them often to prevent burning. Use a meat thermometer to check for doneness. The chicken should reach 165°F (75°C). Serve your Honey Garlic Chicken Skewers in creative ways. Try placing them on a wooden board for a rustic look. You can also garnish with chopped green onions and sesame seeds for added flair. Pair the skewers with a fresh cucumber salad for a nice crunch. Dipping sauce made from the leftover marinade adds more flavor. Just remember to boil the marinade first to ensure safety. {{image_2}} You can swap chicken with shrimp, beef, or even tofu. Shrimp cooks fast and absorbs flavors well. If you choose beef, use tender cuts like sirloin. For a vegetarian option, marinate cubed tofu. The key is to adjust cooking times based on the protein you pick. You can add different spices to change the taste. Try chili flakes for heat or cumin for warmth. Adding citrus flavors like lime or lemon brightens the dish. You can also experiment with various marinades. Think about teriyaki or a spicy peanut sauce for a unique twist. You can serve these skewers as appetizers or a main course. For appetizers, make smaller skewers with fewer pieces of chicken. For a main dish, use larger skewers and pair them with rice or salad. Arranging skewers in fun patterns can impress guests at parties. Use a wooden board or slate to make the presentation pop. For the full recipe, check out the Honey Garlic Chicken Skewers. After grilling, let your chicken skewers cool to room temperature. This helps keep them safe to eat later. Place them in an airtight container. Make sure to refrigerate them within two hours of cooking. The skewers will last in the fridge for about 3 to 4 days. When you want to reheat them, use an oven or a skillet. Heat them at a low temperature. This way, they won’t dry out. Flip them halfway through to warm evenly. If you want to keep your honey garlic chicken skewers longer, freezing is a great option. You can freeze them before or after cooking. To freeze marinated chicken skewers, place them in a freezer bag. Squeeze out as much air as possible before sealing. They can stay fresh in the freezer for up to three months. When you are ready to use them, thaw them in the fridge overnight. This ensures they defrost safely and taste great. For best results, cook them right after thawing for juicy, flavorful skewers. You should marinate chicken for at least 30 minutes. This time allows the flavors to soak in. For the best taste, I recommend marinating for up to 2 hours. This longer time helps the chicken become more tender and flavorful. Just remember not to go over 2 hours; the acid can break down the meat too much. Yes, you can bake Honey Garlic Chicken Skewers. Baking is a great option if you don't have a grill. To bake, preheat your oven to 400°F (200°C). Place the skewers on a baking sheet lined with parchment paper. Bake for about 15-20 minutes, flipping halfway. However, grilling gives the skewers a nice char and smoky flavor. So, if you can grill, I suggest you do! You can serve many sides with these skewers. Some popular options include: - Steamed rice or jasmine rice - Fresh cucumber salad - Grilled vegetables like bell peppers and zucchini - A crisp green salad with light dressing - Noodles tossed in soy sauce These sides will balance the sweet and savory flavors of the chicken. For a complete meal, consider adding a dipping sauce made from the leftover marinade, boiled for safety. For the full recipe, check out the details provided earlier! This article shared how to make delicious Honey Garlic Chicken Skewers. We covered the main ingredients, including chicken, honey, and soy sauce. I provided step-by-step instructions for marinating and grilling to get juicy, tender skewers. You can enhance flavors with spices and serve your skewers in fun ways. Remember to store leftovers properly for later enjoyment. With this guide, you can create tasty meals that impress your friends and family. Enjoy your cooking adventure!

Honey Garlic Chicken Skewers Tasty Grilled Delight

Are you ready to fire up the grill? Honey Garlic Chicken Skewers are the perfect dish for your next cookout.

- 1 can (15 oz) chickpeas, drained and rinsed - 1 small red bell pepper, diced - 1 small cucumber, diced - 1/2 red onion, finely chopped - 1 jalapeño, seeds removed and minced - 1 cup cherry tomatoes, halved - 1/4 cup fresh cilantro, chopped - 3 tablespoons olive oil - 2 tablespoons lime juice - 1 teaspoon cumin - 1/2 teaspoon smoked paprika - Salt and pepper to taste - Prep Time: 15 minutes - Total Time: 25 minutes - Serving Size: 4 servings The main ingredients in this salad are simple, fresh, and tasty. Chickpeas are the star, giving protein and texture. They mix well with the diced red bell pepper and cucumber, adding crunch. The red onion brings a sharp flavor, while the minced jalapeño adds heat. Cherry tomatoes add sweetness and color, and fresh cilantro brightens the dish. For the dressing, start with olive oil and lime juice for a zesty base. Cumin and smoked paprika add warmth and depth. Salt and pepper enhance the flavors, ensuring a balanced taste. This blend makes every bite a delight. You can find the full recipe for more details on how to prepare this dish. With a quick prep time of just 15 minutes, this salad is perfect for a busy day. In just 25 minutes, you can enjoy a fresh meal. Each serving offers a burst of flavor while keeping it healthy and satisfying. Start by draining and rinsing the chickpeas. This step is key. It helps remove excess salt and improves flavor. Next, chop your vegetables. Dice the red bell pepper and cucumber into small pieces. Finely chop the red onion. For a spicy kick, remove the seeds from the jalapeño and mince it. Lastly, halve the cherry tomatoes. In a large bowl, combine all the prepared salad ingredients. Add the chickpeas, diced bell pepper, cucumber, chopped onion, minced jalapeño, and halved cherry tomatoes. This mix creates a colorful and vibrant base for your salad. In a small bowl, whisk together the dressing ingredients. Combine olive oil, lime juice, cumin, smoked paprika, salt, and pepper. Mix until everything blends well. This dressing adds a zesty flavor that ties the salad together. Once mixed, pour the dressing over the salad. Gently toss everything together until the chickpeas and vegetables are well-coated. Allow the salad to rest for about 10 minutes. This time helps the flavors meld beautifully. Enjoy your fresh Spicy Chickpea Fiesta Salad! For more detailed instructions, check the Full Recipe. Adjusting the seasoning is key. Taste as you go. If you like it spicy, add more jalapeño. If you want it tangy, squeeze in extra lime juice. Don’t hesitate to tweak the recipe to fit your taste buds. Fresh herbs make a big difference. I love using cilantro and parsley. Chop them just before adding to the salad. This keeps their taste bright and fresh. You can also add mint for a fun twist. Presentation matters! Use colorful bowls to serve your salad. Bright bowls make your meal look more inviting. Garnish with extra herbs or lime wedges. A little garnish can make your dish pop. For an extra touch, drizzle olive oil on top before serving. {{image_2}} You can make this salad even better by adding more veggies. Try adding: - Diced carrots for crunch - Chopped spinach for greens - Avocado for creaminess - Grilled chicken for protein Mixing in these options adds flavor and nutrition. You can get creative and use what you have at home. Each choice brings a new taste to your salad. Want more heat? Adjust the jalapeño. Here’s how: - Add more jalapeño for spice. - Use a milder pepper if you like it less hot. - Remove seeds for less heat. Play with the spice level until it’s just right for you. Remember, the balance of heat can change the whole dish. The dressing can change your salad completely. Here are some ideas: - Use tahini for a nutty flavor. - Try a yogurt-based dressing for creaminess. - Lemon juice can add a fresh twist. Experiment with different dressings to find your favorite. Each dressing can turn the salad into a new experience. You can find the full recipe to explore these variations! After making your Spicy Chickpea Salad, you may have extras. Store them in an airtight container. This keeps the salad fresh for about three days in the fridge. However, the longer it sits, the softer the veggies get. To enjoy the crispness, try to eat your leftovers within two days. You can make this salad ahead of time. It is a perfect choice for busy weekdays. Prepare a big batch on Sunday. Store it in the fridge for quick lunches. You can pair it with whole grain bread or wrap it in a tortilla. This salad also tastes great on its own! Freezing this salad is not ideal. The texture of the veggies will change when thawed. If you must freeze it, separate the components. Freeze the chickpeas and dressing together. Keep the fresh veggies out. When ready to eat, thaw the chickpeas and dressing, then mix in fresh veggies. This keeps your salad tasty and crunchy. For the full recipe, check out the Spicy Chickpea Fiesta Salad. Chickpeas offer many health benefits. They are rich in protein and fiber. This helps you feel full and satisfied. Chickpeas also have vitamins and minerals like iron and magnesium. They can support heart health and help with digestion. Eating chickpeas can also help manage blood sugar levels. Yes, you can make the salad ahead of time. I suggest preparing it a few hours before serving. This gives the flavors time to blend. Just store it in the fridge until you are ready. If you make it too early, the veggies may get soggy. To avoid this, add the dressing just before serving. If you dislike cilantro, there are great options. You can use parsley for a fresh taste. Mint also adds a nice flavor and aroma. Green onions give a mild onion taste that works well. You can even skip the herbs if you prefer a simpler salad. This salad is easy to make and packed with flavor. You learned about the main ingredients and how to mix them. The tips for fresh herbs and presentation make a big difference. Feel free to add more veggies or adjust the spice to suit your taste. I encourage you to try this salad as a healthy meal prep option. It's a delicious way to enjoy chickpeas and stay nourished. You’ll find it helps you eat well and feel good. Enjoy making it your own!

Spicy Chickpea Salad Fresh and Flavorful Delight

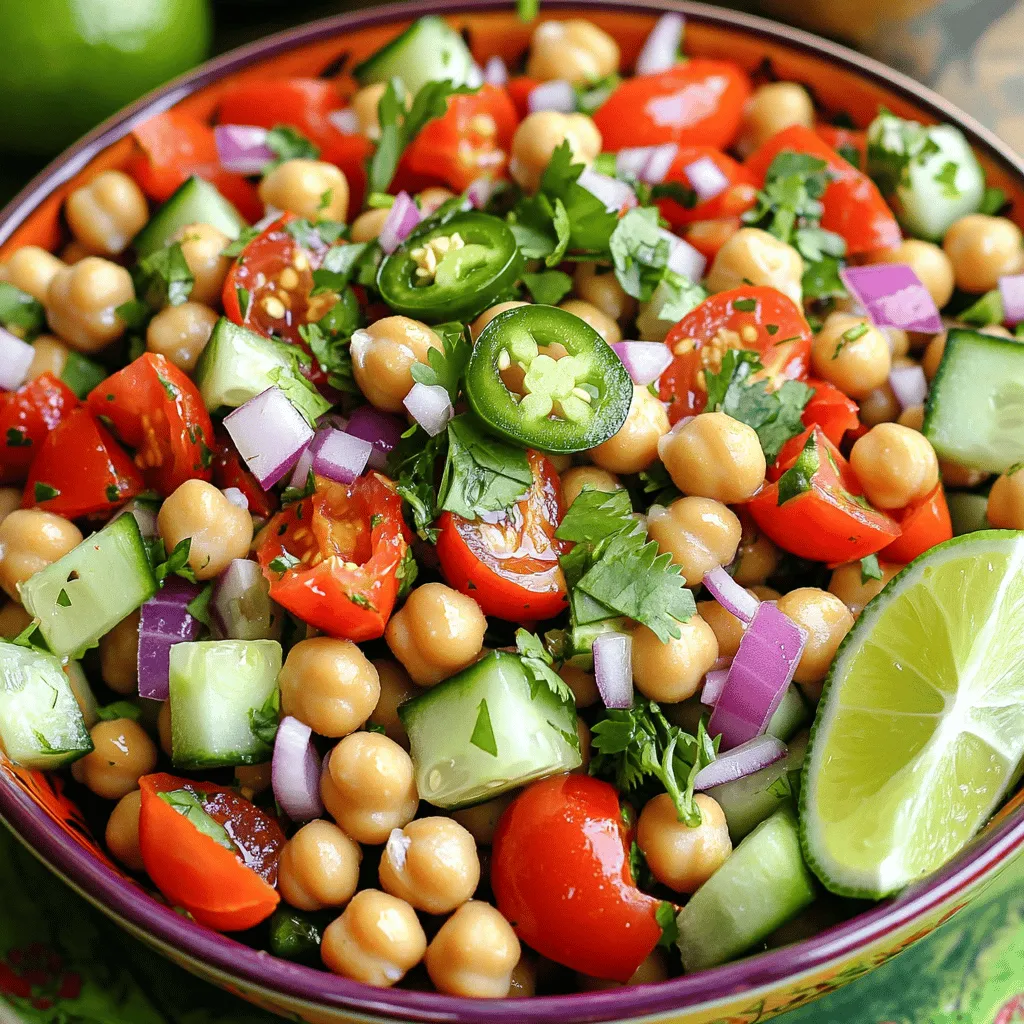
Looking for a fresh and flavorful dish that packs a punch? Welcome to the world of Spicy Chickpea Salad! This

Older posts
Newer posts
← Previous Page1 … Page3 Page4 Page5 Page6 Next →

dsad

© 2025 momdishmagic • Built with GeneratePress

Our Policies

  • Copyright Policy
  • Cookie Policy
  • GDPR Policy
  • Privacy Policy
  • Disclaimer
  • Terms Of Use

More Information

  • Home
  • About
  • Contact
  • Appetizers
  • Dessert
  • Dinner
  • Drinks
©2025, momdishmagic About Back To Top