Craving a sweet treat that’s quick and easy? You’ve come to the right place! These No-Bake Cookies & Cream Bars are simple to whip up and packed with flavor. Perfect for any occasion, they require no baking and just a few tasty ingredients. By following this guide, you’ll create a delightful dessert that will impress everyone. Let’s dive into the sweet world of no-bake treats!
Ingredients
List of Ingredients
– 2 cups crushed chocolate sandwich cookies
– 1/2 cup unsalted butter, melted
– 1 cup cream cheese, softened
– 1 cup powdered sugar
– 1 teaspoon vanilla extract
– 1 cup whipped topping (Cool Whip)
– 1/2 cup chocolate chips (optional for topping)
– Extra crushed cookies for garnish
The main ingredients for this treat are simple but essential. The crushed chocolate sandwich cookies form the base. They give a rich and sweet flavor. Melted butter helps hold this crust together. Cream cheese adds creaminess. Powdered sugar adds sweetness, while vanilla extract gives a warm taste. Whipped topping lightens the filling, making it fluffy. You can add chocolate chips on top for extra fun!
Ingredient Substitutions
You can swap the chocolate sandwich cookies for vanilla ones. This gives a different but tasty flavor. If you need a non-dairy option, look for plant-based cream cheese. You can also use coconut cream for a lighter filling. Instead of powdered sugar, honey or maple syrup works for sweetness. Just adjust the amount to taste!
Nutritional Information
Each bar has about 150 calories. The bars contain 7 grams of fat, 19 grams of carbs, and 2 grams of protein. They are not gluten-free, as they contain cookies. Watch out for dairy if you are lactose intolerant. Always check labels for allergens!
Step-by-Step Instructions
Preparation Steps
To start, grab a mixing bowl. Combine the crushed chocolate sandwich cookies with the melted butter. Mix them well until the crumbs are coated. It should look like wet sand. Next, take a lined 9×9 inch baking pan. Press the cookie mixture firmly into the bottom. Use a measuring cup or flat object to make it even. This crust will hold the filling.
Making the Creamy Filling
Now, grab another large bowl. Beat the softened cream cheese with powdered sugar and vanilla extract together. Mix until it is smooth and creamy. This should take a few minutes. Once smooth, gently fold in the whipped topping. Be careful not to stir too hard. You want to keep that light and airy texture.
Final Assembly
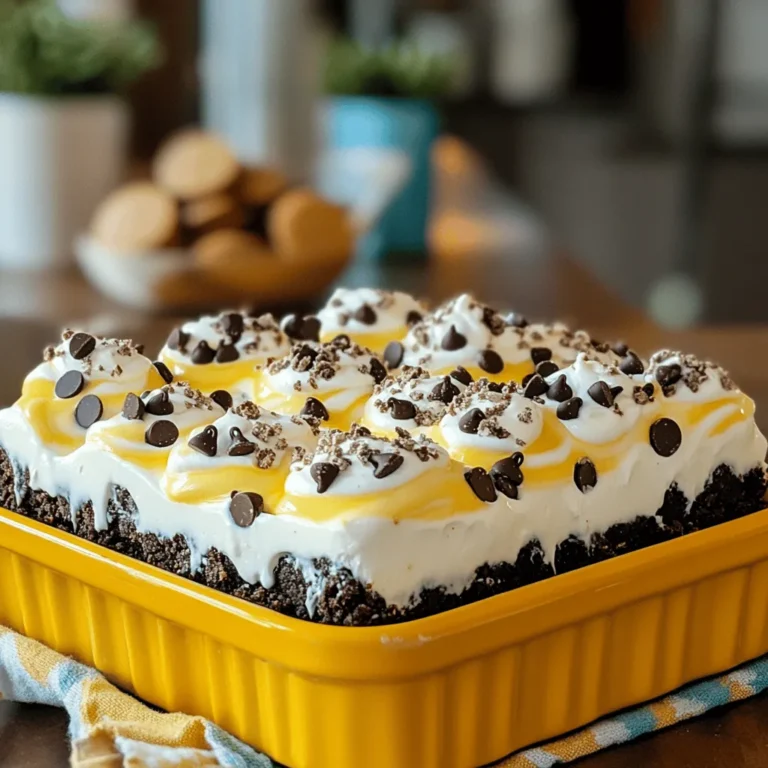
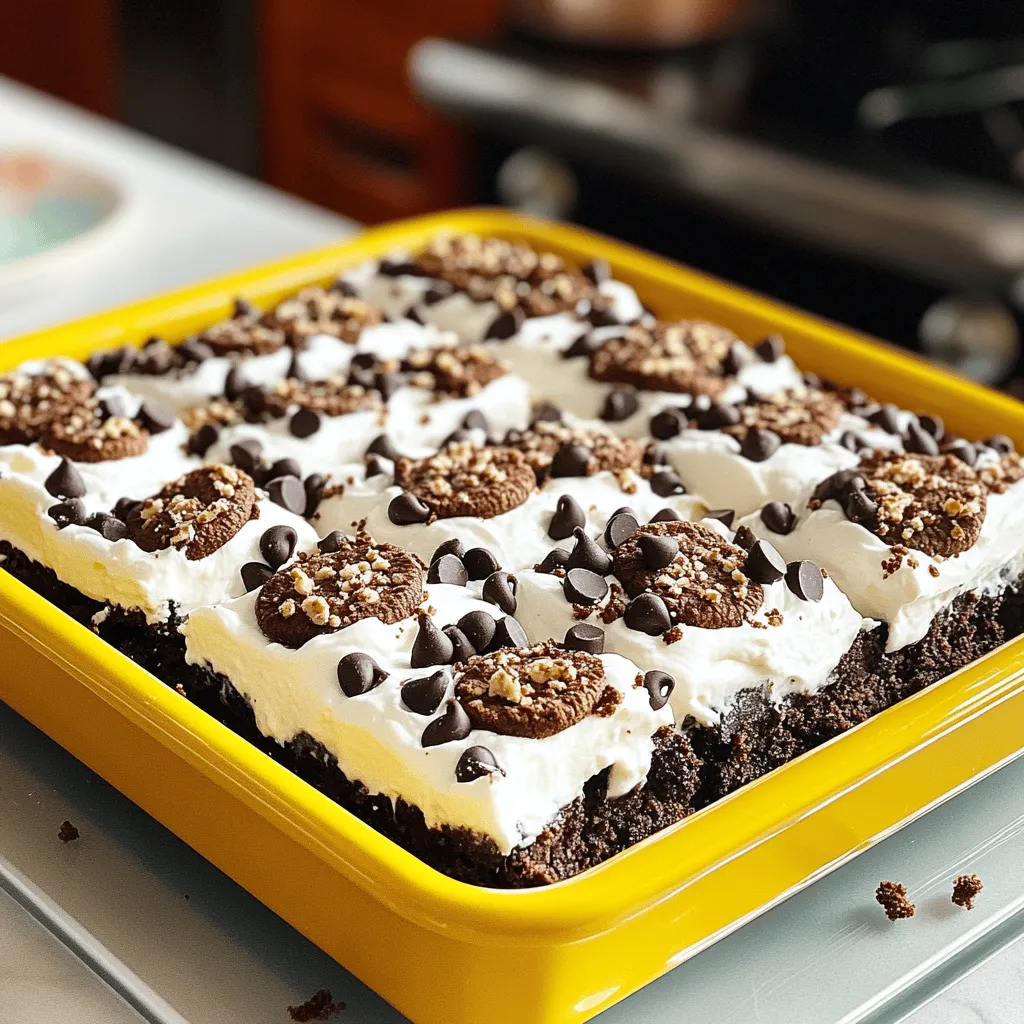
Pour the creamy filling over the crust in the baking pan. Spread it evenly using a spatula. If you like, sprinkle chocolate chips on top for added flavor. They also make it look nice! After you add the toppings, refrigerate the bars for at least 4 hours. This will help them set. When ready, pull them out using the parchment paper. Cut them into squares and garnish with extra crushed cookies if you want. Enjoy your treats!
Tips & Tricks
Best Practices for Mixing
To ensure a smooth cream cheese mixture, start with softened cream cheese. This helps it blend well. Use an electric mixer for the best results. Mix until it is creamy and free of lumps.
When folding in the whipped topping, do it gently. Use a spatula to lift and fold the mixture. This keeps the whipped topping light and airy. You want a fluffy texture, not a flat one.
Achieving the Perfect Texture
To press the crust firmly, use the back of a measuring cup. This helps pack the crumbs tightly. Make sure the crust is even across the pan. A well-pressed crust gives a nice bite.
Consider refrigeration time carefully. The bars need at least 4 hours to set. If they are not fully chilled, they may be too soft. Longer refrigeration can help them firm up nicely.
Troubleshooting Common Issues
If your crust is crumbly, try adding more melted butter. This helps bind the crumbs together. Another tip is to press the crust more firmly.
For a cream mixture that won’t set, check the cream cheese. If it was too cold, it might not mix well. Try beating it a bit longer. If needed, refrigerate the mixture for a short time before pouring it onto the crust.
Variations
Flavor Variations
You can switch up the flavor of your bars. Try using vanilla-flavored cookies instead of chocolate. This gives a nice twist to the classic taste. Adding different extracts can change the flavor too. A few drops of peppermint or almond extract can make your bars unique. Just be careful with the amounts; a little goes a long way.
Topping Ideas
Toppings can make your bars even more fun. You can use nuts like chopped almonds or walnuts for a crunchy bite. Sprinkles add a pop of color and cheer. Drizzling melted chocolate or caramel on top can make them look fancy. You can also use extra crushed cookies for a delicious garnish.
Serving Suggestions
These bars are great on their own, but you can pair them with ice cream for a treat. A scoop of vanilla or chocolate ice cream works well. Fresh fruit, like strawberries or raspberries, adds a fresh touch too. You might also use the bars in dessert platters. They look nice next to cupcakes or brownies at parties.
Storage Info
Storing the Bars
To keep your no-bake cookies and cream bars fresh, refrigerate them right away. Place the bars in an airtight container. If you don’t have one, cover the pan tightly with plastic wrap. This helps prevent them from drying out or absorbing other smells in the fridge.
Freezing Options
You can freeze these bars for long-term storage. Cut them into squares before freezing. Wrap each piece in plastic wrap. Then, place them in a freezer-safe bag or container. This keeps them fresh for up to three months. When you’re ready to enjoy, take them out and let them thaw in the fridge. This keeps the texture creamy.
Shelf Life
In the fridge, these bars last about five days. Look for signs of spoilage, such as an off smell or a change in texture. If the cream filling starts to look watery or grainy, it’s time to toss them. Always trust your senses when it comes to food safety.
FAQs
Can I make these bars ahead of time?
Yes, you can make these bars a day or two ahead of time. This recipe actually tastes better when chilled overnight. Just store them in the fridge. They will be ready to serve when you need them.
What can I substitute for Cool Whip?
If you want to avoid Cool Whip, you can use whipped cream. Just whip heavy cream until it forms soft peaks. You can also use a dairy-free whipped topping if needed. Both options work well in this recipe.
How long do these bars need to set in the fridge?
The bars need at least four hours to set in the fridge. This time helps the filling firm up. For best results, leave them overnight for a firmer texture.
Are No-Bake Cookies & Cream Bars gluten-free?
These bars are not gluten-free as they use crushed chocolate sandwich cookies. To make them gluten-free, choose gluten-free cookies. Check the label to ensure they meet your needs.
Can I use low-fat ingredients for this recipe?
Yes, you can use low-fat cream cheese and whipped topping. The bars will still taste good but may have a different texture. Just remember that low-fat options can change how creamy the filling feels.
In this blog post, we covered how to make delicious No-Bake Cookies & Cream Bars. We explored key ingredients, substitutions, and step-by-step instructions. I shared tips for mixing and achieving a perfect texture. You learned various flavor and topping options. We also discussed storage methods and answered common questions.
Now you can impress friends and family with these easy bars. Enjoy the sweet taste and make them your own!

