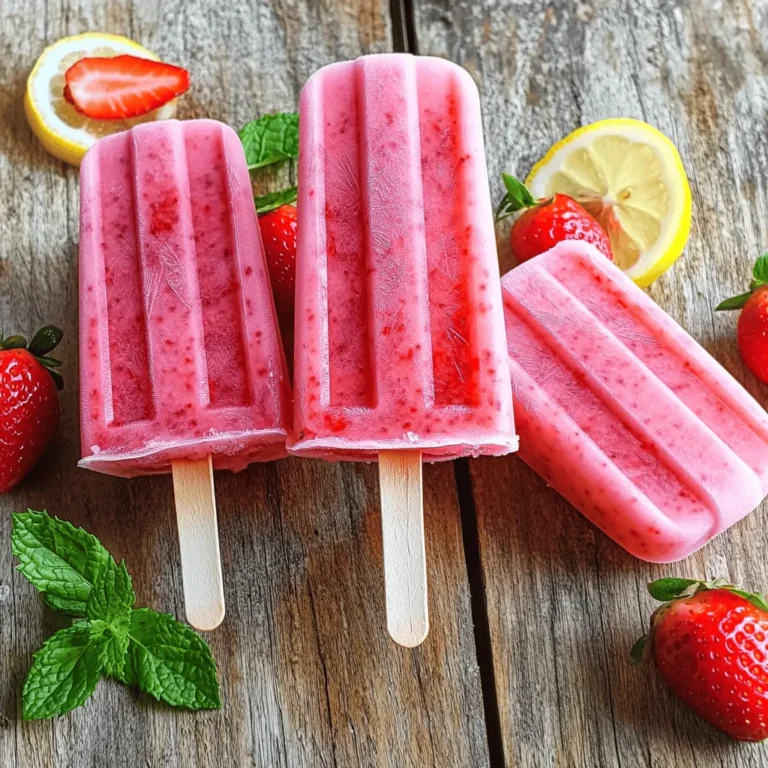
Looking for a fun way to cool down this summer? Strawberry Lemonade Popsicles are the perfect treat! You can easily make them at home using fresh strawberries, lemon juice, and your choice of sweetener. They are bright in flavor and sure to delight everyone. In this guide, I’ll share simple steps to create these refreshing popsicles, along with tips and tricks to customize your own treats. Let’s dive in!
Ingredients
Fresh Strawberries
Fresh strawberries are the star of these popsicles. You need 2 cups of hulled and sliced strawberries. Choose ripe, sweet strawberries for the best flavor. Wash them well before you slice. Fresh berries add a bright color and juicy taste that you cannot beat.
Lemon Juice
Lemon juice is key to a refreshing taste. You will need 1 cup of freshly squeezed lemon juice. This amount comes from about 4 to 6 medium lemons. Fresh juice gives a tangy punch that pairs well with strawberries. Avoid bottled lemon juice for the best results.
Sweetener Options
For sweetness, I recommend using 1/2 cup of sugar. You can adjust the sugar based on your taste. If you prefer, use honey, agave, or a sugar alternative. Just remember to mix well until it fully dissolves. This sweetness balances the tartness of the lemon juice.
Additional Ingredients for Flavor
To enhance the flavor, add the zest of 1 lemon. This adds a lovely citrus aroma. You might also want to include fresh mint leaves for garnish. Mint adds a cooling touch and looks pretty on the plate. These simple additions make your popsicles even more delightful.
Step-by-Step Instructions
Preparation of Strawberry Puree
Start by washing the fresh strawberries. Hull and slice them into smaller pieces. This helps the blender. Place the sliced strawberries in a blender. Add half of the water, which is 1 cup. Blend until the mixture looks smooth. If you want, strain the puree through a fine mesh sieve. This step removes any seeds for a smoother texture.
Creating the Lemonade Mixture
In a separate bowl, squeeze the lemons to get 1 cup of fresh lemon juice. This usually takes about 4 to 6 lemons. Add the sugar to the lemon juice. Mix in the remaining water, another 1 cup. Stir until the sugar dissolves completely. This step is key for sweet lemonade.
Combining Ingredients
Now, take the strawberry puree and add it to the lemonade mixture. Stir well to blend everything together. Taste the mixture to check the sweetness. If you want it sweeter, add more sugar. You can adjust this to your taste.
Freezing Process
Pour the mixture into popsicle molds. Leave a little space at the top for expansion. Insert the popsicle sticks into the molds carefully. Place the molds in the freezer for at least 4 to 6 hours. This time allows them to freeze solid.
Serving Instructions
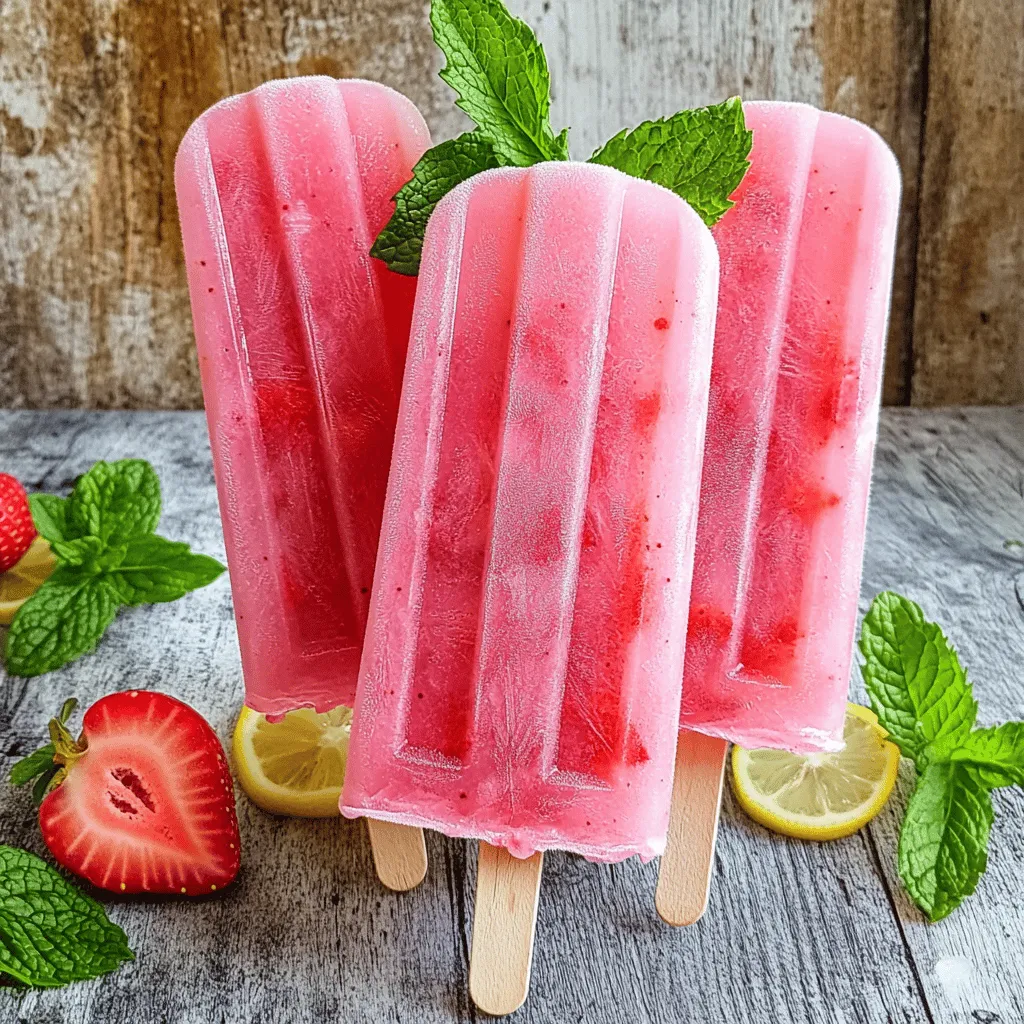
When you are ready to serve, take the molds out of the freezer. To release the popsicles, run warm water over the outside of the molds for a few seconds. This makes them easier to remove. Serve the popsicles right away. If you like, garnish with fresh mint leaves for a nice touch. Enjoy a refreshing summer treat!
Tips & Tricks
How to Choose the Best Strawberries
To make great strawberry lemonade popsicles, start with fresh strawberries. Look for berries that are bright red and firm. Avoid any that have bruises or soft spots. Sweetness matters too. Ripe strawberries taste better. You might want to smell the berries. A sweet scent means they are fresh and ready to eat.
Adjusting Sweetness for Personal Preference
Sweetness is key in this recipe. Start with half a cup of sugar, but feel free to change it. If you want a sweeter popsicle, add more sugar. If you prefer it less sweet, cut back. Lemon juice adds tartness, so taste as you mix. Always adjust to what you like best. Everyone’s taste is different.
Best Practices for Removing Popsicles from Molds
Getting popsicles out of molds can be tricky. To make it easier, run warm water over the outside of the molds. Hold them under the tap for just a few seconds. This helps loosen the popsicles. Don’t pull too hard, as they might break. Serve them right away for the best taste. You can garnish with fresh mint leaves for a nice touch.
Variations
Adding Other Fruits (e.g., Raspberries, Blueberries)
You can mix in other fruits for extra flavor. Raspberries add a nice tartness, while blueberries give a sweet touch. To add them, just blend a cup of your chosen fruit with the strawberries. You will create a colorful and tasty mix. Keep the proportions the same for the best results. This way, your popsicles stay balanced and refreshing.
Using Honey or Agave as Sweeteners
If you prefer natural sweeteners, honey or agave works great. They add a unique flavor and are healthier options. To use these, substitute the sugar in the recipe. Start with a smaller amount, like 1/3 cup, and taste as you mix. You may want to add more for extra sweetness. This swap makes your popsicles not just tasty but also a bit healthier.
Infusing with Herbs (e.g., Basil, Mint)
Adding herbs is an exciting way to boost flavor. Basil or mint can give your popsicles a fresh twist. Simply chop a few leaves and mix them into the lemonade. Let the mixture sit for about 10 minutes before pouring it into molds. This helps the herbs release their flavors fully. The result will be a refreshing treat that surprises your taste buds.
Storage Info
How to Store Leftover Popsicles
To store leftover popsicles, keep them in the freezer. Use an airtight container or a resealable bag. This prevents freezer burn and keeps them fresh. I often label the container with the date. This way, I know when I made them.
Shelf Life of Homemade Popsicles
Homemade popsicles can last about 2 to 3 months in the freezer. After this time, they may lose flavor. For the best taste, try to eat them sooner. If you notice ice crystals, they are still safe to eat but may not taste as good.
Tips for Freezing and Thawing
For best results, freeze your popsicles for at least 4 to 6 hours. This ensures they are fully solid. When ready to enjoy, run warm water over the outside of the mold. This helps loosen them. If they are too hard to eat, let them sit at room temperature for a few minutes to soften.
FAQs
Can I use frozen strawberries for this recipe?
Yes, you can use frozen strawberries! They work well in popsicles. Just make sure to let them thaw a bit before blending. This will help them mix smoothly. Frozen strawberries may make the popsicles a bit thicker. You might want to add a little more water to balance the texture.
How long do homemade popsicles last in the freezer?
Homemade popsicles can last up to two months in the freezer. To keep them fresh, store them in an airtight container. This will help prevent freezer burn. If you follow these steps, your popsicles will stay tasty and refreshing.
Is it possible to make these popsicles without sugar?
Yes, you can make these popsicles without sugar! You can use natural sweeteners like honey or agave syrup. You can also try ripe bananas for sweetness. Just remember to adjust the amount based on your taste. The flavor might change a bit, but they will still be delicious.
What are some serving suggestions for Strawberry Lemonade Popsicles?
These popsicles are great on their own. You can also serve them with fresh fruit or a splash of lemonade. For a fun twist, add them to a glass of soda for a fizzy treat. Garnish with fresh mint to make them look fancy. Enjoy them at parties or on a hot day!
This guide covers all you need for tasty strawberry lemonade popsicles. We explored fresh ingredients, easy steps, and tips for perfect pops. Remember, you can mix flavors and adjust sweetness to your liking. Homemade popsicles are simple and fun to make, and they store well too. Enjoy the delicious taste and creativity these pops offer. Dive in and make your own treats today!

