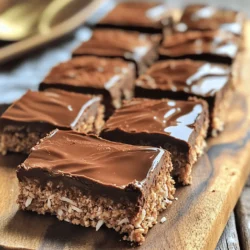
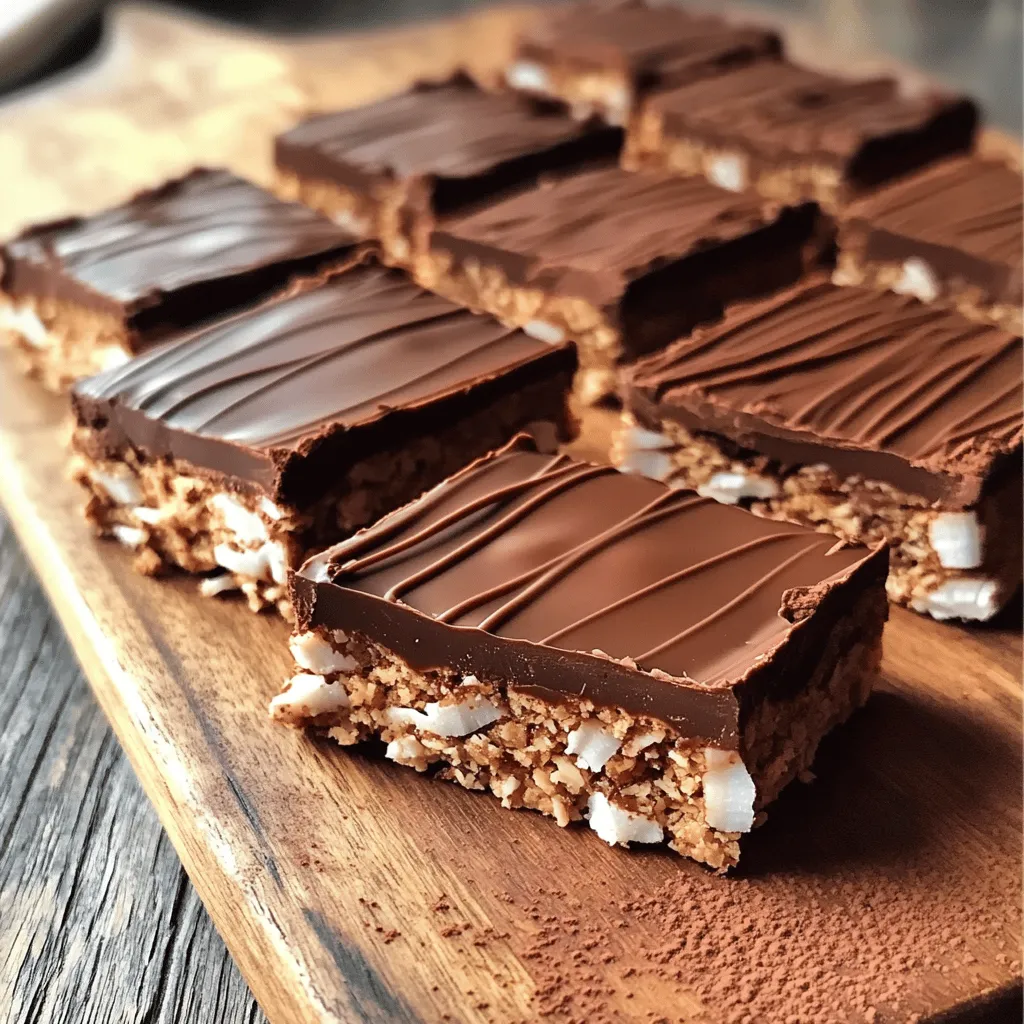
Craving a sweet, chocolatey treat without the hassle of baking? No-Bake Chocolate Coconut Bars are perfect for you! These delightful bars combine rich chocolate and creamy coconut in a simple recipe. Ideal for any occasion, they delight both kids and adults. I’ll guide you through easy steps, ingredient swaps, and tips for perfect bars every time. Let’s dive into this quick no-bake treat that will satisfy your sweet tooth today!
Ingredients
Detailed List of Ingredients
To make No-Bake Chocolate Coconut Bars, you need some simple ingredients. Here’s what you will need:
– 1 cup of shredded unsweetened coconut
– 1 cup of almond flour
– 1/2 cup of maple syrup
– 1/4 cup of coconut oil, melted
– 1/2 cup of cocoa powder
– 1 teaspoon of vanilla extract
– A pinch of salt
– 1/4 cup of dark chocolate chips (for topping)
These ingredients come together to create a rich and chewy treat.
Substitutions and Alternatives
If you want to swap out some ingredients, here are good options:
– Use shredded sweetened coconut if you like it sweeter.
– Replace almond flour with oat flour for a nut-free option.
– Agave syrup can replace maple syrup for a different sweet flavor.
– You can use melted butter instead of coconut oil if you prefer.
– Swap dark chocolate chips for milk chocolate or white chocolate, if you wish.
These substitutions still keep the bars delicious and enjoyable.
Nutritional Information per Serving
Each serving of these bars is both tasty and nutritious. Here’s what you get per bar:
– Calories: 150
– Total Fat: 10g
– Saturated Fat: 5g
– Carbohydrates: 12g
– Fiber: 3g
– Sugars: 6g
– Protein: 3g
This treat offers a good balance of healthy fats and natural sweetness. Enjoy them guilt-free!
Step-by-Step Instructions
Preparation Overview
Making these no-bake chocolate coconut bars is simple and fun. You will need about 15 minutes of prep time. Plus, they need a little time in the fridge to set. Gather your ingredients first, and let’s get started!
Detailed Instructions for Each Step
1. Mix Dry Ingredients: In a big bowl, combine the shredded coconut, almond flour, cocoa powder, and a pinch of salt. Stir well until all dry ingredients mix evenly.
2. Combine Wet Ingredients: In another bowl, mix melted coconut oil, maple syrup, and vanilla extract. Ensure it blends well.
3. Combine Wet and Dry: Pour the wet mix into the dry mix. Stir until you have a thick, sticky dough. It should hold together nicely.
4. Prepare the Pan: Line an 8×8-inch baking pan with parchment paper. Leave some paper hanging over the sides for easy removal later.
5. Pack the Mixture: Transfer the dough into the pan. Press it down firmly with a spatula or your hands. Make sure it’s tightly packed for the best texture.
6. Melt the Chocolate: In a microwave-safe bowl, melt the dark chocolate chips. Do this in 20-second intervals, stirring in between until smooth.
7. Drizzle the Chocolate: Pour the melted chocolate over the pressed coconut mixture. Use a spatula to spread it evenly across the top.
8. Refrigerate to Set: Put the pan in the fridge. Let it chill for at least 2 hours or until firm.
9. Cut and Serve: Once set, lift the bars out of the pan using the parchment paper. Cut them into squares or bars as you like.Enjoy making these tasty treats!
Tips & Tricks
Common Mistakes to Avoid
When making no-bake chocolate coconut bars, avoid these common mistakes:
– Not pressing the mixture firmly: If the mix isn’t packed tight, the bars may crumble.
– Using too much liquid: Stick to the recipe for the best texture.
– Skipping the refrigeration step: This step helps the bars firm up.
Best Practices for Perfect Bars
To get the best results, follow these best practices:
– Use fresh ingredients: Fresh coconut and high-quality cocoa will enhance the taste.
– Measure precisely: Accurate measurements lead to the right texture and flavor.
– Let them chill long enough: Aim for at least 2 hours in the fridge.
How to Enhance Flavors
To make your bars even more delicious, try these tips:
– Add nuts: Chopped almonds or walnuts can add crunch.
– Mix in spices: A pinch of cinnamon or sea salt can elevate the taste.
– Swap the sweetener: Try honey or agave syrup for a different flavor.
These tips will help you create tasty no-bake chocolate coconut bars that everyone will love.
Variations
Flavor Additions
You can easily change the taste of these bars. Try adding nuts or dried fruits. Chopped almonds or walnuts add crunch. Dried cherries or cranberries bring a sweet flavor. Just mix them into the dough before pressing it into the pan. You will create a unique treat every time.
Alternative Sweeteners or Flour Options
If you want to change the sweetness, you have options. You can use honey or agave syrup instead of maple syrup. These sweeteners work well in this recipe. For flour, you can try using coconut flour or oat flour. Just remember that coconut flour absorbs more moisture. Adjust the wet ingredients if you use it.
Vegan and Gluten-Free Options
This recipe is already vegan and gluten-free. The almond flour and coconut are naturally gluten-free. To keep it vegan, stick to plant-based sweeteners. If you want to make it nut-free, try sunflower seed flour instead of almond flour. This way, everyone can enjoy these tasty bars.
Storage Info
Best Practices for Storing Bars
To keep your no-bake chocolate coconut bars fresh, store them in an airtight container. I like to separate the layers with parchment paper. This helps prevent sticking. Always keep them in the fridge. This keeps the bars firm and tasty. If you want them at room temp, take them out just before serving.
How Long They Last
These bars can last up to one week in the fridge. I often find they taste even better after a day or two. The flavors meld together beautifully over time. If you notice any changes in texture or smell, it’s best to toss them.
Freezing Instructions
You can freeze these bars for up to three months. Just cut them into squares first. Wrap each piece tightly in plastic wrap. Then place them in a freezer bag. When you want to enjoy a bar, let it thaw in the fridge overnight. This method keeps them fresh and ready to eat.
FAQs
How do I make No-Bake Chocolate Coconut Bars?
To make No-Bake Chocolate Coconut Bars, gather your ingredients. You need shredded coconut, almond flour, maple syrup, coconut oil, cocoa powder, vanilla extract, salt, and dark chocolate chips. Mix the dry ingredients first. Then, mix the wet ingredients. Combine both mixtures until they form a sticky dough. Press it into a lined baking pan. Melt the chocolate and drizzle it on top. Chill until firm.
Can I use different types of chocolate?
Yes, you can use any chocolate you like. Dark chocolate gives a rich taste. Milk chocolate adds sweetness. White chocolate offers a creamy texture. Each type brings its own flavor. Choose what you enjoy most. Just remember that melting times may vary.
What is the best way to cut the bars?
To cut the bars, first, let them chill completely. Use a sharp knife for clean edges. Run the knife under hot water before cutting. This helps the knife glide smoothly. Cut into squares or rectangles based on your preference. Enjoy the neat slices!
Are these bars suitable for meal prep?
Absolutely! No-Bake Chocolate Coconut Bars are perfect for meal prep. They last well in the fridge. You can grab a quick snack anytime. Prepare a batch on the weekend for the week ahead. They are also great for lunch boxes.
Can I omit the chocolate topping?
Yes, you can skip the chocolate topping. The bars will still be tasty without it. You can add a dusting of cocoa powder instead. This keeps the chocolate flavor while cutting back on sugar. Feel free to customize as you like!
This blog post covered how to create tasty no-bake bars. We discussed ingredients, preparation steps, and helpful tips. Each section offered practical advice for making perfect bars. Remember to explore variations for extra flavor and different diets. Store your bars properly to keep them fresh. With these tips, you can enjoy your homemade treats anytime. I hope you feel ready to try making these delicious bars yourself!