![To make No-Bake Strawberry Cheesecake Cups, you need a few key ingredients. Here’s the list: - 1 cup graham cracker crumbs - 4 tablespoons unsalted butter, melted - 2 tablespoons sugar - 1 cup cream cheese, softened - 1/3 cup powdered sugar - 1 teaspoon vanilla extract - 1 cup heavy whipping cream - 1 cup fresh strawberries, hulled and sliced - Extra strawberries for garnish - Mint leaves for garnish (optional) Using high-quality ingredients makes a big difference. Fresh strawberries add bright flavor. Softened cream cheese creates a smooth filling. I always choose fresh over frozen when possible. It ensures the best taste in every bite. If you need substitutes, there are great options. For a dairy-free version, use dairy-free cream cheese. You can also replace heavy cream with coconut cream for a lighter touch. For flavor variations, think outside the box! Add melted chocolate to the cream cheese mix for a chocolate twist. You can also use blueberries instead of strawberries for a fun change. Mixing flavors lets you create a new dessert every time! For the full recipe, check out the [Full Recipe]. To make a great graham cracker crust, start with these steps: 1. In a mixing bowl, combine: - 1 cup graham cracker crumbs - 4 tablespoons unsalted butter, melted - 2 tablespoons sugar 2. Mix well until the crumbs look like wet sand. 3. Divide this crumb mix into 4 serving cups. Press the crumbs down to form a firm layer. Now, let's make the cheesecake filling: 1. In another bowl, beat 1 cup of softened cream cheese until it's smooth. 2. Gradually add 1/3 cup of powdered sugar and 1 teaspoon of vanilla extract. Mix until creamy. 3. In a separate bowl, whip 1 cup of heavy cream until stiff peaks form. 4. Gently fold the whipped cream into the cream cheese mixture. This will make it light and fluffy. Now it’s time to layer the cups: 1. Spoon the cheesecake mixture over the crust in each cup. Smooth the tops with a spatula. 2. Layer 1 cup of sliced strawberries on top of the cheesecake in each cup. To get the best taste and texture, chill the cups: - Place them in the fridge for at least 2 hours. For a lovely presentation: - Before serving, add extra strawberries on top and a mint leaf if you like. Serve the cheesecake cups on a fancy platter. You can drizzle honey or strawberry sauce on top to make them even more special. For the complete recipe, check out the [Full Recipe]. To whip cream to the right texture, start with chilled heavy cream. Use a clean bowl and beaters for the best results. Whip the cream until you see stiff peaks. This means it stands tall when you pull the beaters out. For a smooth cream cheese mixture, let the cream cheese sit at room temperature. This helps it soften. Beat it well before adding sugar and vanilla. Mix until there are no lumps. This step is key for a creamy cheesecake. Want to boost the flavor? Try adding lemon zest to the cream cheese mixture. This gives a fresh taste. You can also use a splash of lemon juice for a tangy twist. When picking strawberries, choose ripe, sweet ones. Look for bright red color and a sweet smell. If they are not in season, frozen strawberries work too. Just thaw and pat them dry before using. If your cheesecake turns out runny, it may need more cream cheese. Make sure to beat the cream cheese until smooth before adding the whipped cream. To adjust sweetness, taste the mixture before layering. If it's too sweet, add a pinch of salt. This can balance the flavors nicely. For more tips and the full recipe, check out the No-Bake Strawberry Cheesecake Cups! {{image_2}} You can easily change the flavor of your no-bake cheesecake cups. To make chocolate cheesecake cups, mix cocoa powder into the cream cheese filling. Start with 2 tablespoons and adjust to your taste. For vanilla cheesecake cups, simply swap the strawberries for vanilla beans or extract. This gives you a rich, creamy flavor. Fruits add a fun twist. You can use blueberries, raspberries, or peaches. Just chop them up and layer them on top. Each fruit brings its own taste, so feel free to experiment! If you're hosting a larger party, double the recipe. This will give you eight cups instead of four. You can easily scale the ingredients to fit your needs. For mini versions, fill small shot glasses or ramekins. This makes for a cute presentation and a fun way to serve. Just remember to reduce the filling amount to fit. Mixing and matching flavors and sizes keeps things exciting and delicious! Store your No-Bake Strawberry Cheesecake Cups in the fridge. Use an airtight container to keep them fresh. If you have leftovers, cover each cup with plastic wrap. This will help keep the flavors intact. For freezing, place the cups in a freezer-safe container. Make sure to leave some space, as the cheesecake may expand. You can freeze the cups for up to a month. When you're ready to serve, thaw them in the fridge overnight. These cheesecake cups last about 3 to 5 days in the fridge. Keep an eye out for changes in texture or smell. If they start to smell sour or look odd, it’s time to toss them. Signs that the dessert has gone bad include: - Off smell - Excessive separation - Mold on the surface Enjoy your delicious treat while it's fresh for the best taste! For the full recipe, check out the section on ingredients. How long does it take to set the cheesecake cups? The cheesecake cups need about 2 hours in the fridge to set. This time helps them firm up and blend the flavors well. If you want a firmer texture, you can chill them longer. Can I use low-fat cream cheese for a lighter version? Yes, you can use low-fat cream cheese. It cuts some calories and still tastes great. The texture may be a bit different, but your cheesecake cups will still be delicious. Are fresh strawberries necessary, or can I use frozen? Fresh strawberries are best for taste and texture. However, you can use frozen strawberries if fresh ones are not available. Just thaw and drain them before using. What can I use in place of graham cracker crumbs? You can use crushed cookies or biscuits instead of graham crackers. Options like digestive biscuits or vanilla wafers work well. They give a nice flavor and texture to the crust. Can the cheesecake cups be made a day in advance? Yes! You can make these cups a day ahead. Just store them in the fridge, covered. This makes them perfect for parties or gatherings. What's the best way to serve these cups for guests? Serve the cheesecake cups on a pretty platter. You can drizzle honey or strawberry sauce on top for extra flair. Garnishing with mint leaves also adds a nice touch. No-Bake Strawberry Cheesecake Cups are simple and delicious. You learn the key ingredients, preparation steps, and useful tips. Quality ingredients give the best flavors. Substitutes allow for fun twists in your dessert. Follow guidelines for perfect consistency and storage. With a little practice, anyone can master this treat. Enjoy making and sharing these cups at your next gathering. Get creative and have fun with your flavors and presentations. Happy dessert-making!](https://momdishmagic.com/wp-content/uploads/2025/06/9a9ea3e4-12d2-4355-919b-f14f5e9c685b-768x768.webp)
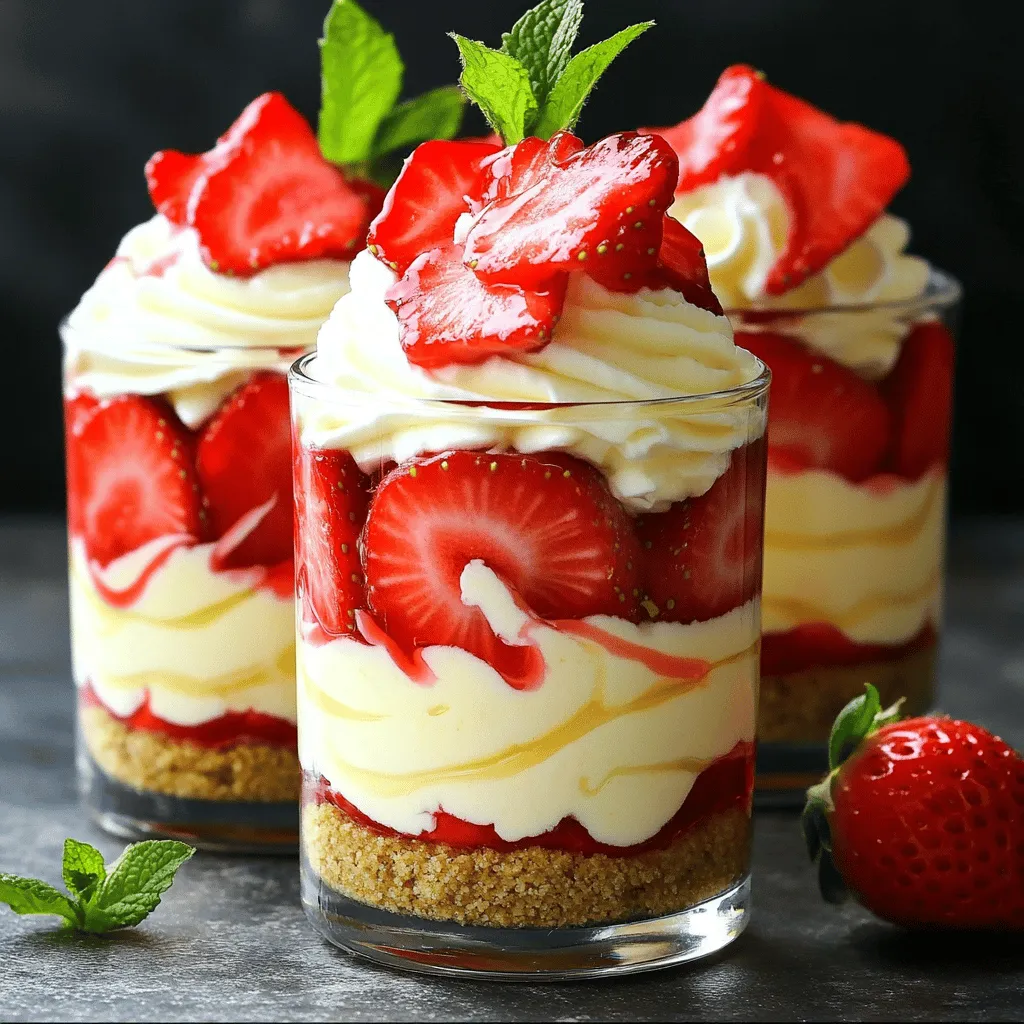
If you crave a sweet treat that’s both easy and delicious, you’ll love these No-Bake Strawberry Cheesecake Cups! I’ll walk you through every step, from choosing the best ingredients to crafting the perfect layers. You’ll impress friends and family while enjoying a refreshing dessert without turning on the oven. Let’s get started on this tasty journey to create your new favorite treat!
Ingredients
Main Components
To make No-Bake Strawberry Cheesecake Cups, you need a few key ingredients. Here’s the list:
– 1 cup graham cracker crumbs
– 4 tablespoons unsalted butter, melted
– 2 tablespoons sugar
– 1 cup cream cheese, softened
– 1/3 cup powdered sugar
– 1 teaspoon vanilla extract
– 1 cup heavy whipping cream
– 1 cup fresh strawberries, hulled and sliced
– Extra strawberries for garnish
– Mint leaves for garnish (optional)
Using high-quality ingredients makes a big difference. Fresh strawberries add bright flavor. Softened cream cheese creates a smooth filling. I always choose fresh over frozen when possible. It ensures the best taste in every bite.
Substitutes and Alternatives
If you need substitutes, there are great options. For a dairy-free version, use dairy-free cream cheese. You can also replace heavy cream with coconut cream for a lighter touch.
For flavor variations, think outside the box! Add melted chocolate to the cream cheese mix for a chocolate twist. You can also use blueberries instead of strawberries for a fun change. Mixing flavors lets you create a new dessert every time!
Step-by-Step Instructions
Preparation Process
To make a great graham cracker crust, start with these steps:
1. In a mixing bowl, combine:
– 1 cup graham cracker crumbs
– 4 tablespoons unsalted butter, melted
– 2 tablespoons sugar
2. Mix well until the crumbs look like wet sand.
3. Divide this crumb mix into 4 serving cups. Press the crumbs down to form a firm layer.
Now, let’s make the cheesecake filling:
1. In another bowl, beat 1 cup of softened cream cheese until it’s smooth.
2. Gradually add 1/3 cup of powdered sugar and 1 teaspoon of vanilla extract. Mix until creamy.
3. In a separate bowl, whip 1 cup of heavy cream until stiff peaks form.
4. Gently fold the whipped cream into the cream cheese mixture. This will make it light and fluffy.
Assembling the Cups
Now it’s time to layer the cups:
1. Spoon the cheesecake mixture over the crust in each cup. Smooth the tops with a spatula.
2. Layer 1 cup of sliced strawberries on top of the cheesecake in each cup.
Serving Instructions
To get the best taste and texture, chill the cups:
– Place them in the fridge for at least 2 hours.
For a lovely presentation:
– Before serving, add extra strawberries on top and a mint leaf if you like.
Serve the cheesecake cups on a fancy platter. You can drizzle honey or strawberry sauce on top to make them even more special.
Tips & Tricks
Achieving Perfect Consistency
To whip cream to the right texture, start with chilled heavy cream. Use a clean bowl and beaters for the best results. Whip the cream until you see stiff peaks. This means it stands tall when you pull the beaters out.
For a smooth cream cheese mixture, let the cream cheese sit at room temperature. This helps it soften. Beat it well before adding sugar and vanilla. Mix until there are no lumps. This step is key for a creamy cheesecake.
Enhancing Flavor
Want to boost the flavor? Try adding lemon zest to the cream cheese mixture. This gives a fresh taste. You can also use a splash of lemon juice for a tangy twist.
When picking strawberries, choose ripe, sweet ones. Look for bright red color and a sweet smell. If they are not in season, frozen strawberries work too. Just thaw and pat them dry before using.
Troubleshooting Common Issues
If your cheesecake turns out runny, it may need more cream cheese. Make sure to beat the cream cheese until smooth before adding the whipped cream.
To adjust sweetness, taste the mixture before layering. If it’s too sweet, add a pinch of salt. This can balance the flavors nicely.
Variations
Flavor Variations
You can easily change the flavor of your no-bake cheesecake cups. To make chocolate cheesecake cups, mix cocoa powder into the cream cheese filling. Start with 2 tablespoons and adjust to your taste.
For vanilla cheesecake cups, simply swap the strawberries for vanilla beans or extract. This gives you a rich, creamy flavor.
Fruits add a fun twist. You can use blueberries, raspberries, or peaches. Just chop them up and layer them on top. Each fruit brings its own taste, so feel free to experiment!
Serving Size Adjustments
If you’re hosting a larger party, double the recipe. This will give you eight cups instead of four. You can easily scale the ingredients to fit your needs.
For mini versions, fill small shot glasses or ramekins. This makes for a cute presentation and a fun way to serve. Just remember to reduce the filling amount to fit.
Mixing and matching flavors and sizes keeps things exciting and delicious!
Storage Info
Proper Storage Techniques
Store your No-Bake Strawberry Cheesecake Cups in the fridge. Use an airtight container to keep them fresh. If you have leftovers, cover each cup with plastic wrap. This will help keep the flavors intact.
For freezing, place the cups in a freezer-safe container. Make sure to leave some space, as the cheesecake may expand. You can freeze the cups for up to a month. When you’re ready to serve, thaw them in the fridge overnight.
Shelf Life
These cheesecake cups last about 3 to 5 days in the fridge. Keep an eye out for changes in texture or smell. If they start to smell sour or look odd, it’s time to toss them.
Signs that the dessert has gone bad include:
– Off smell
– Excessive separation
– Mold on the surface
Enjoy your delicious treat while it’s fresh for the best taste!
FAQs
Common Questions About No-Bake Strawberry Cheesecake Cups
How long does it take to set the cheesecake cups?
The cheesecake cups need about 2 hours in the fridge to set. This time helps them firm up and blend the flavors well. If you want a firmer texture, you can chill them longer.
Can I use low-fat cream cheese for a lighter version?
Yes, you can use low-fat cream cheese. It cuts some calories and still tastes great. The texture may be a bit different, but your cheesecake cups will still be delicious.
Ingredient-Specific Queries
Are fresh strawberries necessary, or can I use frozen?
Fresh strawberries are best for taste and texture. However, you can use frozen strawberries if fresh ones are not available. Just thaw and drain them before using.
What can I use in place of graham cracker crumbs?
You can use crushed cookies or biscuits instead of graham crackers. Options like digestive biscuits or vanilla wafers work well. They give a nice flavor and texture to the crust.
Serving and Enjoying
Can the cheesecake cups be made a day in advance?
Yes! You can make these cups a day ahead. Just store them in the fridge, covered. This makes them perfect for parties or gatherings.
What’s the best way to serve these cups for guests?
Serve the cheesecake cups on a pretty platter. You can drizzle honey or strawberry sauce on top for extra flair. Garnishing with mint leaves also adds a nice touch.
No-Bake Strawberry Cheesecake Cups are simple and delicious. You learn the key ingredients, preparation steps, and useful tips. Quality ingredients give the best flavors. Substitutes allow for fun twists in your dessert. Follow guidelines for perfect consistency and storage. With a little practice, anyone can master this treat. Enjoy making and sharing these cups at your next gathering. Get creative and have fun with your flavors and presentations. Happy dessert-making!
![To make No-Bake Strawberry Cheesecake Cups, you need a few key ingredients. Here’s the list: - 1 cup graham cracker crumbs - 4 tablespoons unsalted butter, melted - 2 tablespoons sugar - 1 cup cream cheese, softened - 1/3 cup powdered sugar - 1 teaspoon vanilla extract - 1 cup heavy whipping cream - 1 cup fresh strawberries, hulled and sliced - Extra strawberries for garnish - Mint leaves for garnish (optional) Using high-quality ingredients makes a big difference. Fresh strawberries add bright flavor. Softened cream cheese creates a smooth filling. I always choose fresh over frozen when possible. It ensures the best taste in every bite. If you need substitutes, there are great options. For a dairy-free version, use dairy-free cream cheese. You can also replace heavy cream with coconut cream for a lighter touch. For flavor variations, think outside the box! Add melted chocolate to the cream cheese mix for a chocolate twist. You can also use blueberries instead of strawberries for a fun change. Mixing flavors lets you create a new dessert every time! For the full recipe, check out the [Full Recipe]. To make a great graham cracker crust, start with these steps: 1. In a mixing bowl, combine: - 1 cup graham cracker crumbs - 4 tablespoons unsalted butter, melted - 2 tablespoons sugar 2. Mix well until the crumbs look like wet sand. 3. Divide this crumb mix into 4 serving cups. Press the crumbs down to form a firm layer. Now, let's make the cheesecake filling: 1. In another bowl, beat 1 cup of softened cream cheese until it's smooth. 2. Gradually add 1/3 cup of powdered sugar and 1 teaspoon of vanilla extract. Mix until creamy. 3. In a separate bowl, whip 1 cup of heavy cream until stiff peaks form. 4. Gently fold the whipped cream into the cream cheese mixture. This will make it light and fluffy. Now it’s time to layer the cups: 1. Spoon the cheesecake mixture over the crust in each cup. Smooth the tops with a spatula. 2. Layer 1 cup of sliced strawberries on top of the cheesecake in each cup. To get the best taste and texture, chill the cups: - Place them in the fridge for at least 2 hours. For a lovely presentation: - Before serving, add extra strawberries on top and a mint leaf if you like. Serve the cheesecake cups on a fancy platter. You can drizzle honey or strawberry sauce on top to make them even more special. For the complete recipe, check out the [Full Recipe]. To whip cream to the right texture, start with chilled heavy cream. Use a clean bowl and beaters for the best results. Whip the cream until you see stiff peaks. This means it stands tall when you pull the beaters out. For a smooth cream cheese mixture, let the cream cheese sit at room temperature. This helps it soften. Beat it well before adding sugar and vanilla. Mix until there are no lumps. This step is key for a creamy cheesecake. Want to boost the flavor? Try adding lemon zest to the cream cheese mixture. This gives a fresh taste. You can also use a splash of lemon juice for a tangy twist. When picking strawberries, choose ripe, sweet ones. Look for bright red color and a sweet smell. If they are not in season, frozen strawberries work too. Just thaw and pat them dry before using. If your cheesecake turns out runny, it may need more cream cheese. Make sure to beat the cream cheese until smooth before adding the whipped cream. To adjust sweetness, taste the mixture before layering. If it's too sweet, add a pinch of salt. This can balance the flavors nicely. For more tips and the full recipe, check out the No-Bake Strawberry Cheesecake Cups! {{image_2}} You can easily change the flavor of your no-bake cheesecake cups. To make chocolate cheesecake cups, mix cocoa powder into the cream cheese filling. Start with 2 tablespoons and adjust to your taste. For vanilla cheesecake cups, simply swap the strawberries for vanilla beans or extract. This gives you a rich, creamy flavor. Fruits add a fun twist. You can use blueberries, raspberries, or peaches. Just chop them up and layer them on top. Each fruit brings its own taste, so feel free to experiment! If you're hosting a larger party, double the recipe. This will give you eight cups instead of four. You can easily scale the ingredients to fit your needs. For mini versions, fill small shot glasses or ramekins. This makes for a cute presentation and a fun way to serve. Just remember to reduce the filling amount to fit. Mixing and matching flavors and sizes keeps things exciting and delicious! Store your No-Bake Strawberry Cheesecake Cups in the fridge. Use an airtight container to keep them fresh. If you have leftovers, cover each cup with plastic wrap. This will help keep the flavors intact. For freezing, place the cups in a freezer-safe container. Make sure to leave some space, as the cheesecake may expand. You can freeze the cups for up to a month. When you're ready to serve, thaw them in the fridge overnight. These cheesecake cups last about 3 to 5 days in the fridge. Keep an eye out for changes in texture or smell. If they start to smell sour or look odd, it’s time to toss them. Signs that the dessert has gone bad include: - Off smell - Excessive separation - Mold on the surface Enjoy your delicious treat while it's fresh for the best taste! For the full recipe, check out the section on ingredients. How long does it take to set the cheesecake cups? The cheesecake cups need about 2 hours in the fridge to set. This time helps them firm up and blend the flavors well. If you want a firmer texture, you can chill them longer. Can I use low-fat cream cheese for a lighter version? Yes, you can use low-fat cream cheese. It cuts some calories and still tastes great. The texture may be a bit different, but your cheesecake cups will still be delicious. Are fresh strawberries necessary, or can I use frozen? Fresh strawberries are best for taste and texture. However, you can use frozen strawberries if fresh ones are not available. Just thaw and drain them before using. What can I use in place of graham cracker crumbs? You can use crushed cookies or biscuits instead of graham crackers. Options like digestive biscuits or vanilla wafers work well. They give a nice flavor and texture to the crust. Can the cheesecake cups be made a day in advance? Yes! You can make these cups a day ahead. Just store them in the fridge, covered. This makes them perfect for parties or gatherings. What's the best way to serve these cups for guests? Serve the cheesecake cups on a pretty platter. You can drizzle honey or strawberry sauce on top for extra flair. Garnishing with mint leaves also adds a nice touch. No-Bake Strawberry Cheesecake Cups are simple and delicious. You learn the key ingredients, preparation steps, and useful tips. Quality ingredients give the best flavors. Substitutes allow for fun twists in your dessert. Follow guidelines for perfect consistency and storage. With a little practice, anyone can master this treat. Enjoy making and sharing these cups at your next gathering. Get creative and have fun with your flavors and presentations. Happy dessert-making!](https://momdishmagic.com/wp-content/uploads/2025/06/9a9ea3e4-12d2-4355-919b-f14f5e9c685b-250x250.webp)
