
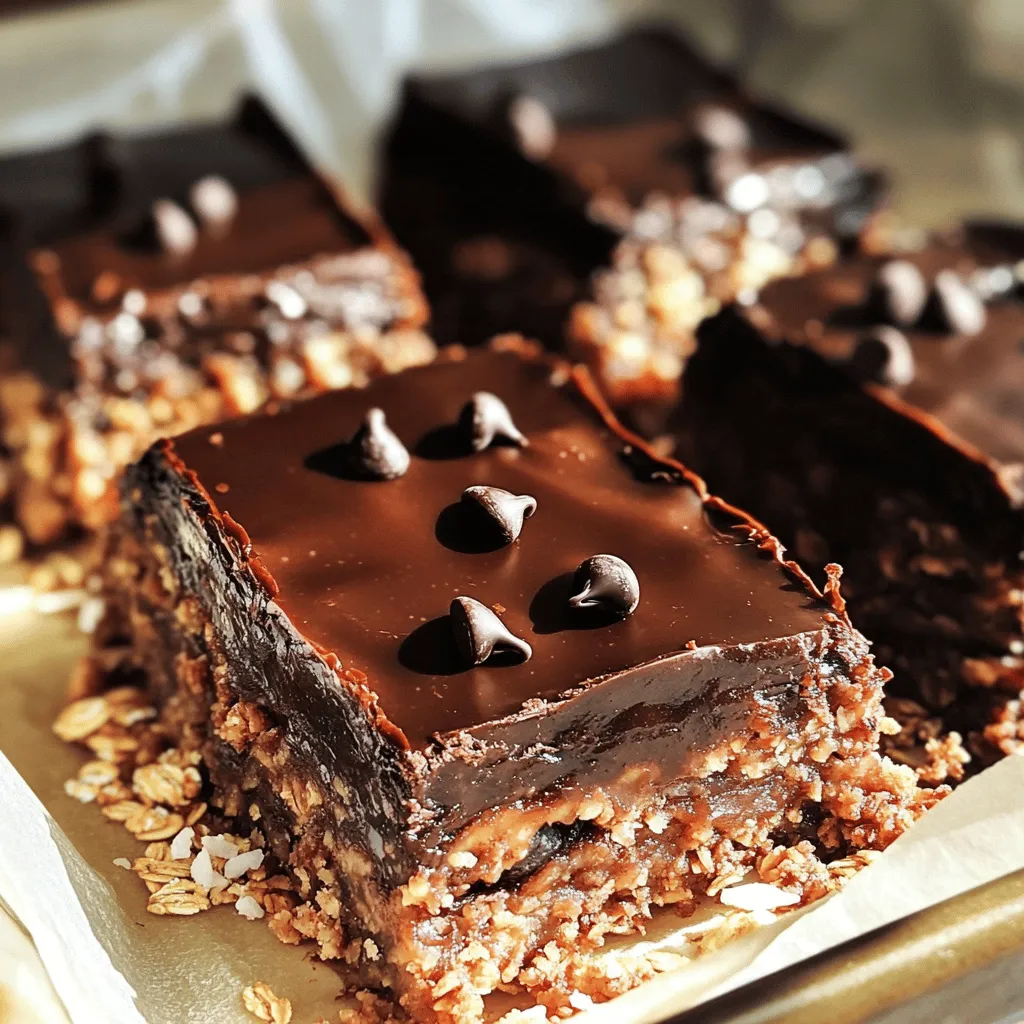
If you crave a sweet treat without turning on the oven, I have just the recipe for you! These No Bake Chocolate Coconut Bars are simple and delicious. With just a few ingredients, you can create a satisfying dessert in no time. Whether you need a quick snack or a fun treat for friends, these bars hit the spot. Let’s dive into the easy steps to make your new favorite dessert!You only need a few ingredients. These bars are great for a quick snack or dessert.
List of Ingredients
– 1 cup medjool dates, pitted
– 1 cup rolled oats
– 1/2 cup unsweetened cocoa powder
– 1/2 cup shredded coconut (unsweetened)
– 1/4 cup almond butter (or any nut butter of your choice)
– 1/4 cup honey or maple syrup
– 1 teaspoon vanilla extract
– Pinch of salt
– 1/4 cup dark chocolate chips (dairy-free if preferred)
Specific Ingredient Notes
Medjool dates give natural sweetness and stickiness. They help hold the bars together. Rolled oats add texture and fiber. Use unsweetened cocoa powder for rich chocolate flavor. Unsweetened shredded coconut adds a chewy bite. Almond butter or your favorite nut butter binds the mix. Honey or maple syrup adds a sweet touch. Vanilla extract enhances the overall flavor. A pinch of salt balances the sweetness. Dark chocolate chips give a tasty finish.
For the best results, use fresh ingredients. Keep your dates soft for easy blending. If you want a sweeter treat, adjust the honey or maple syrup. Each ingredient plays a key role in making these bars delicious and nutritious.
Step-by-Step Instructions
Preparation of the Base
To start, gather all your ingredients. You will need medjool dates, oats, cocoa powder, shredded coconut, almond butter, honey, vanilla, and a pinch of salt. Place these in a food processor. Blend until it forms a sticky dough. If it seems too dry, add a little water. You want a blend that sticks together well.
Pressing the Mixture into the Pan
Next, take an 8×8 inch baking dish and line it with parchment paper. This helps with easy removal later. Pour the sticky dough into the dish. Use your hands or a spoon to press it down firmly. Make sure it is even and flat. This forms the base of your bars, so it’s important to get it right.
Melting and Adding the Chocolate Layer
Now, let’s melt the chocolate. In a microwave-safe bowl, add dark chocolate chips. Heat them in 30-second bursts. Stir in between until smooth. This step is quick, and you should watch closely to avoid burning. Once melted, pour the chocolate over the pressed mixture. Use a spatula to spread it evenly across the top.
Chilling and Cutting the Bars
Finally, it’s time to chill. Place the dish in the fridge for at least 2 hours. This helps the bars set firmly. Once they are set, lift them out using the parchment paper. Place them on a cutting board and slice them into squares or rectangles. Enjoy your tasty no-bake chocolate coconut bars!
Tips & Tricks
Recommended Tools for Preparation
To make these no-bake chocolate coconut bars, you need a few tools. Here’s what I recommend:
– Food processor
– 8×8 inch baking dish
– Parchment paper
– Microwave-safe bowl
– Spatula
– Measuring cups and spoons
These tools help you mix, press, and melt easily.
How to Achieve the Perfect Texture
Getting the right texture is key. You want your mixture to be sticky but not too wet. Here are some tips:
– Use fresh medjool dates. They should be soft and moist.
– If your mixture seems dry, add a bit more almond butter or honey.
– Make sure to pulse the ingredients well in the food processor. You want everything to blend nicely.
Press the mixture firmly into the pan. This helps the bars hold together better.
Serving Suggestions
These bars are great on their own, but you can get creative! Here are a few serving ideas:
– Drizzle extra melted chocolate on top for a fancy touch.
– Sprinkle more shredded coconut or nuts for added crunch.
– Serve with fresh fruit like berries for a nice contrast.
Enjoy your delicious no-bake chocolate coconut bars as a snack or dessert!
Variations
Adding Nuts or Seeds
You can add nuts or seeds to your bars for extra crunch and flavor. Almonds, walnuts, or pumpkin seeds work great. Chop them up and mix them in during the dough stage. About 1/4 cup will add a nice texture without being too much. You can also sprinkle some on top before you chill the bars.
Different Flavor Profiles
Change the flavor by adding spices or extracts. For a tropical twist, use orange zest or coconut extract. You could also try a dash of cinnamon or a hint of espresso powder for a rich taste. Just a teaspoon can elevate the chocolate flavor. Experiment with what you like best.
Making It Vegan or Gluten-Free
To make these bars vegan, simply swap honey for maple syrup. This keeps them sweet and plant-based. For gluten-free bars, ensure your oats are certified gluten-free. This way, everyone can enjoy this tasty treat. These simple swaps make it easy to cater to different diets while keeping the delicious taste.
Storage Info
Best Practices for Storing
To keep your no bake chocolate coconut bars fresh, store them in an airtight container. This helps prevent them from drying out or absorbing other smells in the fridge. I find it best to separate layers with parchment paper. This way, they won’t stick together.
Freezing Options
You can freeze these bars if you want to enjoy them later. Cut the bars into squares before freezing. Place them in a single layer on a baking sheet. Once they are frozen, transfer them to a freezer bag. You can keep them in the freezer for up to three months. Just thaw them in the fridge before eating.
Shelf Life Information
These bars stay fresh in the fridge for about one week. After that, they might lose taste or texture. To ensure you enjoy them at their best, try to eat them within that week. If you freeze them, they will last much longer and taste great when thawed.
FAQs
Can I substitute any ingredients?
Yes, you can swap out some ingredients. For example, you can use cashew butter instead of almond butter. You can also try different sweeteners like agave syrup instead of honey. If you don’t have shredded coconut, finely chopped nuts work well too.
How can I make these bars sweeter?
To add more sweetness, you can use more honey or maple syrup. You might also try adding a bit of powdered sugar. If you like, you can mix in more chocolate chips for extra sweetness and flavor.
What’s the best way to cut no-bake bars?
To cut these bars easily, chill them well first. Use a sharp knife for clean cuts. You can also warm the knife slightly to help it glide through the bars. Wipe the knife after each cut for neat slices.
How long do they last in the fridge?
These no-bake chocolate coconut bars last about a week in the fridge. Store them in an airtight container to keep them fresh. If you want them to last longer, consider freezing them. They freeze well for up to three months. You can take them out and let them thaw before enjoying.
This guide provided you with a clear recipe for no-bake bars, covering every step. We detailed the ingredients, with notes on each for better flavor. You learned how to prepare and chill the bars, plus tips for the best texture. I shared variations to fit your taste and dietary needs. Lastly, we covered storage options, ensuring your bars stay fresh. Enjoy making these delicious treats! They are sure to impress friends and family.

