![To make this delicious cheesecake, you need the following items: - 1 ½ cups digestive biscuits, crushed - ½ cup unsalted butter, melted - 2 cups cream cheese, softened - 1 cup powdered sugar - 1 teaspoon vanilla extract - 1 cup heavy cream - 1 ½ cups fresh strawberries, hulled and sliced - 1 tablespoon lemon juice - Fresh mint leaves for garnish These ingredients work together to create a rich and creamy cheesecake that melts in your mouth. The digestive biscuits form a sturdy crust, while the cream cheese provides a smooth filling. The strawberries add a burst of flavor, making every bite delightful. To customize your cheesecake further, consider these optional ingredients: - Chocolate shavings - Additional fruit toppings - Alternative sweeteners Adding chocolate shavings can give your cheesecake a fun twist. Extra fruit toppings can enhance the flavor and presentation. If you prefer a different sweetener, you can swap out the powdered sugar for a healthier option. For the complete recipe, check out the [Full Recipe]. To start, mix the crushed digestive biscuits and melted butter in a bowl. You want to stir until it feels like wet sand. This step is simple but key for a tasty base. Next, press the mixture firmly into the bottom of a 9-inch springform pan. Make sure it is even and compact. This will help the crust hold up when we add the filling. Place the pan in the refrigerator for 15 minutes to set. In a large bowl, beat the softened cream cheese using an electric mixer. Mix until it feels smooth and creamy. This makes the filling rich and delicious. Gradually add the powdered sugar and vanilla extract. Keep mixing until everything is well blended. This step adds sweetness and flavor to the cheesecake filling. Now, let’s whip the heavy cream. In another bowl, beat the cream until you see stiff peaks form. This means it will hold its shape well. Gently fold the whipped cream into the cream cheese mixture. Be careful not to deflate the whipped cream. You want a light and fluffy texture. Make sure no streaks remain in the mixture. Before we add the strawberries, toss them with the lemon juice in a bowl. This keeps their color bright and adds a nice zing. Pour half of the cheesecake filling into the crust. Layer half of the strawberries on top. Then, pour the rest of the filling over the strawberries. Finally, add the remaining sliced strawberries on top. Cover the cheesecake with plastic wrap and refrigerate it for at least 4 hours. For the best texture, let it chill overnight. When ready to serve, carefully remove the sides of the springform pan. Don’t forget to garnish with fresh mint leaves for a pop of color. Enjoy your No-Bake Strawberry Cheesecake! You can find the Full Recipe for all the details. To make your cheesecake smooth, chill it well. I recommend letting it sit in the fridge for at least 4 hours. If you can, overnight is best. This helps the cheesecake set up nicely. Always use cream cheese at room temperature. Cold cream cheese mixes poorly and can lead to lumps. For a beautiful finish, think about garnishing with fresh mint leaves. They add color and flavor. You can also slice some fresh strawberries to place on top. Serve your cheesecake on a nice plate to impress your guests. If your cheesecake is too runny, it may need more time in the fridge. Give it a few more hours to set. You can also blend in a bit more whipped cream for thickness. If your crust crumbles, try adding a bit more melted butter. This helps hold it together better. {{image_2}} You can easily switch up the flavors of your no-bake strawberry cheesecake. For a rich twist, try a chocolate version. Just add cocoa powder to the cream cheese mix. You can also use melted chocolate in place of some cream cheese. This adds a lovely depth to the dessert. If you need a nut-free option, skip any nuts in the crust or toppings. Use cookie crumbs instead, like graham crackers or digestive biscuits. This keeps it tasty and safe for those with allergies. There are ways to make this cheesecake fit different diets. For a gluten-free version, use gluten-free digestive biscuits. Many brands offer great options that taste just as good. If you're vegan, swap cream cheese with a plant-based alternative. Use coconut cream or silken tofu for a creamy texture. Replace heavy cream with coconut milk for the perfect consistency. While strawberries shine in this recipe, you can change things up with other fruits. Raspberries and blueberries work great too. They add color and a tart flavor that balances the sweet cheesecake. Seasonal fruits like peaches or cherries also make fantastic toppings. You can mix and match to keep it fresh and exciting. Each fruit brings its own unique taste, making every cheesecake special. To keep your no-bake strawberry cheesecake fresh, cover it tightly with plastic wrap. This prevents the cheesecake from absorbing any odors from the fridge. The cheesecake stays tasty for up to five days in the fridge. After five days, it may lose its best flavor and texture. Always check for any signs of spoilage before enjoying leftovers. You can freeze this cheesecake for a longer shelf life. First, let it chill completely in the fridge. Then, wrap it in plastic wrap and place it in an airtight container. It can last for up to three months in the freezer. When you’re ready to serve, take it out and thaw it in the fridge for about six hours. For quick thawing, you can leave it at room temperature for about an hour. Remember to garnish it after thawing for a fresh look. Enjoy your delicious creation! Check the Full Recipe for more details. Yes, you can use frozen strawberries. Just thaw them first. Pat them dry with a paper towel. This helps keep the cheesecake from getting too watery. Frozen berries can also taste great in your cheesecake. The cheesecake needs to chill for at least 4 hours. For the best results, chill it overnight. This helps the cheesecake set properly. A longer chill time makes the texture creamier and firmer. Absolutely! You can make the cheesecake a day or two ahead of time. Just keep it covered in the fridge. This makes it a perfect dessert for parties or gatherings. You can spend more time enjoying your guests. If you want a different taste, try mascarpone or Greek yogurt. They both work well in this recipe. They can change the flavor and texture a bit. Make sure to adjust the sugar if needed for sweetness. You can tell the cheesecake is set if it is firm to the touch. Gently press the top with your finger. If it springs back, it is ready. The edges should look firm, while the center may still be a little soft. This no-bake strawberry cheesecake is easy and fun to make. You learned about the key ingredients like cream cheese, fresh strawberries, and optional toppings for added flavor. I provided step-by-step instructions to guide you through the whole process. Remember to take care with chilling to get the right texture. Feel free to experiment with flavors and toppings. This dessert can fit many tastes and dietary needs. Enjoy creating and sharing this treat with friends and family!](https://momdishmagic.com/wp-content/uploads/2025/06/5e93dc05-ecf8-4630-8a04-be1d9d9c2af7-768x768.webp)
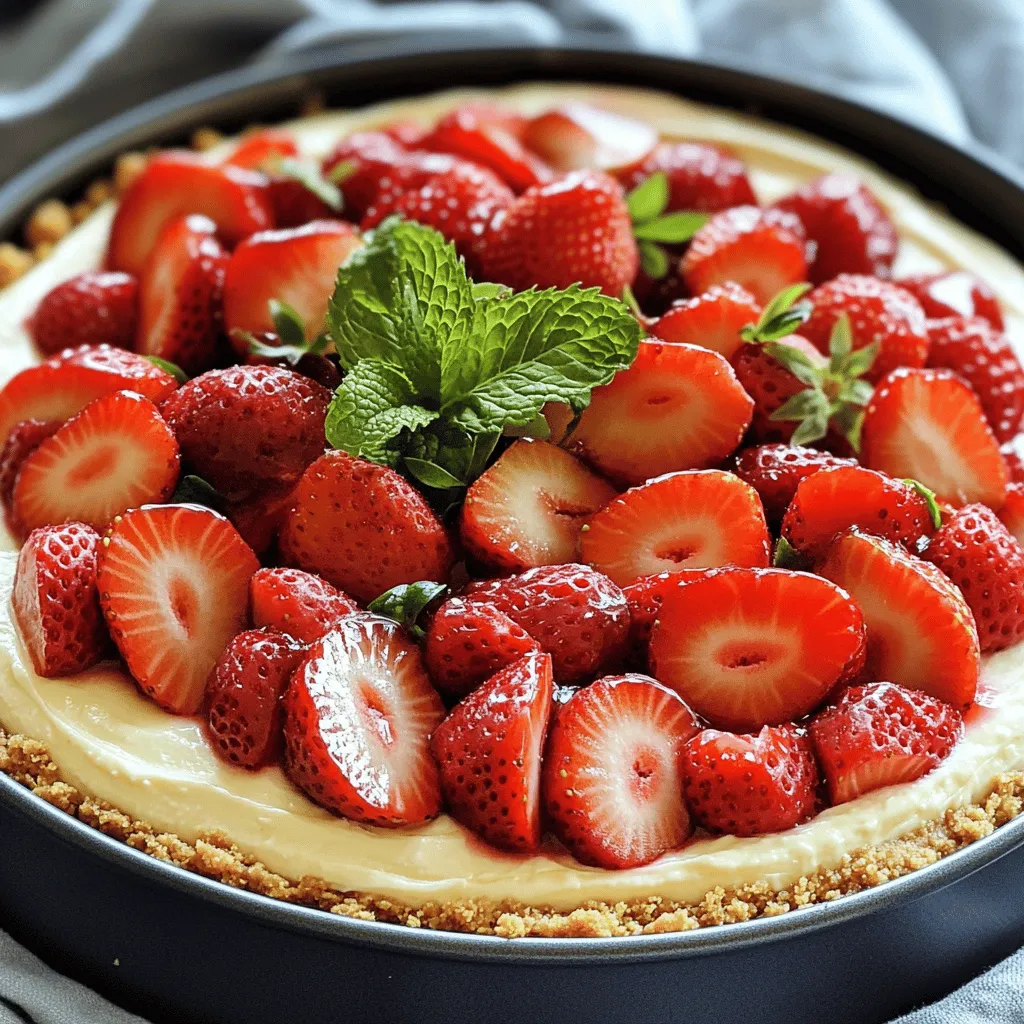
Are you craving a delicious dessert that requires no baking? Look no further! This No-Bake Strawberry Cheesecake is easy to make and packed with flavor. You’ll love the creamy filling and fresh strawberry topping that make it a perfect treat for any occasion. With just a few simple ingredients and some easy steps, you can impress your friends and family. Let’s dive into this delightful recipe!
Ingredients
Required Ingredients for No-Bake Strawberry Cheesecake
To make this delicious cheesecake, you need the following items:
– 1 ½ cups digestive biscuits, crushed
– ½ cup unsalted butter, melted
– 2 cups cream cheese, softened
– 1 cup powdered sugar
– 1 teaspoon vanilla extract
– 1 cup heavy cream
– 1 ½ cups fresh strawberries, hulled and sliced
– 1 tablespoon lemon juice
– Fresh mint leaves for garnish
These ingredients work together to create a rich and creamy cheesecake that melts in your mouth. The digestive biscuits form a sturdy crust, while the cream cheese provides a smooth filling. The strawberries add a burst of flavor, making every bite delightful.
Optional Ingredients for Added Flavor
To customize your cheesecake further, consider these optional ingredients:
– Chocolate shavings
– Additional fruit toppings
– Alternative sweeteners
Adding chocolate shavings can give your cheesecake a fun twist. Extra fruit toppings can enhance the flavor and presentation. If you prefer a different sweetener, you can swap out the powdered sugar for a healthier option.
Step-by-Step Instructions
Preparing the Crust
To start, mix the crushed digestive biscuits and melted butter in a bowl. You want to stir until it feels like wet sand. This step is simple but key for a tasty base. Next, press the mixture firmly into the bottom of a 9-inch springform pan. Make sure it is even and compact. This will help the crust hold up when we add the filling. Place the pan in the refrigerator for 15 minutes to set.
Making the Cheesecake Filling
In a large bowl, beat the softened cream cheese using an electric mixer. Mix until it feels smooth and creamy. This makes the filling rich and delicious. Gradually add the powdered sugar and vanilla extract. Keep mixing until everything is well blended. This step adds sweetness and flavor to the cheesecake filling.
Combining Ingredients
Now, let’s whip the heavy cream. In another bowl, beat the cream until you see stiff peaks form. This means it will hold its shape well. Gently fold the whipped cream into the cream cheese mixture. Be careful not to deflate the whipped cream. You want a light and fluffy texture. Make sure no streaks remain in the mixture.
Assembling the Cheesecake
Before we add the strawberries, toss them with the lemon juice in a bowl. This keeps their color bright and adds a nice zing. Pour half of the cheesecake filling into the crust. Layer half of the strawberries on top. Then, pour the rest of the filling over the strawberries. Finally, add the remaining sliced strawberries on top.
Cover the cheesecake with plastic wrap and refrigerate it for at least 4 hours. For the best texture, let it chill overnight. When ready to serve, carefully remove the sides of the springform pan. Don’t forget to garnish with fresh mint leaves for a pop of color. Enjoy your No-Bake Strawberry Cheesecake!
Tips & Tricks
Perfecting the Texture
To make your cheesecake smooth, chill it well. I recommend letting it sit in the fridge for at least 4 hours. If you can, overnight is best. This helps the cheesecake set up nicely. Always use cream cheese at room temperature. Cold cream cheese mixes poorly and can lead to lumps.
Presentation Tips
For a beautiful finish, think about garnishing with fresh mint leaves. They add color and flavor. You can also slice some fresh strawberries to place on top. Serve your cheesecake on a nice plate to impress your guests.
Troubleshooting Common Issues
If your cheesecake is too runny, it may need more time in the fridge. Give it a few more hours to set. You can also blend in a bit more whipped cream for thickness. If your crust crumbles, try adding a bit more melted butter. This helps hold it together better.
Variations
Flavor Variations
You can easily switch up the flavors of your no-bake strawberry cheesecake. For a rich twist, try a chocolate version. Just add cocoa powder to the cream cheese mix. You can also use melted chocolate in place of some cream cheese. This adds a lovely depth to the dessert.
If you need a nut-free option, skip any nuts in the crust or toppings. Use cookie crumbs instead, like graham crackers or digestive biscuits. This keeps it tasty and safe for those with allergies.
Dietary Adjustments
There are ways to make this cheesecake fit different diets. For a gluten-free version, use gluten-free digestive biscuits. Many brands offer great options that taste just as good.
If you’re vegan, swap cream cheese with a plant-based alternative. Use coconut cream or silken tofu for a creamy texture. Replace heavy cream with coconut milk for the perfect consistency.
Different Fruit Toppings
While strawberries shine in this recipe, you can change things up with other fruits. Raspberries and blueberries work great too. They add color and a tart flavor that balances the sweet cheesecake.
Seasonal fruits like peaches or cherries also make fantastic toppings. You can mix and match to keep it fresh and exciting. Each fruit brings its own unique taste, making every cheesecake special.
Storage Info
Refrigeration Tips
To keep your no-bake strawberry cheesecake fresh, cover it tightly with plastic wrap. This prevents the cheesecake from absorbing any odors from the fridge. The cheesecake stays tasty for up to five days in the fridge. After five days, it may lose its best flavor and texture. Always check for any signs of spoilage before enjoying leftovers.
Freezing Instructions
You can freeze this cheesecake for a longer shelf life. First, let it chill completely in the fridge. Then, wrap it in plastic wrap and place it in an airtight container. It can last for up to three months in the freezer. When you’re ready to serve, take it out and thaw it in the fridge for about six hours. For quick thawing, you can leave it at room temperature for about an hour. Remember to garnish it after thawing for a fresh look. Enjoy your delicious creation!
FAQs
Can I use frozen strawberries?
Yes, you can use frozen strawberries. Just thaw them first. Pat them dry with a paper towel. This helps keep the cheesecake from getting too watery. Frozen berries can also taste great in your cheesecake.
How long does the cheesecake need to chill?
The cheesecake needs to chill for at least 4 hours. For the best results, chill it overnight. This helps the cheesecake set properly. A longer chill time makes the texture creamier and firmer.
Can I make this cheesecake in advance?
Absolutely! You can make the cheesecake a day or two ahead of time. Just keep it covered in the fridge. This makes it a perfect dessert for parties or gatherings. You can spend more time enjoying your guests.
What can I substitute for cream cheese?
If you want a different taste, try mascarpone or Greek yogurt. They both work well in this recipe. They can change the flavor and texture a bit. Make sure to adjust the sugar if needed for sweetness.
How do I know when it’s set?
You can tell the cheesecake is set if it is firm to the touch. Gently press the top with your finger. If it springs back, it is ready. The edges should look firm, while the center may still be a little soft.
This no-bake strawberry cheesecake is easy and fun to make. You learned about the key ingredients like cream cheese, fresh strawberries, and optional toppings for added flavor. I provided step-by-step instructions to guide you through the whole process. Remember to take care with chilling to get the right texture.
Feel free to experiment with flavors and toppings. This dessert can fit many tastes and dietary needs. Enjoy creating and sharing this treat with friends and family!
![To make this delicious cheesecake, you need the following items: - 1 ½ cups digestive biscuits, crushed - ½ cup unsalted butter, melted - 2 cups cream cheese, softened - 1 cup powdered sugar - 1 teaspoon vanilla extract - 1 cup heavy cream - 1 ½ cups fresh strawberries, hulled and sliced - 1 tablespoon lemon juice - Fresh mint leaves for garnish These ingredients work together to create a rich and creamy cheesecake that melts in your mouth. The digestive biscuits form a sturdy crust, while the cream cheese provides a smooth filling. The strawberries add a burst of flavor, making every bite delightful. To customize your cheesecake further, consider these optional ingredients: - Chocolate shavings - Additional fruit toppings - Alternative sweeteners Adding chocolate shavings can give your cheesecake a fun twist. Extra fruit toppings can enhance the flavor and presentation. If you prefer a different sweetener, you can swap out the powdered sugar for a healthier option. For the complete recipe, check out the [Full Recipe]. To start, mix the crushed digestive biscuits and melted butter in a bowl. You want to stir until it feels like wet sand. This step is simple but key for a tasty base. Next, press the mixture firmly into the bottom of a 9-inch springform pan. Make sure it is even and compact. This will help the crust hold up when we add the filling. Place the pan in the refrigerator for 15 minutes to set. In a large bowl, beat the softened cream cheese using an electric mixer. Mix until it feels smooth and creamy. This makes the filling rich and delicious. Gradually add the powdered sugar and vanilla extract. Keep mixing until everything is well blended. This step adds sweetness and flavor to the cheesecake filling. Now, let’s whip the heavy cream. In another bowl, beat the cream until you see stiff peaks form. This means it will hold its shape well. Gently fold the whipped cream into the cream cheese mixture. Be careful not to deflate the whipped cream. You want a light and fluffy texture. Make sure no streaks remain in the mixture. Before we add the strawberries, toss them with the lemon juice in a bowl. This keeps their color bright and adds a nice zing. Pour half of the cheesecake filling into the crust. Layer half of the strawberries on top. Then, pour the rest of the filling over the strawberries. Finally, add the remaining sliced strawberries on top. Cover the cheesecake with plastic wrap and refrigerate it for at least 4 hours. For the best texture, let it chill overnight. When ready to serve, carefully remove the sides of the springform pan. Don’t forget to garnish with fresh mint leaves for a pop of color. Enjoy your No-Bake Strawberry Cheesecake! You can find the Full Recipe for all the details. To make your cheesecake smooth, chill it well. I recommend letting it sit in the fridge for at least 4 hours. If you can, overnight is best. This helps the cheesecake set up nicely. Always use cream cheese at room temperature. Cold cream cheese mixes poorly and can lead to lumps. For a beautiful finish, think about garnishing with fresh mint leaves. They add color and flavor. You can also slice some fresh strawberries to place on top. Serve your cheesecake on a nice plate to impress your guests. If your cheesecake is too runny, it may need more time in the fridge. Give it a few more hours to set. You can also blend in a bit more whipped cream for thickness. If your crust crumbles, try adding a bit more melted butter. This helps hold it together better. {{image_2}} You can easily switch up the flavors of your no-bake strawberry cheesecake. For a rich twist, try a chocolate version. Just add cocoa powder to the cream cheese mix. You can also use melted chocolate in place of some cream cheese. This adds a lovely depth to the dessert. If you need a nut-free option, skip any nuts in the crust or toppings. Use cookie crumbs instead, like graham crackers or digestive biscuits. This keeps it tasty and safe for those with allergies. There are ways to make this cheesecake fit different diets. For a gluten-free version, use gluten-free digestive biscuits. Many brands offer great options that taste just as good. If you're vegan, swap cream cheese with a plant-based alternative. Use coconut cream or silken tofu for a creamy texture. Replace heavy cream with coconut milk for the perfect consistency. While strawberries shine in this recipe, you can change things up with other fruits. Raspberries and blueberries work great too. They add color and a tart flavor that balances the sweet cheesecake. Seasonal fruits like peaches or cherries also make fantastic toppings. You can mix and match to keep it fresh and exciting. Each fruit brings its own unique taste, making every cheesecake special. To keep your no-bake strawberry cheesecake fresh, cover it tightly with plastic wrap. This prevents the cheesecake from absorbing any odors from the fridge. The cheesecake stays tasty for up to five days in the fridge. After five days, it may lose its best flavor and texture. Always check for any signs of spoilage before enjoying leftovers. You can freeze this cheesecake for a longer shelf life. First, let it chill completely in the fridge. Then, wrap it in plastic wrap and place it in an airtight container. It can last for up to three months in the freezer. When you’re ready to serve, take it out and thaw it in the fridge for about six hours. For quick thawing, you can leave it at room temperature for about an hour. Remember to garnish it after thawing for a fresh look. Enjoy your delicious creation! Check the Full Recipe for more details. Yes, you can use frozen strawberries. Just thaw them first. Pat them dry with a paper towel. This helps keep the cheesecake from getting too watery. Frozen berries can also taste great in your cheesecake. The cheesecake needs to chill for at least 4 hours. For the best results, chill it overnight. This helps the cheesecake set properly. A longer chill time makes the texture creamier and firmer. Absolutely! You can make the cheesecake a day or two ahead of time. Just keep it covered in the fridge. This makes it a perfect dessert for parties or gatherings. You can spend more time enjoying your guests. If you want a different taste, try mascarpone or Greek yogurt. They both work well in this recipe. They can change the flavor and texture a bit. Make sure to adjust the sugar if needed for sweetness. You can tell the cheesecake is set if it is firm to the touch. Gently press the top with your finger. If it springs back, it is ready. The edges should look firm, while the center may still be a little soft. This no-bake strawberry cheesecake is easy and fun to make. You learned about the key ingredients like cream cheese, fresh strawberries, and optional toppings for added flavor. I provided step-by-step instructions to guide you through the whole process. Remember to take care with chilling to get the right texture. Feel free to experiment with flavors and toppings. This dessert can fit many tastes and dietary needs. Enjoy creating and sharing this treat with friends and family!](https://momdishmagic.com/wp-content/uploads/2025/06/5e93dc05-ecf8-4630-8a04-be1d9d9c2af7-250x250.webp)
